dockerfile部署vue+springboot+redis
Posted Henu丶雨巷
tags:
篇首语:本文由小常识网(cha138.com)小编为大家整理,主要介绍了dockerfile部署vue+springboot+redis相关的知识,希望对你有一定的参考价值。
后端部署:
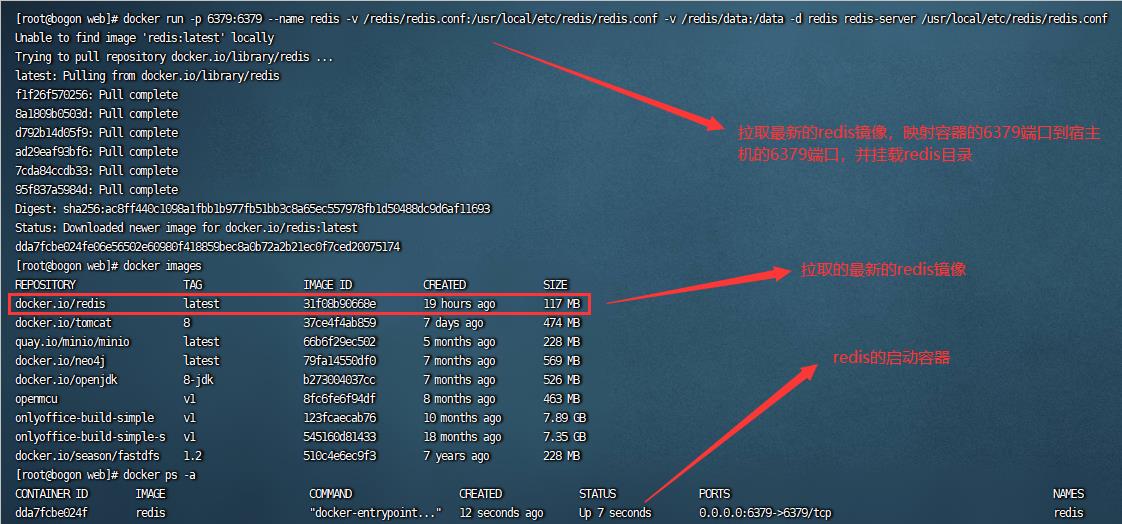
一、拉取并启动redis镜像
1、在服务器/usr/local/etc/redis/文件目录下建立redis.conf配置文件,配置信息如下:
bind 0.0.0.0
protected-mode no

2、拉取并启动最新的redis镜像,映射宿主机端口并挂载目录
docker run -p 6379:6379 --name redis -v /redis/redis.conf:/usr/local/etc/redis/redis.conf -v /redis/data:/data -d redis redis-server /usr/local/etc/redis/redis.conf

二、制作并启动后端镜像
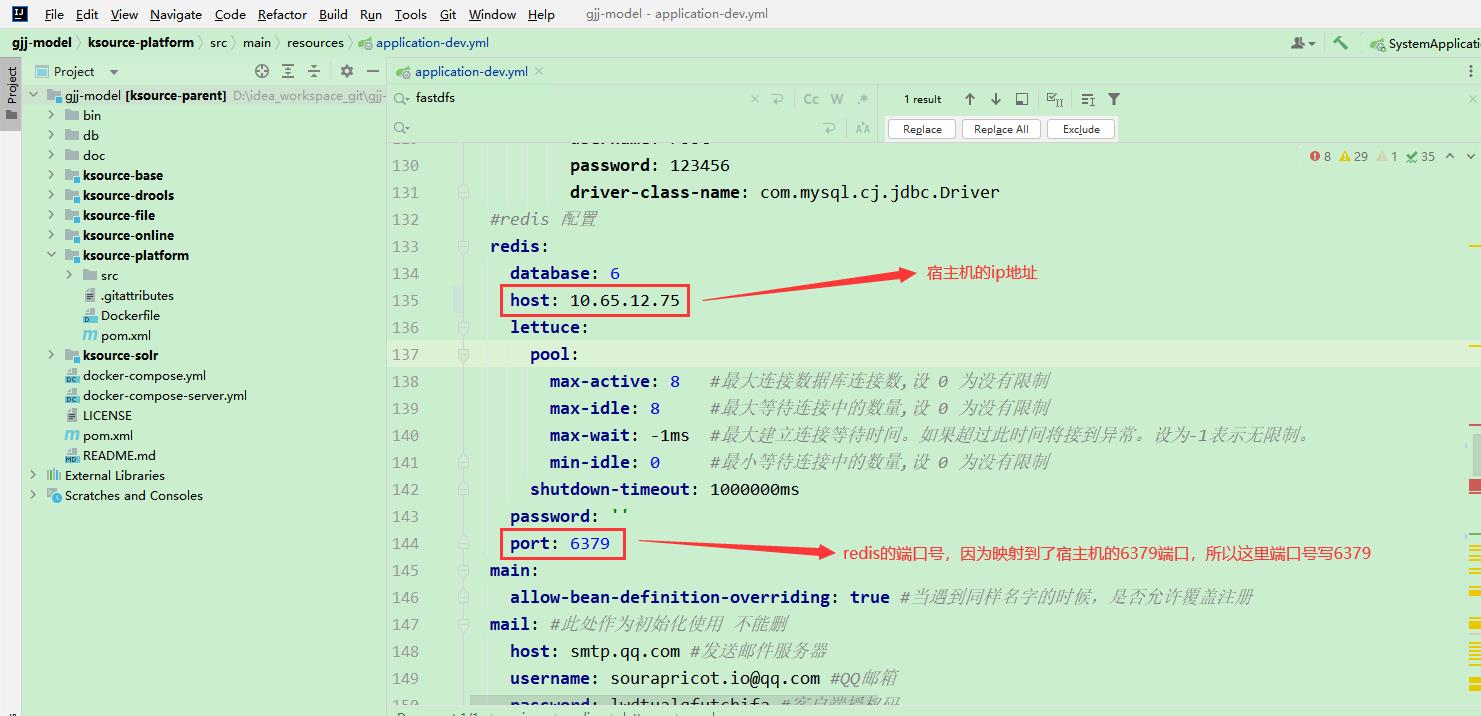
1、修改springboot项目配置文件中redis的ip地址和端口号

2、新建后端的Dockerfile文件,修改端口号,端口号需要和后端项目端口号保持一致,Dockerfile内容如下:
# 指定基础镜像
# amd架构:FROM java:8
# arm架构:FROM openjdk:8-jdk
FROM openjdk:8-jdk
# 定义匿名卷
VOLUME /tmp
#复制文件或修改名称
ADD ksource-platform.jar app.jar
# 允许指定的端口
EXPOSE 8087
ENTRYPOINT ["java","-Djava.security.egd=file:/dev/./urandom","-jar","/app.jar"]


3、将后端的Dockerfile文件与springboot项目的jar包放在同一个目录下

4、制作后端镜像
进入该目录执行以下命令:
docker build -t ksource-platform .

5、启动镜像生成容器
docker run -d -p 8087:8087 3f57165bbf29
1、-d参数是让容器后台运行
2、-p 是做端口映射,此时将服务器中的8086端口映射到容器中的8087(项目中端口配置的是8087)端口
3、使用images镜像的IMAGE ID

6、访问后端地址

前端部署
一、新建nginx.conf配置文件并修改相关配置
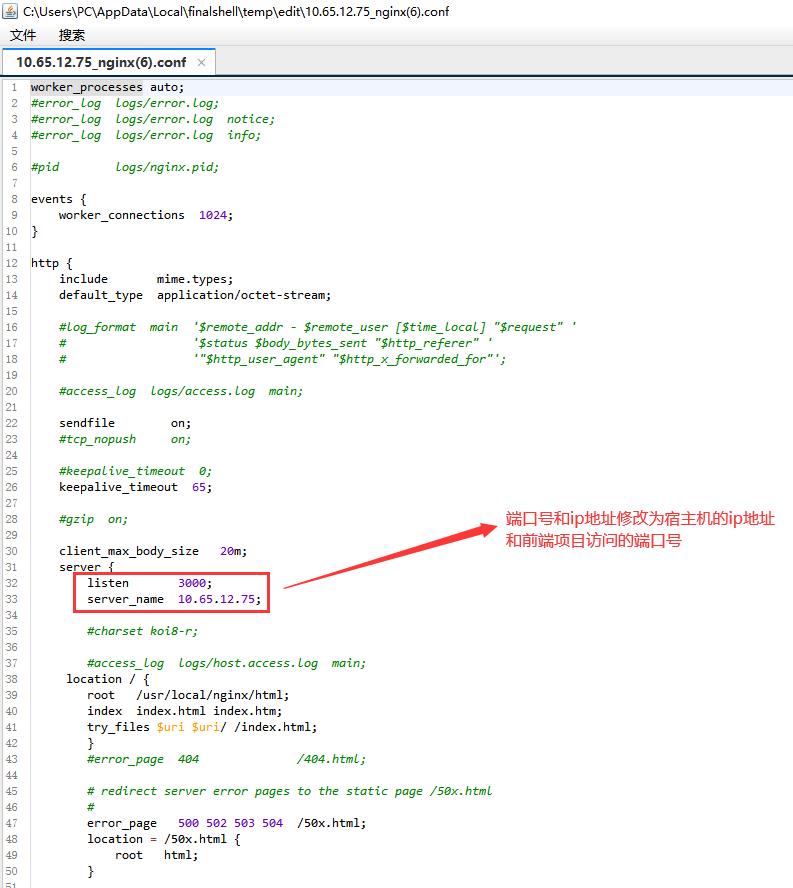
新建nginx配置文件,并修改ip地址和端口号

worker_processes auto;
#error_log  logs/error.log;
#error_log  logs/error.log  notice;
#error_log  logs/error.log  info;

#pid        logs/nginx.pid;

events
    worker_connections  1024;


http
    include       mime.types;
    default_type  application/octet-stream;

    #log_format  main  \'$remote_addr - $remote_user [$time_local] "$request" \'
    #                  \'$status $body_bytes_sent "$http_referer" \'
    #                  \'"$http_user_agent" "$http_x_forwarded_for"\';

    #access_log  logs/access.log  main;

    sendfile        on;
    #tcp_nopush     on;

    #keepalive_timeout  0;
    keepalive_timeout  65;

    #gzip  on;

    client_max_body_size   20m;
    server
        listen       3000;
        server_name  10.65.12.75;

        #charset koi8-r;

        #access_log  logs/host.access.log  main;
     location /
        root   /usr/local/nginx/html;
        index  index.html index.htm;
        try_files $uri $uri/ /index.html;

        #error_page  404              /404.html;

        # redirect server error pages to the static page /50x.html
        #
        error_page   500 502 503 504  /50x.html;
        location = /50x.html
            root   html;


        # proxy the PHP scripts to Apache listening on 127.0.0.1:80
        #
        #location ~ \\.php$
        #    proxy_pass   http://127.0.0.1;
        #

        # pass the PHP scripts to FastCGI server listening on 127.0.0.1:9000
        #
        #location ~ \\.php$
        #    root           html;
        #    fastcgi_pass   127.0.0.1:9000;
        #    fastcgi_index  index.php;
        #    fastcgi_param  SCRIPT_FILENAME  /scripts$fastcgi_script_name;
        #    include        fastcgi_params;
        #

        # deny access to .htaccess files, if Apache\'s document root
        # concurs with nginx\'s one
        #
        #location ~ /\\.ht
        #    deny  all;
        #


    # another virtual host using mix of IP-, name-, and port-based configuration
    #
    #server
    #    listen       8000;
    #    listen       somename:8080;
    #    server_name  somename  alias  another.alias;

    #    location /
    #        root   html;
    #        index  index.html index.htm;
    #
    #
二、制作并启动前端镜像
1、新建前端Dockerfile文件
新建Dockerfile文件,将以下内容复制进去
# 设置基础镜像
FROM nginx
# 将dist文件中的内容复制到 /usr/local/nginx/html 这个目录下面
COPY dist/  /usr/local/nginx/html
RUN chmod -R 755 /usr/local/nginx/html
COPY nginx.conf  /etc/nginx/nginx.conf
RUN echo \'ok!!\'
2、将上面新建的nginx.conf文件和前端的Dockerfile文件以及前端vue打的包dist文件夹放在同一目录下

3、制作前端镜像
进入该目录执行以下命令:
docker build -t query-web .

4、启动容器
docker run --privileged -it -d --name web -p 3000:3000 query-web
执行完后可以通过命令:docker ps -a查看容器启动状态

以上是关于dockerfile部署vue+springboot+redis的主要内容,如果未能解决你的问题,请参考以下文章
手把手教你用VUE开发后台管理系统:搭建SpringBoo 2.xt环境