Flink源码系列Flink 源码分析之 Client 端启动流程分析
Posted JasonLee实时计算
tags:
篇首语:本文由小常识网(cha138.com)小编为大家整理,主要介绍了Flink源码系列Flink 源码分析之 Client 端启动流程分析相关的知识,希望对你有一定的参考价值。
抛出问题
首先来思考一个问题,我们在提交 Flink 任务的时候,在 Flink 客户端执行了下面的命令后,Flink 客户端做了哪些事情?又是怎么执行我们自己写的代码?相信读完这篇文章你就能找到答案。
flink run -d -m yarn-cluster \\
-Dyarn.application.name=FlinkStreamingNewDemoHome \\
-Dyarn.application.queue=flink \\
-Dmetrics.reporter.promgateway.groupingKey="jobname=FlinkStreamingNewDemoHome" \\
-Dmetrics.reporter.promgateway.jobName=FlinkStreamingNewDemoHome \\
-c flink.stream.FlinkStreamingNewDemo \\
-Denv.java.opts="-Dflink_job_name=FlinkStreamingNewDemoHome" \\
/home/jason/bigdata/jar/flink-1.14.0-1.0-SNAPSHOT.jar
要解答这个问题,就先要弄明白,当执行上面命令的时候,实际上底层是在执行哪些代码?我们可以通过查看 flink 脚本找到答案。
# Add HADOOP_CLASSPATH to allow the usage of Hadoop file systems
exec "$JAVA_RUN" $JVM_ARGS $FLINK_ENV_JAVA_OPTS "$log_setting[@]" -classpath "`manglePathList "$CC_CLASSPATH:$INTERNAL_HADOOP_CLASSPATHS"`" org.apache.flink.client.cli.CliFrontend "$@"
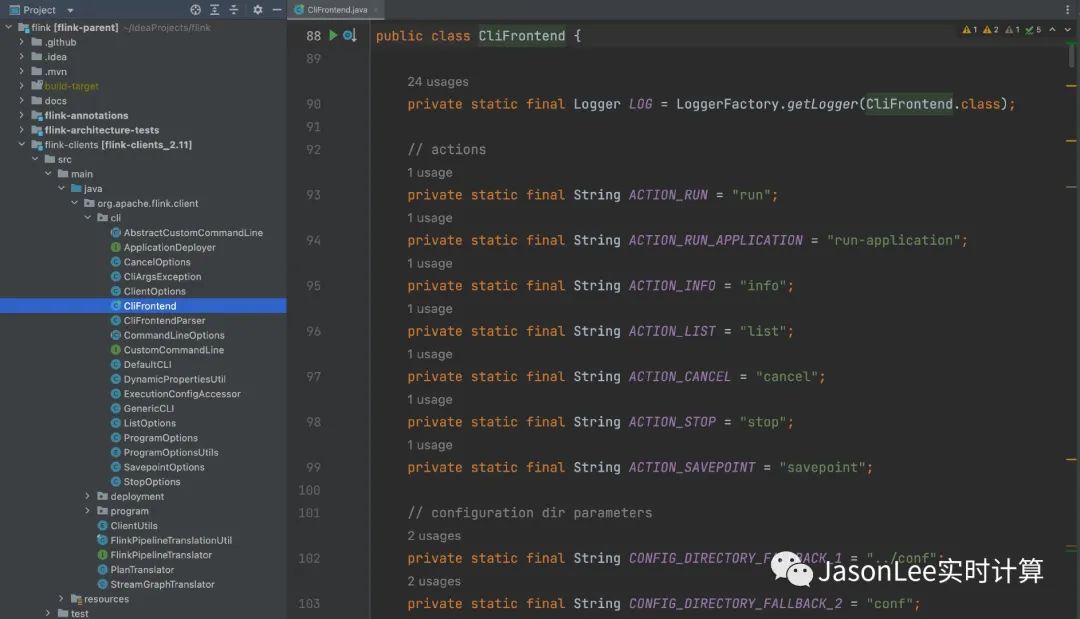
你会发现脚本的最后一行,实际上是通过 Java 命令执行 org.apache.flink.client.cli.CliFrontend 这个对象的,然后把上面的一大堆 Flink 命令当成参数传入到 main 方法里,我们先在 IDEA 里面找到对应的代码。
CliFrontend

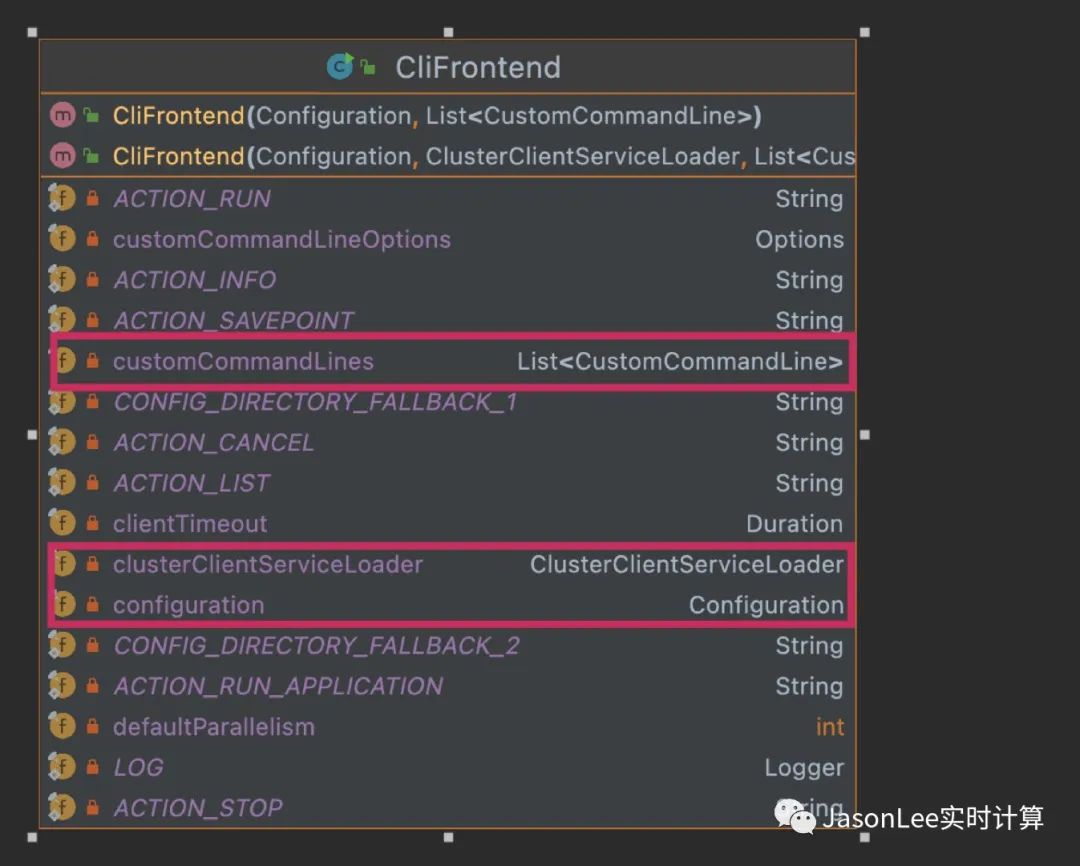
可以看到 CliFrontend 这个类是位于 flink-clients 模块下的,接着来看一下 CliFrontend 类的几个重要成员变量和构造方法。

customCommandLines 这个变量是用来保存 CustomCommandLine,下面会解释它的主要作用,configuration 是用来保存 flink-conf.yaml 配置文件中的配置信息的,相当于一个 map,clusterClientServiceLoader 是用来根据提供的组件发现合适的集群客户端工厂。在构造方法中对其进行初始化。
CliFrontend#main 源码分析
/** Submits the job based on the arguments. */
public static void main(final String[] args)
    // 获取 JVM 信息、hadoop 信息等打印日志
    EnvironmentInformation.logEnvironmentInfo(LOG, "Command Line Client", args);

    // 1. find the configuration directory
    // 获取 flink 的配置文件路径 即: flink/conf/flink-conf.yaml
    final String configurationDirectory = getConfigurationDirectoryFromEnv();

    // 2. load the global configuration
    // 解析并加载 flink-conf.yaml 配置文件中的配置到 Configuration(本质上是一个 Map)
    final Configuration configuration =
            GlobalConfiguration.loadConfiguration(configurationDirectory);

    // 3. load the custom command lines
    // 初始化 3 种不同的 CLI 分别是 GenericCLI 对应的是 per-job 模式,flinkYarnSessionCLI 对应的是 yarn-session 模式,以及 DefaultCLI 对应的是 standalone 模式
    final List<CustomCommandLine> customCommandLines =
            loadCustomCommandLines(configuration, configurationDirectory);

    int retCode = 31;
    try
        // 初始化 CliFrontend 客户端对象
        final CliFrontend cli = new CliFrontend(configuration, customCommandLines);

        SecurityUtils.install(new SecurityConfiguration(cli.configuration));
        // 调用 parseAndRun 执行
        retCode = SecurityUtils.getInstalledContext().runSecured(() -> cli.parseAndRun(args));
     catch (Throwable t)
        final Throwable strippedThrowable =
                ExceptionUtils.stripException(t, UndeclaredThrowableException.class);
        LOG.error("Fatal error while running command line interface.", strippedThrowable);
        strippedThrowable.printStackTrace();
     finally
        System.exit(retCode);
main 方法的代码逻辑非常清晰简介,大致可以分为下面 5 个步骤:
-
获取 flink 的配置文件路径 即: flink/conf/flink-conf.yaml
-
解析并加载 flink-conf.yaml 配置文件中的配置到 Configuration(本质上是一个 Map)
-
初始化 3 种不同的 CLI 分别是 GenericCLI 对应的是 per-job 模式,flinkYarnSessionCLI 对应的是 yarn-session 模式,以及 DefaultCLI 对应的是 standalone 模式
-
初始化 CliFrontend 客户端对象
-
调用 parseAndRun 解析并执行程序
下面就来看一下每个步骤具体做了哪些事情。
flink-conf.yaml 获取配置文件源码
public static String getConfigurationDirectoryFromEnv()
    String location = System.getenv(ConfigConstants.ENV_FLINK_CONF_DIR);

    if (location != null)
        if (new File(location).exists())
            return location;
         else
            throw new RuntimeException(
                    "The configuration directory '"
                            + location
                            + "', specified in the '"
                            + ConfigConstants.ENV_FLINK_CONF_DIR
                            + "' environment variable, does not exist.");

     else if (new File(CONFIG_DIRECTORY_FALLBACK_1).exists())
        location = CONFIG_DIRECTORY_FALLBACK_1;
     else if (new File(CONFIG_DIRECTORY_FALLBACK_2).exists())
        location = CONFIG_DIRECTORY_FALLBACK_2;
     else
        throw new RuntimeException(
                "The configuration directory was not specified. "
                        + "Please specify the directory containing the configuration file through the '"
                        + ConfigConstants.ENV_FLINK_CONF_DIR
                        + "' environment variable.");

    return location;
代码比较简单,直接获取系统环境变量的值,然后返回 flink-conf.yaml 配置文件的路径。
flink-conf.yaml 解析配置文件源码
private static Configuration loadYAMLResource(File file)
    final Configuration config = new Configuration();

    try (BufferedReader reader =
            new BufferedReader(new InputStreamReader(new FileInputStream(file))))

        String line;
        int lineNo = 0;
        while ((line = reader.readLine()) != null)
            lineNo++;
            // 1. check for comments
            String[] comments = line.split("#", 2);
            String conf = comments[0].trim();

            // 2. get key and value
            if (conf.length() > 0)
                String[] kv = conf.split(": ", 2);

                // skip line with no valid key-value pair
                if (kv.length == 1)
                    LOG.warn(
                            "Error while trying to split key and value in configuration file "
                                    + file
                                    + ":"
                                    + lineNo
                                    + ": \\""
                                    + line
                                    + "\\"");
                    continue;

                                // 获取配置的 key: value
                  // 比如,jobmanager.rpc.address: storm1
                  // key: jobmanager.rpc.address
                  // value: storm1
                String key = kv[0].trim();
                String value = kv[1].trim();

                // sanity check
                if (key.length() == 0 || value.length() == 0)
                    LOG.warn(
                            "Error after splitting key and value in configuration file "
                                    + file
                                    + ":"
                                    + lineNo
                                    + ": \\""
                                    + line
                                    + "\\"");
                    continue;


                LOG.info(
                        "Loading configuration property: , ",
                        key,
                        isSensitive(key) ? HIDDEN_CONTENT : value);
                  // 加入到 config,相当于是一个 map
                config.setString(key, value);


     catch (IOException e)
        throw new RuntimeException("Error parsing YAML configuration.", e);


    return config;
loadConfiguration 方法最终会调用 loadYAMLResource 方法进行解析 flink-conf.yaml 配置文件,通过一行行的读取配置,然后把配置的 key,value 加入到 Configuration 中,Configuration 的本质就是一个 map,用来保存 flink 的配置信息。
CustomCommandLine 初始化源码
public static List<CustomCommandLine> loadCustomCommandLines(
        Configuration configuration, String configurationDirectory)
    List<CustomCommandLine> customCommandLines = new ArrayList<>();
    customCommandLines.add(new GenericCLI(configuration, configurationDirectory));

    // Command line interface of the YARN session, with a special initialization here
    // to prefix all options with y/yarn.
    final String flinkYarnSessionCLI = "org.apache.flink.yarn.cli.FlinkYarnSessionCli";
    try
        customCommandLines.add(
                loadCustomCommandLine(
                        flinkYarnSessionCLI,
                        configuration,
                        configurationDirectory,
                        "y",
                        "yarn"));
     catch (NoClassDefFoundError | Exception e)
        final String errorYarnSessionCLI = "org.apache.flink.yarn.cli.FallbackYarnSessionCli";
        try
            LOG.info("Loading FallbackYarnSessionCli");
            customCommandLines.add(loadCustomCommandLine(errorYarnSessionCLI, configuration));
         catch (Exception exception)
            LOG.warn("Could not load CLI class .", flinkYarnSessionCLI, e);


    // Tips: DefaultCLI must be added at last, because getActiveCustomCommandLine(..) will get
    // the
    //       active CustomCommandLine in order and DefaultCLI isActive always return true.
    customCommandLines.add(new DefaultCLI());

    return customCommandLines;
loadCustomCommandLines 主要是用来初始化 CustomCommandLine 的,返回一个 CustomCommandLine 的集合。CustomCommandLine 是一个自定义命令行接口用来加载命令行的。
这里主要有三种不同的 CustomCommandLine 实现类,分别是 GenericCLI,FlinkYarnSessionCli,DefaultCLI。

三种不同的实现类对应三种不同的模式,GenericCLI 对应的是 per-job 模式,flinkYarnSessionCLI 对应的是 yarn-session 模式,以及 DefaultCLI 对应的是 standalone 模式。
CliFrontend 初始化源码
// 初始化 CliFrontend 客户端对象
final CliFrontend cli = new CliFrontend(configuration, customCommandLines);

public CliFrontend(
            Configuration configuration,
            ClusterClientServiceLoader clusterClientServiceLoader,
            List<CustomCommandLine> customCommandLines)
        this.configuration = checkNotNull(configuration);
        this.customCommandLines = checkNotNull(customCommandLines);
        this.clusterClientServiceLoader = checkNotNull(clusterClientServiceLoader);

        FileSystem.initialize(
                configuration, PluginUtils.createPluginManagerFromRootFolder(configuration));

        this.customCommandLineOptions = new Options();

        for (CustomCommandLine customCommandLine : customCommandLines)
            customCommandLine.addGeneralOptions(customCommandLineOptions);
            customCommandLine.addRunOptions(customCommandLineOptions);


        this.clientTimeout = configuration.get(ClientOptions.CLIENT_TIMEOUT);
        this.defaultParallelism = configuration.getInteger(CoreOptions.DEFAULT_PARALLELISM);
通过上面第二步和第三步获取到的 configuration 和 customCommandLines 信息初始化 CliFrontend 对象。
parseAndRun 解析并运行程序源码解析
public int parseAndRun(String[] args)

    // check for action
    if (args.length < 1)
        CliFrontendParser.printHelp(customCommandLines);
        System.out.println("Please specify an action.");
        return 1;


    // get action
    // 其实这里就是 run
    String action = args[0];

    // remove action from parameters
    final String[] params = Arrays.copyOfRange(args, 1, args.length);

    try
        // do action
        switch (action)
            case ACTION_RUN:
                // 所以会走到这里
                run(params);
                return 0;
            case ACTION_RUN_APPLICATION:
                runApplication(params);
                return 0;
            case ACTION_LIST:
                list(params);
                return 0;
            case ACTION_INFO:
                info(params);
                return 0;
            case ACTION_CANCEL:
                cancel(params);
                return 0;
            case ACTION_STOP:
                stop(params);
                return 0;
            case ACTION_SAVEPOINT:
                savepoint(params);
                return 0;
            case "-h":
            case "--help":
                CliFrontendParser.printHelp(customCommandLines);
                return 0;
            case "-v":
            case "--version":
                String version = EnvironmentInformation.getVersion();
                String commitID = EnvironmentInformation.getRevisionInformation().commitId;
                System.out.print("Version: " + version);
                System.out.println(
                        commitID.equals(EnvironmentInformation.UNKNOWN)
                                ? ""
                                : ", Commit ID: " + commitID);
                return 0;
            default:
                System.out.printf("\\"%s\\" is not a valid action.\\n", action);
                System.out.println();
                System.out.println(
                        "Valid actions are \\"run\\", \\"run-application\\", \\"list\\", \\"info\\", \\"savepoint\\", \\"stop\\", or \\"cancel\\".");
                System.out.println();
                System.out.println(
                        "Specify the version option (-v or --version) to print Flink version.");
                System.out.println();
                System.out.println(
                        "Specify the help option (-h or --help) to get help on the command.");
                return 1;

     catch (CliArgsException ce)
        return handleArgException(ce);
     catch (ProgramParametrizationException ppe)
        return handleParametrizationException(ppe);
     catch (ProgramMissingJobException pmje)
        return handleMissingJobException();
     catch (Exception e)
        return handleError(e);
前面 4 个步骤都是在做一些准备工作,最后一步才是真正开始执行程序,因为我们执行的是 flink run 命令,所以会走到 run(params) 方法里面。
run(params) 源码
protected void run(String[] args) throws Exception
    LOG.info("Running 'run' command.");
    // 获取所有的 flink 命令
    final Options commandOptions = CliFrontendParser.getRunCommandOptions();
    // 获取输入参数里面的 flink 命令
    final CommandLine commandLine = getCommandLine(commandOptions, args, true);

    // evaluate help flag
    // 如果是 help 打印帮忙命令信息
    if (commandLine.hasOption(HELP_OPTION.getOpt()))
        CliFrontendParser.printHelpForRun(customCommandLines);
        return;

    // 获取处于 active 状态的 CLI
    final CustomCommandLine activeCommandLine =
            validateAndGetActiveCommandLine(checkNotNull(commandLine));
    // 构建 ProgramOptions 对象
    final ProgramOptions programOptions = ProgramOptions.create(commandLine);
    // 获取用户提交的 jar 包和依赖包
    final List<URL> jobJars = getJobJarAndDependencies(programOptions);

    final Configuration effectiveConfiguration =
            getEffectiveConfiguration(activeCommandLine, commandLine, programOptions, jobJars);

    LOG.debug("Effective executor configuration: ", effectiveConfiguration);

    try (PackagedProgram program = getPackagedProgram(programOptions, effectiveConfiguration))
        // 真正的执行程序
        executeProgram(effectiveConfiguration, program);
首先会获取 flink 所有的 options,然后在获取我们输入的 flink 命令。如果有 h 的话就会打印 help 信息。接下来会获取处于 active 状态的 CustomCommandLine,这里获取到的应该是 GenericCLI 。然后获取用户提交的 jar 包和依赖包,最后调用 executeProgram 开始真正的执行程序。
public static void executeProgram(
        PipelineExecutorServiceLoader executorServiceLoader,
        Configuration configuration,
        PackagedProgram program,
        boolean enforceSingleJobExecution,
        boolean suppressSysout)
        throws ProgramInvocationException
    checkNotNull(executorServiceLoader);
    // 获取用户代码的类加载器,默认情况下是 ChildFirstClassLoader 这个可以在配置文件里面配置
    final ClassLoader userCodeClassLoader = program.getUserCodeClassLoader();
    // 获取当前线程的类加载器
    final ClassLoader contextClassLoader = Thread.currentThread().getContextClassLoader();
    try
        // 把当前线程的类加载器设置为 ChildFirstClassLoader
        Thread.currentThread().setContextClassLoader(userCodeClassLoader);

        LOG.info(
                "Starting program (detached: )",
                !configuration.getBoolean(DeploymentOptions.ATTACHED));
        // 初始化上下文的配置信息 ContextEnvironment
        ContextEnvironment.setAsContext(
                executorServiceLoader,
                configuration,
                userCodeClassLoader,
                enforceSingleJobExecution,
                suppressSysout);
        // 初始化 StreamContextEnvironment
        StreamContextEnvironment.setAsContext(
                executorServiceLoader,
                configuration,
                userCodeClassLoader,
                enforceSingleJobExecution,
                suppressSysout);

        try
            // 通过反射去执行用户编写的代码
            program.invokeInteractiveModeForExecution();
         finally
            ContextEnvironment.unsetAsContext();
            StreamContextEnvironment.unsetAsContext();

     finally
          // 最后在把类加载器切换回去
        Thread.currentThread().setContextClassLoader(contextClassLoader);
先是会获取用户代码的类加载器,默认情况下是 ChildFirstClassLoader 这个可以在 flink-conf.yaml 配置文件里面配置
#Flink的类加载策略
classloader.resolve-order: child-first/parent-first
这里有一个非常有意思的地方是,获取当前线程的类加载器 contextClassLoader ,然后把当前线程的类加载器设置为 ChildFirstClassLoader 或者 ParentFirstClassLoader 紧接着初始化 ContextEnvironment 和 StreamContextEnvironment 的上下文配置信息,最终通过反射的方式调用 invokeInteractiveModeForExecution 方法,也就是在执行用户的代码,注意最后在 finally 里面执行完用户代码后又把当前线程的类加载器切换到了之前的 contextClassLoader,相当于做了一个线程类加载器的切换,也就是通过这种方式,实现了用户代码和 flink 框架代码的隔离。
callMainMethod 源码
private static void callMainMethod(Class<?> entryClass, String[] args)
        throws ProgramInvocationException
    Method mainMethod;
    if (!Modifier.isPublic(entryClass.getModifiers()))
        throw new ProgramInvocationException(
                "The class " + entryClass.getName() + " must be public.");


    try
        // 获取到用户编写代码类的 main 方法
        mainMethod = entryClass.getMethod("main", String[].class);
     catch (NoSuchMethodException e)
        throw new ProgramInvocationException(
                "The class " + entryClass.getName() + " has no main(String[]) method.");
     catch (Throwable t)
        throw new ProgramInvocationException(
                "Could not look up the main(String[]) method from the class "
                        + entryClass.getName()
                        + ": "
                        + t.getMessage(),
                t);


    if (!Modifier.isStatic(mainMethod.getModifiers()))
        throw new ProgramInvocationException(
                "The class " + entryClass.getName() + " declares a non-static main method.");

    if (!Modifier.isPublic(mainMethod.getModifiers()))
        throw new ProgramInvocationException(
                "The class " + entryClass.getName() + " declares a non-public main method.");


    try
        // 调用 invoke 方法的时候就会走到用户代码的 main 方法里面
        mainMethod.invoke(null, (Object) args);
     catch (IllegalArgumentException e)
        throw new ProgramInvocationException(
                "Could not invoke the main method, arguments are not matching.", e);
     catch (IllegalAccessException e)
        throw new ProgramInvocationException(
                "Access to the main method was denied: " + e.getMessage(), e);
     catch (InvocationTargetException e)
        Throwable exceptionInMethod = e.getTargetException();
        if (exceptionInMethod instanceof Error)
            throw (Error) exceptionInMethod;
         else if (exceptionInMethod instanceof ProgramParametrizationException)
            throw (ProgramParametrizationException) exceptionInMethod;
         else if (exceptionInMethod instanceof ProgramInvocationException)
            throw (ProgramInvocationException) exceptionInMethod;
         else
            throw new ProgramInvocationException(
                    "The main method caused an error: " + exceptionInMethod.getMessage(),
                    exceptionInMethod);

     catch (Throwable t)
        throw new ProgramInvocationException(
                "An error occurred while invoking the program's main method: " + t.getMessage(),
                t);
invokeInteractiveModeForExecution 方法里面调用的是 callMainMethod 方法。首先会判断该类是否是 public 的,如果是的话,会获取到 main 方法返回 mainMethod 对象,然后再次判断 mainMethod 是否是 public static 修饰的,都满足条件的话,最后会调用 invoke 方法,这个时候就来到了用户自己的代码,比如上面提交的代码是 flink.stream.FlinkStreamingNewDemo 那么就会执行 FlinkStreamingNewDemo 类的 main 方法。
经过上面一系列的解析配置,初始化最后终于走到我们的代码里面了。相信看到这里你就能回答最开始的问题了。
总结
本文主要通过阅读 flink-client 模块的相关源码,一步一步的揭开 client 端启动流程的神秘面纱,从而对 flink 底层执行流程有了更加深入的理解,也顺便了解了 flink 如何实现自身框架代码和用户代码的隔离。
推荐阅读
Flink 1.14.0 全新的 Kafka Connector
如果你觉得文章对你有帮助,麻烦点一下赞和在看吧,你的支持是我创作的最大动力.
以上是关于Flink源码系列Flink 源码分析之 Client 端启动流程分析的主要内容,如果未能解决你的问题,请参考以下文章