smarty模板内容
Posted 雾若晨曦
tags:
篇首语:本文由小常识网(cha138.com)小编为大家整理,主要介绍了smarty模板内容相关的知识,希望对你有一定的参考价值。
Smarty自带了一些内置函数,这些内置函数是Smarty模板引擎的组成部分。他们被编译成相应的内嵌php代码,以获得最大性能。
您创建的自定义函数不能与内置函数同名,也不必修改这些内置函数。
其中一些具有assign属性,用来收集函数结果,并将结果分配给一个命名的模板变量,而不是将内容输出,类似于{assign}函数。
一、{if}{elseif}{else} 条件
随着一些特性加入到模版引擎,Smarty的{if}语句与php的if语句一样富有弹性。每一个{if}必须与一个{/if}成对出现,允许使用{else}和{elseif},所有php条件和函数在这里同样适用,诸如||、or、&&、and、is_array()等等。
如果开启安全,只支持符合$php_functions的安全策略属性的php函数。
下面是一串有效的限定符,它们的左右必须用空格分隔开,注意列出的清单中方括号是可选的,在适用情况下使用相应的等号(全等或不全等)。
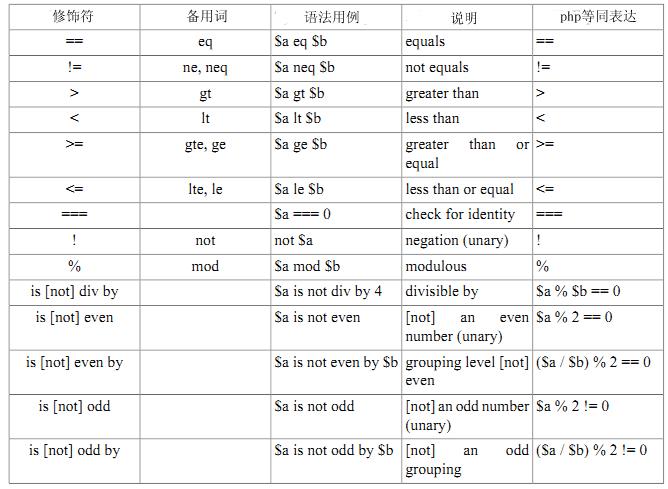
(1){if}语句(开头结尾不要忘记)
先要在php页面引入“入口文件”,写入“变量注册方法”和“模板显示方法”
|
1
2
3
4
5
6
7
|
<?phpinclude("../init.inc.php"); //引入的入口文件$smarty->assign("name",10); //变量注册方法assign() |
然后是html页面的条件了
|
1
2
3
4
5
6
7
|
<!--开头if--><{if $name == 10}> <!--如果$name等于10--><div style="width:100px; height:100px; background-color:#F00;"></div> <!--这个div的颜色是红色--><!--结尾if--><{/if}> |
看下结果
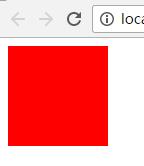
修改一下php文件中的注册值
|
1
|
$smarty->assign("name",11); |
那么这个div就不会显示了,因为条件是$name等于10的时候才会显示红色
(2){if}...{else}语句
php页面还是上面的例子,不同的是html页面加了一个“否则”的语句
|
1
2
3
4
5
6
7
8
|
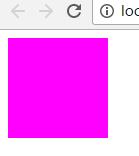
<!--开头if--><{if $name == 10}> <!--如果$name等于10,这个div就是红色--><div style="width:100px; height:100px; background-color:#F00;"></div><!--否则--><{else}> <!--否则这个div是粉色--><div style="width:100px; height:100px; background-color:#F0F;"></div><!--结尾if--><{/if}> |
刚开始在php中name的值是“10”,所以也看到了颜色是红色;现在我们把name的值成随便一个数,那么html中的如果就不会成立,那么就会出现“否则”的颜色
注意:上面的那个表中相对的“备用词”也是可以用的。
二、{foreach},{foreachelse}遍历
(1)同样,要先写php文件,既然是遍历,那么我们可以用数组
|
1
2
3
4
5
6
7
8
9
10
11
12
13
|
<?phpinclude("../init.inc.php");$arr = array( array("001","中国"), array("002","淄博"), array("003","济南"), array("004","济宁"),);$smarty->assign("shuzu",$arr);$smarty->display("test.html"); |
(2)然后就是写html页面了,{foreach}也是双标签啊,这里使用下拉列表显示出来的
|
1
2
3
4
5
6
7
|
<select> <{foreach $shuzu as $v}> <option value="<{$v[0]}>"><{$v[1]}></option> <{/foreach}></select> |
看下显示结果

(3)嵌套了key的{foreach}
php页面没有任何变换,变换的是html页面
不同的是as后面的代码
|
1
2
3
4
5
|
<select> <{foreach $shuzu as $k=>$v}> <!--不同之处就是$k=>$v--> <option value="<{$v[0]}>"><{$k}><{$v[1]}></option> <{/foreach}> </select> |
这样就是显示出代号了

(4)@index
包含当前数组的下标,开始时为0。
同样的将html页面中的key进行修改
|
1
2
3
4
5
|
<select> <{foreach $shuzu as $v}> <option value="<{$v[0]}>"><{$v@index }><{$v[1]}></option> <{/foreach}></select> |
效果是同样的

同样的还有一些差不多的
@iteration :iteration包含当前循环的迭代,总是以1开始,这点与index不同。每迭代一次值自动加1。
@first :当{foreach}循环第一个时first为真。这里我们演示当第一次迭代表格头所在行。
三、编辑器插件
这个就是关于编辑器的文件:
根据提示可以修改任何的参数对编辑器进行修改
|
1
2
3
4
5
6
7
8
9
10
11
12
13
14
15
16
17
18
19
20
21
22
23
24
25
26
27
28
29
30
31
32
33
34
35
36
37
38
39
40
41
42
43
44
45
46
47
48
49
50
51
52
53
54
55
56
57
58
59
60
61
62
63
64
65
66
67
68
69
70
71
72
73
74
75
76
77
78
|
<?php /** * 编辑器 * @param int $textareaid * @param int $toolbar 有basic full 和desc三种 * @param int $color 编辑器颜色 * @param string $alowuploadexts 允许上传类型 * @param string $height 编辑器高度 * @param string $disabled_page 是否禁用分页和子标题 */ function smarty_block_textarea($args, $content, $smarty, &$repeat) { //public static function editor($textareaid = \'content\', $toolbar = \'basic\', $height = 200, $color = \'\', $up=true) { if(!$repeat) { $textareaid = !empty($args[\'name\']) ? $args[\'name\'] : \'content\'; $toolbar = !empty($args[\'toolbar\']) ? $args[\'toolbar\'] : \'basic\'; $height = !empty($args[\'height\']) ? $args[\'height\'] : \'200\'; $color = !empty($args[\'color\']) ? $args[\'color\'] : \'\'; $up = !empty($args[\'up\']) ? $args[\'up\'] : true; $str =\'<textarea name="\'.$textareaid.\'">\'.$content.\'</textarea>\'; if(!defined(\'EDITOR_INIT\')) { define(\'EDITOR_INIT\', 1); } if($toolbar == \'basic\') { $toolbar = "[\'Bold\', \'Italic\',\'Underline\',\'Strike\',\'NumberedList\', \'BulletedList\', \'TextColor\',\'BGColor\', \'Link\', \'Unlink\', \'-\', \'Image\',\'Flash\',\'Table\',\'Smiley\',\'SpecialChar\'],[\'RemoveFormat\'], \\r\\n"; } elseif($toolbar == \'full\') { $toolbar = "[\'Source\',\'-\',\'Templates\'], [\'Cut\',\'Copy\',\'Paste\',\'PasteText\',\'PasteFromWord\',\'-\',\'Print\'], [\'Undo\',\'Redo\',\'-\',\'Find\',\'Replace\',\'-\',\'SelectAll\',\'RemoveFormat\'],[\'ShowBlocks\'],[\'Image\',\'Capture\',\'Flash\'],[\'Maximize\'], \'/\', [\'Bold\',\'Italic\',\'Underline\',\'Strike\',\'-\'], [\'Subscript\',\'Superscript\',\'-\'], [\'NumberedList\',\'BulletedList\',\'-\',\'Outdent\',\'Indent\',\'Blockquote\'], [\'JustifyLeft\',\'JustifyCenter\',\'JustifyRight\',\'JustifyBlock\'], [\'Link\',\'Unlink\',\'Anchor\'], [\'Table\',\'HorizontalRule\',\'Smiley\',\'SpecialChar\'], \'/\', [\'Styles\',\'Format\',\'Font\',\'FontSize\'], [\'TextColor\',\'BGColor\'], [\'attachment\'],\\r\\n"; } elseif($toolbar == \'desc\') { $toolbar = "[\'Bold\', \'Italic\', \'-\', \'NumberedList\', \'BulletedList\', \'-\', \'Link\', \'Unlink\', \'-\', \'Image\', \'-\',\'Source\'],\\r\\n"; } else { $toolbar = \'\'; } $str .= "<script type=\\"text/javascript\\">\\r\\n"; $str .= "CKEDITOR.replace( \'$textareaid\',{"; $str .= "height:{$height},"; if($color) { $str .= "extraPlugins : \'uicolor\',uiColor: \'$color\',"; } /* if($up) { $str .="filebrowserImageUploadUrl:\'".B_URL."/upimage\',"; $str .="filebrowserFlashUploadUrl:\'".B_URL."/upflash\',"; } */ $str .= "toolbar :\\r\\n"; $str .= "[\\r\\n"; $str .= $toolbar; $str .= "]\\r\\n"; //$str .= "fullPage : true"; $str .= "});\\r\\n"; $str .= \'</script>\'; return $str; } } |
可以显示出编辑器来看下,同样的在html文件中写
|
1
2
3
|
<{textarea}><{/textarea}> |
这样就可以加载出编辑框了

(1)在上面的插件中有这么一句注释
|
1
|
* @param int $toolbar 有basic full 和desc三种 |
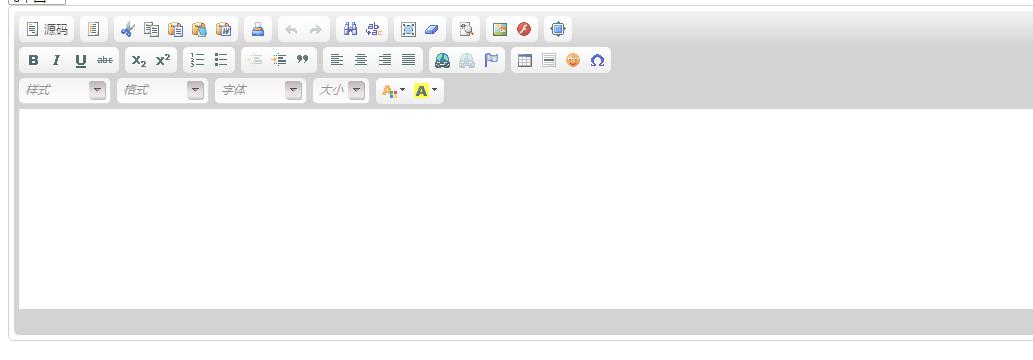
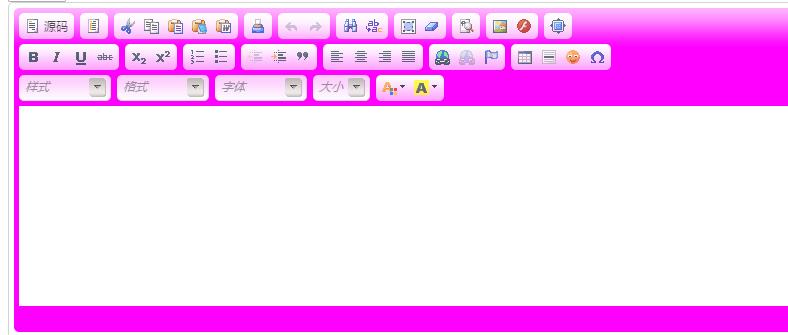
这样是可以直接在html中进行修改编辑框显示的功能,将toolbar的值改成“full”
|
1
2
3
|
<{textarea name=\'uid\' toolbar=\'full\'}><{/textarea}> |
看下结果:比没有改值的时候的功能多了点
通过一些参数还可以修改其他的样式:比如颜色,那么就在后面加上
|
1
|
color=\'#F0F\' |
就可以变成想要的颜色
以上是关于smarty模板内容的主要内容,如果未能解决你的问题,请参考以下文章