OSPF虚链路配置实验
Posted
tags:
篇首语:本文由小常识网(cha138.com)小编为大家整理,主要介绍了OSPF虚链路配置实验相关的知识,希望对你有一定的参考价值。
实验开始之前首先往GNS3中拖入四台路由器和两台PC机,并进行实验拓扑图规划。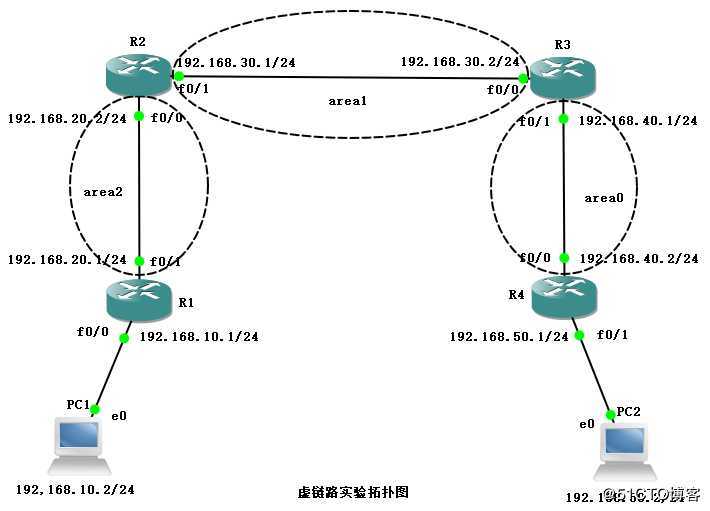
配置路由器接口
R1路由器:
conf t //进入全局模式
int f0/0 //进入f0/0接口
ip add 192.168.10.1 255.255.255.0 //配置IP地址
no shut //启动配置
ex //退出
int f0/1 //进入f0/1接口
ip add 192.168.20.1 255.255.255.0 //配置IP地址
no shut //启动配置
ex //退出
int lo 0
ip add 1.1.1.1 255.255.255.255 //配置路由器IP地址
no shut //启动配置
ex //退出
router ospf 1 //配置ospf动态路由
router-id 1.1.1.1 //宣告路由器IP地址
network 192.168.10.0 0.0.0.255 area 2 //宣告主网络号
network 192.168.20.0 0.0.0.255 area 2 //宣告主网络号
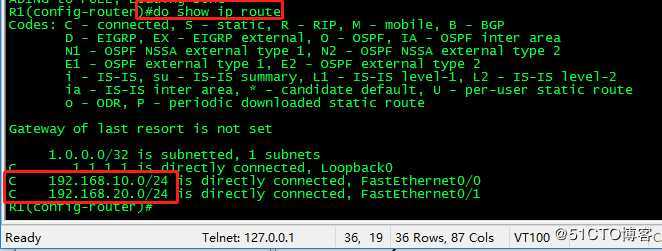
do show ip route //查看路由表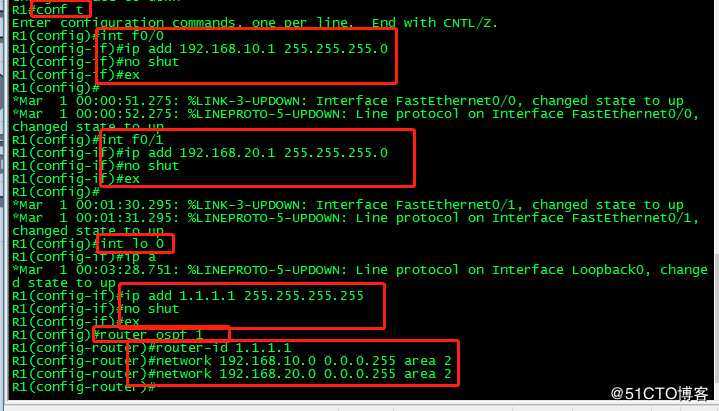
R2路由器:
conf t //进入全局模式
int f0/0
ip add 192.168.20.2 255.255.255.0
no shut
ex
int f0/1
ip add 192.168.30.1 255.255.255.0
no shut
ex
int lo 0
ip add 2.2.2.2 255.255.255.255
no shut
ex
router ospf 1
router-id 2.2.2.2
network 192.168.20.0 0.0.0.255 area 2
network 192.168.30.0 0.0.0.255 area 1
do show ip route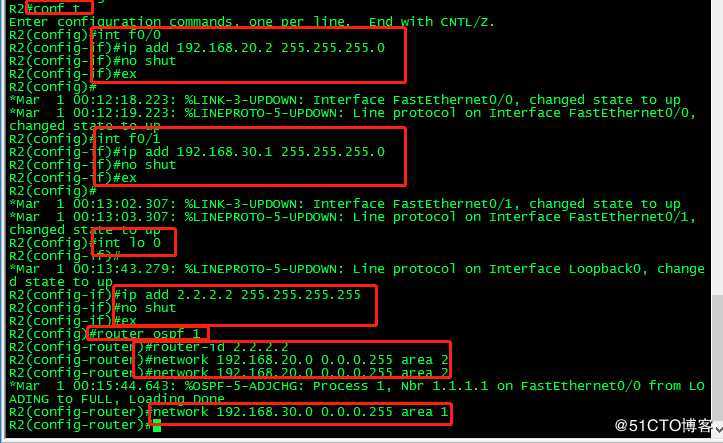
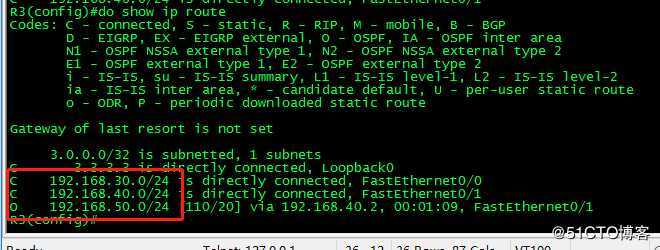
R3路由器:
conf t //进入全局模式
int f0/0
ip add 192.168.30.2 255.255.255.0
no shut
ex
int f0/1
ip add 192.168.40.1 255.255.255.0
no shut
ex
int lo 0
ip add 4.4.4.4 255.255.255.255
no shut
ex
router ospf 1
router-id 3.3.3.3
network 192.168.30.0 0.0.0.255 area 1
network 192.168.40.0 0.0.0.255 area 0
do show ip route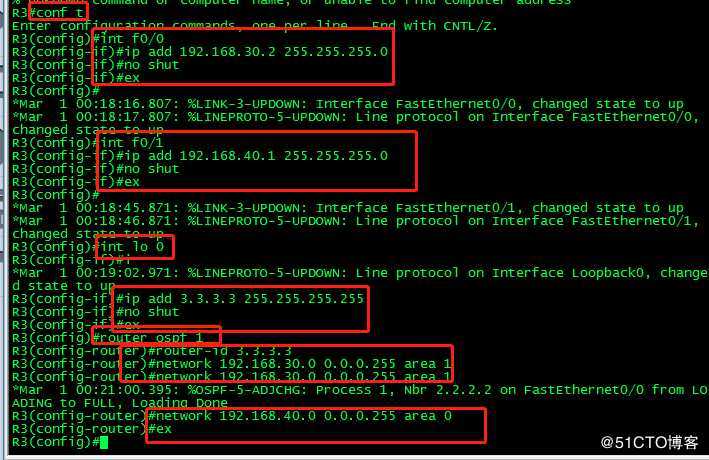
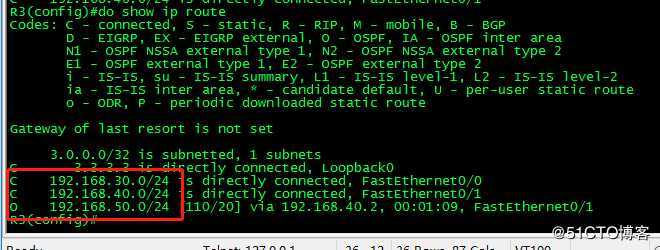
R4路由器:
conf t //进入全局模式
int f0/0
ip add 192.168.40.2 255.255.255.0
no shut
ex
int f0/1
ip add 192.168.50.1 255.255.255.0
no shut
ex
int lo 0
ip add 4.4.4.4 255.255.255.255
no shut
ex
router ospf 1
router-id 4.4.4.4
network 192.168.40.0 0.0.0.255 area 2
network 192.168.50.0 0.0.0.255 area 2
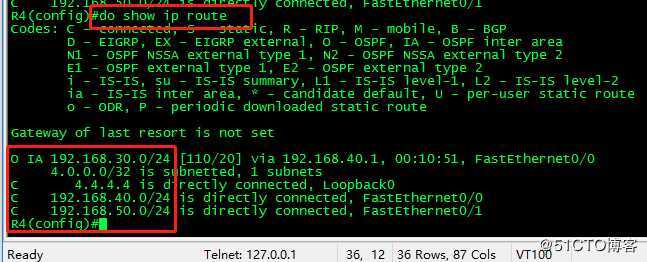
do show ip route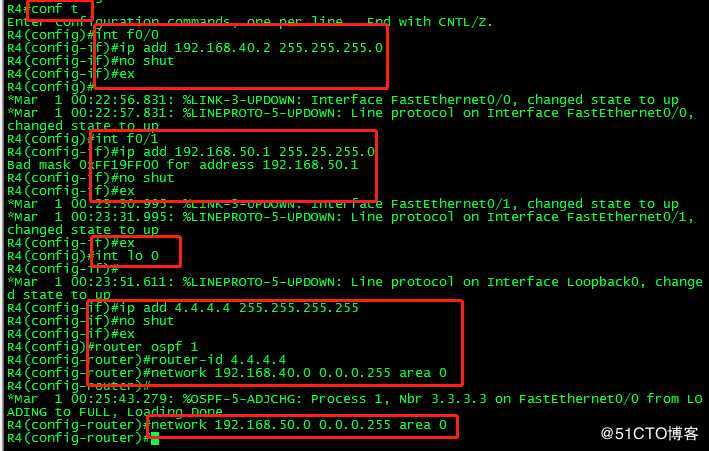
PC机IP地址设置
PC1:ip 192.168.10.2 192.168.10.1 //配置PC1IP地址
PC2:ip 192.168.50.2 192.168.50.1 //配置PC2IP地址
ping 192.168.10.2 用PC2pingPC1
当然此时是ping不通的

OSPF虚链路配置
router ospf 1
area 1 virtual-link 3.3.3.3
router ospf 1
area 1 virtual-link 2.2.2.2

ping 192.168.50.2 //使用PC1pingPC2
此时就可以拼通了。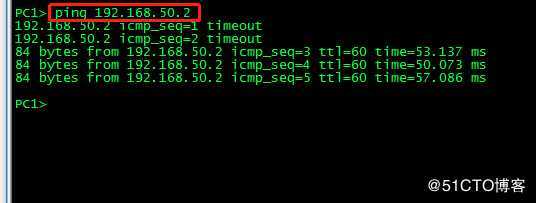
以上是关于OSPF虚链路配置实验的主要内容,如果未能解决你的问题,请参考以下文章