elasticsearch + fluentd + kibana 日志收集
Posted yanjieli
tags:
篇首语:本文由小常识网(cha138.com)小编为大家整理,主要介绍了elasticsearch + fluentd + kibana 日志收集相关的知识,希望对你有一定的参考价值。
软件包使用说明
说明:
1.这里采用离线安装所有的软件(elasticsearch、fluentd、kibana、jdk),且使用rpm包方式进行安装。
本文所使用软件包 下载链接 提取码:uq8o
软件版本:
| Software | Version | MD5 |
|---|---|---|
| jdk | 1.8.0_211 | 561abbcd9cc9214714de8429c679d56e |
| elasticsearch | 6.8.1 | 6a95250e603710fc515c91831734665b |
| kibana | 6.8.1 | 79a9bb38de1508e5fe5695ebc1514bbd |
| fluentd(td-agent) | 3.6.0 | ff093b5ee4350f81bce45597bca435b6 |
Elasticsearch部署
因为elasticsearch服务运行需要java环境,所以首先安装jdk
安装jdk
# yum localinstall jdk-8u211-linux-x64.rpm -y
# java -version
java version "1.8.0_211"
Java(TM) SE Runtime Environment (build 1.8.0_211-b12)
Java HotSpot(TM) 64-Bit Server VM (build 25.211-b12, mixed mode)
安装elasticsearch
1.安装
# yum localinstall elasticsearch-6.8.1.rpm -y

2.编辑配置文件
# cp /etc/elasticsearch/elasticsearch.yml{,.bck}
# cat /etc/elasticsearch/elasticsearch.yml
cluster.name: ELK-Cluster    #ELK的集群名称,名称相同即属于是同一个集群
node.name: elk-node1         #本机在集群内的节点名称
path.data: /var/lib/elasticsearch    #数据存放目录
path.logs: /var/log/elasticsearch    #日志保存目录
bootstrap.memory_lock: true  #服务启动的时候锁定足够的内存,防止数据写入swap
network.host: 192.168.3.60   #监听的IP地址
http.port: 9200              #服务监听的端口
discovery.zen.ping.unicast.hosts: ["192.168.3.60"]    #单播配置一台即可

3.修改启动内存限制,内存锁定需要配置2g以上的内存,否则会导致启动失败
# vim /usr/lib/systemd/system/elasticsearch.service
# 在[Service]下加入下面这行内容
LimitMEMLOCK=infinity

4.修改内存限制,这里是测试服务器所以只给2g
# vim /etc/elasticsearch/jvm.options
-Xms2g
-Xmx2g

5.启动elasticsearch并加入开机启动
# systemctl start elasticsearch.service
# systemctl enable elasticsearch.service
# netstat -nltp |grep java
tcp6       0      0 192.168.3.60:9200       :::*                    LISTEN      35849/java
tcp6       0      0 192.168.3.60:9300       :::*                    LISTEN      35849/java

6.可以通过shell命令获取集群状态,可以对status进行分析,如果等于green(绿色)就是运行在正常,等于yellow(黄色)表示副本分片丢失,red(红色)表示主分片丢失。
# curl http://192.168.3.60:9200/_cluster/health?pretty=true
{
  "cluster_name" : "ELK-Cluster",
  "status" : "green",
  "timed_out" : false,
  "number_of_nodes" : 1,
  "number_of_data_nodes" : 1,
  "active_primary_shards" : 0,
  "active_shards" : 0,
  "relocating_shards" : 0,
  "initializing_shards" : 0,
  "unassigned_shards" : 0,
  "delayed_unassigned_shards" : 0,
  "number_of_pending_tasks" : 0,
  "number_of_in_flight_fetch" : 0,
  "task_max_waiting_in_queue_millis" : 0,
  "active_shards_percent_as_number" : 100.0
}
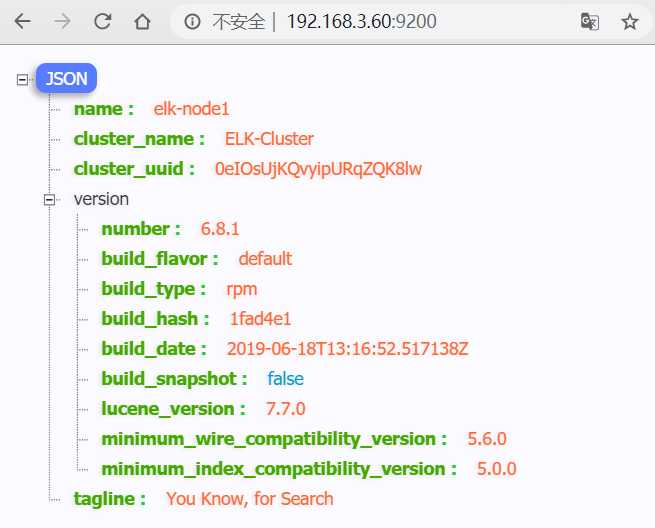
web界面访问查看状态 http://IP:PORT

安装elasticsearch插件head
head插件主要用来做集群管理的插件
这里同样采用离线安装方式,说明,需要安装npm
1.安装npm
# wget -O /etc/yum.repos.d/epel.repo http://mirrors.aliyun.com/repo/epel-7.repo
# yum install npm -y
2.上传软件并解压
# ls elasticsearch-head.tar.gz
elasticsearch-head.tar.gz
# tar xf elasticsearch-head.tar.gz -C /usr/local/
3.启动
# cd /usr/local/elasticsearch-head/
# npm run start &
4.由于上面启动不方便,故编写一个启动脚本
# cat /usr/bin/elasticsearch-head
#!/bin/bash
#desc: elasticsearch-head service manager
data="cd /usr/local/elasticsearch-head/; nohup npm run start > /dev/null 2>&1 & "
function START (){
eval $data && echo -e "elasticsearch-head start�33[32m ok�33[0m"
}
function STOP (){
ps -ef |grep grunt |grep -v "grep" |awk ‘{print $2}‘ |xargs kill -s 9 > /dev/null && echo -e "elasticsearch-head stop�33[32m ok�33[0m"
}
case "$1" in
start)
START
;;
stop)
STOP
;;
restart)
STOP
sleep 3
START
;;
*)
echo "Usage: elasticsearch-head (start|stop|restart)"
;;
esac
添加执行权限
# chmod +x /usr/bin/elasticsearch-head
启动
# elasticsearch-head start
# netstat -nltp |grep 9100
tcp 0 0 0.0.0.0:9100 0.0.0.0:* LISTEN 36484/grunt
5.修改elasticsearch配置文件,开启跨域访问支持,并重启elasticsearch
# vim /etc/elasticsearch/elasticsearch.yml
http.cors.enabled: true
http.cors.allow-origin: "*"
# systemctl restart elasticsearch.service
访问elasticsearch-head

fluentd部署
安装fluentd
无网络情况:
1.安装td-agent
# yum localinstall td-agent-3.6.0-0.el7.x86_64.rpm -y

2.安装插件(通过这些插件fluend才能将消息推送到elasticsearch)
插件下载地址:https://rubygems.org/
# /usr/sbin/td-agent-gem install fluent-plugin-elasticsearch-4.0.7.gem
# /usr/sbin/td-agent-gem install fluent-plugin-typecast-0.2.0.gem

安装fluent-plugin-secure-forward插件依赖于proxifier和resolve-hostname插件,
# /usr/sbin/td-agent-gem install fluent-plugin-secure-forward-0.4.5.gem
ERROR:  Could not find a valid gem ‘proxifier‘ (>= 0), here is why:
          Unable to download data from https://rubygems.org/ - no such name (https://rubygems.org/specs.4.8.gz)
# /usr/sbin/td-agent-gem install fluent-plugin-secure-forward-0.4.5.gem
ERROR:  Could not find a valid gem ‘resolve-hostname‘ (>= 0), here is why:
          Unable to download data from https://rubygems.org/ - no such name (https://rubygems.org/specs.4.8.gz)
故而先安装这两个插件,再安装fluent-plugin-secure-forward
# /usr/sbin/td-agent-gem install proxifier-1.0.3.gem
# /usr/sbin/td-agent-gem install resolve-hostname-0.1.0.gem
# /usr/sbin/td-agent-gem install fluent-plugin-secure-forward-0.4.5.gem
有网络情况:
# curl -L https://toolbelt.treasuredata.com/sh/install-redhat-td-agent3.sh | sh
# /usr/sbin/td-agent-gem install fluent-plugin-elasticsearch
# /usr/sbin/td-agent-gem install fluent-plugin-typecast
# /usr/sbin/td-agent-gem install fluent-plugin-secure-forward
配置fluentd
1.编辑配置文件
这里配置收集系统日志,/var/log/messages ,需要给予可读权限
# cp /etc/td-agent/td-agent.conf{,.bck}
# cat /etc/td-agent/td-agent.conf
<source>
@type forward
port 24224
</source>

<source>
@type tail
path /var/log/messages
pos_file /var/log/td-agent/messages.log.pos
tag message
<parse>
@type json
</parse>
</source>

<match debug.**>
@type stdout
</match>

<match *.**>
@type copy
<store>
@type elasticsearch
host 192.168.3.60
port 9200
logstash_format true
logstash_prefix message-${tag}
logstash_dateformat %Y%m%d
include_tag_key true
type_name access_log
tag_key @log_name
flush_interval 1s
</store>
<store>
@type stdout
</store>
</match>

2.给予被收集的日志可读权限
# chmod o+r /var/log/messages

3.启动td-agent,并测试
# systemctl start td-agent
# systemctl enable td-agent

# tail -2 /var/log/td-agent/td-agent.log
2020-03-29 14:50:01 +0800 [warn]: #0 pattern not matched: "Mar 29 14:50:01 localhost systemd: Starting Session 38 of user root."
2020-03-29 14:50:01.433035076 +0800 fluent.warn: {"message":"pattern not matched: "Mar 29 14:50:01 localhost systemd: Starting Session 38 of user root.""}
elasticsearch-head界面查询

kibana部署
1.安装kibana
# yum localinstall kibana-6.8.1-x86_64.rpm -y

2.配置
# cp /etc/kibana/kibana.yml{,.bck}
# cat /etc/kibana/kibana.yml
server.port: 5601
server.host: "192.168.3.60"
elasticsearch.hosts: ["http://192.168.3.60:9200"]
i18n.locale: "zh-CN"

3.启动kibana
# systemctl start kibana
# systemctl enable kibana
# netstat -nltp |grep 5601
tcp        0      0 192.168.3.60:5601       0.0.0.0:*               LISTEN      39743/node
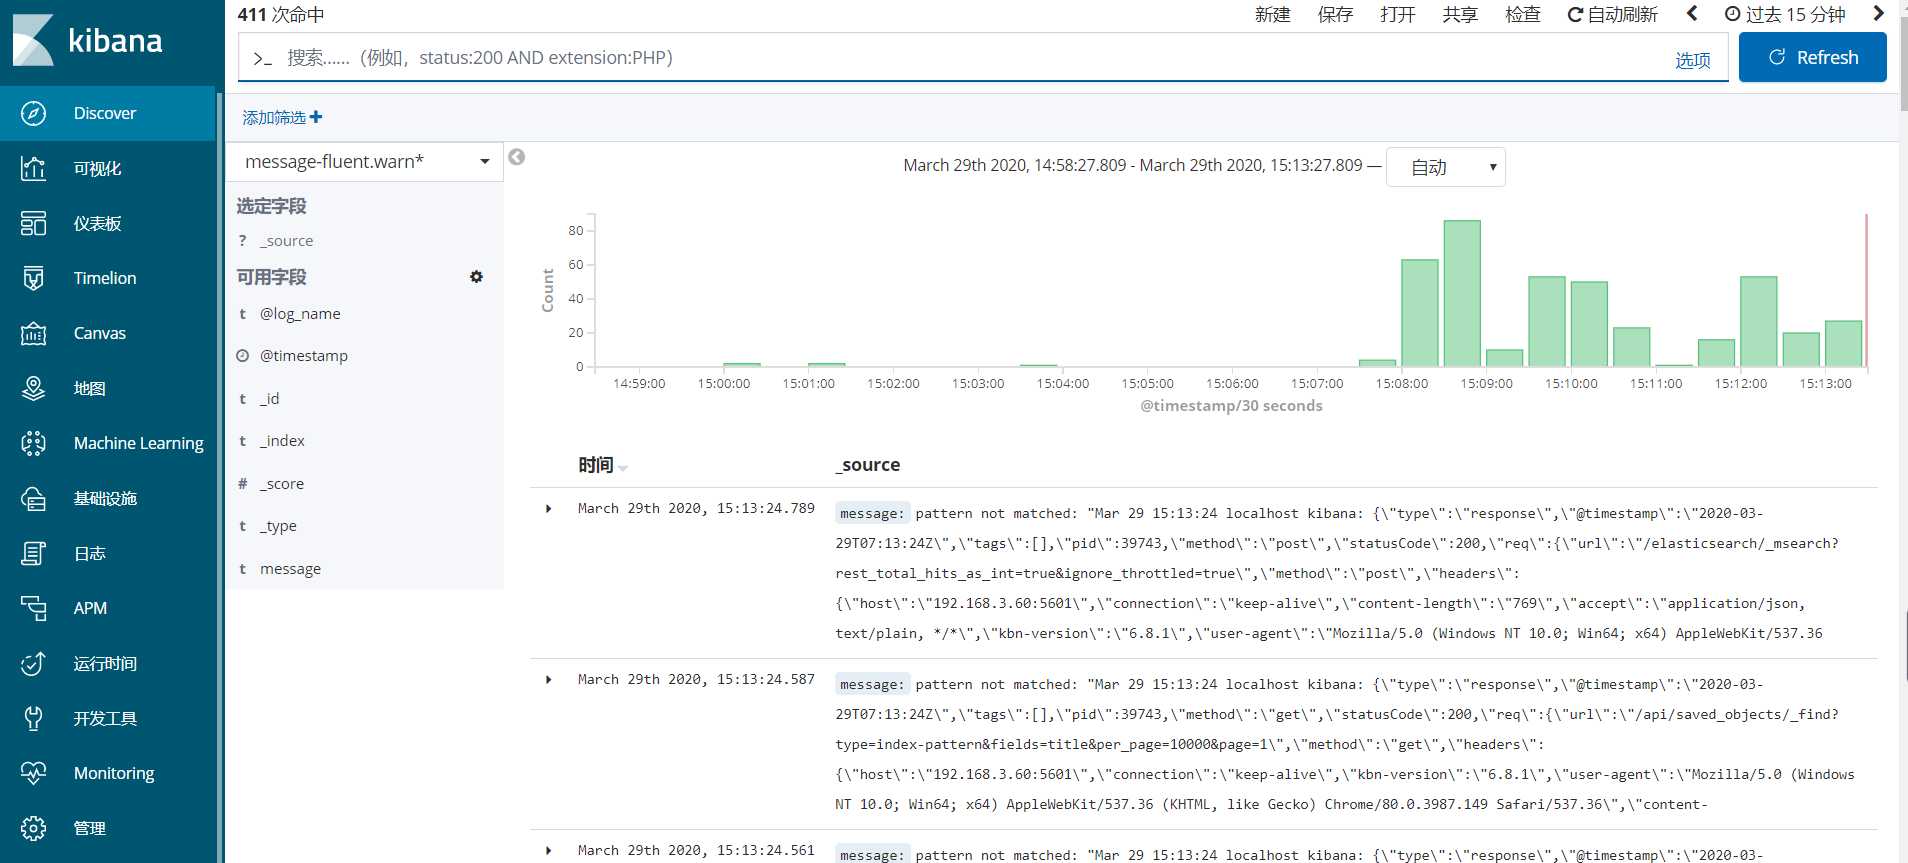
web界面添加索引 http://IP:PORT


以上是关于elasticsearch + fluentd + kibana 日志收集的主要内容,如果未能解决你的问题,请参考以下文章
elk/elasticsearch+fluentd+kibana
EFK(elasticsearch + fluentd + kibana)日志系统
Nginx容器日志收集方案fluentd+elasticsearch+kilbana
fluentd 丢失毫秒,现在日志消息在 elasticsearch 中乱序存储