最简单的 UE 4 C++ 教程 ——通过插值和重叠事件实现开门效果三十一
Posted panda1234lee
tags:
篇首语:本文由小常识网(cha138.com)小编为大家整理,主要介绍了最简单的 UE 4 C++ 教程 ——通过插值和重叠事件实现开门效果三十一相关的知识,希望对你有一定的参考价值。
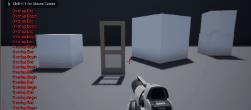
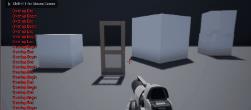
效果图

原教程是基于 UE 4.18,我是基于 UE 4.25】
在本教程中,在这个虚幻引擎4 C++ 教程中,我们将学习如何依据玩家的方向,通过使用 lerp 函数和重叠事件自动打开一扇门。创建一个新的 actor 类,比如叫它 OpenDoorWithLerp 。
首先,在 .h 文件中,让我们在文件的顶部使用 #include BoxComponent 。确保它出现在 Actor 的 generated.h 文件之前。
#include "CoreMinimal.h"
#include "GameFramework/Actor.h"

// include before generated file
#include "Components/BoxComponent.h"

#include "OpenDoorWithLerp.generated.h"
接下来,我们将创建变量。我们将声明门 的 UStaticMeshComponent、UBoxComponent、我们的重叠函数、bool、float 和用于门旋转的 FRotator 变量。
三个 bool 变量确定门的状态,四个 float 变量为门设置不同的数字。接下来,我们将添加用于切换门的函数和使用构建门本身的 UStaticMeshComponent 和 UBoxComponent。所有元素将放在头文件的公共部分之下。
...
public:
	// Called every frame
	virtual void Tick(float DeltaTime) override;

	UPROPERTY(EditAnywhere)
	UStaticMeshComponent* Door;

	UPROPERTY(EditAnywhere)
	UBoxComponent* MyBoxComponent;

	// declare overlap begin function
	UFUNCTION()
	void OnOverlapBegin(class UPrimitiveComponent* OverlappedComp, class AActor* OtherActor, class UPrimitiveComponent* OtherComp, int32 OtherBodyIndex, bool bFromSweep, const FHitResult& SweepResult);

	// declare overlap end function
	UFUNCTION()
	void OnOverlapEnd(class UPrimitiveComponent* OverlappedComp, class AActor* OtherActor, class UPrimitiveComponent* OtherComp, int32 OtherBodyIndex);

	bool Open;
	float RotateValue;
	FRotator DoorRotation;
接下来,我们将进入 Actor 的 .cpp 文件。我们首先要 #include KismetMathLibrary 头文件。我们将在重叠函数中使用一个数学函数。
#include "Kismet/KismetMathLibrary.h"在构造函数中,我们将设置默认变量。我们首先将门的 Open (bool 类型)设置为 false。接下来,我们将设置我们的 UBoxComponent 和 UStaticMeshComponent 。我们将UBoxComponent 设置为我们的 RootComponent 。然后,将重叠函数连接到 UBoxComponent 。稍后,我们将创建它们正在调用的重叠函数。
AOpenDoorWithLerp::AOpenDoorWithLerp()
{
 	// Set this actor to call Tick() every frame.  You can turn this off to improve performance if you don't need it.
	PrimaryActorTick.bCanEverTick = true;

	Open = false;

    MyBoxComponent = CreateDefaultSubobject<UBoxComponent>(TEXT("My Box Component"));
    MyBoxComponent->InitBoxExtent(FVector(50,50,50));
    RootComponent = MyBoxComponent;

    Door = CreateDefaultSubobject<UStaticMeshComponent>(TEXT("My Mesh"));
    Door->SetRelativeLocation(FVector(0.0f, 50.0f, -50.0f));
    Door->SetupAttachment(RootComponent);

    MyBoxComponent->OnComponentBeginOverlap.AddDynamic(this, &AOpenDoorWithLerp::OnOverlapBegin);
    MyBoxComponent->OnComponentEndOverlap.AddDynamic(this, &AOpenDoorWithLerp::OnOverlapEnd);
}
在 Tick 函数中,我们将检查门是否打开,并运行 lerp 函数。必须在 Tick 函数中运行一个 lerp 函数。我们将通过使用 Door->RelativeRotation 来获取门的旋转,以返回门在每一帧上的旋转。在得到门的旋转后,我们将平滑地移动 yaw 到 90,-90,或 0。
void AOpenDoorWithLerp::Tick(float DeltaTime)
{
	Super::Tick(DeltaTime);

	DoorRotation = Door->RelativeRotation;

    if(Open)
    {
        Door->SetRelativeRotation(FMath::Lerp(FQuat(DoorRotation), FQuat(FRotator(0.0f, RotateValue, 0.0f)), 0.01f));
    }
    else
    {
        Door->SetRelativeRotation(FMath::Lerp(FQuat(DoorRotation), FQuat(FRotator(0.0f, 0.0f, 0.0f)), 0.01f));
    }

}接下来,让我们创建重叠函数。OnOverlapBegin 将首先对空值进行条件检查,以确定函数是否应该继续。然后,该函数根据玩家和 actor 的位置和旋转来检查他们所面对的方向。在这个函数中,我们的玩家也就是我们的 Pawn 是传递给函数的 OtherActor 参数。我们用 Actor 的位置减去Pawn 的位置,得到一个方向 FVector。然后我们需要考虑父组件的旋转,因此我们运行UKismetMathLibrary::LessLess_VectorRotator。这个方法取自虚幻引擎4的内容示例。如果玩家在门前,则 RotateValue 将等于 90.0f,如果不是,则 RotateValue 将等于 -90.0f 。然后,最后我们将 Open 设为 true 。
OnOnverlapEnd 简单地将 Open 设置为 false。
void AOpenDoorWithLerp::OnOverlapBegin(class UPrimitiveComponent* OverlappedComp, class AActor* OtherActor, class UPrimitiveComponent* OtherComp, int32 OtherBodyIndex, bool bFromSweep, const FHitResult& SweepResult)
{
    if ( (OtherActor != nullptr ) && (OtherActor != this) && ( OtherComp != nullptr ) )
    {
        FVector PawnLocation = OtherActor->GetActorLocation();
        FVector Direction = GetActorLocation() - PawnLocation;
        Direction = UKismetMathLibrary::LessLess_VectorRotator(Direction, GetActorRotation());

        if(Direction.X > 0.0f)
        {
            RotateValue = 90.0f;
        }
        else
        {
            RotateValue = -90.0f;
        }

        Open = true;
    }
}

void AOpenDoorWithLerp::OnOverlapEnd(class UPrimitiveComponent* OverlappedComp, class AActor* OtherActor, class UPrimitiveComponent* OtherComp, int32 OtherBodyIndex)
{
    if ( (OtherActor != nullptr ) && (OtherActor != this) && ( OtherComp != nullptr ) )
    {
        Open = false;
    }
}
我们已经完成了代码。进入编辑器并编译。将角色拖放到游戏世界中。将 BoxComponent 的碰撞预设设置为 Trigger ,并从启动器内容中添加门静态网格作为 UStaticMeshComponent 。
那么就可以得到如文章开头那样的效果

以上是关于最简单的 UE 4 C++ 教程 ——通过插值和重叠事件实现开门效果三十一的主要内容,如果未能解决你的问题,请参考以下文章
最简单的 UE 4 C++ 教程 —— 绘制 UE4 辅助调试的形状
最简单的 UE 4 C++ 教程 —— 漂浮的 Actor二十七
最简单的 UE 4 C++ 教程 —— 为 Charactor 添加重叠事件十九