使用Albumentations 对关键点 做增强
Posted AI浩
tags:
篇首语:本文由小常识网(cha138.com)小编为大家整理,主要介绍了使用Albumentations 对关键点 做增强相关的知识,希望对你有一定的参考价值。
目录
在本示例中,我们将展示如何将Albumentations 应用于关键点增强的问题。 请参考变换列表及其支持的目标,以查看哪些空间级增强支持关键点。 您可以对具有关键点的图像使用任何像素级增强,因为像素级增强不会影响关键点。
注意:默认情况下,与关键点配合使用的增强功能不会在转换后更改关键点的标签。 如果要点的标签是特定于侧面的,则可能会引起问题。 例如,如果您有一个名为``左臂''的关键点并应用了HorizontalFlip增强,您将获得一个具有相同左臂标签的关键点,但现在看起来像是一个右臂关键点。 有关视觉示例,请参见本文末尾的图片。
如果您使用这种类型的关键点,请考虑使用为解决这种情况而专门创建的,来自albumentations-experimental的SymmetricKeypoints扩展。
1、导入所需要的库
import random

import cv2
from matplotlib import pyplot as plt

import albumentations as A
2、定义可视化图像关键点的函数
KEYPOINT_COLOR = (0, 255, 0) # Green

def vis_keypoints(image, keypoints, color=KEYPOINT_COLOR, diameter=15):
    image = image.copy()

    for (x, y) in keypoints:
        cv2.circle(image, (int(x), int(y)), diameter, (0, 255, 0), -1)

    plt.figure(figsize=(8, 8))
    plt.axis('off')
    plt.imshow(image)
得到图像和标注
image = cv2.imread('images/keypoints_image.jpg')
image = cv2.cvtColor(image, cv2.COLOR_BGR2RGB)
定义关键点
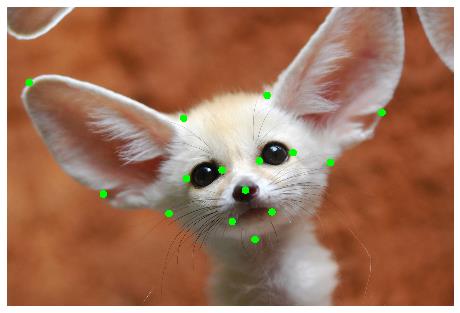
我们将使用xy格式作为关键点的坐标。 每个关键点都有两个坐标定义,x是在x轴上的位置,y是在y轴上的位置。 请参阅本文,详细了解关键点坐标的格式-https://albumentations.ai/docs/getting_started/keypoints_augmentation/
keypoints = [
    (100, 100),
    (720, 410),
    (1100, 400),
    (1700, 30),
    (300, 650),
    (1570, 590),
    (560, 800),
    (1300, 750),
    (900, 1000),
    (910, 780),
    (670, 670),
    (830, 670),
    (1000, 670),
    (1150, 670),
    (820, 900),
    (1000, 900),
]
3、展示图像的关键点
vis_keypoints(image, keypoints)

4、定义一个简单的管道
transform = A.Compose(
    [A.HorizontalFlip(p=1)],
    keypoint_params=A.KeypointParams(format='xy')
)
transformed = transform(image=image, keypoints=keypoints)
vis_keypoints(transformed['image'], transformed['keypoints'])

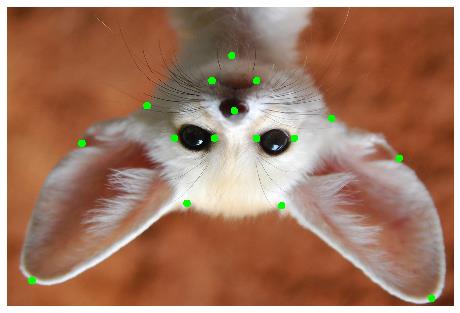
5、扩充管道的更多示例
transform = A.Compose(
    [A.VerticalFlip(p=1)],
    keypoint_params=A.KeypointParams(format='xy')
)
transformed = transform(image=image, keypoints=keypoints)
vis_keypoints(transformed['image'], transformed['keypoints'])

我们固定随机种子是为了可视化目的,因此增强将始终产生相同的结果。 在真实的计算机视觉管道中,您不应该在对图像应用转换之前固定随机种子,因为在这种情况下,管道将始终输出相同的图像。 图像增强的目的是每次使用不同的变换。
random.seed(7)
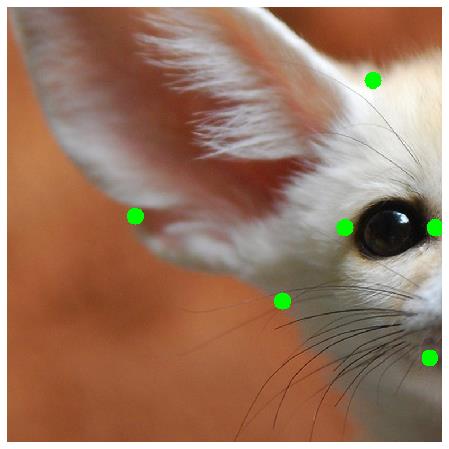
transform = A.Compose(
    [A.RandomCrop(width=768, height=768, p=1)],
    keypoint_params=A.KeypointParams(format='xy')
)
transformed = transform(image=image, keypoints=keypoints)
vis_keypoints(transformed['image'], transformed['keypoints'])

random.seed(7)
transform = A.Compose(
    [A.Rotate(p=0.5)],
    keypoint_params=A.KeypointParams(format='xy')
)
transformed = transform(image=image, keypoints=keypoints)
vis_keypoints(transformed['image'], transformed['keypoints'])

transform = A.Compose(
    [A.CenterCrop(height=512, width=512, p=1)],
    keypoint_params=A.KeypointParams(format='xy')
)
transformed = transform(image=image, keypoints=keypoints)
vis_keypoints(transformed['image'], transformed['keypoints'])

random.seed(7)
transform = A.Compose(
    [A.ShiftScaleRotate(p=0.5)],
    keypoint_params=A.KeypointParams(format='xy')
)
transformed = transform(image=image, keypoints=keypoints)
vis_keypoints(transformed['image'], transformed['keypoints'])

6、一个复杂的增强管道例子
random.seed(7)
transform = A.Compose([
        A.RandomSizedCrop(min_max_height=(256, 1025), height=512, width=512, p=0.5),
        A.HorizontalFlip(p=0.5),
        A.OneOf([
            A.HueSaturationValue(p=0.5),
            A.RGBShift(p=0.7)
        ], p=1),
        A.RandomBrightnessContrast(p=0.5)
    ],
    keypoint_params=A.KeypointParams(format='xy'),
)
transformed = transform(image=image, keypoints=keypoints)
vis_keypoints(transformed['image'], transformed['keypoints'])

以上是关于使用Albumentations 对关键点 做增强的主要内容,如果未能解决你的问题,请参考以下文章
Python库 - Albumentations 图片数据增强库
图像分割模型——segmentation_models_pytorch和albumentations 组合实现多类别分割