图像增强库Albumentations使用总结
Posted AI浩
tags:
篇首语:本文由小常识网(cha138.com)小编为大家整理,主要介绍了图像增强库Albumentations使用总结相关的知识,希望对你有一定的参考价值。
目录
Spatial-level transforms(空间层次转换)
ShiftScaleRotate 随机平移,缩放和旋转输入。
RandomGridShuffle把图像切成网格单元随机排列。
HueSaturationValue随机更改图像的颜色,饱和度和值。
GaussianBlur 使用随机核大小的高斯滤波器对图像进行模糊处理
ChannelShuffle随机重新排列输入RGB图像的通道。
摘要
albumentations包是一种针对数据增强专门写的API,里面基本包含大量的数据增强手段,其特点:
1、Albumentations支持所有常见的计算机视觉任务,如分类、语义分割、实例分割、目标检测和姿态估计。
2、该库提供了一个简单统一的API,用于处理所有数据类型:图像(rbg图像、灰度图像、多光谱图像)、分割掩码、边界框和关键点。
3、该库包含70多种不同的增强功能,可以从现有数据中生成新的训练样本。
4、Albumentations快。我们对每个新版本进行基准测试,以确保增强功能提供最大的速度。
5、它与流行的深度学习框架(如PyTorch和TensorFlow)一起工作。顺便说一下,Albumentations是PyTorch生态系统的一部分。
6、由专家写的。作者既有生产计算机视觉系统的工作经验,也有参与竞争性机器学习的经验。许多核心团队成员是Kaggle Masters和Grandmasters。
7、该库广泛应用于工业、深度学习研究、机器学习竞赛和开源项目。
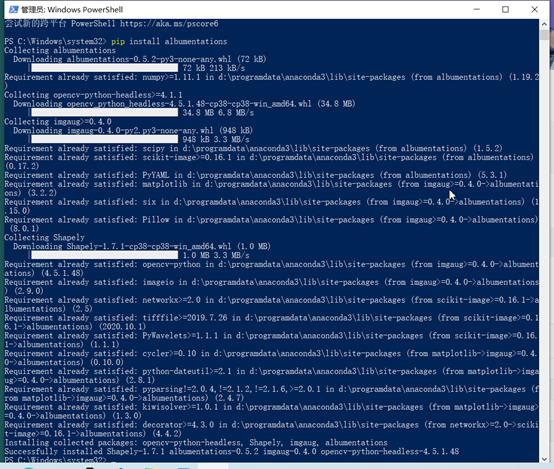
Albumentations 的 pip 安装
pip install albumentations
基准测试结果
测试使用ImageNet验证集的前2000张图像在Intel Xeon Gold 6140 CPU运行基准测试的结果。所有输出都被转换为带有np的连续NumPy数组。uint8数据类型。表格显示了在单个核上每秒可以处理的图像数量;高越好。
| albumentations 0.5.0 | imgaug 0.4.0 | torchvision (Pillow-SIMD backend) 0.7.0 | keras 2.4.3 | augmentor 0.2.8 | solt 0.1.9 | |
|---|---|---|---|---|---|---|
| HorizontalFlip | 9909 | 2821 | 2267 | 873 | 2301 | 6223 |
| VerticalFlip | 4374 | 2218 | 1952 | 4339 | 1968 | 3562 |
| Rotate | 371 | 296 | 163 | 27 | 60 | 345 |
| ShiftScaleRotate | 635 | 437 | 147 | 28 | - | - |
| Brightness | 2751 | 1178 | 419 | 229 | 418 | 2300 |
| Contrast | 2756 | 1213 | 352 | - | 348 | 2305 |
| BrightnessContrast | 2738 | 699 | 195 | - | 193 | 1179 |
| ShiftRGB | 2757 | 1176 | - | 348 | - | - |
| ShiftHSV | 597 | 284 | 58 | - | - | 137 |
| Gamma | 2844 | - | 382 | - | - | 946 |
| Grayscale | 5159 | 428 | 709 | - | 1064 | 1273 |
| RandomCrop64 | 175886 | 3018 | 52103 | - | 41774 | 20732 |
| PadToSize512 | 3418 | - | 574 | - | - | 2874 |
| Resize512 | 1003 | 634 | 1036 | - | 1016 | 977 |
| RandomSizedCrop_64_512 | 3191 | 939 | 1594 | - | 1529 | 2563 |
| Posterize | 2778 | - | - | - | - | - |
| Solarize | 2762 | - | - | - | - | - |
| Equalize | 644 | 413 | - | - | 735 | - |
| Multiply | 2727 | 1248 | - | - | - | - |
| MultiplyElementwise | 118 | 209 | - | - | - | - |
| ColorJitter | 368 | 78 | 57 | - | - | - |
Python and library versions: Python 3.8.6 (default, Oct 13 2020, 20:37:26) [GCC 8.3.0], numpy 1.19.2, pillow-simd 7.0.0.post3, opencv-python 4.4.0.44, scikit-image 0.17.2, scipy 1.5.2.
Spatial-level transforms(空间层次转换)
空间级转换将同时改变输入图像和附加目标,如掩模、边界框和关键点。下表显示了每个转换支持哪些附加目标。
| Transform | Image | Masks | BBoxes | Keypoints |
|---|---|---|---|---|
| Affine | ✓ | ✓ | ✓ | ✓ |
| CenterCrop | ✓ | ✓ | ✓ | ✓ |
| CoarseDropout | ✓ | ✓ | ||
| Crop | ✓ | ✓ | ✓ | ✓ |
| CropAndPad | ✓ | ✓ | ✓ | ✓ |
| CropNonEmptyMaskIfExists | ✓ | ✓ | ✓ | ✓ |
| ElasticTransform | ✓ | ✓ | ||
| Flip | ✓ | ✓ | ✓ | ✓ |
| GridDistortion | ✓ | ✓ | ||
| GridDropout | ✓ | ✓ | ||
| HorizontalFlip | ✓ | ✓ | ✓ | ✓ |
| IAAAffine | ✓ | ✓ | ✓ | ✓ |
| IAAPiecewiseAffine | ✓ | ✓ | ✓ | ✓ |
| Lambda | ✓ | ✓ | ✓ | ✓ |
| LongestMaxSize | ✓ | ✓ | ✓ | ✓ |
| MaskDropout | ✓ | ✓ | ||
| NoOp | ✓ | ✓ | ✓ | ✓ |
| OpticalDistortion | ✓ | ✓ | ||
| PadIfNeeded | ✓ | ✓ | ✓ | ✓ |
| Perspective | ✓ | ✓ | ✓ | ✓ |
| RandomCrop | ✓ | ✓ | ✓ | ✓ |
| RandomCropNearBBox | ✓ | ✓ | ✓ | ✓ |
| RandomGridShuffle | ✓ | ✓ | ||
| RandomResizedCrop | ✓ | ✓ | ✓ | ✓ |
| RandomRotate90 | ✓ | ✓ | ✓ | ✓ |
| RandomScale | ✓ | ✓ | ✓ | ✓ |
| RandomSizedBBoxSafeCrop | ✓ | ✓ | ✓ | |
| RandomSizedCrop | ✓ | ✓ | ✓ | ✓ |
| Resize | ✓ | ✓ | ✓ | ✓ |
| Rotate | ✓ | ✓ | ✓ | ✓ |
| SafeRotate | ✓ | ✓ | ✓ | ✓ |
| ShiftScaleRotate | ✓ | ✓ | ✓ | ✓ |
| SmallestMaxSize | ✓ | ✓ | ✓ | ✓ |
| Transpose | ✓ | ✓ | ✓ | ✓ |
| VerticalFlip | ✓ | ✓ | ✓ | ✓ |
支持的列表
- Blur
- CLAHE
- ChannelDropout
- ChannelShuffle
- ColorJitter
- Downscale
- Emboss
- Equalize
- FDA
- FancyPCA
- FromFloat
- GaussNoise
- GaussianBlur
- GlassBlur
- HistogramMatching
- HueSaturationValue
- ISONoise
- ImageCompression
- InvertImg
- MedianBlur
- MotionBlur
- MultiplicativeNoise
- Normalize
- Posterize
- RGBShift
- RandomBrightnessContrast
- RandomFog
- RandomGamma
- RandomRain
- RandomShadow
- RandomSnow
- RandomSunFlare
- RandomToneCurve
- Sharpen
- Solarize
- Superpixels
- ToFloat
- ToGray
- ToSepia
简单的使用案例
import albumentations as A
import cv2

import matplotlib.pyplot as plt

# Declare an augmentation pipeline
transform = A.Compose([
    A.RandomCrop(width=512, height=512),
    A.HorizontalFlip(p=0.8),
    A.RandomBrightnessContrast(p=0.5),
])

# Read an image with OpenCV and convert it to the RGB colorspace
image = cv2.imread("aa.jpg")
image = cv2.cvtColor(image, cv2.COLOR_BGR2RGB)

# Augment an image
transformed = transform(image=image)
transformed_image = transformed["image"]
plt.imshow(transformed_image)
plt.show()
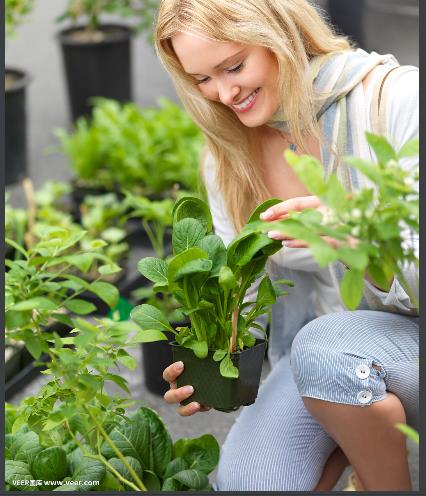
原始图像:
运行结果:

详细使用案例
-
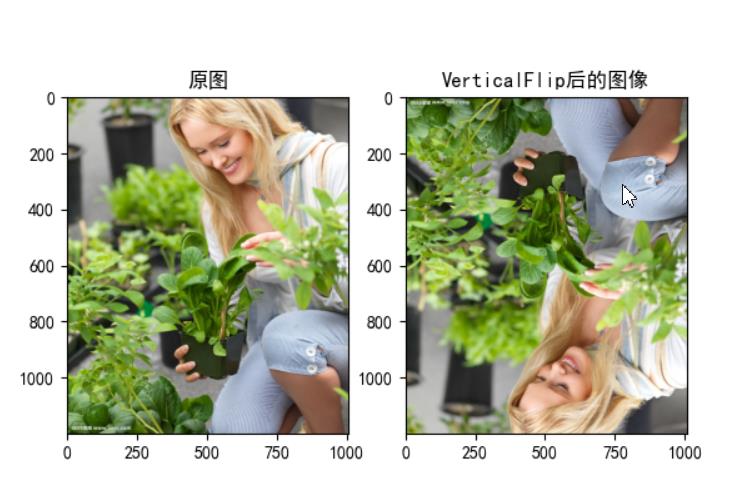
VerticalFlip 围绕X轴垂直翻转输入。
import albumentations as A
import cv2
import numpy as np
import matplotlib.pyplot as plt
#解决中文显示问题
plt.rcParams['font.sans-serif']=['SimHei']
plt.rcParams['axes.unicode_minus'] = False
# Read an image with OpenCV and convert it to the RGB colorspace
image = cv2.imread("aa.jpg")
image = cv2.cvtColor(image, cv2.COLOR_BGR2RGB)
# Augment an image
transformed = A.VerticalFlip(always_apply=False, p=1)(image=image)
transformed_image = transformed["image"]
plt.subplot(1, 2, 1)
plt.title('原图')   #第一幅图片标题
plt.imshow(image)
plt.subplot(1, 2, 2)
plt.title('Blur后的图像')
plt.imshow(transformed_image)
plt.show()
-
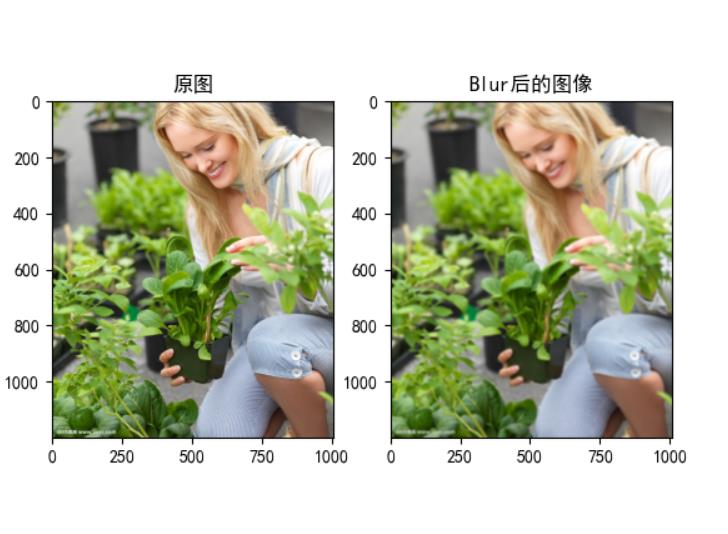
Blur模糊输入图像
import albumentations as A
import cv2
import numpy as np
import matplotlib.pyplot as plt
#解决中文显示问题
plt.rcParams['font.sans-serif']=['SimHei']
plt.rcParams['axes.unicode_minus'] = False
# Read an image with OpenCV and convert it to the RGB colorspace
image = cv2.imread("aa.jpg")
image = cv2.cvtColor(image, cv2.COLOR_BGR2RGB)
# Augment an image
transformed = A.Blur(blur_limit=15,always_apply=False, p=1)(image=image)
transformed_image = transformed["image"]
plt.subplot(1, 2, 1)
plt.title('原图')   #第一幅图片标题
plt.imshow(image)
plt.subplot(1, 2, 2)
plt.title('Blur后的图像')
plt.imshow(transformed_image)
plt.show()
-
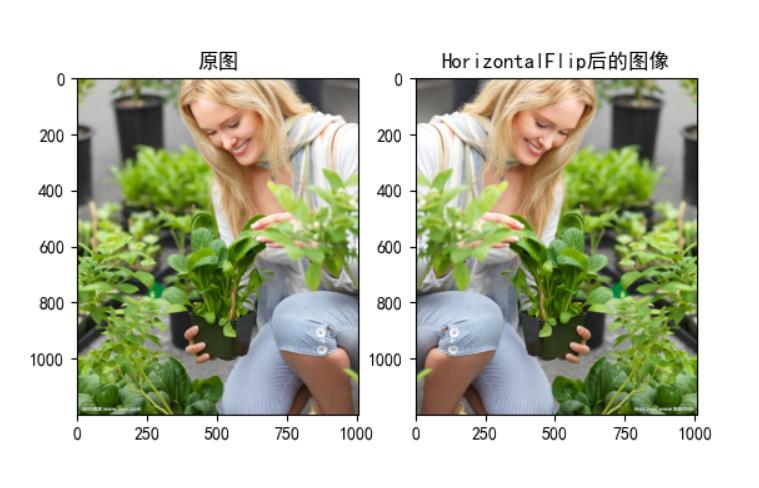
HorizontalFlip 围绕y轴水平翻转输入
import albumentations as A
import cv2
import numpy as np
import matplotlib.pyplot as plt
#解决中文显示问题
plt.rcParams['font.sans-serif']=['SimHei']
plt.rcParams['axes.unicode_minus'] = False
# Read an image with OpenCV and convert it to the RGB colorspace
image = cv2.imread("aa.jpg")
image = cv2.cvtColor(image, cv2.COLOR_BGR2RGB)
# Augment an image
transformed = A.HorizontalFlip(always_apply=False, p=1)(image=image)
transformed_image = transformed["image"]
plt.subplot(1, 2, 1)
plt.title('原图')   #第一幅图片标题
plt.imshow(image)
plt.subplot(1, 2, 2)
plt.title('HorizontalFlip后的图像')
plt.imshow(transformed_image)
plt.show()
运行结果:
-
Flip水平,垂直或水平和垂直翻转输入。
import albumentations as A
import cv2
import numpy as np
import matplotlib.pyplot as plt
#解决中文显示问题
plt.rcParams['font.sans-serif']=['SimHei']
plt.rcParams['axes.unicode_minus'] = False
# Read an image with OpenCV and convert it to the RGB colorspace
image = cv2.imread("aa.jpg")
image = cv2.cvtColor(image, cv2.COLOR_BGR2RGB)
# Augment an image
transformed = A.Flip(always_apply=False, p=1)(image=image)
transformed_image = transformed["image"]
plt.subplot(1, 2, 1)
plt.title('原图')   #第一幅图片标题
plt.imshow(image)
plt.subplot(1, 2, 2)
plt.title('Flip后的图像')
plt.imshow(transformed_image)
plt.show()
运行结果有一定的随机性,如下图:

-
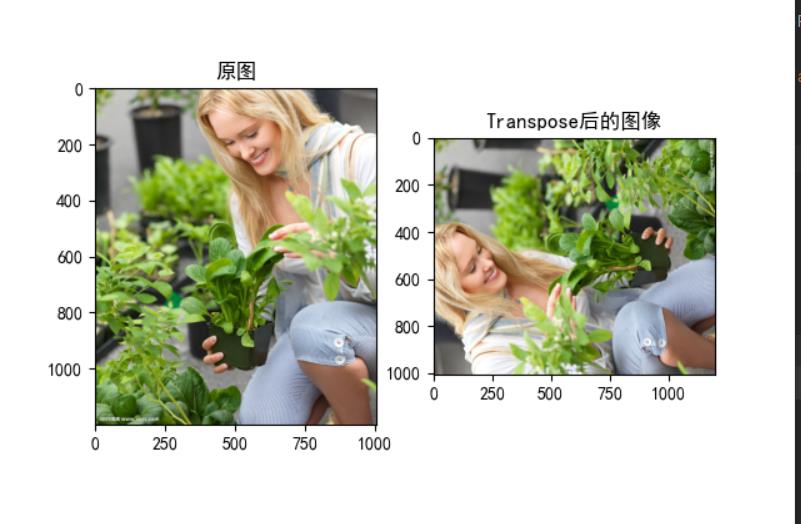
Transpose, 通过交换行和列来转置输入。
import albumentations as A
import cv2
import numpy as np
import matplotlib.pyplot as plt
#解决中文显示问题
plt.rcParams['font.sans-serif']=['SimHei']
plt.rcParams['axes.unicode_minus'] = False
# Read an image with OpenCV and convert it to the RGB colorspace
image = cv2.imread("aa.jpg")
image = cv2.cvtColor(image, cv2.COLOR_BGR2RGB)
# Augment an image
transformed = A.Transpose(always_apply=False, p=1)(image=image)
transformed_image = transformed["image"]
plt.subplot(1, 2, 1)
plt.title('原图')   #第一幅图片标题
plt.imshow(image)
plt.subplot(1, 2, 2)
plt.title('Transpose后的图像')
plt.imshow(transformed_image)
plt.show()
运行结果:
-
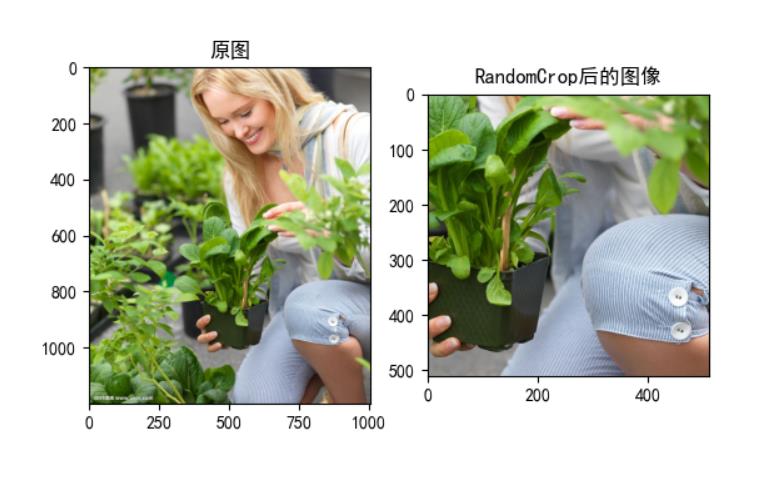
RandomCrop 随机裁剪
import albumentations as A
import cv2
import numpy as np
import matplotlib.pyplot as plt
#解决中文显示问题
plt.rcParams['font.sans-serif']=['SimHei']
plt.rcParams['axes.unicode_minus'] = False
# Read an image with OpenCV and convert it to the RGB colorspace
image = cv2.imread("aa.jpg")
image = cv2.cvtColor(image, cv2.COLOR_BGR2RGB)
# Augment an image
transformed = A.RandomCrop(512, 512,always_apply=False, p=1)(image=image)
transformed_image = transformed["image"]
plt.subplot(1, 2, 1)
plt.title('原图')   #第一幅图片标题
plt.imshow(image)
plt.subplot(1, 2, 2)
plt.title('RandomCrop后的图像')
plt.imshow(transformed_image)
plt.show()
运行结果:
-
RandomGamma 随机灰度系数
import albumentations as A
import cv2
import numpy as np
import matplotlib.pyplot as plt
#解决中文显示问题
plt.rcParams['font.sans-serif']=['SimHei']
plt.rcParams['axes.unicode_minus'] = False
# Read an image with OpenCV and convert it to the RGB colorspace
image = cv2.imread("aa.jpg")
image = cv2.cvtColor(image, cv2.COLOR_BGR2RGB)
# Augment an image
transformed = A.RandomGamma(gamma_limit=(20, 20), eps=None, always_apply=False, p=1)(image=image)
transformed_image = transformed["image"]
plt.subplot(1, 2, 1)
plt.title('原图')   #第一幅图片标题
plt.imshow(image)
plt.subplot(1, 2, 2)
plt.title('RandomGamma后的图像')
plt.imshow(transformed_image)
plt.show()
运行结果:

-
RandomRotate90 将输入随机旋转90度,N次
import albumentations as A
import cv2
import numpy as np
import matplotlib.pyplot as plt
#解决中文显示问题
plt.rcParams['font.sans-serif']=['SimHei']
plt.rcParams['axes.unicode_minus'] = False
# Read an image with OpenCV and convert it to the RGB colorspace
image = cv2.imread("aa.jpg")
image = cv2.cvtColor(image, cv2.COLOR_BGR2RGB)
# Augment an image
transformed = A.RandomRotate90(always_apply=False, p=1)(image=image)
transformed_image = transformed["image"]
plt.subplot(1, 2, 1)
plt.title('原图')   #第一幅图片标题
plt.imshow(image)
plt.subplot(1, 2, 2)
plt.title('RandomRotate90后的图像')
plt.imshow(transformed_image)
plt.show()
运行结果:

-
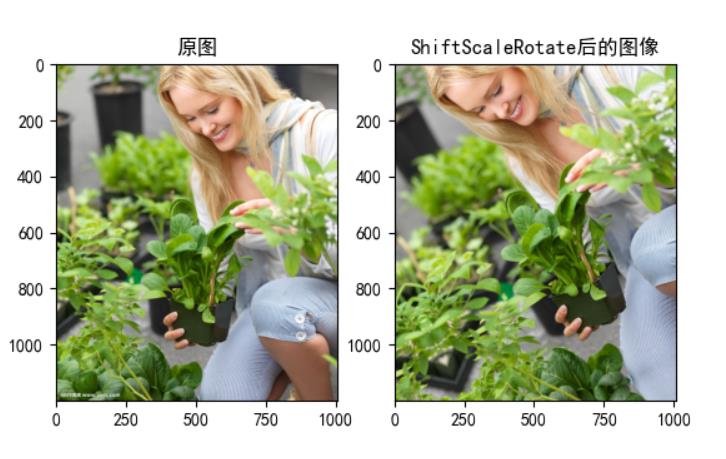
ShiftScaleRotate 随机平移,缩放和旋转输入。
import albumentations as A
import cv2
import numpy as np
import matplotlib.pyplot as plt
#解决中文显示问题
plt.rcParams['font.sans-serif']=['SimHei']
plt.rcParams['axes.unicode_minus'] = False
# Read an image with OpenCV and convert it to the RGB colorspace
image = cv2.imread("aa.jpg")
image = cv2.cvtColor(image, cv2.COLOR_BGR2RGB)
# Augment an image
transformed = A.ShiftScaleRotate(shift_limit=0.0625, scale_limit=0.1, rotate_limit=45, interpolation=1, border_mode=4, value=None, mask_value=None, always_apply=False, p=1)(image=image)
transformed_image = transformed["image"]
plt.subplot(1, 2, 1)
plt.title('原图')   #第一幅图片标题
plt.imshow(image)
plt.subplot(1, 2, 2)
plt.title('ShiftScaleRotate后的图像')
plt.imshow(transformed_image)
plt.show()
运行结果:
-
CenterCrop 裁剪图像的中心部分
import albumentations as A
import cv2
import numpy as np
import matplotlib.pyplot as plt

# 解决中文显示问题
plt.rcParams['font.sans-serif'] = ['SimHei']
plt.rcParams['axes.unicode_minus'] = False
# Read an image with OpenCV and convert it to the RGB colorspace
image = cv2.imread("aa.jpg")
image = cv2.cvtColor(image, cv2.COLOR_BGR2RGB)
# Augment an image
transformed = A.CenterCrop(256, 256, always_apply=False, p=1)(image=image)
transformed_image = transformed["image"]
plt.subplot(1, 2, 1)
plt.title('原图')  # 第一幅图片标题
plt.imshow(image)
plt.subplot(1, 2, 2)
plt.title("CenterCrop后的图像")
plt.imshow(transformed_image)
plt.show()

-
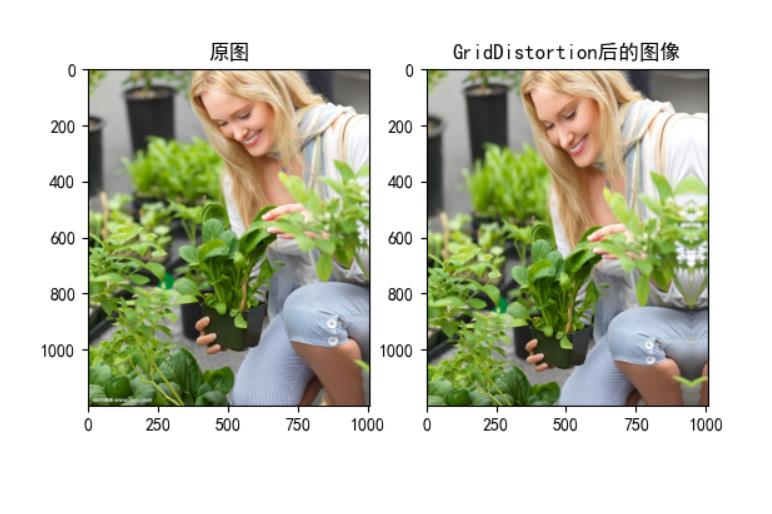
GridDistortion网格失真
import albumentations as A
import cv2
import numpy as np
import matplotlib.pyplot as plt

# 解决中文显示问题
plt.rcParams['font.sans-serif'] = ['SimHei']
plt.rcParams['axes.unicode_minus'] = False
# Read an image with OpenCV and convert it to the RGB colorspace
image = cv2.imread("aa.jpg")
image = cv2.cvtColor(image, cv2.COLOR_BGR2RGB)
# Augment an image
transformed = A.GridDistortion(num_steps=10, distort_limit=0.3,border_mode=4, always_apply=False, p=1)(image=image)
transformed_image = transformed["image"]
plt.subplot(1, 2, 1)
plt.title('原图')  # 第一幅图片标题
plt.imshow(image)
plt.subplot(1, 2, 2)
plt.title("GridDistortion后的图像")
plt.imshow(transformed_image)
plt.show()
运行结果:
-
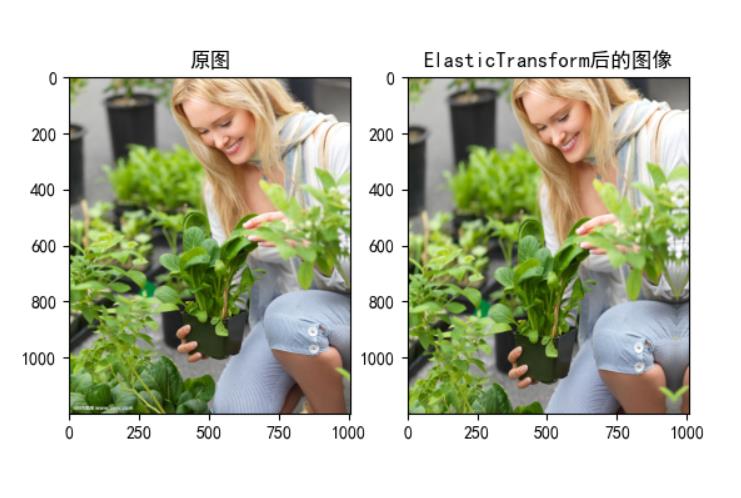
ElasticTransform 弹性变换
-
import albumentations as A
import cv2
import numpy as np
import matplotlib.pyplot as plt

# 解决中文显示问题
plt.rcParams['font.sans-serif'] = ['SimHei']
plt.rcParams['axes.unicode_minus'] = False
# Read an image with OpenCV and convert it to the RGB colorspace
image = cv2.imread("aa.jpg")
image = cv2.cvtColor(image, cv2.COLOR_BGR2RGB)
# Augment an image
transformed = A.ElasticTransform(alpha=5, sigma=50, alpha_affine=50, interpolation=1, border_mode=4,always_apply=False, p=1)(image=image)
transformed_image = transformed["image"]
plt.subplot(1, 2, 1)
plt.title('原图')  # 第一幅图片标题
plt.imshow(image)
plt.subplot(1, 2, 2)
plt.title("ElasticTransform后的图像")
plt.imshow(transformed_image)
plt.show()
运行结果:
-
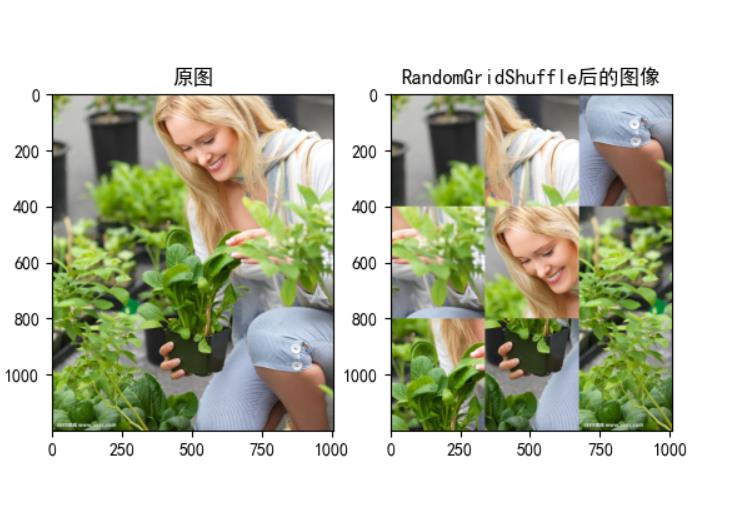
RandomGridShuffle把图像切成网格单元随机排列。
-
import albumentations as A
import cv2
import numpy as np
import matplotlib.pyplot as plt

# 解决中文显示问题
plt.rcParams['font.sans-serif'] = ['SimHei']
plt.rcParams['axes.unicode_minus'] = False
# Read an image with OpenCV and convert it to the RGB colorspace
image = cv2.imread("aa.jpg")
image = cv2.cvtColor(image, cv2.COLOR_BGR2RGB)
# Augment an image
transformed = A.RandomGridShuffle(grid=(3, 3), always_apply=False, p=1) (image=image)
transformed_image = transformed["image"]
plt.subplot(1, 2, 1)
plt.title('原图')  # 第一幅图片标题
plt.imshow(image)
plt.subplot(1, 2, 2)
plt.title("RandomGridShuffle后的图像")
plt.imshow(transformed_image)
plt.show()
运行结果:
-
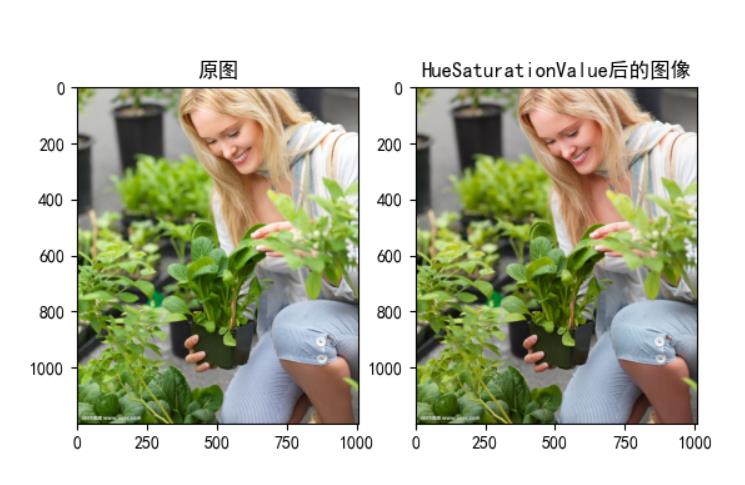
HueSaturationValue随机更改图像的颜色,饱和度和值。
import albumentations as A
import cv2
import numpy as np
import matplotlib.pyplot as plt

# 解决中文显示问题
plt.rcParams['font.sans-serif'] = ['SimHei']
plt.rcParams['axes.unicode_minus'] = False
# Read an image with OpenCV and convert it to the RGB colorspace
image = cv2.imread("aa.jpg")
image = cv2.cvtColor(image, cv2.COLOR_BGR2RGB)
# Augment an image
transformed = A.HueSaturationValue(hue_shift_limit=20, sat_shift_limit=30, val_shift_limit=20, always_apply=False, p=1)(image=image)
transformed_image = transformed["image"]
plt.subplot(1, 2, 1)
plt.title('原图')  # 第一幅图片标题
plt.imshow(image)
plt.subplot(1, 2, 2)
plt.title("HueSaturationValue后的图像")
plt.imshow(transformed_image)
plt.show()
运行结果:
-
PadIfNeeded 填充图像
import albumentations as A
import cv2
import numpy as np
import matplotlib.pyplot as plt

# 解决中文显示问题
plt.rcParams['font.sans-serif'] = ['SimHei']
plt.rcParams['axes.unicode_minus'] = False
# Read an image with OpenCV and convert it to the RGB colorspace
image = cv2.imread("aa.jpg")
image = cv2.cvtColor(image, cv2.COLOR_BGR2RGB)
# Augment an image
transformed = A.PadIfNeeded(min_height=2048, min_width=2048, border_mode=4, always_apply=False, p=1)(image=image)
transformed_image = transformed["image"]
plt.subplot(1, 2, 1)
plt.title('原图')  # 第一幅图片标题
plt.imshow(image)
plt.subplot(1, 2, 2)
plt.title("PadIfNeeded后的图像")
plt.imshow(transformed_image)
plt.show()
运行结果: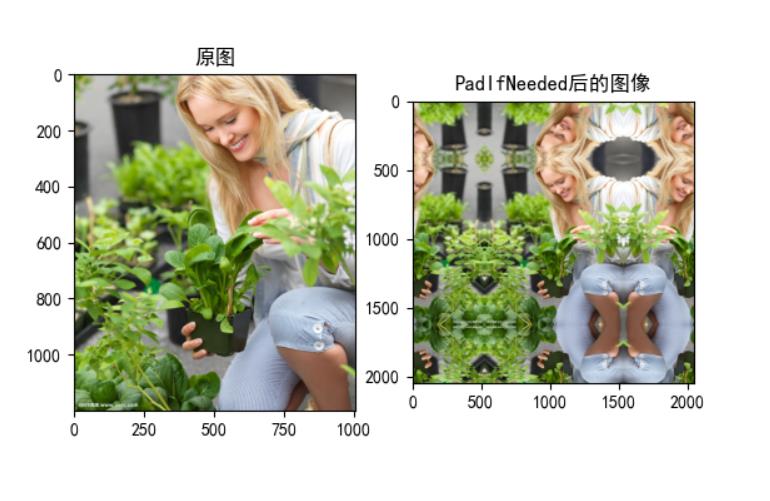
-
RGBShift,对图像RGB的每个通道随机移动值。
import albumentations as A
import cv2
import numpy as np
import matplotlib.pyplot as plt

# 解决中文显示问题
plt.rcParams['font.sans-serif'] = ['SimHei']
plt.rcParams['axes.unicode_minus'] = False
# Read an image with OpenCV and convert it to the RGB colorspace
image = cv2.imread("aa.jpg")
image = cv2.cvtColor(image, cv2.COLOR_BGR2RGB)
# Augment an image
transformed = A.RGBShift(r_shift_limit=10, g_shift_limit=20, b_shift_limit=20, always_apply=False, p=1)(image=image)
transformed_image = transformed["image"]
plt.subplot(1, 2, 1)
plt.title('原图')  # 第一幅图片标题
plt.imshow(image)
plt.subplot(1, 2, 2)
plt.title("RGBShift后的图像")
plt.imshow(transformed_image)
plt.show()
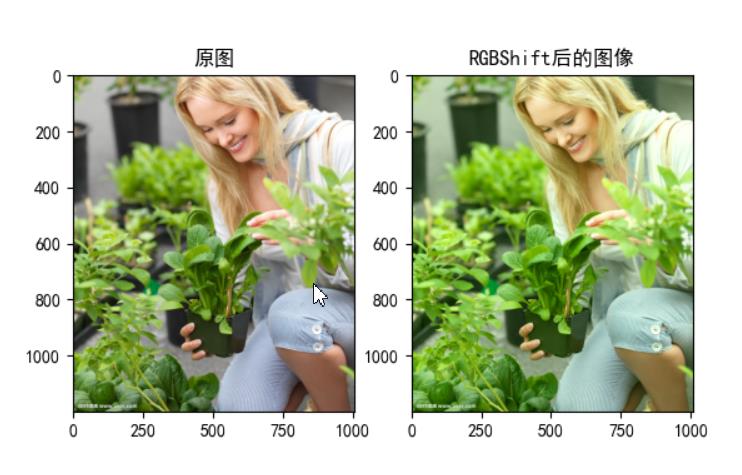
-
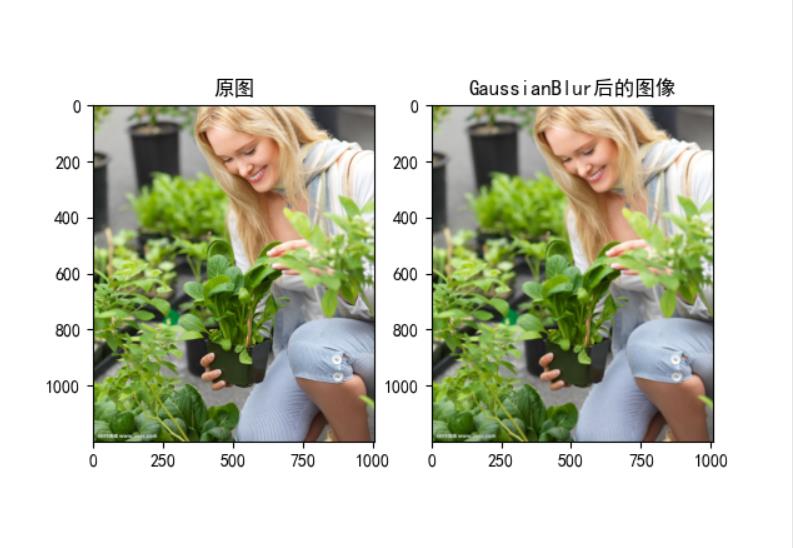
GaussianBlur 使用随机核大小的高斯滤波器对图像进行模糊处理
import albumentations as A
import cv2
import numpy as np
import matplotlib.pyplot as plt

# 解决中文显示问题
plt.rcParams['font.sans-serif'] = ['SimHei']
plt.rcParams['axes.unicode_minus'] = False
# Read an image with OpenCV and convert it to the RGB colorspace
image = cv2.imread("aa.jpg")
image = cv2.cvtColor(image, cv2.COLOR_BGR2RGB)
# Augment an image
transformed = A.GaussianBlur(blur_limit=11, always_apply=False, p=1)(image=image)
transformed_image = transformed["image"]
plt.subplot(1, 2, 1)
plt.title('原图')  # 第一幅图片标题
plt.imshow(image)
plt.subplot(1, 2, 2)
plt.title("GaussianBlur后的图像")
plt.imshow(transformed_image)
plt.show()
运行结果:
-
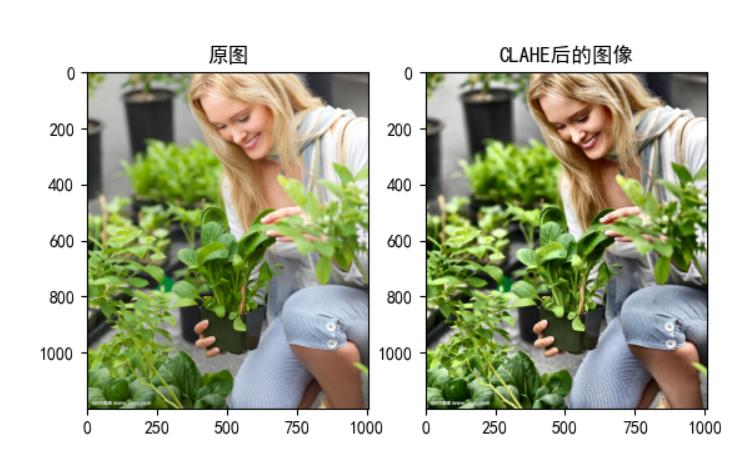
CLAHE自适应直方图均衡
import albumentations as A
import cv2
import numpy as np
import matplotlib.pyplot as plt

# 解决中文显示问题
plt.rcParams['font.sans-serif'] = ['SimHei']
plt.rcParams['axes.unicode_minus'] = False
# Read an image with OpenCV and convert it to the RGB colorspace
image = cv2.imread("aa.jpg")
image = cv2.cvtColor(image, cv2.COLOR_BGR2RGB)
# Augment an image
transformed = A.CLAHE(clip_limit=4.0, tile_grid_size=(8, 8), always_apply=False, p=0.5)(image=image)
transformed_image = transformed["image"]
plt.subplot(1, 2, 1)
plt.title('原图')  # 第一幅图片标题
plt.imshow(image)
plt.subplot(1, 2, 2)
plt.title("CLAHE后的图像")
plt.imshow(transformed_image)
plt.show()
运行结果:
-
ChannelShuffle随机重新排列输入RGB图像的通道。
import albumentations as A
import cv2
import numpy as np
import matplotlib.pyplot as plt

# 解决中文显示问题
plt.rcParams['font.sans-serif'] = ['SimHei']
plt.rcParams['axes.unicode_minus'] = False
# Read an image with OpenCV and convert it to the RGB colorspace
image = cv2.imread("aa.jpg")
image = cv2.cvtColor(image, cv2.COLOR_BGR2RGB)
# Augment an image
transformed = A.ChannelShuffle(always_apply=False, p=0.5)(image=image)
transformed_image = transformed["image"]
plt.subplot(1, 2, 1)
plt.title('原图')  # 第一幅图片标题
plt.imshow(image)
plt.subplot(1, 2, 2)
plt.title("ChannelShuffle后的图像")
plt.imshow(transformed_image)
plt.show()
运行结果:

-
InvertImg反色
import albumentations as A
import cv2
import numpy as np
import matplotlib.pyplot as plt

# 解决中文显示问题
plt.rcParams['font.sans-serif'] = ['SimHei']
plt.rcParams['axes.unicode_minus'] = False
# Read an image with OpenCV and convert it to the RGB colorspace
image = cv2.imread("aa.jpg")
image = cv2.cvtColor(image, cv2.COLOR_BGR2RGB)
# Augment an image
transformed = A.InvertImg(always_apply=False, p=0.5)(image=image)
transformed_image = transformed["image"]
plt.subplot(1, 2, 1)
plt.title('原图')  # 第一幅图片标题
plt.imshow(image)
plt.subplot(1, 2, 2)
plt.title("InvertImg后的图像")
plt.imshow(transformed_image)
plt.show()

-
Cutout 随机擦除
import albumentations as A
import cv2
import numpy as np
import matplotlib.pyplot as plt

# 解决中文显示问题
plt.rcParams['font.sans-serif'] = ['SimHei']
plt.rcParams['axes.unicode_minus'] = False
# Read an image with OpenCV and convert it to the RGB colorspace
image = cv2.imread("aa.jpg")
image = cv2.cvtColor(image, cv2.COLOR_BGR2RGB)
# Augment an image
transformed = A.Cutout(num_holes=20, max_h_size=20, max_w_size=20, fill_value=0, always_apply=False, p=1)(image=image)
transformed_image = transformed["image"]
plt.subplot(1, 2, 1)
plt.title('原图')  # 第一幅图片标题
plt.imshow(image)
plt.subplot(1, 2, 2)
plt.title("Cutout后的图像")
plt.imshow(transformed_image)
plt.show()
运行结果:

-
RandomFog随机雾化
import albumentations as A
import cv2
import numpy as np
import matplotlib.pyplot as plt

# 解决中文显示问题
plt.rcParams['font.sans-serif'] = ['SimHei']
plt.rcParams['axes.unicode_minus'] = False
# Read an image with OpenCV and convert it to the RGB colorspace
image = cv2.imread("aa.jpg")
image = cv2.cvtColor(image, cv2.COLOR_BGR2RGB)
# Augment an image
transformed = A.RandomFog(fog_coef_lower=0.3, fog_coef_upper=1, alpha_coef=0.08, always_apply=False, p=1)(image=image)
transformed_image = transformed["image"]
plt.subplot(1, 2, 1)
plt.title('原图')  # 第一幅图片标题
plt.imshow(image)
plt.subplot(1, 2, 2)
plt.title("RandomFog后的图像")
plt.imshow(transformed_image)
plt.show()
运行结果:

-
GridDropout网格擦除
import albumentations as A
import cv2
import numpy as np
import matplotlib.pyplot as plt

# 解决中文显示问题
plt.rcParams['font.sans-serif'] = ['SimHei']
plt.rcParams['axes.unicode_minus'] = False
# Read an image with OpenCV and convert it to the RGB colorspace
image = cv2.imread("aa.jpg")
image = cv2.cvtColor(image, cv2.COLOR_BGR2RGB)
# Augment an image
transformed = A.GridDropout(ratio=0.5, unit_size_min=None, unit_size_max=None, holes_number_x=None, holes_number_y=None,
                            shift_x=0, shift_y=0, always_apply=False, p=0.5)(image=image)
transformed_image = transformed["image"]
plt.subplot(1, 2, 1)
plt.title('原图')  # 第一幅图片标题
plt.imshow(image)
plt.subplot(1, 2, 2)
plt.title("GridDropout后的图像")
plt.imshow(transformed_image)
plt.show()
运行结果:

组合变换(Compose)
变换不仅可以单独使用,还可以将这些组合起来,这就需要用到 Compose 类,该类继承自 BaseCompose。Compose 类含有以下参数:
transforms:转换类的数组,list类型bbox_params:用于 bounding boxes 转换的参数,BboxPoarams 类型keypoint_params:用于 keypoints 转换的参数, KeypointParams 类型additional_targets:key新target 名字,value 为旧 target 名字的 dict,如 'image2': 'image',dict 类型p:使用这些变换的概率,默认值为 1.0image3 = Compose([ # 对比度受限直方图均衡 #(Contrast Limited Adaptive Histogram Equalization) CLAHE(), # 随机旋转 90° RandomRotate90(), # 转置 Transpose(), # 随机仿射变换 ShiftScaleRotate(shift_limit=0.0625, scale_limit=0.50, rotate_limit=45, p=.75), # 模糊 Blur(blur_limit=3), # 光学畸变 OpticalDistortion(), # 网格畸变 GridDistortion(), # 随机改变图片的 HUE、饱和度和值 HueSaturationValue() ], p=1.0)(image=image)['image']随机选择(OneOf)
- 它同Compose一样,都是做组合的,都有概率。区别就在于:Compose组合下的变换是要挨着顺序做的,而OneOf组合里面的变换是系统自动选择其中一个来做,而这里的概率参数p是指选定后的变换被做的概率。例:
image4 = Compose([ RandomRotate90(), # 翻转 Flip(), Transpose(), OneOf([ # 高斯噪点 IAAAdditiveGaussianNoise(), GaussNoise(), ], p=0.2), OneOf([ # 模糊相关操作 MotionBlur(p=.2), MedianBlur(blur_limit=3, p=0.1), Blur(blur_limit=3, p=0.1), ], p=0.2), ShiftScaleRotate(shift_limit=0.0625, scale_limit=0.2, rotate_limit=45, p=0.2), OneOf([ # 畸变相关操作 OpticalDistortion(p=0.3), GridDistortion(p=.1)以上是关于图像增强库Albumentations使用总结的主要内容,如果未能解决你的问题,请参考以下文章
Python库 - Albumentations 图片数据增强库
图像分割模型——segmentation_models_pytorch和albumentations 组合实现多类别分割