鸿蒙App开发(11)---RadioButton与RadioContainer组件
Posted 一天一篇Python库
tags:
篇首语:本文由小常识网(cha138.com)小编为大家整理,主要介绍了鸿蒙App开发(11)---RadioButton与RadioContainer组件相关的知识,希望对你有一定的参考价值。
RadioButton与RadioContainer组件
在个人信息的选择中,一般都会涉及到性别的处理。而性别显然是一个单选问题,这种单选情况,在鸿蒙开发中需要使用RadioButton与RadioContainer组件。
本篇,将详细介绍RadioButton与RadioContainer组件的使用规则。
创建单选项
首先,我们用纯XML布局文件创建一个单选项选择组件。示例代码如下所示:
<?xml version="1.0" encoding="utf-8"?>
<DirectionalLayout
    xmlns:ohos="http://schemas.huawei.com/res/ohos"
    ohos:height="match_parent"
    ohos:width="match_parent"
    ohos:background_element="#98ffff"
    ohos:orientation="vertical">

    <RadioContainer
        ohos:id="$+id:test_radiocontainer"
        ohos:height="match_content"
        ohos:width="match_content"
        ohos:layout_alignment="horizontal_center"
        ohos:top_margin="20vp"
        ohos:orientation="vertical">

        <RadioButton
            ohos:height="match_content"
            ohos:width="match_content"
            ohos:text_size="25fp"
            ohos:text_color_on="#0066FF"
            ohos:text_color_off="#505050"
            ohos:text="学士"/>

        <RadioButton
            ohos:height="match_content"
            ohos:width="match_content"
            ohos:text_size="25fp"
            ohos:text_color_on="#0066FF"
            ohos:text_color_off="#505050"
            ohos:text="硕士"/>

        <RadioButton
            ohos:height="match_content"
            ohos:width="match_content"
            ohos:text_size="25fp"
            ohos:text_color_on="#0066FF"
            ohos:text_color_off="#505050"
            ohos:marked="true"
            ohos:text="博士"/>

    </RadioContainer>

</DirectionalLayout>
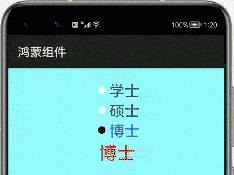
这里的属性基本在前面的讲解都用到过,这里不在赘述。唯一需要说明的是,因为其是单选项,那么肯定会有一个初始化的选择,而marked可以设置默认选项。
运行之后,效果如下:
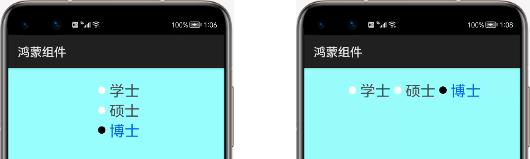
这里,只要更改RadioContainer属性orientation为横向纵向,就可以显示出上面的两种效果图。
监听事件
当然,我们使用单选项的目的,是为了获取我们选择的到底是哪个数据。所以,我们需要对RadioContainer组件进行监听。
示例如下:
public class MainAbilitySlice extends AbilitySlice{
    HiLogLabel label=new HiLogLabel(HiLog.LOG_APP, 0x00201, "TAG");
    private Text radio_text;
    private RadioContainer radioContainer;
    @Override
    public void onStart(Intent intent) {
        super.onStart(intent);
        super.setUIContent(ResourceTable.Layout_ability_main);
        this.radioContainer=(RadioContainer)findComponentById(ResourceTable.Id_test_radiocontainer);
        this.radio_text=(Text)findComponentById(ResourceTable.Id_radio_text);
        int radio_id=radioContainer.getMarkedButtonId();
        this.radio_text.setText(((RadioButton) radioContainer.getComponentAt(radio_id)).getText());
        this.radioContainer.setMarkChangedListener(new RadioContainer.CheckedStateChangedListener() {
            @Override
            public void onCheckedChanged(RadioContainer radioContainer, int i) {
                radio_text.setText(((RadioButton) radioContainer.getComponentAt(i)).getText());
            }
        });
    }
}
这里,我们通过getMarkedButtonId()获取单选项的默认子组件序号。然后,再通过getComponentAt()获取到RadioButton以及它的值。
同样的,监听选择需要使用CheckedStateChangedListener接口,而获取选中项的值与上面一样。
运行之后,效果如首图所示。
以上是关于鸿蒙App开发(11)---RadioButton与RadioContainer组件的主要内容,如果未能解决你的问题,请参考以下文章