第148天学习打卡(Kubernetes kubeadm init 成功部署 部署网络插件 部署容器化应用)
Posted doudoutj
tags:
篇首语:本文由小常识网(cha138.com)小编为大家整理,主要介绍了第148天学习打卡(Kubernetes kubeadm init 成功部署 部署网络插件 部署容器化应用)相关的知识,希望对你有一定的参考价值。
继续安装
c3j9i2htclj6thlta6Z ~]# clear
[root@iZ2vc3j9i2htclj6thlta6Z ~]#  systemctl stop firewalld
[root@iZ2vc3j9i2htclj6thlta6Z ~]#  systemctl disable firewalld
[root@iZ2vc3j9i2htclj6thlta6Z ~]#  sed -i 's/enforcing/disabled/' /etc/selinux/config
[root@iZ2vc3j9i2htclj6thlta6Z ~]#  setenforce 0
setenforce: SELinux is disabled
[root@iZ2vc3j9i2htclj6thlta6Z ~]#  swapoff -a
[root@iZ2vc3j9i2htclj6thlta6Z ~]#  sed -ri 's/.*swap.*/#&/' /etc/fstab
[root@iZ2vc3j9i2htclj6thlta6Z ~]#  hostnamectl set-hostname master
[root@iZ2vc3j9i2htclj6thlta6Z ~]# hostname
master
 #这一步只在master节点执行
[root@iZ2vc3j9i2htclj6thlta6Z ~]# cat >> /etc/hosts << EOF
> 阿里云公网ip master
> 阿里云公网ip node01
> 阿里云公网ip node02
> 阿里云公网ip node03
> EOF
[root@iZ2vc3j9i2htclj6thlta6Z ~]# cat > /etc/sysctl.d/k8s.conf << EOF
> net.bridge.bridge-nf-call-ip6tables = 1
> net.bridge.bridge-nf-call-iptables = 1
> EOF
[root@iZ2vc3j9i2htclj6thlta6Z ~]#  sysctl --system

[root@iZ2vc3j9i2htclj6thlta6Z ~]#  yum install ntpdate -y
                                                                                     [root@iZ2vc3j9i2htclj6thlta6Z ~]#  ntpdate time.windows.com
 5 Jun 15:35:49 ntpdate[1580]: adjust time server 52.231.114.183 offset -0.003727 sec
[root@iZ2vc3j9i2htclj6thlta6Z ~]# sysctl --system

[root@iZ2vc3j9i2htclj6thlta6Z ~]# yum -y install gcc
[root@iZ2vc3j9i2htclj6thlta6Z ~]#yum -y install gcc-c++

[root@iZ2vc3j9i2htclj6thlta6Z ~]# systemctl status chronyd
● chronyd.service - NTP client/server
   Loaded: loaded (/usr/lib/systemd/system/chronyd.service; enabled; vendor preset: enabled)
   Active: active (running) since Sat 2021-06-05 15:16:23 CST; 22min ago
     Docs: man:chronyd(8)
           man:chrony.conf(5)
 Main PID: 565 (chronyd)
   CGroup: /system.slice/chronyd.service
           └─565 /usr/sbin/chronyd

Jun 05 15:16:23 AliYun systemd[1]: Starting NTP client/server...
Jun 05 15:16:23 AliYun chronyd[565]: chronyd version 3.4 starting (+CMDMON +NTP +REFCLOCK +RTC +PRIVDROP +SCFILTER +SIGND +ASYNCDNS +SECHASH +IPV6 +DEBUG)
Jun 05 15:16:23 AliYun chronyd[565]: Frequency -32.455 +/- 0.741 ppm read from /var/lib/chrony/drift
Jun 05 15:16:23 AliYun systemd[1]: Started NTP client/server.
Jun 05 15:17:01 iZ2vc3j9i2htclj6thlta6Z chronyd[565]: Selected source 100.100.61.88
Jun 05 15:17:01 iZ2vc3j9i2htclj6thlta6Z chronyd[565]: System clock wrong by 0.760561 seconds, adjustment started
[root@iZ2vc3j9i2htclj6thlta6Z ~]# systemctl restart chronyd
[root@iZ2vc3j9i2htclj6thlta6Z ~]#  cat /etc/chrony.conf
[root@iZ2vc3j9i2htclj6thlta6Z ~]#  free -m
              total        used        free      shared  buff/cache   available
Mem:           7551         139        6635           0         776        7172
Swap:             0           0           0
[root@iZ2vc3j9i2htclj6thlta6Z ~]# cd /usr/lib/modules
[root@iZ2vc3j9i2htclj6thlta6Z modules]# ls
3.10.0-1127.19.1.el7.x86_64  3.10.0-1127.el7.x86_64
[root@iZ2vc3j9i2htclj6thlta6Z modules]# uname -r
3.10.0-1127.19.1.el7.x86_64
[root@iZ2vc3j9i2htclj6thlta6Z modules]# cd 3.10.0-1127.19.1.el7.x86_64/
[root@iZ2vc3j9i2htclj6thlta6Z 3.10.0-1127.19.1.el7.x86_64]# ls
build  kernel         modules.alias.bin  modules.builtin      modules.dep      modules.devname  modules.modesetting  modules.order    modules.symbols      source   vdso
extra  modules.alias  modules.block      modules.builtin.bin  modules.dep.bin  modules.drm      modules.networking   modules.softdep  modules.symbols.bin  updates  weak-updates
[root@iZ2vc3j9i2htclj6thlta6Z 3.10.0-1127.19.1.el7.x86_64]# cd kernel/
[root@iZ2vc3j9i2htclj6thlta6Z kernel]# ls
arch  crypto  drivers  fs  kernel  lib  mm  net  sound  virt
[root@iZ2vc3j9i2htclj6thlta6Z kernel]# ls
arch  crypto  drivers  fs  kernel  lib  mm  net  sound  virt
[root@iZ2vc3j9i2htclj6thlta6Z kernel]# cd net/
[root@iZ2vc3j9i2htclj6thlta6Z net]# ls
6lowpan  8021q  bluetooth  can   core  dns_resolver  ipv4  key   llc       mac802154  netlink      packet   rfkill  sctp    unix       wireless
802      atm    bridge     ceph  dccp  ieee802154    ipv6  l2tp  mac80211  netfilter  openvswitch  psample  sched   sunrpc  vmw_vsock  xfrm
[root@iZ2vc3j9i2htclj6thlta6Z net]# cd netfilter/
[root@iZ2vc3j9i2htclj6thlta6Z netfilter]# ls
[root@iZ2vc3j9i2htclj6thlta6Z netfilter]# cd ipvs
[root@iZ2vc3j9i2htclj6thlta6Z ipvs]# pwd
/usr/lib/modules/3.10.0-1127.19.1.el7.x86_64/kernel/net/netfilter/ipvs
[root@iZ2vc3j9i2htclj6thlta6Z ipvs]# ls
ip_vs_dh.ko.xz   ip_vs.ko.xz       ip_vs_lblcr.ko.xz  ip_vs_nq.ko.xz      ip_vs_rr.ko.xz   ip_vs_sh.ko.xz   ip_vs_wrr.ko.xz
ip_vs_ftp.ko.xz  ip_vs_lblc.ko.xz  ip_vs_lc.ko.xz     ip_vs_pe_sip.ko.xz  ip_vs_sed.ko.xz  ip_vs_wlc.ko.xz
[root@iZ2vc3j9i2htclj6thlta6Z ipvs]# cd ..
[root@iZ2vc3j9i2htclj6thlta6Z netfilter]# cd ..
[root@iZ2vc3j9i2htclj6thlta6Z net]# cd ..
[root@iZ2vc3j9i2htclj6thlta6Z kernel]# cd ..
[root@iZ2vc3j9i2htclj6thlta6Z 3.10.0-1127.19.1.el7.x86_64]# cd ..
[root@iZ2vc3j9i2htclj6thlta6Z modules]# cd ..
[root@iZ2vc3j9i2htclj6thlta6Z lib]# cd ..
[root@iZ2vc3j9i2htclj6thlta6Z usr]# cd ..
[root@iZ2vc3j9i2htclj6thlta6Z /]#  wget https://mirrors.aliyun.com/docker-ce/linux/centos/docker-ce.repo -O  /etc/yum.repos.d/docker-ce.repo
[root@iZ2vc3j9i2htclj6thlta6Z /]# yum install docker-ce-20.10.7 -y
[root@iZ2vc3j9i2htclj6thlta6Z /]# sudo mkdir -p /etc/docker
[root@iZ2vc3j9i2htclj6thlta6Z /]# sudo tee /etc/docker/daemon.json <<-'EOF'
> {
>   "registry-mirrors": ["https://g6yrjrwf.mirror.aliyuncs.com"]
> }
> EOF
{
  "registry-mirrors": ["https://g6yrjrwf.mirror.aliyuncs.com"]
}
[root@iZ2vc3j9i2htclj6thlta6Z /]# sudo systemctl daemon-reload
[root@iZ2vc3j9i2htclj6thlta6Z /]# sudo systemctl restart docker
[root@iZ2vc3j9i2htclj6thlta6Z /]# cat /etc/docker/daemon.json
{
  "registry-mirrors": ["https://g6yrjrwf.mirror.aliyuncs.com"]
}
[root@iZ2vc3j9i2htclj6thlta6Z /]#


#  配置镜像加速器(这个是上面的操作 把这个全部复制然后去Xhsell里面粘贴就可以了)
sudo mkdir -p /etc/docker
sudo tee /etc/docker/daemon.json <<-'EOF'
{
  "registry-mirrors": ["https://g6yrjrwf.mirror.aliyuncs.com"]
}
EOF
sudo systemctl daemon-reload
sudo systemctl restart docker

[root@iZ2vc3j9i2htclj6thlta6Z /]# systemctl enable docker.service # 自动开启docker
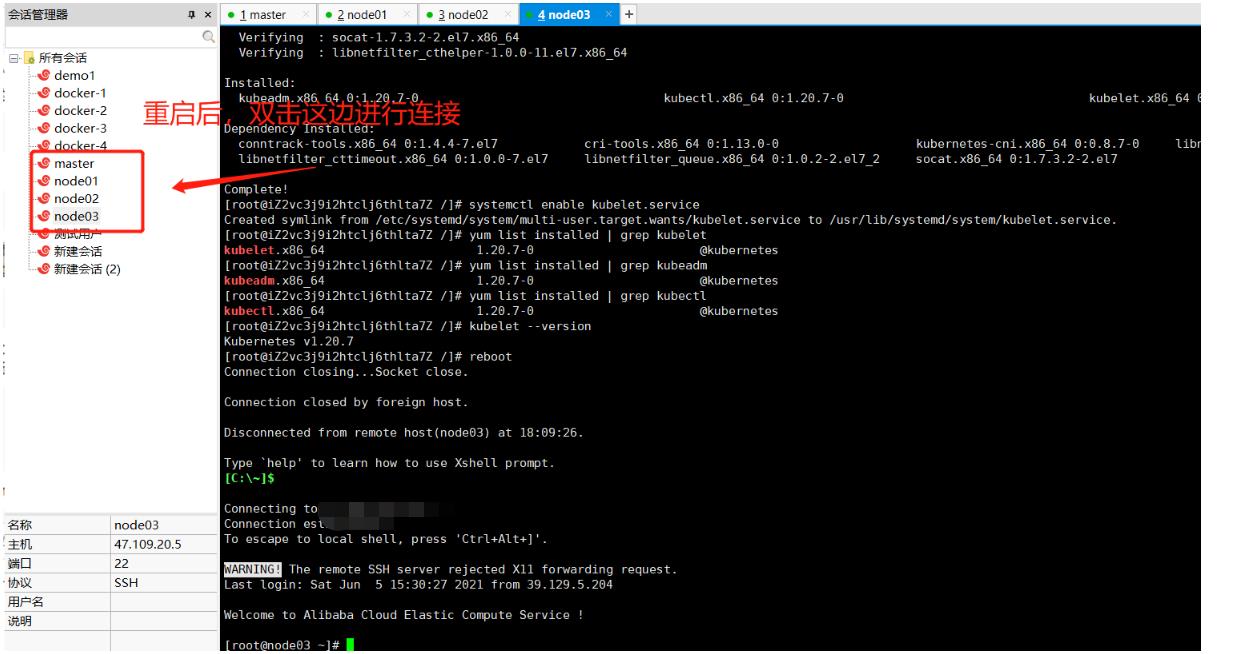
[root@iZ2vc3j9i2htclj6thlta6Z /]# yum install kubelet-1.20.7 kubeadm-1.20.7 kubectl-1.20.7 -y
[root@iZ2vc3j9i2htclj6thlta6Z /]# systemctl enable kubelet.service
[root@iZ2vc3j9i2htclj6thlta6Z /]# yum list installed | grep kubelet
kubelet.x86_64                     1.20.7-0                       @kubernetes
[root@iZ2vc3j9i2htclj6thlta6Z /]# yum list installed | grep kubeadm
kubeadm.x86_64                     1.20.7-0                       @kubernetes
[root@iZ2vc3j9i2htclj6thlta6Z /]# yum list installed | grep kubectl
kubectl.x86_64                     1.20.7-0                       @kubernetes

# 上面三个步骤可以直接把下面这段命令粘贴到命令行就可以了
yum list installed | grep kubelet
yum list installed | grep kubeadm
yum list installed | grep kubectl

[root@iZ2vc3j9i2htclj6thlta6Z /]# kubelet --version  # 查看安装版本
Kubernetes v1.20.7
Kubelet:运行在cluster 所有节点上,负责启动POD和容器;
Kubeadm:用于初始化cluster的一个工具。
Kubectl: kubectl是kubenetes命令行工具,通过kubectl可以部署和管理应用,查看各种资源,创建,删除和更新组件
部署Kubernetes Master主节点, 此命令在master机器上执行
 kubeadm init \\
  --apiserver-advertise-address=master节点的阿里云公网ip \\
  --image-repository registry.aliyuncs.com/google_containers \\
  --kubernetes-version v1.20.7 \\
  --service-cidr=10.96.0.0/12 \\
  --pod-network-cidr=10.244.0.0/16
说明:service-cidr的选取不能和PodCIDR及本机网络有重叠或者冲突,一般可以选择一个本机网络和PodCIDR都没有用到的丝网地址段,比如PODCIDR使用10.244.0.0/16, 那么service cidr可以选择10.96.0.0.12,网络无重叠冲突即可
错误:
	Unfortunately, an error has occurred:
		timed out waiting for the condition

	This error is likely caused by:
		- The kubelet is not running
		- The kubelet is unhealthy due to a misconfiguration of the node in some way (required cgroups disabled)

	If you are on a systemd-powered system, you can try to troubleshoot the error with the following commands:
		- 'systemctl status kubelet'
		- 'journalctl -xeu kubelet'

	Additionally, a control plane component may have crashed or exited when started by the container runtime.
	To troubleshoot, list all containers using your preferred container runtimes CLI.

	Here is one example how you may list all Kubernetes containers running in docker:
		- 'docker ps -a | grep kube | grep -v pause'
		Once you have found the failing container, you can inspect its logs with:
		- 'docker logs CONTAINERID'

error execution phase wait-control-plane: couldn't initialize a Kubernetes cluster
解决办法:
[root@iZ2vc3j9i2htclj6thlta6Z /]# reboot # 重启centos

遇到的错误
error execution phase preflight: [preflight] Some fatal errors occurred:
	[ERROR Port-10259]: Port 10259 is in use
	[ERROR Port-10257]: Port 10257 is in use
	[ERROR FileAvailable--etc-kubernetes-manifests-kube-apiserver.yaml]: /etc/kubernetes/manifests/kube-apiserver.yaml already exists
	[ERROR FileAvailable--etc-kubernetes-manifests-kube-controller-manager.yaml]: /etc/kubernetes/manifests/kube-controller-manager.yaml already exists
	[ERROR FileAvailable--etc-kubernetes-manifests-kube-scheduler.yaml]: /etc/kubernetes/manifests/kube-scheduler.yaml already exists
	[ERROR FileAvailable--etc-kubernetes-manifests-etcd.yaml]: /etc/kubernetes/manifests/etcd.yaml already exists
	[ERROR Port-10250]: Port 10250 is in use
解决办法
[root@master ~]# kubeadm reset
[root@master ~]# docker images
REPOSITORY                                                        TAG        IMAGE ID       CREATED         SIZE
registry.aliyuncs.com/google_containers/kube-proxy                v1.20.7    ff54c88b8ecf   3 weeks ago     118MB
registry.aliyuncs.com/google_containers/kube-controller-manager   v1.20.7    22d1a2072ec7   3 weeks ago     116MB
registry.aliyuncs.com/google_containers/kube-apiserver            v1.20.7    034671b24f0f   3 weeks ago     122MB
registry.aliyuncs.com/google_containers/kube-scheduler            v1.20.7    38f903b54010   3 weeks ago     47.3MB
registry.aliyuncs.com/google_containers/etcd                      3.4.13-0   0369cf4303ff   9 months ago    253MB
coredns/coredns                                                   1.7.0      bfe3a36ebd25   11 months ago   45.2MB
registry.aliyuncs.com/google_containers/coredns                   1.7.0      bfe3a36ebd25   11 months ago   45.2MB
registry.aliyuncs.com/google_containers/pause
出现的问题:
[root@master ~]# systemctl status kubelet
● kubelet.service - kubelet: The Kubernetes Node Agent
   Loaded: loaded (/usr/lib/systemd/system/kubelet.service; enabled; vendor preset: disabled)
  Drop-In: /usr/lib/systemd/system/kubelet.service.d
           └─10-kubeadm.conf
   Active: active (running) since Sat 2021-06-05 19:28:55 CST; 4min 42s ago
     Docs: https://kubernetes.io/docs/
 Main PID: 25643 (kubelet)
    Tasks: 14
   Memory: 36.2M
   CGroup: /system.slice/kubelet.service
           └─25643 /usr/bin/kubelet --bootstrap-kubeconfig=/etc/kubernetes/bootstrap-kubelet.conf --kubeconfig=/etc/kubernetes/kubelet.conf --config=/var/lib/kubelet/config.yaml -...

Jun 05 19:33:37 master kubelet[25643]: E0605 19:33:37.202204   25643 kubelet.go:2263] node "master" not found
Jun 05 19:33:37 master kubelet[25643]: E0605 19:33:37.302347   25643 kubelet.go:2263] node "master" not found
Jun 05 19:33:37 master kubelet[25643]: E0605 19:33:37.382628   25643 kubelet.go:2183] Container runtime network not ready: NetworkReady=false reason:NetworkPluginNotRe...ninitialized
Jun 05 19:33:37 master kubelet[25643]: E0605 19:33:37.402453   25643 kubelet.go:2263] node "master" not found
Jun 05 19:33:37 master kubelet[25643]: E0605 19:33:37.502545   25643 kubelet.go:2263] node "master" not found
Jun 05 19:33:37 master kubelet[25643]: E0605 19:33:37.602667   25643 kubelet.go:2263] node "master" not found
Jun 05 19:33:37 master kubelet[25643]: E0605 19:33:37.702794   25643 kubelet.go:2263] node "master" not found
Jun 05 19:33:37 master kubelet[25643]: E0605 19:33:37.802895   25643 kubelet.go:2263] node "master" not found
Jun 05 19:33:37 master kubelet[25643]: E0605 19:33:37.903020   25643 kubelet.go:2263] node "master" not found
Jun 05 19:33:38 master kubelet[25643]: E0605 19:33:38.003156   25643 kubelet.go:2263] node "master" not found
Hint: Some lines were ellipsized, use -l to show in full.
[root@master ~]#
错误
Jun 05 19:33:37 master kubelet[25643]: E0605 19:33:37.382628 25643 kubelet.go:2183] Container runtime network not ready: NetworkReady=false reason:NetworkPluginNotRe...ninitialized
解决办法
#mkdir -p /etc/cni/net.d

 # vi 10-flannel.conflist

{
  "name": "cbr0",
  "plugins": [
    {
      "type": "flannel",
      "delegate": {
        "hairpinMode": true,
        "isDefaultGateway": true
      }
    },
    {
      "type": "portmap",
      "capabilities": {
        "portMappings": true
      }
    }
  ]
}


systemctl daemon-reload

systemctl restart kubelet
错误
Jun 05 19:33:37 master kubelet[25643]: E0605 19:33:37.402453 25643 kubelet.go:2263] node "master" not found
解决办法
[root@master ~]# systemctl stop kubelet[root@master ~]# systemctl stop dockerWarning: Stopping docker.service, but it can still be activated by: docker.socket[root@master ~]# systemctl restart network[root@master ~]# systemctl restart docker[root@master ~]# systemctl restart kubelet[root@master ~]# ifconfig
错误
[root@master ~]# kubeadm init[preflight] You can also perform this action in beforehand using 'kubeadm config images pull'error execution phase preflight: [preflight] Some fatal errors occurred: [ERROR ImagePull]: failed to pull image k8s.gcr.io/kube-apiserver:v1.20.7: output: Error response from daemon: Get https://k8s.gcr.io/v2/: net/http: request canceled while waiting for connection (Client.Timeout exceeded while awaiting headers), error: exit status 1 [ERROR ImagePull]: failed to pull image k8s.gcr.io/kube-controller-manager:v1.20.7: output: Error response from daemon: Get https://k8s.gcr.io/v2/: net/http: request canceled while waiting for connection (Client.Timeout exceeded while awaiting headers), error: exit status 1 [ERROR ImagePull]: failed to pull image k8s.gcr.io/kube-scheduler:v1.20.7: output: Error response from daemon: Get https://k8s.gcr.io/v2/: net/http: request canceled while waiting for connection (Client.Timeout exceeded while awaiting headers), error: exit status 1 [ERROR ImagePull]: failed to pull image k8s.gcr.io/kube-proxy:v1.20.7: output: Error response from daemon: Get https://k8s.gcr.io/v2/: net/http: request canceled while waiting for connection (Client.Timeout exceeded while awaiting headers), error: exit status 1 [ERROR ImagePull]: failed to pull image k8s.gcr.io/pause:3.2: output: Error response from daemon: Get https://k8s.gcr.io/v2/: net/http: request canceled while waiting for connection (Client.Timeout exceeded while awaiting headers), error: exit status 1 [ERROR ImagePull]: failed to pull image k8s.gcr.io/etcd:3.4.13-0: output: Error response from daemon: Get https://k8s.gcr.io/v2/: net/http: request canceled while waiting for connection (Client.Timeout exceeded while awaiting headers), error: exit status 1 [ERROR ImagePull]: failed to pull image k8s.gcr.io/coredns:1.7.0: output: Error response from daemon: Get https://k8s.gcr.io/v2/: net/http: request canceled while waiting for connection (Client.Timeout exceeded while awaiting headers), error: exit status 1
解决办法 成功初始化
[root@master ~]# kubeadm init --image-repository=registry.aliyuncs.com/google_containers --pod-network-cidr=10.244.0.0/16 --kubernetes-version=v1.20.7
[init] Using Kubernetes version: v1.20.7
[preflight] Running pre-flight checks
	[WARNING IsDockerSystemdCheck]: detected "cgroupfs" as the Docker cgroup driver. The recommended driver is "systemd". Please follow the guide at https://kubernetes.io/docs/setup/cri/
	[WARNING SystemVerification]: this Docker version is not on the list of validated versions: 20.10.7. Latest validated version: 19.03
[preflight] Pulling images required for setting up a Kubernetes cluster
[preflight] This might take a minute or two, depending on the speed of your internet connection
[preflight] You can also perform this action in beforehand using 'kubeadm config images pull'
[certs] Using certificateDir folder "/etc/kubernetes/pki"
[certs] Generating "ca" certificate and key
[certs] Generating "apiserver" certificate and key
[certs] apiserver serving cert is signed for DNS names [kubernetes kubernetes.default kubernetes.default.svc kubernetes.default.svc.cluster.local master] and IPs [10.96.0.1 172.31.197.181]
[certs] Generating "apiserver-kubelet-client" certificate and key
[certs] Generating "front-proxy-ca" certificate and key
[certs] Generating "front-proxy-client" certificate and key
[certs] Generating "etcd/ca" certificate and key
[certs] Generating "etcd/server" certificate and key
[certs] etcd/server serving cert is signed for DNS names [localhost master] and IPs [172.31.197.181 127.0.0.1 ::1]
[certs] Generating "etcd/peer" certificate and key
[certs] etcd/peer serving cert is signed for DNS names [localhost master] and IPs [172.31.197.181 127.0.0.1 ::1]
[certs] Generating "etcd/healthcheck-client" certificate and key
[certs] Generating "apiserver-etcd-client" certificate and key
[certs] Generating "sa" key and public key
[kubeconfig] Using kubeconfig folder "/etc/kubernetes"
[kubeconfig] Writing "admin.conf" kubeconfig file
[kubeconfig] Writing "kubelet.conf" kubeconfig file
[kubeconfig] Writing "controller-manager.conf" kubeconfig file
[kubeconfig] Writing "scheduler.conf" kubeconfig file
[kubelet-start] Writing kubelet environment file with flags to file "/var/lib/kubelet/kubeadm-flags.env"
[kubelet-start] Writing kubelet configuration to file "/var/lib/kubelet/config.yaml"
[kubelet-start] Starting the kubelet
[control-plane] Using manifest folder "/etc/kubernetes/manifests"
[control-plane] Creating static Pod manifest for "kube-apiserver"
[control-plane] Creating static Pod manifest for "kube-controller-manager"
[control-plane] Creating static Pod manifest for "kube-scheduler"
[etcd] Creating static Pod manifest for local etcd in "/etc/kubernetes/manifests"
[wait-control-plane] Waiting for the kubelet to boot up the control plane as static Pods from directory "/etc/kubernetes/manifests". This can take up to 4m0s
[apiclient] All control plane components are healthy after 12.503112 seconds
[upload-config] Storing the configuration used in ConfigMap "kubeadm-config" in the "kube-system" Namespace
[kubelet] Creating a ConfigMap "kubelet-config-1.20" in namespace kube-system with the configuration for the kubelets in the cluster
[upload-certs] Skipping phase. Please see --upload-certs
[mark-control-plane] Marking the node master as control-plane by adding the labels "node-role.kubernetes.io/master=''" and "node-role.kubernetes.io/control-plane='' (deprecated)"
[mark-control-plane] Marking the node master as control-plane by adding the taints [node-role.kubernetes.io/master:NoSchedule]
[bootstrap-token] Using token: mpc92u.3b3cccktgt25md2q
[bootstrap-token] Configuring bootstrap tokens, cluster-info ConfigMap, RBAC Roles
[bootstrap-token] configured RBAC rules to allow Node Bootstrap tokens to get nodes
[bootstrap-token] configured RBAC rules to allow Node Bootstrap tokens to post CSRs in order for nodes to get long term certificate credentials
[bootstrap-token] configured RBAC rules to allow the csrapprover controller automatically approve CSRs from a Node Bootstrap Token
[bootstrap-token] configured RBAC rules to allow certificate rotation for all node client certificates in the cluster
[bootstrap-token] Creating the "cluster-info" ConfigMap in the "kube-public" namespace
[kubelet-finalize] Updating "/etc/kubernetes/kubelet.conf" to point to a rotatable kubelet client certificate and key
[addons] Applied essential addon: CoreDNS
[addons] Applied essential addon: kube-proxy

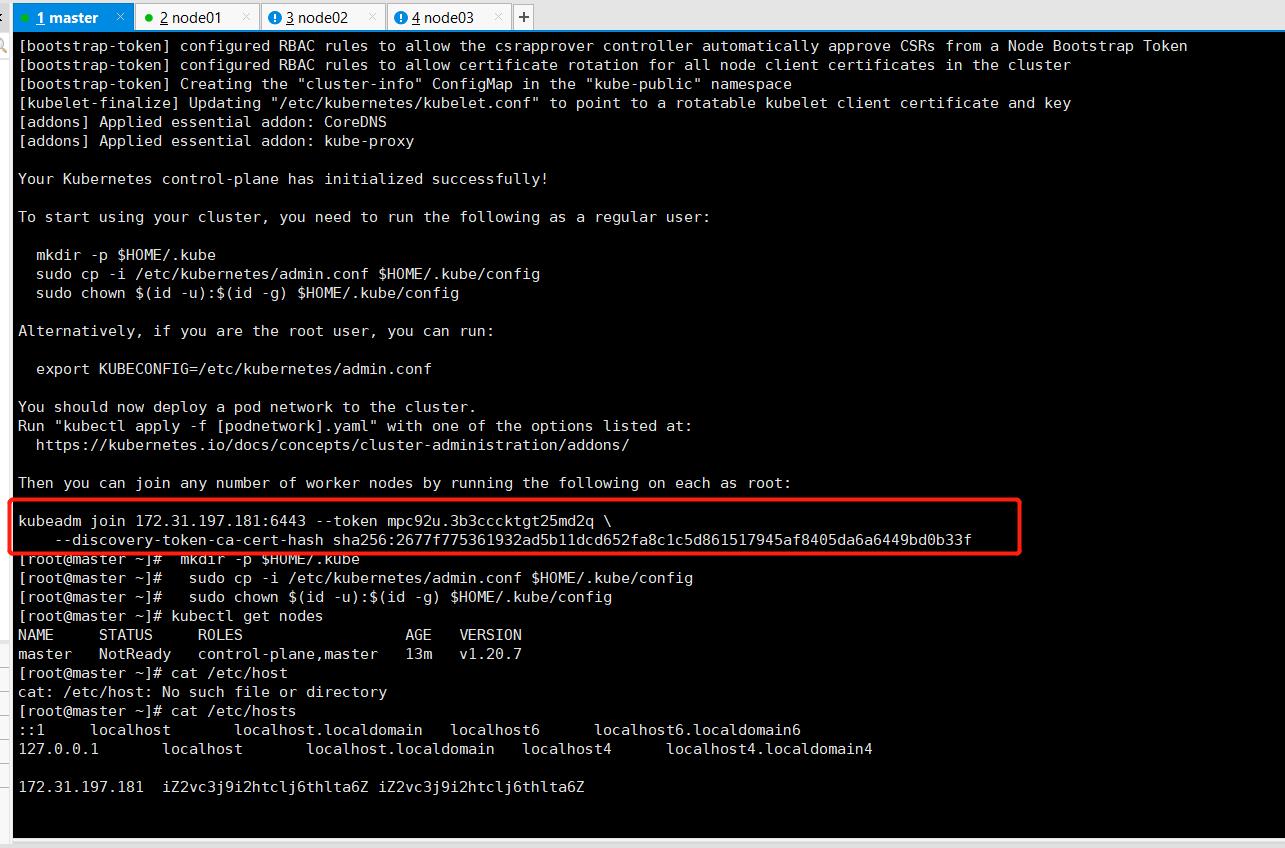
Your Kubernetes control-plane has initialized successfully!

To start using your cluster, you need to run the following as a regular user:

  mkdir -p $HOME/.kube
  sudo cp -i /etc/kubernetes/admin.conf $HOME/.kube/config
  sudo chown $(id -u):$(id -g) $HOME/.kube/config

Alternatively, if you are the root user, you can run:

  export KUBECONFIG=/etc/kubernetes/admin.conf

You should now deploy a pod network to the cluster.
Run "kubectl apply -f [podnetwork].yaml" with one of the options listed at:
  https://kubernetes.io/docs/concepts/cluster-administration/addons/

Then you can join any number of worker nodes by running the following on each as root:

kubeadm join 172.31.197.181:6443 --token mpc92u.3b3cccktgt25md2q \\
    --discovery-token-ca-cert-hash sha256:2677f775361932ad5b11dcd652fa8c1c5d861517945af8405da6a6449bd0b33f
在master节点上执行下面这个命令
mkdir -p $HOME/.kube sudo cp -i /etc/kubernetes/admin.conf $HOME/.kube/config sudo chown $(id -u):$(id -g) $HOME/.kube/config
[root@master ~]# mkdir -p $HOME/.kube[root@master ~]# sudo cp -i /etc/kubernetes/admin.conf $HOME/.kube/config[root@master ~]# sudo chown $(id -u):$(id -g) $HOME/.kube/config[root@master ~]# kubectl get nodesNAME STATUS ROLES AGE VERSIONmaster NotReady control-plane,master 13m v1.20.7[root@master ~]# [root@master ~]# cat /etc/hosts::1 localhost localhost.localdomain localhost6 localhost6.localdomain6127.0.0.1 localhost localhost.localdomain localhost4 localhost4.localdomain4172.31.197.181 iZ2vc3j9i2htclj6thlta6Z iZ2vc3j9i2htclj6thlta6Z阿里云公网ip master阿里云公网ip node01阿里云公网ip node02阿里云公网ip node03
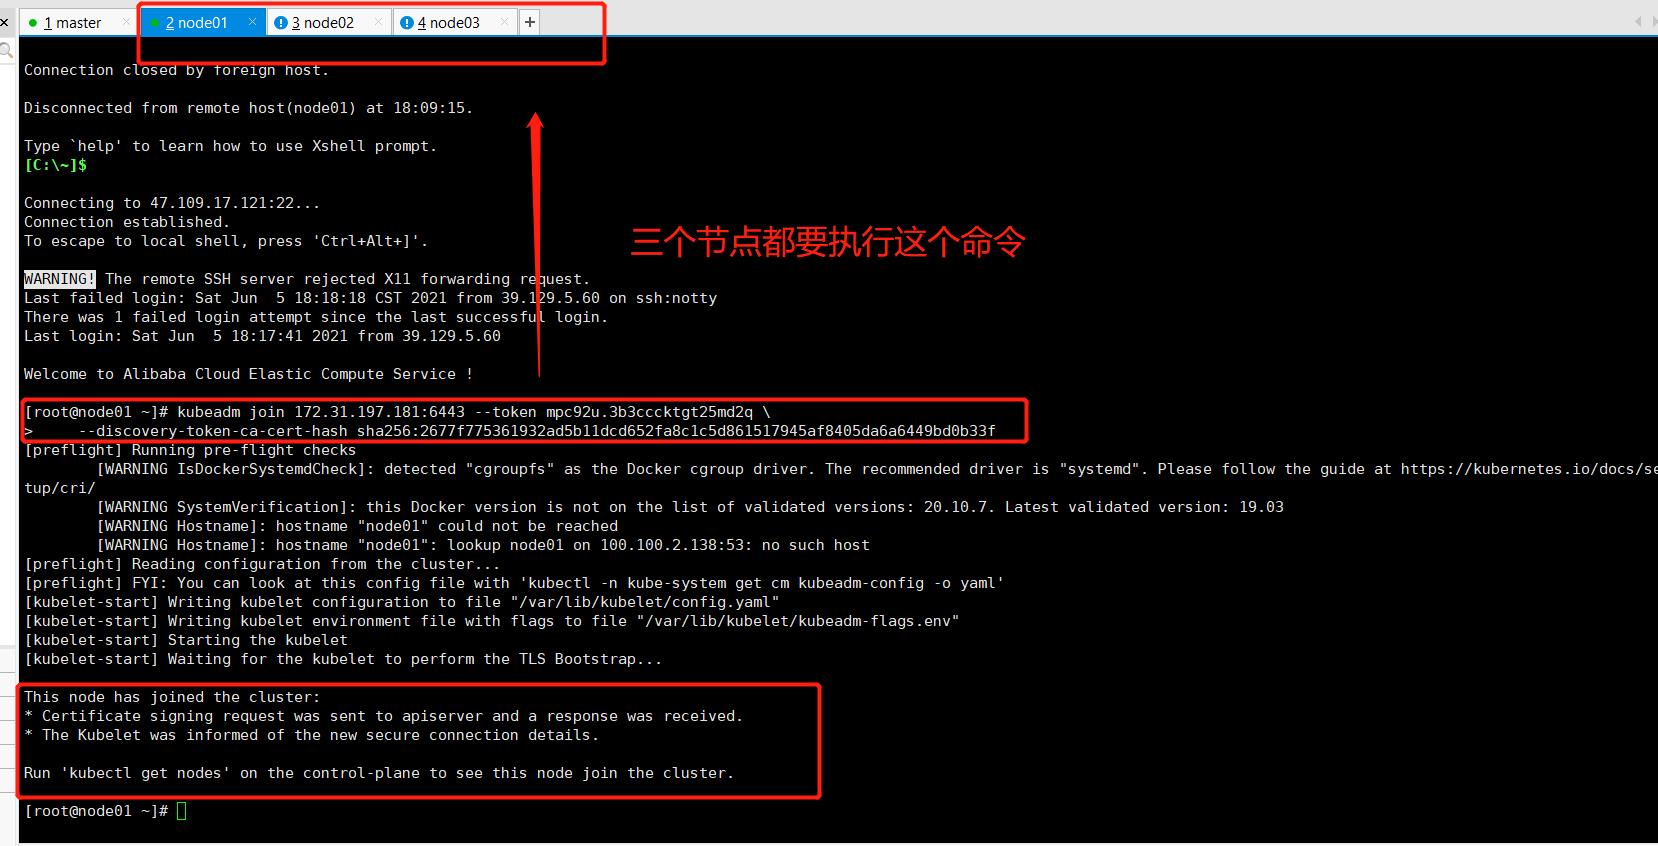
接下来把node节点加入到master中,在Node机器上执行;向集群添加新节点,执行的命令就是kubeadm init最后输出的kubeadm join命令
kubeadm join 172.31.197.181:6443 --token mpc92u.3b3cccktgt25md2q \\ --discovery-token-ca-cert-hash sha256:2677f775361932ad5b11dcd652fa8c1c5d861517945af8405da6a6449bd0b33f


然后在master节点上查看
[root@master ~]# kubectl get nodesNAME STATUS ROLES AGE VERSIONmaster NotReady control-plane,master 25m v1.20.7node01 NotReady <none> 3m21s v1.20.7node02 NotReady <none> 3m11s v1.20.7node03 NotReady <none> 3m6s v1.20.7[root@master ~]#
部署网络插件(这些命令都是在master节点下进行的)
下载kube-flannel.yml 文件
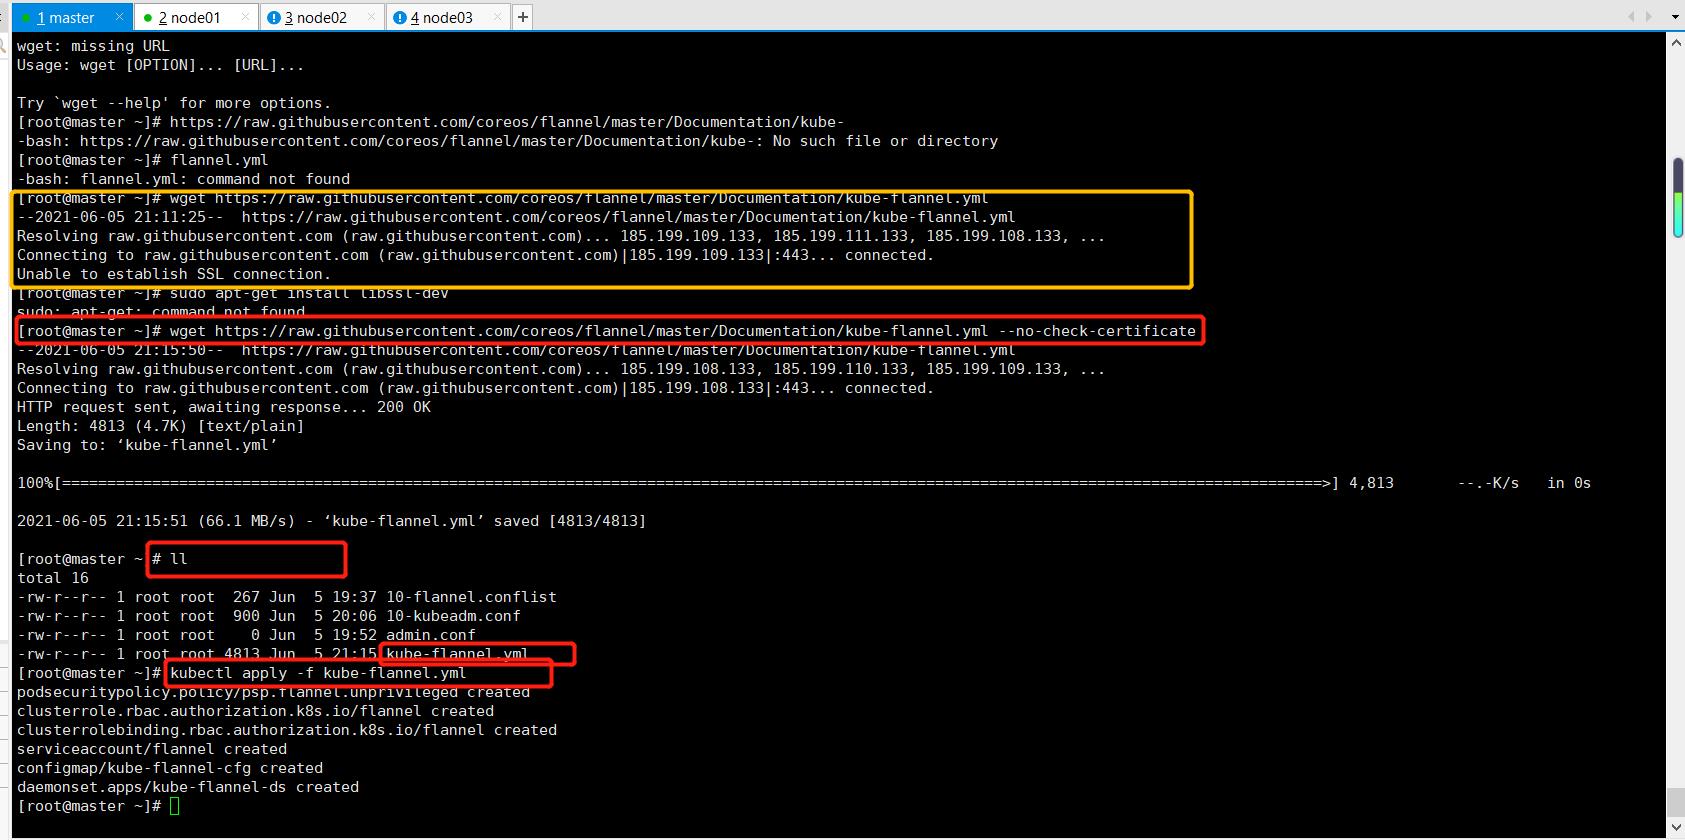
出现的问题:
[root@master ~]# wget https://raw.githubusercontent.com/coreos/flannel/master/Documentation/kube-flannel.yml
--2021-06-05 21:11:25--  https://raw.githubusercontent.com/coreos/flannel/master/Documentation/kube-flannel.yml
Resolving raw.githubusercontent.com (raw.githubusercontent.com)... 185.199.109.133, 185.199.111.133, 185.199.108.133, ...
Connecting to raw.githubusercontent.com (raw.githubusercontent.com)|185.199.109.133|:443... connected.
Unable to establish SSL connection.
解决办法
wget https://raw.githubusercontent.com/coreos/flannel/master/Documentation/kube-flannel.yml --no-check-certificate
[root@master ~]# wget https://raw.githubusercontent.com/coreos/flannel/master/Documentation/kube-flannel.yml --no-check-certificate
--2021-06-05 21:15:50--  https://raw.githubusercontent.com/coreos/flannel/master/Documentation/kube-flannel.yml
Resolving raw.githubusercontent.com (raw.githubusercontent.com)... 185.199.108.133, 185.199.110.133, 185.199.109.133, ...
Connecting to raw.githubusercontent.com (raw.githubusercontent.com)|185.199.108.133|:443... connected.
HTTP request sent, awaiting response... 200 OK
Length: 4813 (4.7K) [text/plain]
Saving to: ‘kube-flannel.yml’

100%[============================================================================================================================================>] 4,813       --.-K/s   in 0s

2021-06-05 21:15:51 (66.1 MB/s) - ‘kube-flannel.yml’ saved [4813/4813]
应用kube-flannel.yml文件得到运行时容器
kubectl apply -f kube-flannel.yml
[root@master ~]# lltotal 16-rw-r--r-- 1 root root 267 Jun 5 19:37 10-flannel.conflist-rw-r--r-- 1 root root 900 Jun 5 20:06 10-kubeadm.conf-rw-r--r-- 1 root root 0 Jun 5 19:52 admin.conf-rw-r--r-- 1 root root 4813 Jun 5 21:15 kube-flannel.yml[root@master ~]# kubectl apply -f kube-flannel.ymlpodsecuritypolicy.policy/psp.flannel.unprivileged createdclusterrole.rbac.authorization.k8s.io/flannel createdclusterrolebinding.rbac.authorization.k8s.io/flannel createdserviceaccount/flannel createdconfigmap/kube-flannel-cfg createddaemonset.apps/kube-flannel-ds created

查看节点状态:
kubectl get nodes
查看运行时容器pod(一个pod里面运行了多个docker容器)
kubectl get pods -n kube-system
[root@master ~]# kubectl get nodes
NAME STATUS ROLES AGE VERSION
master Ready control-plane,master 49m v1.20.7
node01 Ready <none> 26m v1.20.7
node02 Ready <none> 26m v1.20.7
node03 Ready <none> 26m v1.20.7
[root@master ~]# kubectl get pods -n kube-system
NAME READY STATUS RESTARTS AGE
coredns-7f89b7bc75-jx925 1/1 Running 0 54m
coredns-7f89b7bc75-pml7q 1/1 Running 0 54m
etcd-master 1/1 Running 0 54m
kube-apiserver-master 1/1 Running 0 54m
kube-controller-manager-master 1/1 Running 0 54m
kube-flannel-ds-7kmgr 1/1 Running 0 9m22s
kube-flannel-ds-hmqcw以上是关于第148天学习打卡(Kubernetes kubeadm init 成功部署 部署网络插件 部署容器化应用)的主要内容,如果未能解决你的问题,请参考以下文章
第156天学习打卡(Kubernetes 搭建监控平台 高可用集群部署 )
第149天学习打卡(Kubernetes 部署nginx 部署Dashboard)
第151天学习打卡(Kubernetes 集群YAML文件详解 Pod Controller)