第154天学习打卡(Kubernetes 使用Helm快速部署应用, 如何自己创建Chart)
Posted doudoutj
tags:
篇首语:本文由小常识网(cha138.com)小编为大家整理,主要介绍了第154天学习打卡(Kubernetes 使用Helm快速部署应用, 如何自己创建Chart)相关的知识,希望对你有一定的参考价值。
使用helm快速部署应用
第一步 使用命令搜索应用
helm search repo 名称 (weave)
第二步 根据搜索内容选择安装
helm install 安装之后的名称 搜索应用的名称

查看安装之后状态
helm list
helm status 安装之后名称
[root@master linux-amd64]# helm search repo weave
NAME              	CHART VERSION	APP VERSION	DESCRIPTION
stable/weave-cloud	0.3.9        	1.4.0      	DEPRECATED - Weave Cloud is a add-on to Kuberne...
stable/weave-scope	1.1.12       	1.12.0     	DEPRECATED - A Helm chart for the Weave Scope c...
[root@master linux-amd64]# helm install ui3 stable/weave-scope
WARNING: This chart is deprecated
W0611 16:13:45.383789   15586 warnings.go:70] rbac.authorization.k8s.io/v1beta1 ClusterRole is deprecated in v1.17+, unavailable in v1.22+; use rbac.authorization.k8s.io/v1 ClusterRole
W0611 16:13:45.385260   15586 warnings.go:70] rbac.authorization.k8s.io/v1beta1 ClusterRoleBinding is deprecated in v1.17+, unavailable in v1.22+; use rbac.authorization.k8s.io/v1 ClusterRoleBinding
W0611 16:13:45.409268   15586 warnings.go:70] rbac.authorization.k8s.io/v1beta1 ClusterRole is deprecated in v1.17+, unavailable in v1.22+; use rbac.authorization.k8s.io/v1 ClusterRole
W0611 16:13:45.413066   15586 warnings.go:70] rbac.authorization.k8s.io/v1beta1 ClusterRoleBinding is deprecated in v1.17+, unavailable in v1.22+; use rbac.authorization.k8s.io/v1 ClusterRoleBinding
NAME: ui3
LAST DEPLOYED: Fri Jun 11 16:13:45 2021
NAMESPACE: default
STATUS: deployed
REVISION: 1
NOTES:
You should now be able to access the Scope frontend in your web browser, by
using kubectl port-forward:

kubectl -n default port-forward $(kubectl -n default get endpoints \\
ui3-weave-scope -o jsonpath='{.subsets[0].addresses[0].targetRef.name}') 8080:4040

then browsing to http://localhost:8080/.
For more details on using Weave Scope, see the Weave Scope documentation:

https://www.weave.works/docs/scope/latest/introducing/

[root@master linux-amd64]# helm repo list
NAME  	URL
stable	http://mirror.azure.cn/kubernetes/charts/
[root@master linux-amd64]# helm list
NAME	NAMESPACE	REVISION	UPDATED                                	STATUS  	CHART             	APP VERSION
ui3  	default  	1       	2021-06-11 15:47:29.338897612 +0800 CST	deployed	weave-scope-1.1.12	1.12.0
[root@master linux-amd64]# helm status ui3 #查看状态信息
NAME: ui3
LAST DEPLOYED: Fri Jun 11 16:13:45 2021
NAMESPACE: default
STATUS: deployed
REVISION: 1
NOTES:
You should now be able to access the Scope frontend in your web browser, by
using kubectl port-forward:

kubectl -n default port-forward $(kubectl -n default get endpoints \\
ui3-weave-scope -o jsonpath='{.subsets[0].addresses[0].targetRef.name}') 8080:4040

then browsing to http://localhost:8080/.
For more details on using Weave Scope, see the Weave Scope documentation:

https://www.weave.works/docs/scope/latest/introducing/
[root@master linux-amd64]# kubectl get svc
NAME              TYPE        CLUSTER-IP       EXTERNAL-IP   PORT(S)        AGE
kubernetes        ClusterIP   10.96.0.1        <none>        443/TCP        5d19h
ui3-weave-scope   ClusterIP   10.103.97.141    <none>        80/TCP         7m31s
web               NodePort    10.111.111.127   <none>        80:32079/TCP   19h
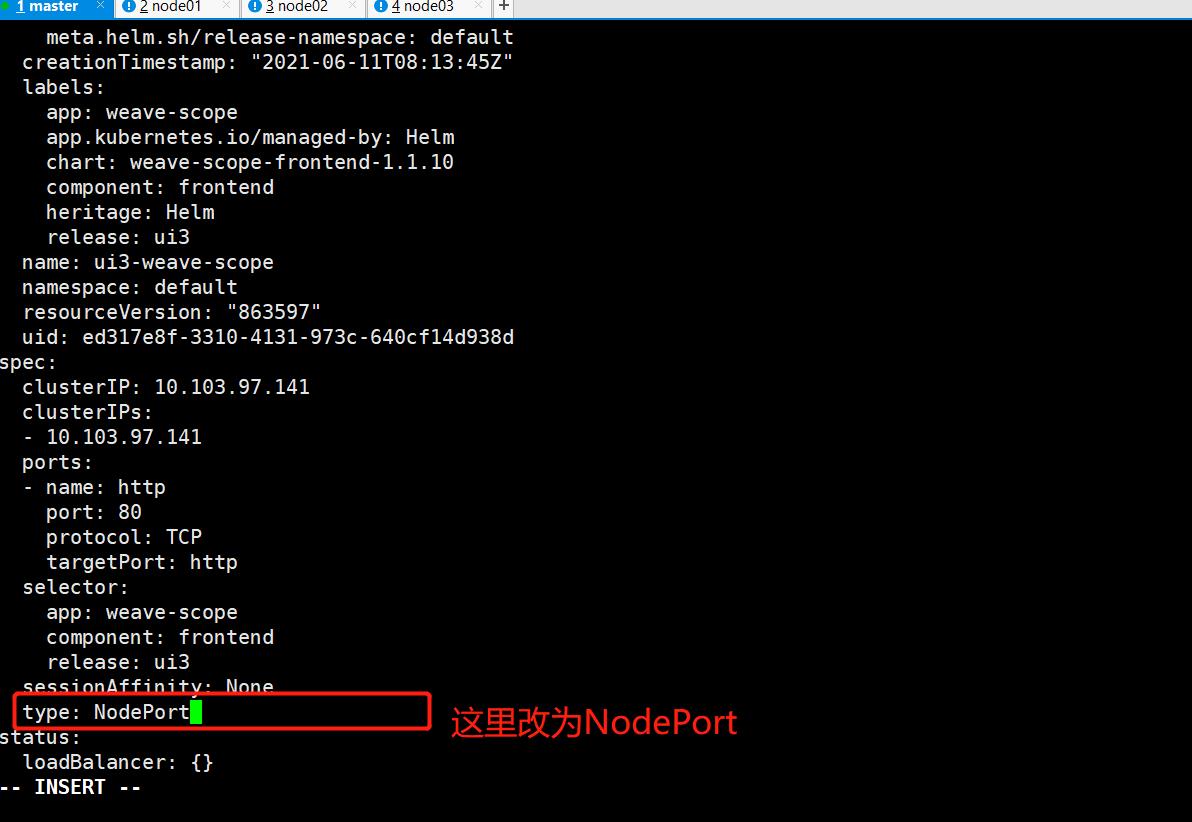
修改service的yaml文件,type改为NodePort,使其对外暴露端口
[root@master linux-amd64]# kubectl edit svc ui3-weave-scope
service/ui3-weave-scope edited
[root@master linux-amd64]# kubectl get svc
NAME TYPE CLUSTER-IP EXTERNAL-IP PORT(S) AGE
kubernetes ClusterIP 10.96.0.1 <none> 443/TCP 5d19h
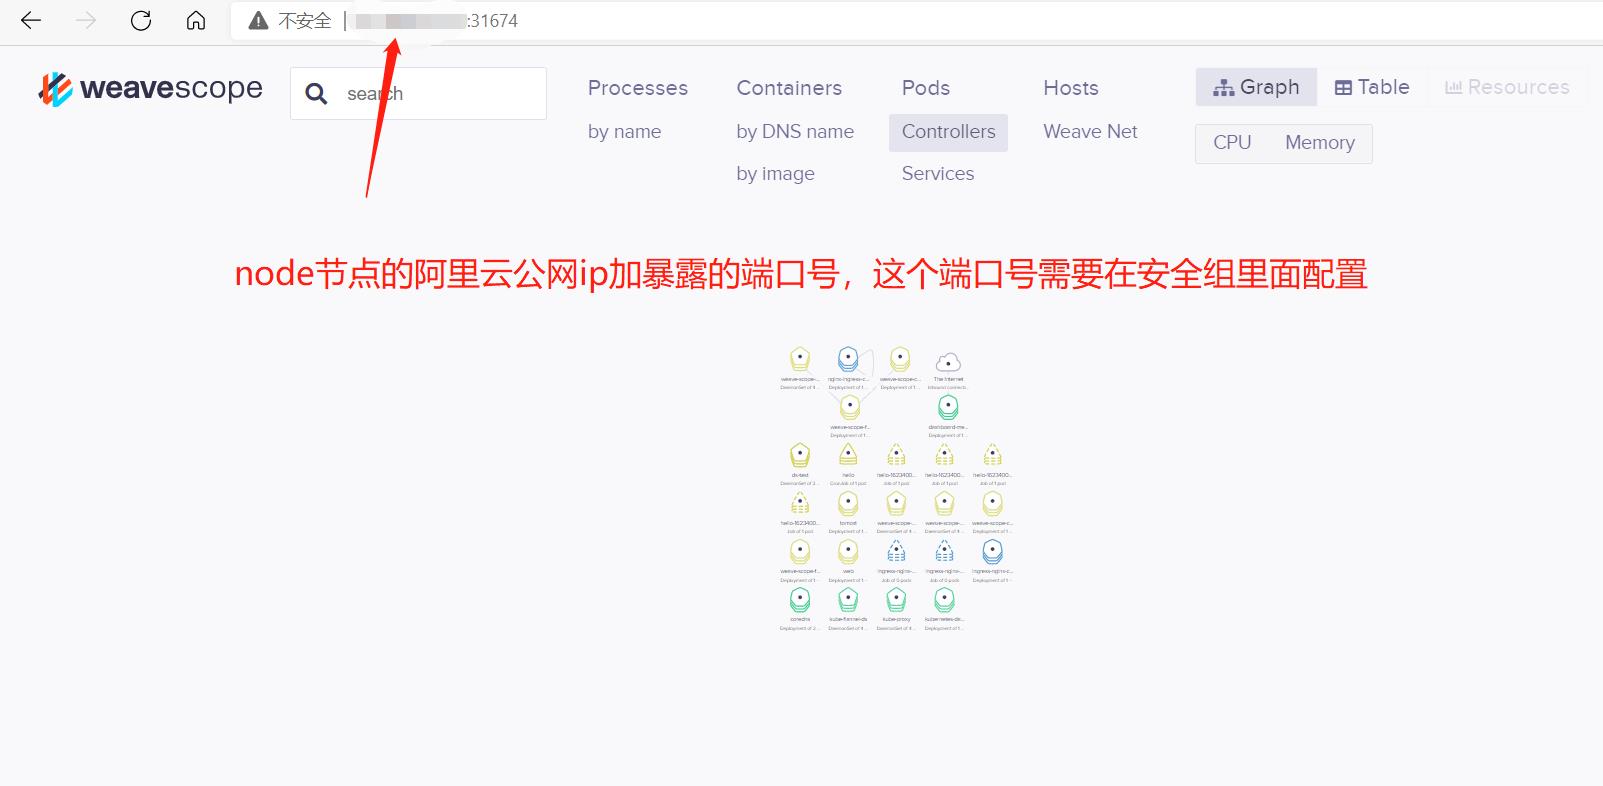
ui3-weave-scope NodePort 10.103.97.141 <none> 80:31674/TCP 15m
web NodePort 10.111.111.127 <none> 80:32079/TCP 19h
[root@master linux-amd64]#
如何自己创建Chart
1.使用命令创建chart
helm create chart名称
[root@master linux-amd64]# cd ..
[root@master ~]# helm create mychart
Creating mychart
[root@master ~]# ls
10-flannel.conflist  cronjob.yaml                    ingress01.yaml           mary                   recommended.yaml  service1.yaml
10-kubeadm.conf      deploy.yaml                     ingress-controller.yaml  mychart                redis.properties  sts.yaml
admin.conf           deploy.yaml.1                   job.yaml                 myconfig.yaml          secret-var.yaml
cm.yaml              ds.yaml                         kube-flannel.yml         rbac-rolebinding.yaml  secret-vol.yaml
config-var.yaml      helm-v3.6.0-linux-amd64.tar.gz  linux-amd64              rbac-role.yaml         secret.yaml
[root@master ~]# cd mychart
[root@master mychart]# ls
charts  Chart.yaml  templates  values.yaml
[root@master mychart]# ls charts/
[root@master mychart]# cd charts/
[root@master charts]# cd ..
[root@master mychart]# cat Chart.yaml #查看信息
apiVersion: v2
name: mychart
description: A Helm chart for Kubernetes

# A chart can be either an 'application' or a 'library' chart.
#
# Application charts are a collection of templates that can be packaged into versioned archives
# to be deployed.
#
# Library charts provide useful utilities or functions for the chart developer. They're included as
# a dependency of application charts to inject those utilities and functions into the rendering
# pipeline. Library charts do not define any templates and therefore cannot be deployed.
type: application

# This is the chart version. This version number should be incremented each time you make changes
# to the chart and its templates, including the app version.
# Versions are expected to follow Semantic Versioning (https://semver.org/)
version: 0.1.0

# This is the version number of the application being deployed. This version number should be
# incremented each time you make changes to the application. Versions are not expected to
# follow Semantic Versioning. They should reflect the version the application is using.
# It is recommended to use it with quotes.
appVersion: "1.16.0"
[root@master mychart]# cd templates/
[root@master templates]# ls
deployment.yaml  _helpers.tpl  hpa.yaml  ingress.yaml  NOTES.txt  serviceaccount.yaml  service.yaml  tests
[root@master templates]# rm -rf * #删除templates里面的文件,然后等下把自己写的放到这里面
[root@master templates]# ls
[root@master templates]#
- Chartyaml: 当前chart属性配置信心
- templates: 编写yaml文件放到这个目录中
- values.yaml:yaml文件可以使用全局变量
2.在templates文件夹创建两个yaml文件
- deployment.yaml
- service.yaml
[root@master templates]# kubectl create deployment web1 --image=nginx --dry-run -o yaml > deployment.yaml
W0611 16:53:59.635980   32639 helpers.go:553] --dry-run is deprecated and can be replaced with --dry-run=client.
[root@master templates]# ls
deployment.yaml
[root@master templates]# cat deployment.yaml
apiVersion: apps/v1
kind: Deployment
metadata:
  creationTimestamp: null
  labels:
    app: web1
  name: web1
spec:
  replicas: 1
  selector:
    matchLabels:
      app: web1
  strategy: {}
  template:
    metadata:
      creationTimestamp: null
      labels:
        app: web1
    spec:
      containers:
      - image: nginx
        name: nginx
        resources: {}
status: {}
[root@master templates]# kubectl create deployment web1 --image=nginx  #先创建web1 ,然后再执行下面的service.yaml
deployment.apps/web1 created
[root@master templates]# kubectl get pods
[root@master templates]# kubectl expose deployment web1 --port=80 --target-port=80 --type=NodePort --dry-run -o yaml > service.yaml
W0611 16:59:07.608904    2461 helpers.go:553] --dry-run is deprecated and can be replaced with --dry-run=client.
[root@master templates]# ls
deployment.yaml  service.yaml
[root@master templates]# vi service.yaml
#然后再删除web1
[root@master templates]# kubectl delete deployment web1
deployment.apps "web1" deleted
[root@master templates]# kubectl get pods
[root@master templates]# ls
deployment.yaml  service.yaml
3.安装mychart
[root@master ~]# helm install web1 mychart/
NAME: web1
LAST DEPLOYED: Fri Jun 11 17:05:55 2021
NAMESPACE: default
STATUS: deployed
REVISION: 1
TEST SUITE: None
[root@master ~]# kubectl get pods
web1-6fbb48567f-ch86p 1/1 Running 0 61s
root@master ~]# kubectl get svc
NAME TYPE CLUSTER-IP EXTERNAL-IP PORT(S) AGE
kubernetes ClusterIP 10.96.0.1 <none> 443/TCP 5d20h
ui3-weave-scope NodePort 10.103.97.141 <none> 80:31674/TCP 53m
web NodePort 10.111.111.127 <none> 80:32079/TCP 20h
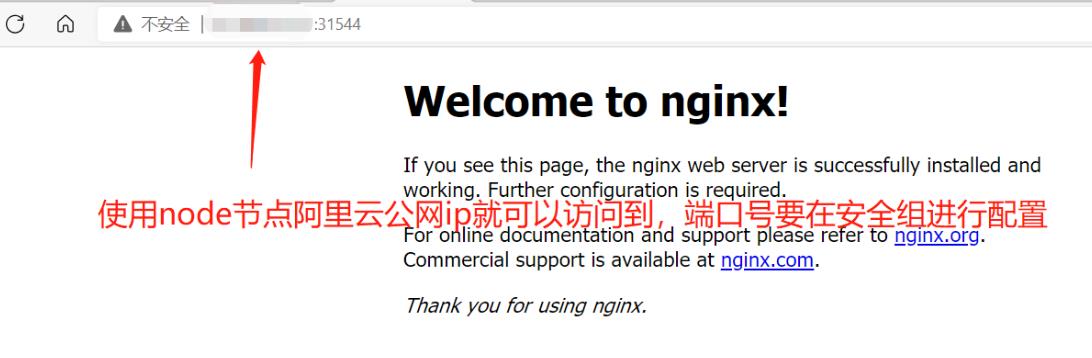
web1 NodePort 10.96.150.188 <none> 80:31544/TCP 79s
4.应用升级
helm upgrade chart名称
[root@master ~]# helm upgrade web1 mychart/
Release "web1" has been upgraded. Happy Helming!
NAME: web1
LAST DEPLOYED: Fri Jun 11 17:12:01 2021
NAMESPACE: default
STATUS: deployed
REVISION: 2
TEST SUITE: None
实现yaml高效复用
- 通过传递参数,动态渲染模板,yaml内容动态传入参数生成
- 在chart中有values.yaml文件,定义yaml文件全局变量
[root@master mychart]# ls
charts  Chart.yaml  templates  values.yaml
[root@master mychart]#
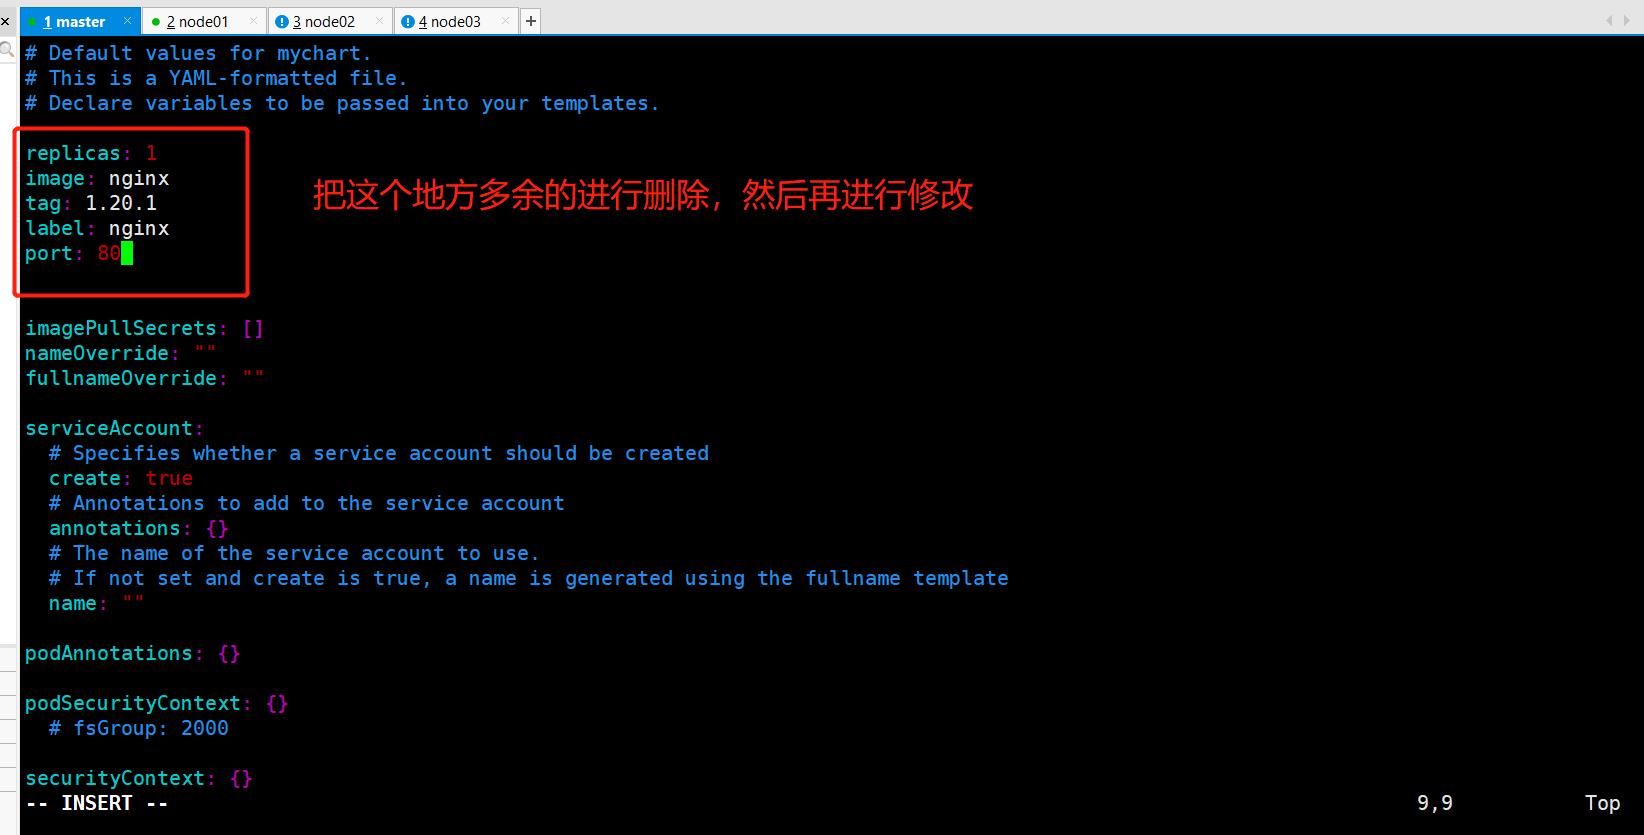
1.在values.yaml定义变量和值
2.在具体yaml文件中,获取定义变量值
yaml文件大体有几个地方不同
- image
- tag
- label
- port
- replicas
一、在values.yaml定义变量和值
这个是原本文件里面的内容
# Default values for mychart.
# This is a YAML-formatted file.
# Declare variables to be passed into your templates.

replicaCount: 1

image:
  repository: nginx
  pullPolicy: IfNotPresent
  # Overrides the image tag whose default is the chart appVersion.
  tag: ""

imagePullSecrets: []
nameOverride: ""
fullnameOverride: ""

serviceAccount:
  # Specifies whether a service account should be created
  create: true
  # Annotations to add to the service account
  annotations: {}
  # The name of the service account to use.
  # If not set and create is true, a name is generated using the fullname template
  name: ""

podAnnotations: {}

podSecurityContext: {}
  # fsGroup: 2000

securityContext: {}
  # capabilities:
  #   drop:
  #   - ALL
  # readOnlyRootFilesystem: true
  # runAsNonRoot: true
  # runAsUser: 1000

service:
  type: ClusterIP
  port: 80

ingress:
  enabled: false
  className: ""
  annotations: {}
    # kubernetes.io/ingress.class: nginx
    # kubernetes.io/tls-acme: "true"
  hosts:
    - host: chart-example.local
      paths:
        - path: /
[root@master mychart]# vim values.yaml
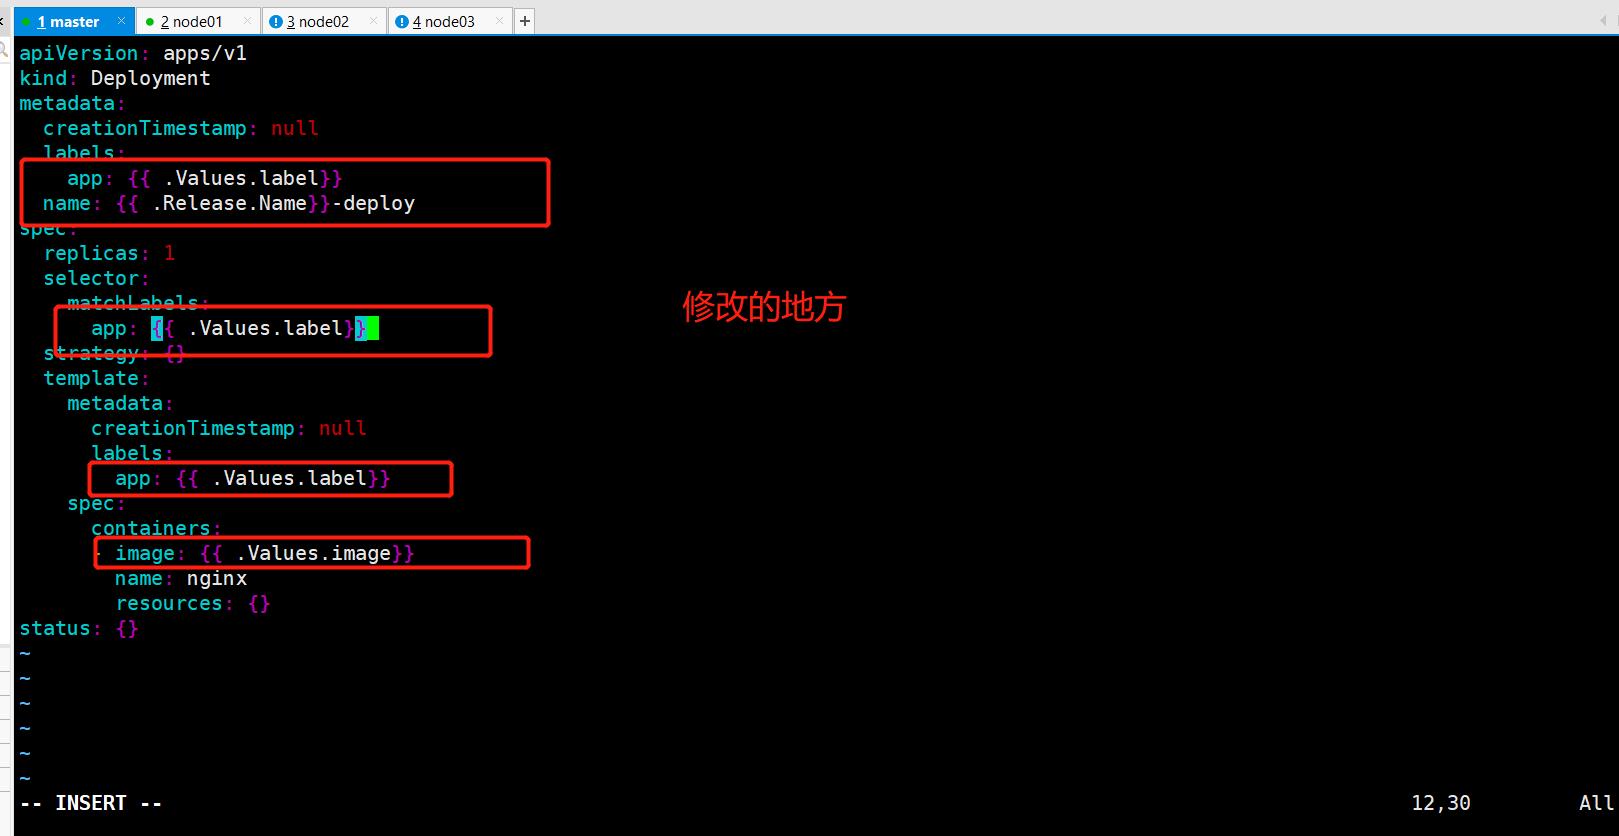
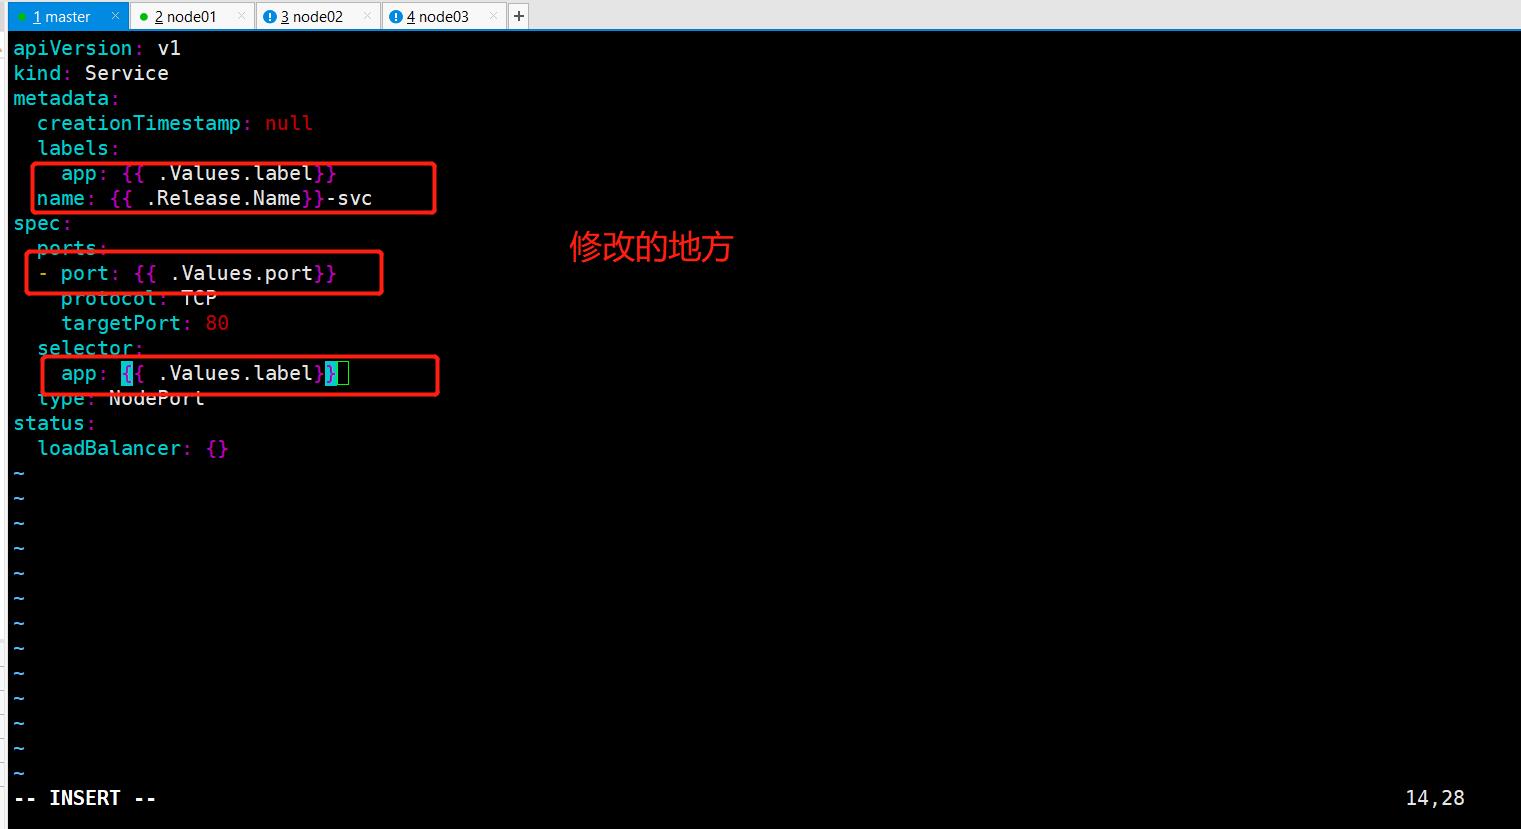
二、在templates的yaml文件中使用values.yaml定义的变量
- 通过表达式形式使用全局变量
- {{.Values.变量名称}}
- {{.Release.Name}}
[root@master mychart]# cd templates/
[root@master templates]# ls
deployment.yaml  service.yaml
[root@master templates]# vim deployment.yaml
[root@master templates]# vim service.yaml
[root@master ~]# helm install --dry-run web2 mychart/
NAME: web2
LAST DEPLOYED: Fri Jun 11 19:01:27 2021
NAMESPACE: default
STATUS: pending-install
REVISION: 1
TEST SUITE: None
HOOKS:
MANIFEST:
---
# Source: mychart/templates/service.yaml
apiVersion: v1
kind: Service
metadata:
  creationTimestamp: null
  labels:
    app: nginx
  name: web2-svc
spec:
  ports:
  - port: 80
    protocol: TCP
    targetPort: 80
  selector:
    app: nginx
  type: NodePort
status:
  loadBalancer: {}
---
# Source: mychart/templates/deployment.yaml
apiVersion: apps/v1
kind: Deployment
metadata:
  creationTimestamp: null
  labels:
    app: nginx
  name: web2-deploy
spec:
  replicas: 1
  selector:
    matchLabels:
      app: nginx
  strategy: {}
  template:
    metadata:
      creationTimestamp: null
      labels:
        app: nginx
    spec:
      containers:
      - image: nginx
        name: nginx
        resources: {}
status: {}
#因为我前面使用web2创建时出错了,使得这个web2已被使用,所以出错换个名字就行
[root@master ~]# helm install web2 mychart/
Error: cannot re-use a name that is still in use
[root@master ~]# helm install web3 mychart/
NAME: web3
LAST DEPLOYED: Fri Jun 11 19:02:33 2021
NAMESPACE: default
STATUS: deployed
REVISION: 1
TEST SUITE: None
[root@master ~]# kubectl get pods
NAME                                             READY   STATUS             RESTARTS   AGE
ds-test-489bb                                    1/1     Running            0          47h
ds-test-4rvcr                                    1/1     Running            0          47h
ds-test-nx6kt                                    1/1     Running            0          47h
web3-deploy-6799fc88d8-p74vt                     1/1     Running            0          114s
[root@master ~]# kubectl get svc
NAME              TYPE        CLUSTER-IP       EXTERNAL-IP   PORT(S)        AGE
kubernetes        ClusterIP   10.96.0.1        <none>        443/TCP        5d22h
web3-svc          NodePort    10.99.114.106    <none>        80:32379/TCP   2m22s
B站学习网址:k8s教程由浅入深-尚硅谷_哔哩哔哩_bilibili
以上是关于第154天学习打卡(Kubernetes 使用Helm快速部署应用, 如何自己创建Chart)的主要内容,如果未能解决你的问题,请参考以下文章