React-Native 热更新尝试(Android)
Posted vv_小虫
tags:
篇首语:本文由小常识网(cha138.com)小编为大家整理,主要介绍了React-Native 热更新尝试(Android)相关的知识,希望对你有一定的参考价值。
前言:由于苹果发布的ios的一些rn的app存在安全问题,主要就是由于一些第三方的热更新库导致的,然而消息一出就闹得沸沸扬扬的,导致有些人直接认为“学了大半年的rn白学啦~~!!真是哭笑不得。废话不多说了,马上进入我们今天的主题吧。“
因为一直在做android开发,所以今天也只是针对于android进行热更新尝试(ios我也无能为力哈,看都看不懂,哈哈~~~)。
先看一下效果:

怎么样?效果还是不错的吧?其实呢,实现起来还是不是很难的,下面让我们一点一点的尝试一下吧(小伙伴跟紧一点哦)。
首先我们来看看当我们执行:
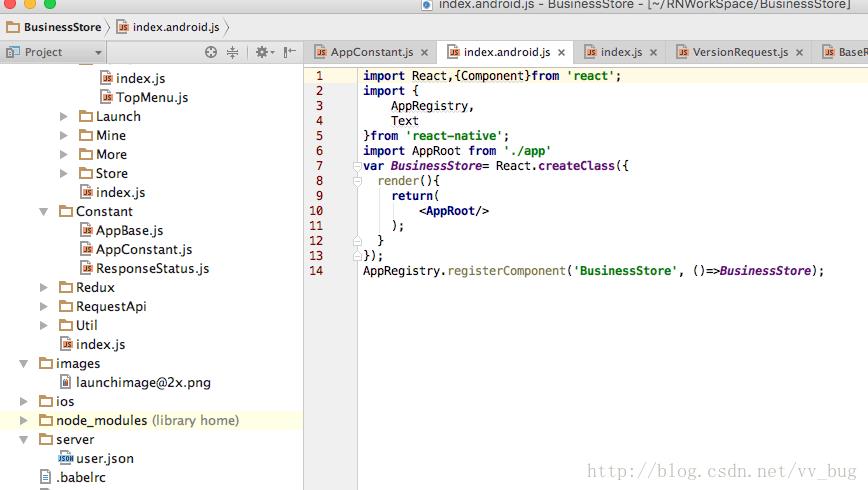
react-native init xxxx命令的时候,rn会自动帮我们创建一个android项目跟ios项目,然后我们看看rn帮我们创建的android项目长啥样:

我们看到,帮我们创建了一个MainActivity跟一个MainApplication,我们先看一下MainActivity:
package com.businessstore;

import com.facebook.react.ReactActivity;

public class MainActivity extends ReactActivity {

    /**
     * Returns the name of the main component registered from javascript.
     * This is used to schedule rendering of the component.
     */
    @Override
    protected String getMainComponentName() {
        return "BusinessStore";
    }
}
很简单,就一行代码getMainComponentName,然后返回我们的组件名字,这个名字即为我们在index.android.js中注册的组件名字:
然后我们看看MainApplication长啥样:
public class MainApplication extends Application implements ReactApplication {

  private final ReactNativeHost mReactNativeHost = new ReactNativeHost(this) {
    @Override
    protected boolean getUseDeveloperSupport() {
      return BuildConfig.DEBUG;
    }

    @Override
    protected List<ReactPackage> getPackages() {
      return Arrays.<ReactPackage>asList(
          new MainReactPackage()
      );
    }
  };

  @Override
  public ReactNativeHost getReactNativeHost() {
    return mReactNativeHost;
  }

  @Override
  public void onCreate() {
    super.onCreate();
    SoLoader.init(this, /* native exopackage */ false);
  }
}
也是没有几行代码…..
好啦~那我们的rn页面是怎么出来的呢? 不急,我们来一步一步往下看,首先点开MainActivity:
public class MainActivity extends ReactActivity {

    /**
     * Returns the name of the main component registered from JavaScript.
     * This is used to schedule rendering of the component.
     */
    @Override
    protected String getMainComponentName() {
        return "BusinessStore";
    }
}
一个activity要显示一个页面的话肯定得setContentView,既然我们的activity没有,然后就找到它的父类ReactActivity:
public abstract class ReactActivity extends Activity
    implements DefaultHardwareBackBtnHandler, PermissionAwareActivity {

  private final ReactActivityDelegate mDelegate;

  protected ReactActivity() {
    mDelegate = createReactActivityDelegate();
  }

  /**
   * Returns the name of the main component registered from JavaScript.
   * This is used to schedule rendering of the component.
   * e.g. "MoviesApp"
   */
  protected @Nullable String getMainComponentName() {
    return null;
  }

  /**
   * Called at construction time, override if you have a custom delegate implementation.
   */
  protected ReactActivityDelegate createReactActivityDelegate() {
    return new ReactActivityDelegate(this, getMainComponentName());
  }

  @Override
  protected void onCreate(Bundle savedInstanceState) {
    super.onCreate(savedInstanceState);
    mDelegate.onCreate(savedInstanceState);
  }

  @Override
  protected void onPause() {
    super.onPause();
    mDelegate.onPause();
  }

  @Override
  protected void onResume() {
    super.onResume();
    mDelegate.onResume();
  }

  @Override
  protected void onDestroy() {
    super.onDestroy();
    mDelegate.onDestroy();
  }

  @Override
  public void onActivityResult(int requestCode, int resultCode, Intent data) {
    mDelegate.onActivityResult(requestCode, resultCode, data);
  }

  @Override
  public boolean onKeyUp(int keyCode, KeyEvent event) {
    return mDelegate.onKeyUp(keyCode, event) || super.onKeyUp(keyCode, event);
  }

  @Override
  public void onBackPressed() {
    if (!mDelegate.onBackPressed()) {
      super.onBackPressed();
    }
  }

  @Override
  public void invokeDefaultOnBackPressed() {
    super.onBackPressed();
  }

  @Override
  public void onNewIntent(Intent intent) {
    if (!mDelegate.onNewIntent(intent)) {
      super.onNewIntent(intent);
    }
  }

  @Override
  public void requestPermissions(
    String[] permissions,
    int requestCode,
    PermissionListener listener) {
    mDelegate.requestPermissions(permissions, requestCode, listener);
  }

  @Override
  public void onRequestPermissionsResult(
    int requestCode,
    String[] permissions,
    int[] grantResults) {
    mDelegate.onRequestPermissionsResult(requestCode, permissions, grantResults);
  }

  protected final ReactNativeHost getReactNativeHost() {
    return mDelegate.getReactNativeHost();
  }

  protected final ReactInstanceManager getReactInstanceManager() {
    return mDelegate.getReactInstanceManager();
  }

  protected final void loadApp(String appKey) {
    mDelegate.loadApp(appKey);
  }
}
代码也不是很多,可见,我们看到了activity的很多生命周期方法,然后都是由一个叫mDelegate的类给处理掉了,所以我们继续往下走看看mDelegate:
// Copyright 2004-present Facebook. All Rights Reserved.

package com.facebook.react;

import android.annotation.TargetApi;
import android.app.Activity;
import android.content.Context;
import android.content.Intent;
import android.net.Uri;
import android.os.Build;
import android.os.Bundle;
import android.provider.Settings;
import android.support.v4.app.FragmentActivity;
import android.view.KeyEvent;
import android.widget.Toast;

import com.facebook.common.logging.FLog;
import com.facebook.infer.annotation.Assertions;
import com.facebook.react.bridge.Callback;
import com.facebook.react.common.ReactConstants;
import com.facebook.react.devsupport.DoubleTapReloadRecognizer;
import com.facebook.react.modules.core.DefaultHardwareBackBtnHandler;
import com.facebook.react.modules.core.PermissionListener;

import javax.annotation.Nullable;

/**
 * Delegate class for {@link ReactActivity} and {@link ReactFragmentActivity}. You can subclass this
 * to provide custom implementations for e.g. {@link #getReactNativeHost()}, if your Application
 * class doesn't implement {@link ReactApplication}.
 */
public class ReactActivityDelegate {

  private final int REQUEST_OVERLAY_PERMISSION_CODE = 1111;
  private static final String REDBOX_PERMISSION_GRANTED_MESSAGE =
    "Overlay permissions have been granted.";
  private static final String REDBOX_PERMISSION_MESSAGE =
    "Overlay permissions needs to be granted in order for react native apps to run in dev mode";

  private final @Nullable Activity mActivity;
  private final @Nullable FragmentActivity mFragmentActivity;
  private final @Nullable String mMainComponentName;

  private @Nullable ReactRootView mReactRootView;
  private @Nullable DoubleTapReloadRecognizer mDoubleTapReloadRecognizer;
  private @Nullable PermissionListener mPermissionListener;
  private @Nullable Callback mPermissionsCallback;

  public ReactActivityDelegate(Activity activity, @Nullable String mainComponentName) {
    mActivity = activity;
    mMainComponentName = mainComponentName;
    mFragmentActivity = null;
  }

  public ReactActivityDelegate(
    FragmentActivity fragmentActivity,
    @Nullable String mainComponentName) {
    mFragmentActivity = fragmentActivity;
    mMainComponentName = mainComponentName;
    mActivity = null;
  }

  protected @Nullable Bundle getLaunchOptions() {
    return null;
  }

  protected ReactRootView createRootView() {
    return new ReactRootView(getContext());
  }

  /**
   * Get the {@link ReactNativeHost} used by this app. By default, assumes
   * {@link Activity#getApplication()} is an instance of {@link ReactApplication} and calls
   * {@link ReactApplication#getReactNativeHost()}. Override this method if your application class
   * does not implement {@code ReactApplication} or you simply have a different mechanism for
   * storing a {@code ReactNativeHost}, e.g. as a static field somewhere.
   */
  protected ReactNativeHost getReactNativeHost() {
    return ((ReactApplication) getPlainActivity().getApplication()).getReactNativeHost();
  }

  public ReactInstanceManager getReactInstanceManager() {
    return getReactNativeHost().getReactInstanceManager();
  }

  protected void onCreate(Bundle savedInstanceState) {
    boolean needsOverlayPermission = false;
    if (getReactNativeHost().getUseDeveloperSupport() && Build.VERSION.SDK_INT >= Build.VERSION_CODES.M) {
      // Get permission to show redbox in dev builds.
      if (!Settings.canDrawOverlays(getContext())) {
        needsOverlayPermission = true;
        Intent serviceIntent = new Intent(Settings.ACTION_MANAGE_OVERLAY_PERMISSION, Uri.parse("package:" + getContext().getPackageName()));
        FLog.w(ReactConstants.TAG, REDBOX_PERMISSION_MESSAGE);
        Toast.makeText(getContext(), REDBOX_PERMISSION_MESSAGE, Toast.LENGTH_LONG).show();
        ((Activity) getContext()).startActivityForResult(serviceIntent, REQUEST_OVERLAY_PERMISSION_CODE);
      }
    }

    if (mMainComponentName != null && !needsOverlayPermission) {
      loadApp(mMainComponentName);
    }
    mDoubleTapReloadRecognizer = new DoubleTapReloadRecognizer();
  }

  protected void loadApp(String appKey) {
    if (mReactRootView != null) {
      throw new IllegalStateException("Cannot loadApp while app is already running.");
    }
    mReactRootView = createRootView();
    mReactRootView.startReactApplication(
      getReactNativeHost().getReactInstanceManager(),
      appKey,
      getLaunchOptions());
    getPlainActivity().setContentView(mReactRootView);
  }

  protected void onPause() {
    if (getReactNativeHost().hasInstance()) {
      getReactNativeHost().getReactInstanceManager().onHostPause(getPlainActivity());
    }
  }

  protected void onResume() {
    if (getReactNativeHost().hasInstance()) {
      getReactNativeHost().getReactInstanceManager().onHostResume(
        getPlainActivity(),
        (DefaultHardwareBackBtnHandler) getPlainActivity());
    }

    if (mPermissionsCallback != null) {
      mPermissionsCallback.invoke();
      mPermissionsCallback = null;
    }
  }

  protected void onDestroy() {
    if (mReactRootView != null) {
      mReactRootView.unmountReactApplication();
      mReactRootView = null;
    }
    if (getReactNativeHost().hasInstance()) {
      getReactNativeHost().getReactInstanceManager().onHostDestroy(getPlainActivity());
    }
  }

  public void onActivityResult(int requestCode, int resultCode, Intent data) {
    if (getReactNativeHost().hasInstance()) {
      getReactNativeHost().getReactInstanceManager()
        .onActivityResult(getPlainActivity(), requestCode, resultCode, data);
    } else {
      // Did we request overlay permissions?
      if (requestCode == REQUEST_OVERLAY_PERMISSION_CODE && Build.VERSION.SDK_INT >= Build.VERSION_CODES.M) {
        if (Settings.canDrawOverlays(getContext())) {
          if (mMainComponentName != null) {
            loadApp(mMainComponentName);
          }
          Toast.makeText(getContext(), REDBOX_PERMISSION_GRANTED_MESSAGE, Toast.LENGTH_LONG).show();
        }
      }
    }
  }

  public boolean onKeyUp(int keyCode, KeyEvent event) {
    if (getReactNativeHost().hasInstance() && getReactNativeHost().getUseDeveloperSupport()) {
      if (keyCode == KeyEvent.KEYCODE_MENU) {
        getReactNativeHost().getReactInstanceManager().showDevOptionsDialog();
        return true;
      }
      boolean didDoubleTapR = Assertions.assertNotNull(mDoubleTapReloadRecognizer)
        .didDoubleTapR(keyCode, getPlainActivity().getCurrentFocus());
      if (didDoubleTapR) {
        getReactNativeHost().getReactInstanceManager().getDevSupportManager().handleReloadJS();
        return true;
      }
    }
    return false;
  }

  public boolean onBackPressed() {
    if (getReactNativeHost().hasInstance()) {
      getReactNativeHost().getReactInstanceManager().onBackPressed();
      return true;
    }
    return false;
  }

  public boolean onNewIntent(Intent intent) {
    if (getReactNativeHost().hasInstance()) {
      getReactNativeHost().getReactInstanceManager().onNewIntent(intent);
      return true;
    }
    return false;
  }

  @TargetApi(Build.VERSION_CODES.M)
  public void requestPermissions(
    String[] permissions,
    int requestCode,
    PermissionListener listener) {
    mPermissionListener = listener;
    getPlainActivity().requestPermissions(permissions, requestCode);
  }

  public void onRequestPermissionsResult(
    final int requestCode,
    final String[] permissions,
    final int[] grantResults) {
    mPermissionsCallback = new Callback() {
      @Override
      public void invoke(Object... args) {
        if (mPermissionListener != null && mPermissionListener.onRequestPermissionsResult(requestCode, permissions, grantResults)) {
          mPermissionListener = null;
        }
      }
    };
  }

  private Context getContext() {
    if (mActivity != null) {
      return mActivity;
    }
    return Assertions.assertNotNull(mFragmentActivity);
  }

  private Activity getPlainActivity() {
    return ((Activity) getContext());
  }
}
我们终于看到了一些有用的代码了,这个类就是处理跟activity生命周期相关的一些方法,包括(给activity添加contentview、监听用户回退、按键、6.0的一些运行时权限等等…)我们看到onCreate方法:
protected void onCreate(Bundle savedInstanceState) {
boolean needsOverlayPermission = false;
if (getReactNativeHost().getUseDeveloperSupport() && Build.VERSION.SDK_INT >= Build.VERSION_CODES.M) {
// Get permission to show redbox in dev builds.
if (!Settings.canDrawOverlays(getContext())) {
needsOverlayPermission = true;
Intent serviceIntent = new Intent(Settings.ACTION_MANAGE_OVERLAY_PERMISSION, Uri.parse("package:" + getContext().getPackageName()));
FLog.w(ReactConstants.TAG, REDBOX_PERMISSION_MESSAGE);
Toast.makeText(getContext(), REDBOX_PERMISSION_MESSAGE, Toast.LENGTH_LONG).show();
((Activity) getContext()).startActivityForResult(serviceIntent, REQUEST_OVERLAY_PERMISSION_CODE);
}
}
if (mMainComponentName != null && !needsOverlayPermission) {
loadApp(mMainComponentName);
}
mDoubleTapReloadRecognizer = new DoubleTapReloadRecognizer();
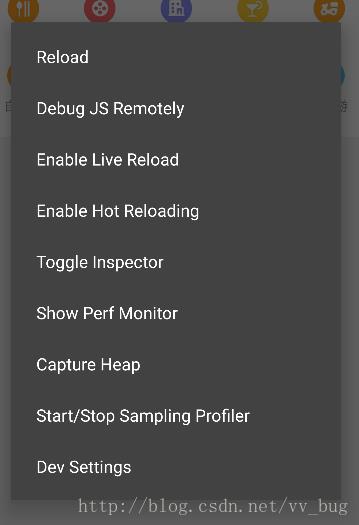
}我们看到这么一个判断,这个是做什么的呢?是为了检测是不是具有弹出悬浮窗的权限:
if (getReactNativeHost().getUseDeveloperSupport() && Build.VERSION.SDK_INT >= Build.VERSION_CODES.M) {
      // Get permission to show redbox in dev builds.
      if (!Settings.canDrawOverlays(getContext())) {
getReactNativeHost().getUseDeveloperSupport()返回的即为我们在MainApplication中写的:
@Override
    protected boolean getUseDeveloperSupport() {
      return BuildConfig.DEBUG;
    }
也就是说,当我们运行debug包的时候,会去检测app是不是具有弹出悬浮窗的权限,没有权限的话就会去请求权限,悬浮窗即为rn的调试menu:
好啦~!有点偏离我们今天的主题了,我们继续往下走…往下我们看到会去执行一个叫loadApp的方法:
    if (mMainComponentName != null && !needsOverlayPermission) {
      loadApp(mMainComponentName);
    }
我们点开loadApp:
protected void loadApp(String appKey) {
    if (mReactRootView != null) {
      throw new IllegalStateException("Cannot loadApp while app is already running.");
    }
    mReactRootView = createRootView();
    mReactRootView.startReactApplication(
      getReactNativeHost().getReactInstanceManager(),
      appKey,
      getLaunchOptions());
    getPlainActivity().setContentView(mReactRootView);
  }
好啦~~! 看到这里我们看到直接给activity设置了一个叫mReactRootView的组件,而这个组件正是rn封装的组件,我们在js中写的组件都会被转换成native组件,然后添加进mReactRootView这个组件中,那么问题来了,这些rn的组件又是在何时添加进我们的mReactRootView这个组件的呢???我们继续往下走,看到rootview有一个startReactApplication方法:
public void startReactApplication(
      ReactInstanceManager reactInstanceManager,
      String moduleName,
      @Nullable Bundle launchOptions) {
    UiThreadUtil.assertOnUiThread();

    // TODO(6788889): Use POJO instead of bundle here, apparently we can't just use WritableMap
    // here as it may be deallocated in native after passing via JNI bridge, but we want to reuse
    // it in the case of re-creating the catalyst instance
    Assertions.assertCondition(
        mReactInstanceManager == null,
        "This root view has already been attached to a catalyst instance manager");

    mReactInstanceManager = reactInstanceManager;
    mJSModuleName = moduleName;
    mLaunchOptions = launchOptions;

    if (!mReactInstanceManager.hasStartedCreatingInitialContext()) {
      mReactInstanceManager.createReactContextInBackground();
    }

    // We need to wait for the initial onMeasure, if this view has not yet been measured, we set which
    // will make this view startReactApplication itself to instance manager once onMeasure is called.
    if (mWasMeasured) {
      attachToReactInstanceManager();
    }
  }
我们看到这么一行代码:
if (!mReactInstanceManager.hasStartedCreatingInitialContext()) {
      mReactInstanceManager.createReactContextInBackground();
    }
看名字就知道肯定是加载了某些东西,可是点进去我们发现居然是一个抽象的方法,尴尬了~~!!:
public abstract void createReactContextInBackground();那么肯定有它的实现类,我们看到这个mReactInstanceManager是我们在调用loadApp这个方法的时候传进入的:
protected void loadApp(String appKey) {
    if (mReactRootView != null) {
      throw new IllegalStateException("Cannot loadApp while app is already running.");
    }
    mReactRootView = createRootView();
    mReactRootView.startReactApplication(
      getReactNativeHost().getReactInstanceManager(),
      appKey,
      getLaunchOptions());
    getPlainActivity().setContentView(mReactRootView);
  }
而mReactInstanceManager又是调用getReactNativeHost().getReactInstanceManager()方法获取的,getReactNativeHost()这个返回的对象即为我们在MainApplication中创建的host对象:
public class MainApplication extends Application implements ReactApplication {
    private static final String FILE_NAME = "index.android";

    private final ReactNativeHost mReactNativeHost = new ReactNativeHost(this) {
然后我们顺着getReactNativeHost().getReactInstanceManager()一直往下找最后发现mReactInstanceManager的实现类在这里被创建了:
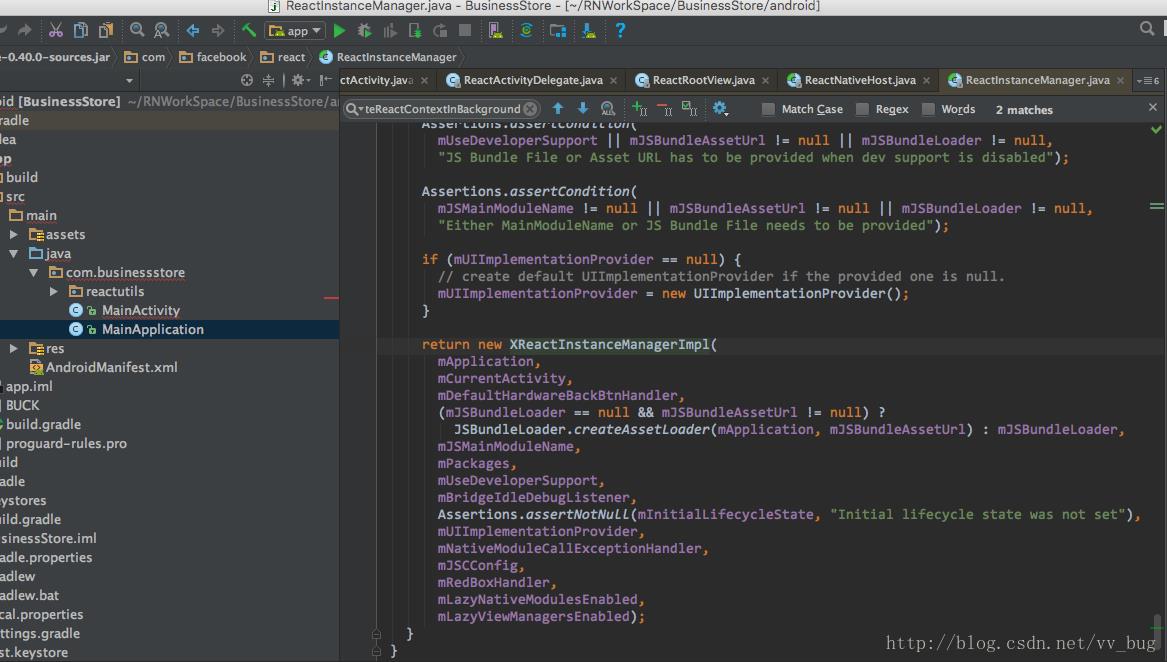
我们赶紧找到XReactInstanceManagerImpl类,然后看一下createReactContextInBackground这个方法:
@Override
  public void createReactContextInBackground() {
    Assertions.assertCondition(
        !mHasStartedCreatingInitialContext,
        "createReactContextInBackground should only be called when creating the react " +
            "application for the first time. When reloading JS, e.g. from a new file, explicitly" +
            "use recreateReactContextInBackground");

    mHasStartedCreatingInitialContext = true;
    recreateReactContextInBackgroundInner();
  }
然后我们继续往下:
private void recreateReactContextInBackgroundInner() {
   ...
              @Override
              public void onPackagerStatusFetched(final boolean packagerIsRunning) {
                UiThreadUtil.runOnUiThread(
                    new Runnable() {
                      @Override
                      public void run() {
        ...
        recreateReactContextInBackgroundFromBundleLoader();
                        }
                      }
                    });
              }
            });
      }
      return;
    }
我们找到recreateReactContextInBackgroundFromBundleLoader继续往下:
 private void recreateReactContextInBackgroundFromBundleLoader() {
    recreateReactContextInBackground(
        new JSCJavaScriptExecutor.Factory(mJSCConfig.getConfigMap()),
        mBundleLoader);
  }
然后看到recreateReactContextInBackground方法:
private void recreateReactContextInBackground(
      JavaScriptExecutor.Factory jsExecutorFactory,
      JSBundleLoader jsBundleLoader) {
    UiThreadUtil.assertOnUiThread();

    ReactContextInitParams initParams =
        new ReactContextInitParams(jsExecutorFactory, jsBundleLoader);
    if (mReactContextInitAsyncTask == null) {
      // No background task to create react context is currently running, create and execute one.
      mReactContextInitAsyncTask = new ReactContextInitAsyncTask();
      mReactContextInitAsyncTask.executeOnExecutor(AsyncTask.THREAD_POOL_EXECUTOR, initParams);
    } else {
      // Background task is currently running, queue up most recent init params to recreate context
      // once task completes.
      mPendingReactContextInitParams = initParams;
    }
  }
recreateReactContextInBackground这就是我们今天需要找的方法,传递了两个参数:一个是执行js代码的线程池、另外一个是我们bundle文件的加载器(bundle文件可以是我们的npm服务器中的文件(debug模式),也可以是我们assert目录中的bundle文件(发布版))。
既然如此,那我们热更新方案是不是可以这样呢?
1、请求服务器接口,当接口中返回的版本号跟我们rn中存储的版本号不一致的时候,那么这个时候就需要更新版本了。
2、服务器接口返回一个jsbundle文件的下载地址,然后我们app中拿到地址下载到本地,替换掉当前版本的jsbundle文件。
3、重新执行一下recreateReactContextInBackground方法,让app重新加载新的jsbundle文件。
好啦~! 有了思路以后,我们就可以写我们的代码了:
首先,我们模拟一个后台接口:
{
    "url": "/business/version",
    "method": "post",
    "response": {
      "code": "0",
      "message": "请求成功",
      "body": {
        "versionName": "2.0.0",
        "description":"添加了热更新功能",
        "url":"http://www.baidu.com"
      }
    }
  },
然后在我们的rn中我们对应定义了一个常量叫version:
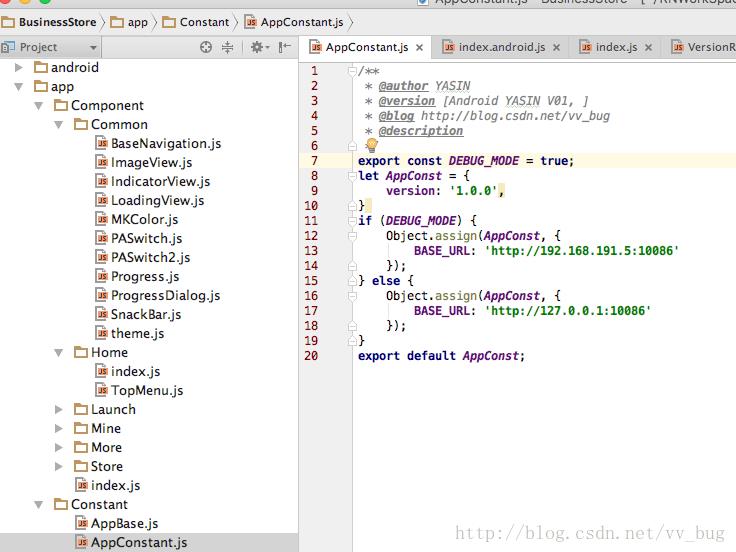
可以看到我们rn中定义的为1.0.0,所以待会我去请求接口,当接口返回的2.0.0不等于1.0.0的时候,我就去下载更新bundle文件了,于是在我们rn主页面的时候,我们就发送一个请求,然后做判断:
componentDidMount() {
        this._versionCheck();
    }

    _versionCheck() {
        this.versionRequest = new HomeMenuRequest(null, 'POST');
        this.versionRequest.start((version)=> {
            version = version.body;
            if (version && version.versionName != AppConstant.version) {
                if (Platform.OS == 'android') {
                    Alert.alert(
                        '发现新版本,是否升级?',
                        `版本号: ${version.versionName}\\n版本描述: ${version.description}`,
                        [
                            {
                                text: '是',
                                onPress: () => {
                                    this.setState({
                                        currProgress: Math.random() * 80,
                                        modalVisible: true
                                    });

                                    NativeModules.UpdateAndroid.doUpdate('index.android.bundle_2.0', (progress)=> {
                                        let pro = Number.parseFloat('' + progress);
                                        if (pro >= 100) {
                                            this.setState({
                                                modalVisible: false,
                                                currProgress: 100
                                            });
                                        } else {
                                            this.setState({
                                                currProgress: pro
                                            });
                                        }
                                    });
                                }
                            },
                            {
                                text: '否'
                            }
                        ]
                    )
                }
            }
        }, (erroStr)=> {

        });
    }
}
会弹出一个对话框:

当我们点击是的时候:
 NativeModules.UpdateAndroid.doUpdate('index.android.bundle_2.0', (progress)=> {
                                        let pro = Number.parseFloat('' + progress);
                                        if (pro >= 100) {
                                            this.setState({
                                                modalVisible: false,
                                                currProgress: 100
                                            });
                                        } else {
                                            this.setState({
                                                currProgress: pro
                                            });
                                        }
                                    });
我们执行了native中的doUpdate并传递了两个参数,一个是下载地址,一个是当native完成热更新后的回调:
NativeModules.UpdateAndroid.doUpdate()这里声明一下,因为我这边用的服务器是mock的服务器,所以没法放一个文件到服务器上,我就直接把需要下载的bundle_2.0放在了跟1.0同级的一个目录中了,然后我们去copy 2.0到内存卡(模拟从网络上获取),替换掉1.0的版本。
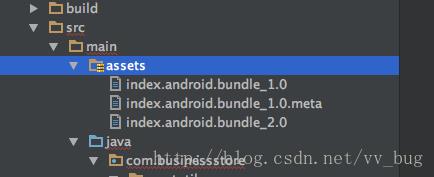
再次声明,我们发布apk的时候需要把本地的js文件打成bundle,然后丢到assets目录中,所以最初的版本应该是index.android.bundle_1.0,这里出现了一个index.android.bundle_2.0是为了模拟从服务器下载,我就直接丢在了assert目录了(正常这个文件是在我们的远程服务器中的)。
如果还不知道怎么发布apk的童鞋可以去看我前面的一篇博客:
接下来就看看我们native的代码如何实现了….
我就直接拿发布版的例子来说了,我们首先看看我们的MainApplication中该怎么写:
public class MainApplication extends Application implements ReactApplication {
    private static final String FILE_NAME = "index.android";

    private final ReactNativeHost mReactNativeHost = new ReactNativeHost(this) {
        @Override
        protected boolean getUseDeveloperSupport() {
            //这里返回false的话即为发布版,否则为测试版
            //发布版的话,app默认就会去assert目录中找bundle文件,
            // 如果为测试版的话,就回去npm服务器上获取bundle文件
            return false;
        }

        @Override
        protected List<ReactPackage> getPackages() {
            return Arrays.<ReactPackage>asList(
                    new MainReactPackage(),
                    new VersionAndroidPackage(),
                    new UpdateAndroidPackage()
            );
        }
        @Nullable
        @Override
        protected String getJSBundleFile() {
            File file = new File(getExternalCacheDir(), FILE_NAME);
            if (file != null && file.length() > 0) {
                return file.getAbsolutePath();
            }
            return super.getJSBundleFile();
        }
    };

    @Override
    public ReactNativeHost getReactNativeHost() {
        return mReactNativeHost;
    }

    @Override
    public void onCreate() {
        super.onCreate();
        copyBundle();
        SoLoader.init(this, /* native exopackage */ false);
    }

    private void copyBundle(){
        if (!Environment.getExternalStorageState().equals(Environment.MEDIA_MOUNTED)) {
            return;
        }
        File file = new File(getExternalCacheDir(), FILE_NAME);
        if (file != null && file.length() > 0) {
            return;
        }
        BufferedInputStream bis = null;
        BufferedOutputStream bos = null;
        try {
            bis = new BufferedInputStream(getAssets().open("index.android.bundle_1.0"));
            bos = new BufferedOutputStream(new FileOutputStream(file));
            int len = -1;
            byte[] buffer = new byte[512];
            while ((len = bis.read(buffer)) != -1) {
                bos.write(buffer, 0, len);
                bos.flush();
            }
        } catch (Exception e) {
            e.printStackTrace();
        } finally {
            try {
                if (bis != null) {
                    bis.close();
                }
                if (bos != null) {
                    bos.close();
                }
            } catch (IOException e) {
                e.printStackTrace();
            }
        }
    }
}
可以看到我们多重写了一个方法,然后还写了一段copy bundle文件到内存卡的代码:
 @Nullable
        @Override
        protected String getJSBundleFile() {
            File file = new File(getExternalCacheDir(), FILE_NAME);
            if (file != null && file.length() > 0) {
                return file.getAbsolutePath();
            }
            return super.getJSBundleFile();
        }
    };
因为rn默认是去assert目录中加载bundle文件的,当指定了bundle文件的地址后,rn会去加载我们指定的目录。所以当我们第一次运行app的时候,我们首先把assert中的bundle文件拷贝到了内存卡,然后让rn去内存卡中加在bundle文件。
好啦~~!!此时的rn已经知道去内存卡中加载bundle文件了,我们要做的就是:
1、根据rn 中传递的地址去下载最新的bundle文件。
2、替换掉内存卡中的bundle文件。
3、调用createReactContextInBackground方法重新加载bundle文件。
至于rn怎么去跟native交互,我这里简单的说一下哈:
首先我们需要建一个叫UpdateAndroid去继承ReactContextBaseJavaModule,然后注释声明为react的module:
@ReactModule(name = "UpdateAndroid")
public class UpdateAndroid extends ReactContextBaseJavaModule {
然后重写里面的一个叫getName的方法给这个module取一个名字:
  @Override
    public String getName() {
        return "UpdateAndroid";
    }
最后声明一个类方法,让rn调取:
@ReactMethod
    public void doUpdate(String url, Callback callback) {
        if (task == null) {
            task = new UpdateTask(callback);
            task.execute("index.android.bundle_2.0");
        }
    }
全部代码:
@ReactModule(name = "UpdateAndroid")
public class UpdateAndroid extends ReactContextBaseJavaModule {
private UpdateTask task;
public UpdateAndroid(ReactApplicationContext reactContext) {
super(reactContext);
}
@ReactMethod
public void doUpdate(String url, Callback callback) {
if (task == null) {
task = new UpdateTask(callback);
task.execute("index.android.bundle_2.0");
}
}
@Override
public String getName() {
return "UpdateAndroid";
}
private class UpdateTask extends AsyncTask<String, Float, File> {
private Callback callback;
private static final String FILE_NAME = "index.android";
private UpdateTask(Callback callback) {
this.callback = callback;
}
@Override
protected File doInBackground(String... params) {
return downloadBundle(params[0]);
}
@Override
protected void onProgressUpdate(Float... values) {
// if (callback != null && values != null && values.length > 0){
// callback.invoke(values[0]);
// Log.e("TAG", "progress-->" + values[0]);
// }
}
@Override
protected void onPostExecute(File file) {
if (callback != null) callback.invoke(100f);
//重写初始化rn组件
onJSBundleLoadedFromServer(file);
}
private void onJSBundleLoadedFromServer(File file) {
if (file == null || !file.exists()) {
Log.i(TAG, "download error, check URL or network state");
return;
}
Log.i(TAG, "download success, reload js bundle");
Toast.makeText(getCurrentActivity(), "Downloading complete", Toast.LENGTH_SHORT).show();
try {
ReactApplication application = (ReactApplication) getCurrentActivity().getApplication();
Class<?> RIManagerClazz = application.getReactNativeHost().getReactInstanceManager().getClass();
Method method = RIManagerClazz.getDeclaredMethod("recreateReactContextInBackground",
JavaScriptExecutor.Factory.class, JSBundleLoader.class);
method.setAccessible(true);
method.invoke(application.getReactNativeHost().getReactInstanceManager(),
new JSCJavaScriptExecutor.Factory(JSCConfig.EMPTY.getConfigMap()),
JSBundleLoader.createFileLoader(file.getAbsolutePath()));
} catch (NoSuchMethodException e) {
e.printStackTrace();
} catch (IllegalAccessException e) {
e.printStackTrace();
} catch (InvocationTargetException e) {
e.printStackTrace();
} catch (IllegalArgumentException e) {
e.printStackTrace();
}
}
/**
* 模拟bundle下载链接url
*
* @param url
*/
private File downloadBundle(String url) {
if (!Environment.getExternalStorageState().equals(Environment.MEDIA_MOUNTED)) {
return null;
}
//删除以前的文件
File file = new File(getReactApplicationContext().getExternalCacheDir(), FILE_NAME);
if (file != null && file.length() > 0) {
f以上是关于React-Native 热更新尝试(Android)的主要内容,如果未能解决你的问题,请参考以下文章
Hot Reload 在 react-native android 中不起作用