Android布局管理器-使用LinearLayout实现简单的登录窗口布局
Posted 公众号:霸道的程序猿
tags:
篇首语:本文由小常识网(cha138.com)小编为大家整理,主要介绍了Android布局管理器-使用LinearLayout实现简单的登录窗口布局相关的知识,希望对你有一定的参考价值。
场景
android布局管理器-从实例入手学习相对布局管理器的使用:
https://blog.csdn.net/BADAO_LIUMANG_QIZHI/article/details/103838924
线性布局LinearLayout,分为水平和垂直线性布局。
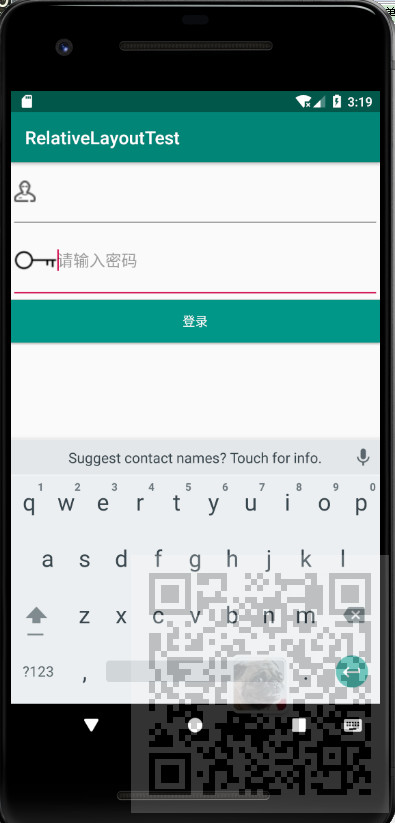
实现效果如下

注:
博客:
https://blog.csdn.net/badao_liumang_qizhi
关注公众号
霸道的程序猿
获取编程相关电子书、教程推送与免费下载。
实现
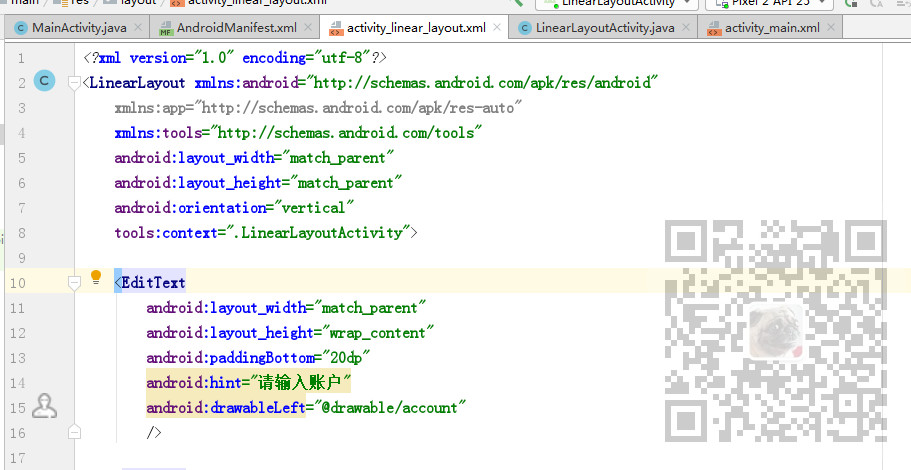
将activity修改为LinearLayout布局

并且通过
android:orientation="vertical"
设置其为竖直线型布局。
然后添加两个输入框分别为用户名和密码
通过
android:hint="请输入账户"
设置输入框提示文本
通过
android:drawableLeft="@drawable/account"
设置输入框左边的图片
这里的图片是放在res下的drawable目录下

然后添加一个按钮,设置其颜色。
完整示例代码
<?xml version="1.0" encoding="utf-8"?>
<LinearLayout xmlns:android="http://schemas.android.com/apk/res/android"
    xmlns:app="http://schemas.android.com/apk/res-auto"
    xmlns:tools="http://schemas.android.com/tools"
    android:layout_width="match_parent"
    android:layout_height="match_parent"
    android:orientation="vertical"
    tools:context=".LinearLayoutActivity">

    <EditText
        android:layout_width="match_parent"
        android:layout_height="wrap_content"
        android:paddingBottom="20dp"
        android:hint="请输入账户"
        android:drawableLeft="@drawable/account"
        />

    <EditText
        android:layout_width="match_parent"
        android:layout_height="wrap_content"
        android:paddingBottom="20dp"
        android:hint="请输入密码"
        android:drawableLeft="@drawable/pass"
        />
    <Button
        android:layout_width="match_parent"
        android:layout_height="wrap_content"
        android:text="登录"
        android:textColor="#FFFFFF"
        android:background="#FF009688"
        />

</LinearLayout>
以上是关于Android布局管理器-使用LinearLayout实现简单的登录窗口布局的主要内容,如果未能解决你的问题,请参考以下文章
Android布局管理器-从实例入手学习相对布局管理器的使用
Android布局管理器-使用LinearLayout实现简单的登录窗口布局
Android Studio入门:Android应用界面详解(上)(View布局管理器)