httpd.2.4虚拟主机配置测试
Posted
tags:
篇首语:本文由小常识网(cha138.com)小编为大家整理,主要介绍了httpd.2.4虚拟主机配置测试相关的知识,希望对你有一定的参考价值。
测试目标:
三个虚拟主机,要求如下
vhost1: phpMyAdmin, 同时提供https服务;
vhost2: wordpress
配置过程:
一、配置vhost1
1、首先配置vhost1,先搭建私有CA
在172.16.20.242上搭建私有CA:
(1) 创建私钥,公钥无需处理
[[email protected] ~]# cd /etc/pki/CA/
[[email protected] CA]# (umask 077;openssl genrsa -out private/cakey.pem 2048)
Generating RSA private key, 2048 bit long modulus
.....+++
.......+++
e is 65537 (0x10001)

(2) 生成自签证书,填写相关证书信息
[[email protected] CA]# (umask 077;openssl genrsa -out private/cakey.pem 2048)
Generating RSA private key, 2048 bit long modulus
.....+++
.......+++
e is 65537 (0x10001)
[[email protected] CA]# openssl req -new -x509 -key private/cakey.pem -out cacert.pem -days 3655
You are about to be asked to enter information that will be incorporated
into your certificate request.
What you are about to enter is what is called a Distinguished Name or a DN.
There are quite a few fields but you can leave some blank
For some fields there will be a default value,
If you enter '.', the field will be left blank.
-----
Country Name (2 letter code) [XX]:CN
State or Province Name (full name) []:Hubei
Locality Name (eg, city) [Default City]:Hubei
Organization Name (eg, company) [Default Company Ltd]:Gump Ltd
Organizational Unit Name (eg, section) []:Ops
Common Name (eg, your name or your server's hostname) []:ca.gump.com
Email Address []:[email protected]
[[email protected] CA]#
// 需要注意的是,证书格式必须为pem格式

(3)创建签署证书环境
[[email protected] CA]# touch /etc/pki/CA/index.txt
[[email protected] CA]# touch /etc/pki/CA/serial
[[email protected] CA]# echo 01 > /etc/pki/CA/serial
2、在web主机上生成证书请求,并发送证书请求到CA主机
在172.16.20.244生成证书请求:
(1)生成密钥,并保存到应用此证书的服务的配置文件目录下
[[email protected] ~]#  mkdir /etc/httpd/ssl
[[email protected] ~]#  cd /etc/httpd/ssl
[[email protected] ssl]# (umask 077;openssl genrsa -out httpd.key 2048)
Generating RSA private key, 2048 bit long modulus
..........+++
....................................................................+++
e is 65537 (0x10001)
[[email protected] ssl]# ls
httpd.key

(2) 生成证书签署请求,填写相关信息需要注意的是,除了主机地址和邮箱地址,其它需要保持一致
[[email protected] ssl]# openssl req -new -key httpd.key -out httpd.csr
You are about to be asked to enter information that will be incorporated
into your certificate request.
What you are about to enter is what is called a Distinguished Name or a DN.
There are quite a few fields but you can leave some blank
For some fields there will be a default value,
If you enter '.', the field will be left blank.
-----
Country Name (2 letter code) [XX]:CN
State or Province Name (full name) []:Hubei
Locality Name (eg, city) [Default City]:Hubei
Organization Name (eg, company) [Default Company Ltd]:Gump Ltd
Organizational Unit Name (eg, section) []:Ops
Common Name (eg, your name or your server's hostname) []:web.gump.com
Email Address []:[email protected]

Please enter the following 'extra' attributes
to be sent with your certificate request
A challenge password []:
An optional company name []:
[[email protected] ssl]# ls
httpd.csr  httpd.key
[[email protected] ssl]# scp httpd.csr [email protected]:/tmp/
[email protected]'s password:
httpd.csr                                                          100% 1050     1.0KB/s   00:00
[[email protected] ssl]#
3、签署证书请求,将证书请求发送回web主机
(1)签署证书请求
[[email protected] CA]# openssl ca -in /tmp/httpd.csr -out /tmp/web.gump.com.crt -days 365
Using configuration from /etc/pki/tls/openssl.cnf
Check that the request matches the signature
Signature ok
Certificate Details:
        Serial Number: 1 (0x1)
        Validity
            Not Before: Aug 23 10:55:56 2017 GMT
            Not After : Aug 23 10:55:56 2018 GMT
        Subject:
            countryName               = CN
            stateOrProvinceName       = Hubei
            organizationName          = Gump Ltd
            organizationalUnitName    = Ops
            commonName                = web.gump.com
            emailAddress              = [email protected]
        X509v3 extensions:
            X509v3 Basic Constraints:
                CA:FALSE
            Netscape Comment:
                OpenSSL Generated Certificate
            X509v3 Subject Key Identifier:
                7A:D2:B5:60:3D:13:27:33:C4:F5:02:DC:AC:44:BB:0F:F9:32:00:71
            X509v3 Authority Key Identifier:
                keyid:5A:9A:54:2F:9C:91:3E:D6:BE:CC:22:68:50:C6:83:EB:23:AD:AC:AF

Certificate is to be certified until Aug 23 10:55:56 2018 GMT (365 days)
Sign the certificate? [y/n]:y


1 out of 1 certificate requests certified, commit? [y/n]y
Write out database with 1 new entries
Data Base Updated
[[email protected] CA]#
(2)将证书传回请求者
[[email protected] CA]# scp /tmp/web.gump.com.crt [email protected]:/etc/httpd/ssl
The authenticity of host '172.16.20.244 (172.16.20.244)' can't be established.
RSA key fingerprint is 5a:10:33:a2:bf:5b:06:82:25:01:fb:c2:74:93:34:95.
Are you sure you want to continue connecting (yes/no)? yes
Warning: Permanently added '172.16.20.244' (RSA) to the list of known hosts.
[email protected]'s password:
web.gump.com.crt                                                   100% 4595     4.5KB/s   00:00
[[email protected] CA]#
4、配置httpd支持使用ssl
(1)查看当前web主机是否已安装mod_ssl模块,如果没有安装,则必须先安装mod_ssl模块
(2)配置ssl配置文件
[[email protected] ssl]# vim /etc/httpd/conf.d/ssl.conf
修改如下选项:
<VirtuaHost 172.16.20.244:443>
// 因为ssl会话是基于IP地址建立的,若有多个IP地址,则需指定地址,若只有一个地址,则无需修
改,保持"*"即可;
DocumentRoot "/www/htdocs"
// 此目录为虚拟主机vhost1的中心目录,即网页文件存放位置
ServerName web.gump.com:443
// 当前主机名
ErrorLog /logs/pma_error_log
// 错误日志存放位置
Transferlog logs/pma_access_log
// 访问日志存放目录
SSLCertificateFile /etc/httpd/ssl/web.gump.com.crt
// 服务器证书存放目录
SSlCertificateKeyFile /etc/httpd/ssl/httpd.key
// 证书私钥存放目录
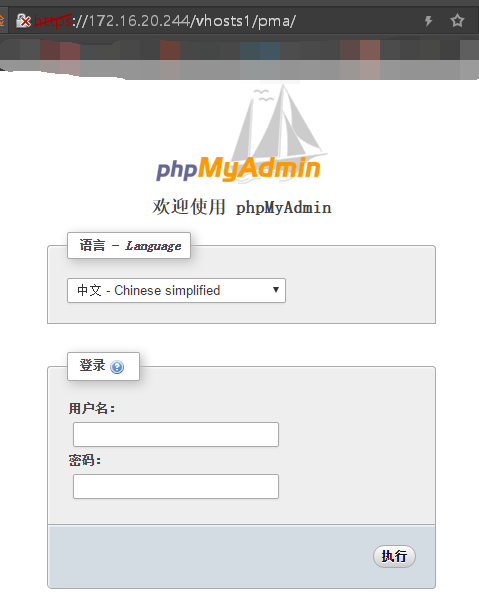
(3)配置phpMyadmin网页文件
[[email protected]  ~]#    mkdir -pv /www/htdocs/vhosts{1,2,3}
[[email protected] ~]#  unzip phpMyAdmin-4.0.10.20-all-languages.zip
[[email protected] ~]#  cp phpMyAdmin-4.0.10.20-all-languages /www/htdocs/vhosts1/
[[email protected]  ~]#    ln -sv phpMyAdmin-4.0.10.20-all-languages pma
(4)配置httpd.conf
[[email protected] conf]# vim httpd.conf
ServerName Localhost:80
DocumentRoot "/www/htdocs"
<Directory "/www/htdocs">
// Directory 指定的目录要和DocumentRoot一致
(5)配置虚拟主机配置文件
[[email protected] ~]#  vim /etc/httpd/conf.d/httpd-vhost1.conf
<VirtualHost 172.16.20.244:80>
  ServerAdmin web.gump.com
  DocumentRoot "/www/htdocs"
  <Directory "/www/htdocs/vhosts1/pma">
    Options None
    AllowOverride None
    Require all granted
  </Directory>
</VirtualHost>
[[email protected] ~]#   systemctl reload httpd.service
查看配置效果
二、配置虚拟主机2
1、配置虚拟主机2的配置文件
[[email protected] ~]#   vim /etc/httpd/conf.d/httpd-vhost2.conf
<VirtualHost 172.16.20.245:80>
  ServerAdmin web2.gump.com
  DocumentRoot "/www/htdocs"
  <Directory "/www/htdocs/vhosts2">
    Options None
    AllowOverride None
    Require all granted
  </Directory>
</VirtualHost>
2、为虚拟主机2配置IP地址
由于是虚拟机,没有多张网卡使用ip命令添加地址达到多IP效果
[[email protected] ~]#   ip addr add 172.16.20.245/24 dev ens33
[[email protected] ~]#   ip addr show dev ens33
[[email protected] ~]# ip add show dev ens33
2: ens33: <BROADCAST,MULTICAST,UP,LOWER_UP> mtu 1500 qdisc pfifo_fast state UP qlen 1000
    link/ether 00:0c:29:44:e2:e3 brd ff:ff:ff:ff:ff:ff
    inet 172.16.20.244/24 brd 172.16.20.255 scope global ens33
       valid_lft forever preferred_lft forever
    inet 172.16.20.245/24 scope global secondary ens33
       valid_lft forever preferred_lft forever
    inet6 fe80::d846:2237:6188:97fe/64 scope link tentative dadfailed
       valid_lft forever preferred_lft forever
    inet6 fe80::a0de:8503:69c8:5595/64 scope link tentative dadfailed
       valid_lft forever preferred_lft forever
    inet6 fe80::9a1a:88f0:c9cf:41bd/64 scope link tentative dadfailed
       valid_lft forever preferred_lft forever
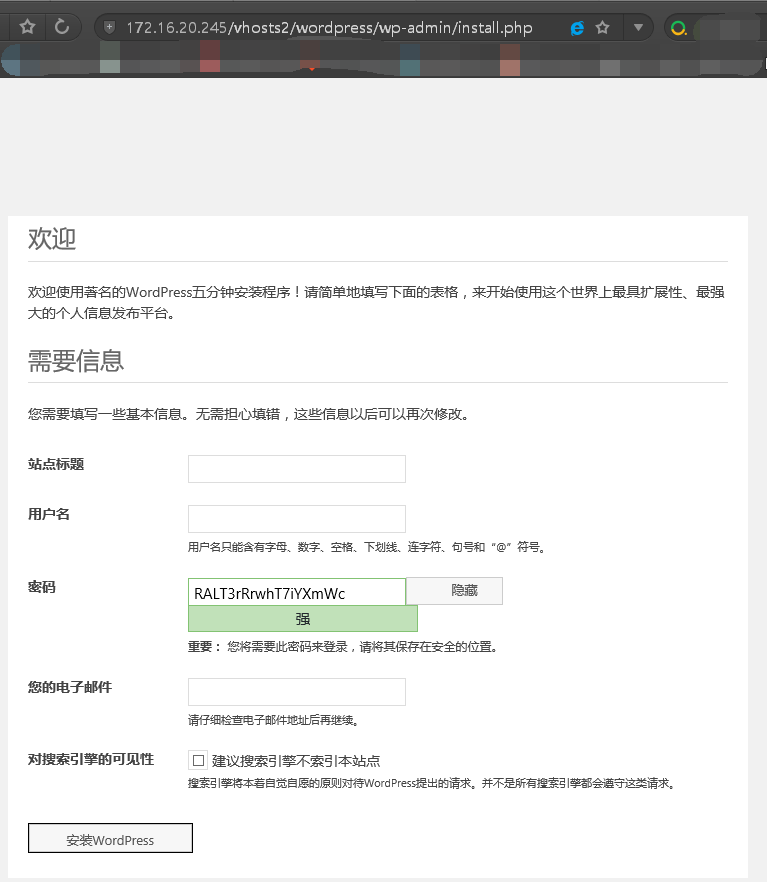
3、配置虚拟主机2的网页文件
[[email protected] ~]#  unzip wordpress-4.7.4-zh_CH.zip
[[email protected] ~]#  cp wordpress /www/htdocs/vhosts2/
4、配置虚拟主机2的wordpress的配置文件
[[email protected] ~]# mysql
MariaDB [(none)]> CREATE DATABASE mydb1;
MariaDB [(none)]> exit
// 连接wordpress必须要配置正确的数据库及用户名密码,所以需要实现创建好数据库
[[email protected] ~]#   cd /www/htdocs/vhost2/wordpress
[[email protected] ~]#   cp wp-config-sample.php wp-config.php
[[email protected] ~]#   vim wp-config.php
define('DB_NAME','mydb1');  // 数据库为事先创建好的mydb1
define('DB_USER','root');   // 用户名为root
define('DB_PASSWORD','');   // root密码默认为空
5、查看配置效果
写的比较潦草,如有遗漏错误和争议之处,欢迎大家的批评指正和讨论,谢谢。
以上是关于httpd.2.4虚拟主机配置测试的主要内容,如果未能解决你的问题,请参考以下文章
基于httpd-2.2和httpd-2.4配置虚拟主机web站点,并提供https服务

