|
我们知道,Maven仓库包括本地仓库和远程仓库,而远程仓库又包括中央仓库,私服,Jboss仓库和Java.net仓库等。
私服,即私有的仓库服务器,它不仅可以降低中央仓库负荷,节省外网带宽,还可以加速Maven构建,自己部署构件等,从而高效地使用Maven。对于私服,我们可以使用仓库管理软件来创建自己的私有仓库服务器。目前网上流行的仓库管理软件有Apache的Achiva,JFrog的Artifactory和Sonatype的Nexus。由于当前Nexus是最流行的仓库管理软件,因此,我们这里采用Nexus。
Nexus的安装很简单,只需从http://nexus.sonatype.org/downloads下载最新的版本即可。需要注意的是官网向我们提供了两种安装方式,一种是自带Web容器(Jetty)的Bundle包,另外一种是war包。(可以直接部署到Tomcat等Web容器中)
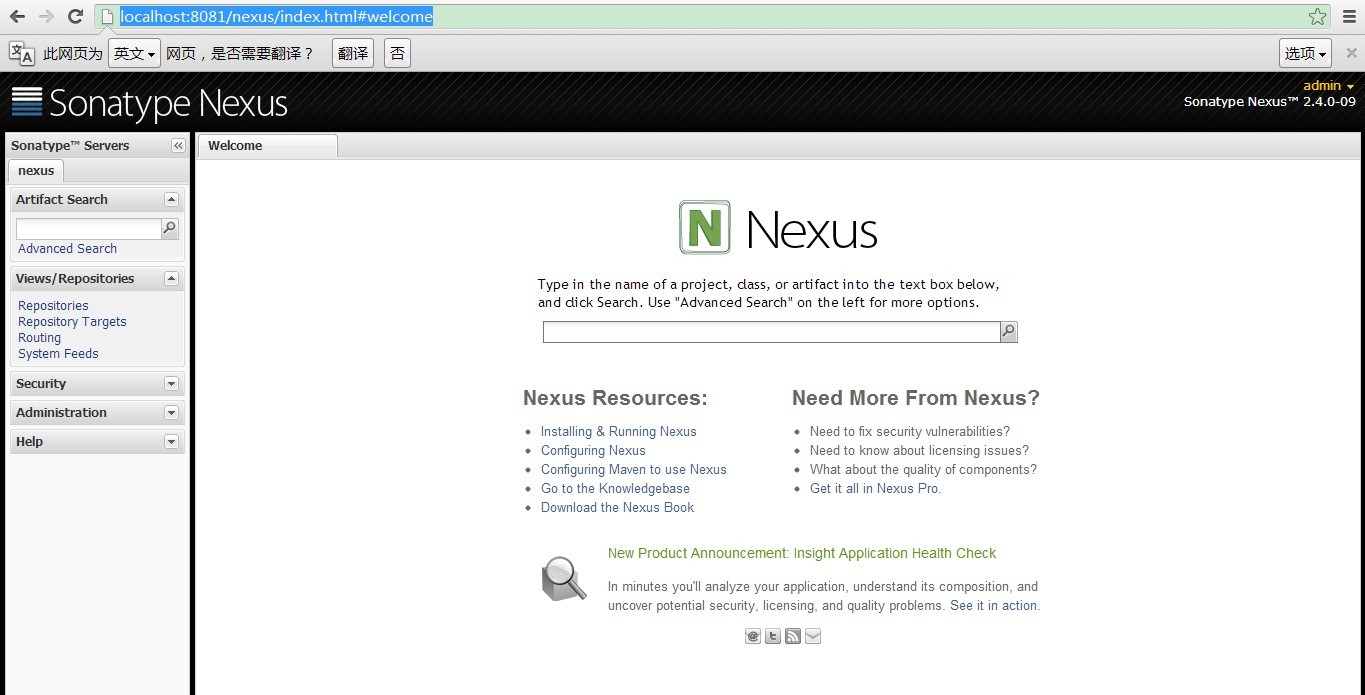
假设下载的是Bundle包,解压到指定目录后(笔者的目录是E:\\sonatype-nexus),进入目录E:\\sonatype-nexus\\nexus-2.4.0-09-bundle\\nexus-2.4.0-09\\bin\\jsw\\windows-x86-32\\,找到脚本文件console-nexus.bat,打开并运行。如果没有出现错误,打开浏览器输入http://localhost:8081/nexus/index.html#welcome,可以看到nexus的欢迎界面:
![]()
默认情况下是匿名登录该网站,只能享受浏览,搜索等功能。如果想拥有更多控制能力,可以点击右上角的Login in进行登录,Nexus内置了一个管理员账户,用户名是admin,密码是admin123。
下面开始创建自己的宿主仓库,目的是为了将自己编写的构件部署到该仓库中,供组织其它成员下载。
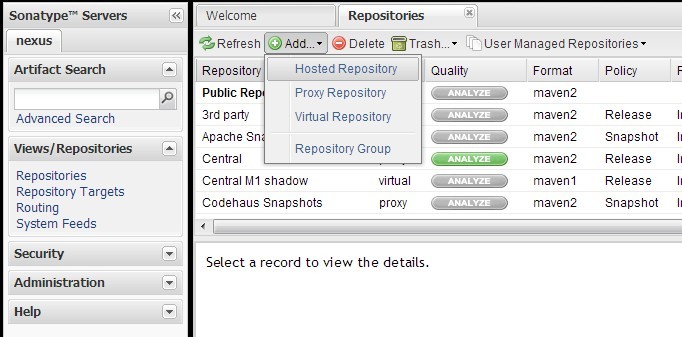
用管理员账户登录之后,在左边导航栏框中找到Repositories,点击后,在右框中选择Add按钮,弹出的菜单中选择Hosted Repository,表示添加宿主仓库。
在新建宿主仓库表中,填写仓库的ID,Name以及仓库策略(release表示发布版构件,snapshot表示快照版构件),比如:
 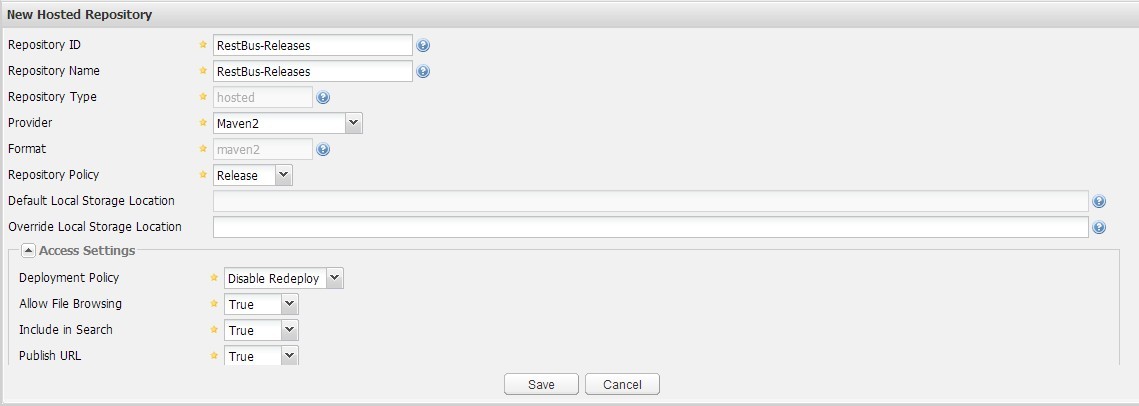
点击save按钮,完成策略为Release的宿主仓库创建。
同理,创建策略为Snapshot的宿主仓库。
 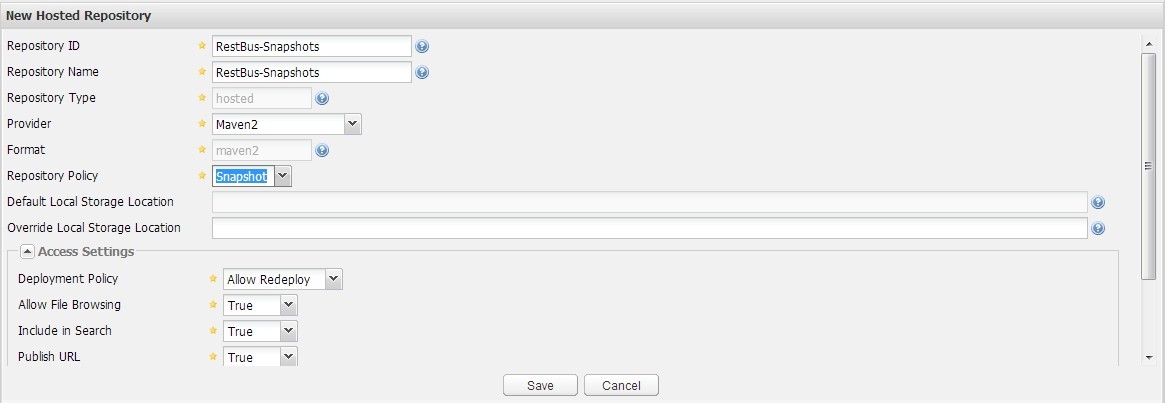
至此,我们的宿主仓库(包括发布版和快照版)就完成了。
接下来,需要添加权限(Privileges)
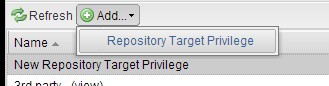
在左边导航栏的Security中找到Privileges,点击后,在右框中点击Add按钮,选择Repository Target Privilleges
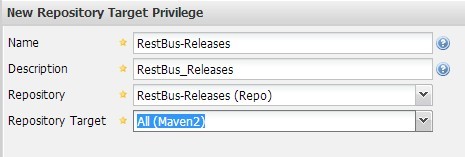
按如图所示添加发布版和快照版。
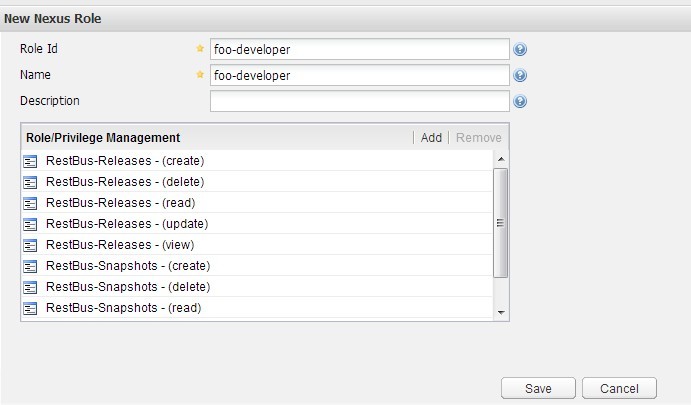
接下来创建具有相应权限的角色(Role)
最后创建用户。

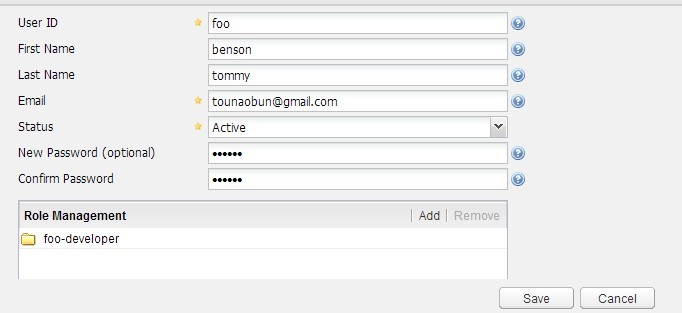
这里需要注意的是,User ID就是远程仓库的username,password就是远程仓库的password。
至此,宿主仓库就算完成了。
因为远程仓库需要安全认证,所以需要在settings.xml中进行配置。
打开settings.xml,在settings根标签下添加如下内容:
- <server>
- <id>pro-snapshot</id>
- <username>foo</username>
- <password>123456</password>
- </server>
-
- <server>
- <id>pro-release</id>
- <username>foo</username>
- <password>123456</password>
- </server>
这里的用户名和密码对应之前创建的user的userId和password。即foo和123456。另外,id元素对应pom.xml中distributionManagement里的id元素。之后会给出相应的代码。
安全认证配置好后,接下来打开你要部署的maven项目的pom.xml,在project元素下添加如下内容:
- <distributionManagement>
- <repository>
- <id>pro-release</id>
- <name>Proj Release Repository</name>
- <url>http://localhost:8081/nexus/content/repositories/RestBus-Releases</url>
- </repository>
-
- <snapshotRepository>
- <id>pro-snapshot</id>
- <name>Proj Snapshot Repository</name>
- <url>http://localhost:8081/nexus/content/repositories/RestBus-Snapshots</url>
- </snapshotRepository>
- </distributionManagement>
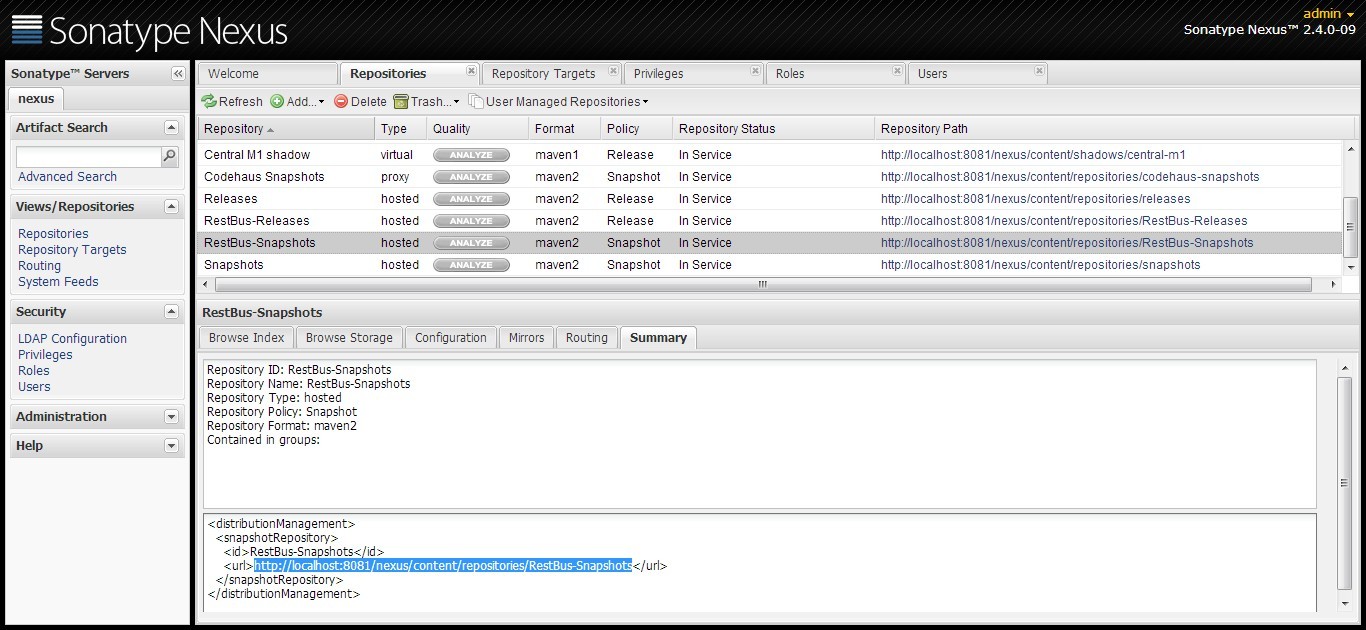
这里在distributionManagement元素下添加了发布版仓库和快照版仓库,它们的id对应之前在settings.xml中server的id。url为仓库地址,该url可以在nexus的repositories中找到:

最后一步,打开命令提示符窗口,定位到maven根目录下(和pom.xml同目录),执行maven命令:
mvn clean deploy
如果配置没有错误,会出现以下类似打印信息:
- [INFO] Scanning for projects...
- [INFO]
- [INFO] ------------------------------------------------------------------------
- [INFO] Building bus-location 1.0
- [INFO] ------------------------------------------------------------------------
- [INFO]
- [INFO] --- maven-clean-plugin:2.4.1:clean (default-clean) @ bus-location ---
- [INFO] Deleting G:\\bus-location\\target
- [INFO]
- [INFO] --- maven-resources-plugin:2.5:resources (default-resources) @ bus-location ---
- [debug] execute contextualize
- [INFO] Using \'UTF-8\' encoding to copy filtered resources.
- [INFO] skip non existing resourceDirectory G:\\bus-location\\src\\main\\resources
- [INFO]
- [INFO] --- maven-compiler-plugin:2.3.2:compile (default-compile) @ bus-location ---
- [INFO] Compiling 1 source file to G:\\bus-location\\target\\classes
- [INFO]
- [INFO] --- maven-resources-plugin:2.5:testResources (default-testResources) @ bus-location ---
- [debug] execute contextualize
- [INFO] Using \'UTF-8\' encoding to copy filtered resources.
- [INFO] skip non existing resourceDirectory G:\\bus-location\\src\\test\\resources
- [INFO]
- [INFO] --- maven-compiler-plugin:2.3.2:testCompile (default-testCompile) @ bus-location ---
- [INFO] Compiling 1 source file to G:\\bus-location\\target\\test-classes
- [INFO]
- [INFO] --- maven-surefire-plugin:2.10:test (default-test) @ bus-location ---
- [INFO] Surefire report directory: G:\\bus-location\\target\\surefire-reports
-
- -------------------------------------------------------
- T E S T S
- -------------------------------------------------------
- Running zjut.edu.soft.bus.AppTest
- Tests run: 1, Failures: 0, Errors: 0, Skipped: 0, Time elapsed: 0.016 sec
-
- Results :
-
- Tests run: 1, Failures: 0, Errors: 0, Skipped: 0
-
- [INFO]
- [INFO] --- maven-jar-plugin:2.3.2:jar (default-jar) @ bus-location ---
- [INFO] Building jar: G:\\bus-location\\target\\bus-location-1.0.jar
- [INFO]
- [INFO] --- maven-install-plugin:2.3.1:install (default-install) @ bus-location ---
- [INFO] Installing G:\\bus-location\\target\\bus-location-1.0.jar to C:\\Users\\tsw\\.m2\\repository\\zjut\\edu\\soft\\bus\\bus-location\\1.0\\bus-location-1.0.jar
- [INFO] Installing G:\\bus-location\\pom.xml to C:\\Users\\tsw\\.m2\\repository\\zjut\\edu\\soft\\bus\\bus-location\\1.0\\bus-location-1.0.pom
- [INFO]
- [INFO] --- maven-deploy-plugin:2.7:deploy (default-deploy) @ bus-location ---
- Uploading: http://localhost:8081/nexus/content/repositories/RestBus-Releases/zjut/edu/soft/bus/bus-location/1.0/bus-location-1.0.jar
- 2/3 KB
- 3/3 KB
-
- Uploaded: http://localhost:8081/nexus/content/repositories/RestBus-Releases/zjut/edu/soft/bus/bus-location/1.0/bus-location-1.0.jar (3 KB at 7.3 KB/sec)
- Uploading: http://localhost:8081/nexus/content/repositories/RestBus-Releases/zjut/edu/soft/bus/bus-location/1.0/bus-location-1.0.pom
- 2/2 KB
-
- Uploaded: http://localhost:8081/nexus/content/repositories/RestBus-Releases/zjut/edu/soft/bus/bus-location/1.0/bus-location-1.0.pom (2 KB at 10.1 KB/sec)
- Downloading: http://localhost:8081/nexus/content/repositories/RestBus-Releases/zjut/edu/soft/bus/bus-location/maven-metadata.xml
-
- Uploading: http://localhost:8081/nexus/content/repositories/RestBus-Releases/zjut/edu/soft/bus/bus-location/maven-metadata.xml
- 305/305 B
-
- Uploaded: http://localhost:8081/nexus/content/repositories/RestBus-Releases/zjut/edu/soft/bus/bus-location/maven-metadata.xml (305 B at 3.1 KB/sec)
- [INFO] ------------------------------------------------------------------------
- [INFO] BUILD SUCCESS
- [INFO] ------------------------------------------------------------------------
- [INFO] Total time: 4.762s
- [INFO] Finished at: Wed May 22 13:23:16 CST 2013
- [INFO] Final Memory: 14M/33M
- [INFO] ------------------------------------------------------------------------
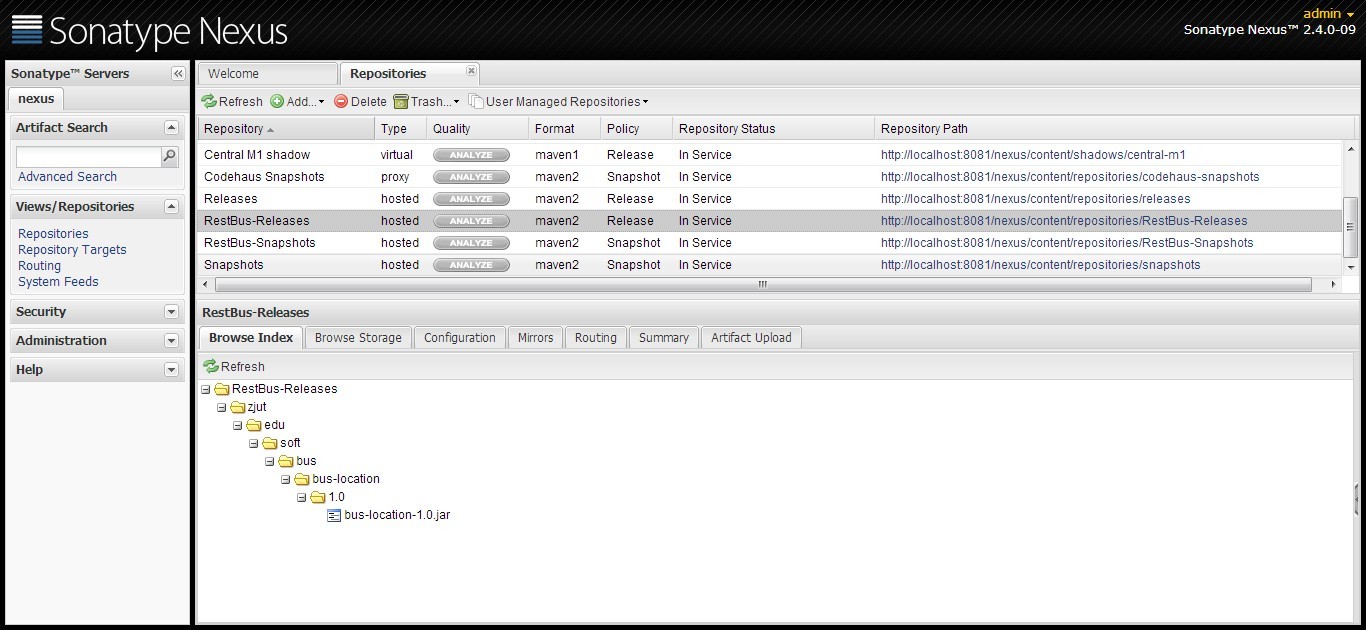
进入http://localhost:8081/nexus网页,在RestBus-Releases(因为在pom.xml中,version是1.0,不是快照版)中,可以找到刚刚部署上去的构件bus-location-1.0.jar
当然,也可以在网页上进行手工部署。
|


