HAproxy动静分离
Posted
tags:
篇首语:本文由小常识网(cha138.com)小编为大家整理,主要介绍了HAproxy动静分离相关的知识,希望对你有一定的参考价值。
(一)简述
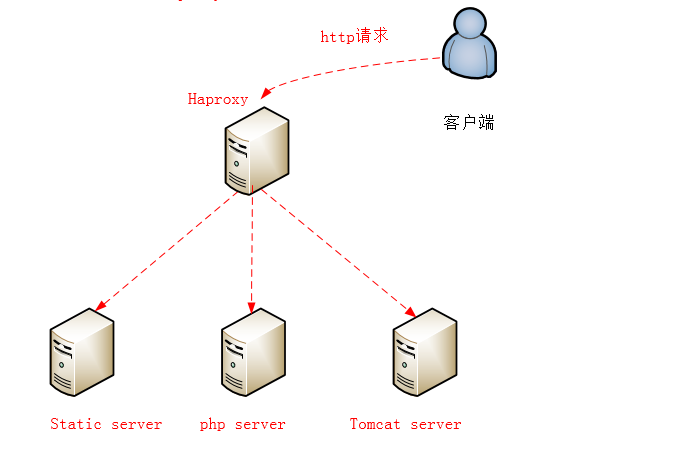
在现实的应用环境中,往往根据业务请求的不同将相关的请求指定到不同的后端服务器中,例如客户是静态资源的请求,haproxy就将请求转发给静态服务器,如果是动态的请求就转发给静态服务器,haproxy实现动静分离是通过acl匹配规则来实现这一目的。
| 服务器名称 | IP | 说明 |
| HAProxy | 192.168.180.23 | web服务器 |
| Static Server | 192.168.180.4 | 静态资源服务器(nginx代理) |
| php Server | 192.168.180.9 | php服务器(nginx代理) |
| JSP Server | 192.168.180.2 | jsp服务器 |
(二)具体的步骤:
(1)在192.168.180.4上配置static服务器
[[email protected] conf]# vim /data/index.html
<h1>192.168.180.4---static</h1>

[[email protected] conf]# vim /usr/local/nginx/conf/nginx.conf
worker_processes  1;
user appuser appuser;
error_log  /data/nginx/error.log;
events {
    worker_connections  1024;
}
http {
    include       mime.types;
    default_type  application/octet-stream;
    log_format  main  ‘$remote_addr - $remote_user [$time_local] "$request" ‘
                      ‘$status $body_bytes_sent "$http_referer" ‘
                      ‘"$http_user_agent" "$http_x_forwarded_for"‘;
   sendfile        on;
    access_log      /data/nginx/access.log;
    keepalive_timeout  65;
    gzip  on;
    server_tokens off;

 server {
         listen    80;
         server_name  192.168.180.4;
         access_log  /data/nginx/nginx.access.log;
         index   index.php  index.html index.htm;
       # root       /data/www/;
         root      /data/;
         }
     }
[[email protected] conf]# /usr/local/nginx/sbin/nginx -s reload
保存后直接加载nginx ,在浏览器上查看该页面
(2)在192.168.180.9安装配置php服务器。
[[email protected] www]# vim /www/html/www/index.php
<h1>this is 192.168.180.9---dynamic for php page</h1>
<?php
     phpinfo();
?>
[[email protected] www]# cat  /usr/local/nginx/conf/nginx.conf
worker_processes  1;
#error_log  logs/error.log  info;
#pid        logs/nginx.pid;
events {
    worker_connections  1024;
}
http {
    include       mime.types;
    default_type  application/octet-stream;
    log_format  main  ‘$remote_addr - $remote_user [$time_local] "$request" ‘
                      ‘$status $body_bytes_sent "$http_referer" ‘
                      ‘"$http_user_agent" "$http_x_forwarded_for"‘;
    access_log  logs/access.log  main;
    sendfile        on;
    tcp_nopush     on;
    keepalive_timeout  65;
    gzip  on;
   server {
       listen 80;
       location ~ .php$ {
                   root /www/html/www;
                   fastcgi_pass 127.0.0.1:9000;
                   fastcgi_index index.php;
                   fastcgi_param SCRIPT_FILENAME $document_root$fastcgi_script_name;
                    include fastcgi_params;
                 }
     }
 }
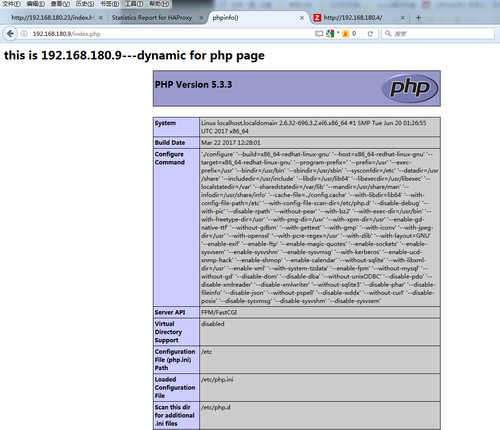
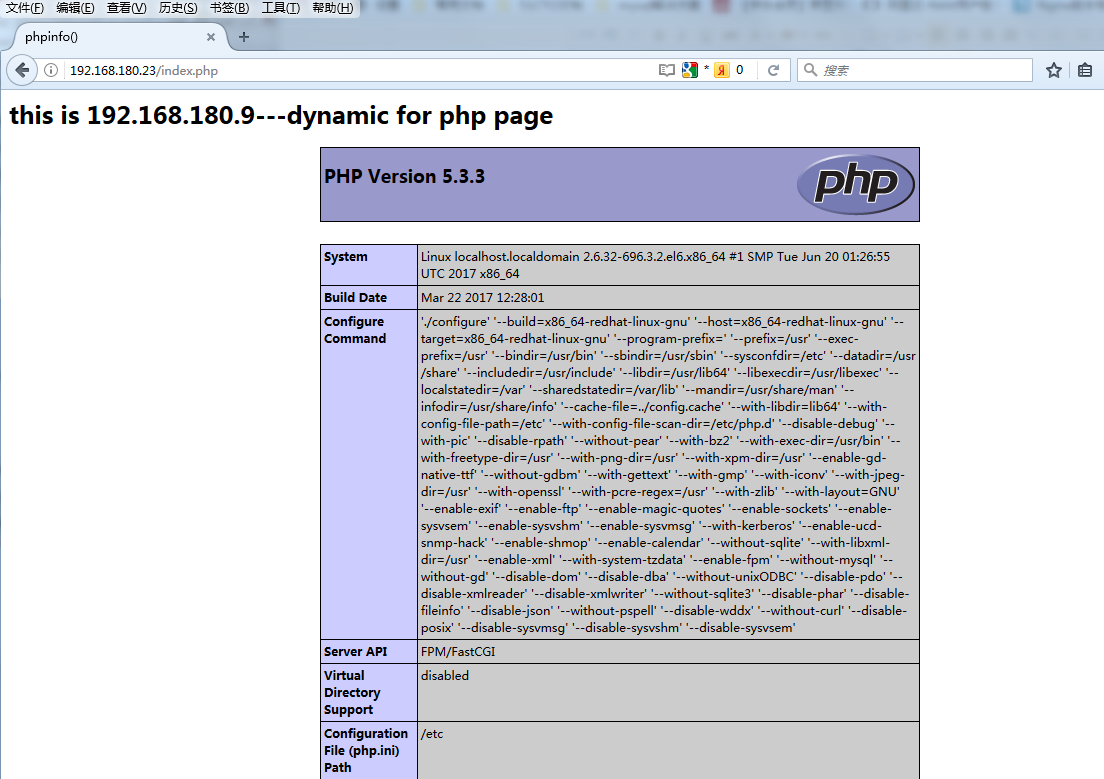
重新加载nginx ,在浏览器中查看如下界面:
(3)在192.168.180.2服务器中安装配置jsp测试界面
[[email protected] m]# vim 1.jsp
this is test jsp page
[[email protected] conf]# /usr/local/tomcat/bin/startup.sh
Using CATALINA_BASE:   /usr/local/tomcat
Using CATALINA_HOME:   /usr/local/tomcat
Using CATALINA_TMPDIR: /usr/local/tomcat/temp
Using JRE_HOME:        /usr/java/jdk1.7.0_79
Using CLASSPATH:       /usr/local/tomcat/bin/bootstrap.jar:/usr/local/tomcat/bin/tomcat-juli.jar
Tomcat started.
查看测试界面
(4)接下来是最重要的配置haproxy服务器
[[email protected] haproxy]# vim /etc/haproxy/haproxy.cfg
#---------------------------------------------------------------------
# Global settings
#---------------------------------------------------------------------
global
 log 127.0.0.1 local2 info  ###[err warning info debug]
 chroot /usr/local/haproxy
 pidfile /var/run/haproxy.pid ###haproxy的pid存放路径,启动进程的用户必须有权限访问此文件
 maxconn 4000     ###最大连接数,默认4000
 user haproxy
 group haproxy
 daemon       ###创建1个进程进入deamon模式运行。此参数要求将运行模式设置为"daemon"

#---------------------------------------------------------------------
# common defaults that all the ‘listen‘ and ‘backend‘ sections will
# use if not designated in their block
#---------------------------------------------------------------------
defaults
 mode http    ###默认的模式mode { tcp|http|health },tcp是4层,http是7层,health只会返回OK
 log global   ###采用全局定义的日志
 option dontlognull  ###不记录健康检查的日志信息
 option httpclose  ###每次请求完毕后主动关闭http通道
 option httplog   ###日志类别http日志格式
 option forwardfor  ###如果后端服务器需要获得客户端真实ip需要配置的参数,可以从Http Header中获得客户端ip
 option redispatch  ###serverId对应的服务器挂掉后,强制定向到其他健康的服务器
 timeout connect 10000 #default 10 second timeout if a backend is not found
 timeout client 300000 ###客户端连接超时
 timeout server 300000 ###服务器连接超时
 maxconn  60000  ###最大连接数
 retries  3   ###3次连接失败就认为服务不可用,也可以通过后面设置
####################################################################
listen stats
  bind 0.0.0.0:1080   #监听端口
  stats refresh 30s   #统计页面自动刷新时间
  stats uri /stats   #统计页面url
  stats realm Haproxy Manager #统计页面密码框上提示文本
  stats auth admin:admin  #统计页面用户名和密码设置
  stats hide-version   #隐藏统计页面上HAProxy的版本信息
  stats enable         ###启用管理界面
  stats admin if TRUE  ##如果登录成功就可以管理在线服务器
#---------------------------------------------------------------------
# main frontend which proxys to the backends
#---------------------------------------------------------------------
frontend main
#frontend   www    # *表示haproxy监听所有地址,监听的端口为80
 bind 0.0.0.0:80
# bind *:8080
#######定义访问控制,表示url以.css .js .html .php结尾的分别调度到哪台服务器上访问
# acl  url_static    path_beg  -i   /static /images /javascript /stylesheets
 acl  url_static    path_end  -i   .jpg .gif .png .css .js .html
 acl  url_dynamic_php   path_end  -i   .php
 acl  url_dynamic_jsp   path_end  -i   .jsp
#######usr_backend表示使用backend服务,if表示如果满足url_static这个条件就调度到这台服务器上
 use_backend         static          if url_static  ###满足策略要求,则响应策略定义的backend静态页面
 use_backend         dynamic_php     if url_dynamic_php   ###满足策略要求,则响应策略定义的backend静态页面
  se_backend         dynamic_jsp     if url_dynamic_jsp  ###满足策略要求,则响应策略定义的backend静态页面
# default_backend     dynamic                  ###不满足则响应backend的默认动态页面
# default_backend     dynamic                  ###不满足则响应backend的默认动态页面

#---------------------------------------------------------------------
# static backend for serving up images, stylesheets and such
#---------------------------------------------------------------------

backend static           ###定义后端静态请求响应
 balance  roundrobin     ###负载均衡模式轮询
 server  static 192.168.180.4:80 check ###后端服务器定义
#server  static 192.168.180.9:80 check ###后端服务器定义

backend dynamic_php           #####定义后端动态请求响应
 balance roundrobin
 server   phpsrv1 192.168.180.9:80 check maxconn 2000
# server   websrv1 dd192.168.180.9:80 check maxconn 2000
#server   websrv2 192.168.180.4:80 check maxconn 2000
# server   websrv2 192.168.180.2:443 check maxconn 2000
backend dynamic_jsp           #####定义后端动态请求响应
 balance roundrobin
 server   jspsrv1 192.168.180.2:8081 check maxconn 2000

#---------------------------------------------------------------------
# round robin balancing between the various backends
#---------------------------------------------------------------------


errorfile 403 /etc/haproxy/errorfiles/403.http

errorfile 500 /etc/haproxy/errorfiles/500.http

errorfile 502 /etc/haproxy/errorfiles/502.http

errorfile 503 /etc/haproxy/errorfiles/503.http
[[email protected] haproxy]# systemctl restart haproxy.service
(三)测试
(1)测试static页面并查看haproxy的访问日志;
[[email protected] ~]# tail -f /var/log/haproxy.log
Jul 20 18:07:22 localhost haproxy[6436]: 192.168.181.231:53672 [20/Jul/2017:18:07:22.371] main static/static 0/0/0/1/1 304 167 - - ---- 0/0/0/0/0 0/0 "GET /index.html HTTP/1.1"
(2)访问php页面
[[email protected] ~]# tail -f /var/log/haproxy.log
Jul 20 18:08:36 localhost haproxy[6436]: 192.168.181.231:53834 [20/Jul/2017:18:08:36.261] main dynamic_php/phpsrv1 0/0/1/0/2 200 2332 - - ---- 0/0/0/0/0 0/0 "GET /index.php?=PHPE9568F35-D428-11d2-A769-00AA001ACF42 HTTP/1.1"
(3)访问jsp页面
[[email protected] ~]# tail -f /var/log/haproxy.log
Jul 20 18:09:58 localhost haproxy[6436]: 192.168.181.231:54015 [20/Jul/2017:18:09:57.999] main dynamic_jsp/jspsrv1 0/0/1/2/3 200 188 - - ---- 0/0/0/0/0 0/0 "GET /1.jsp HTTP/1.1"
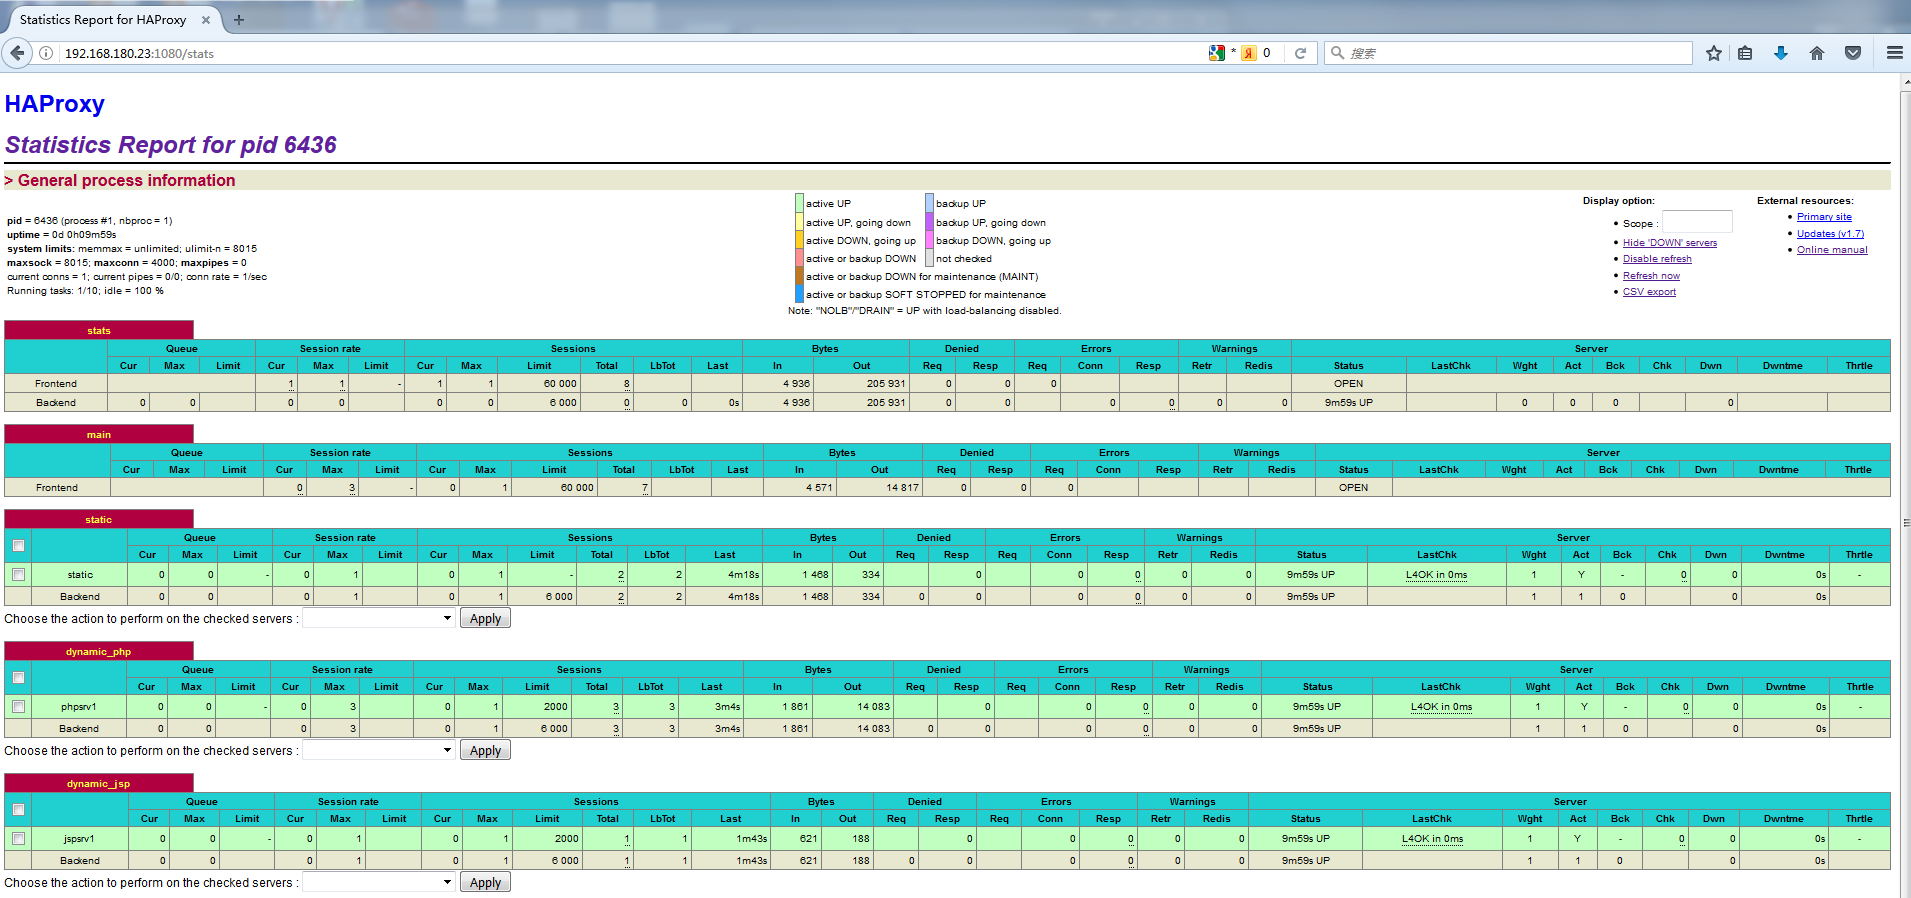
(4)查看haproxy监控页面
总之:haproxy可以利用acl规则匹配url做相应的请求跳转,比如动静分离,域名跳转等等应用需求,haproxy是一款性能很强大的四层以及七层代理server。HAProxy运行在 当前的硬件上,完全可以支持数以万计的并发连接。并且它的运行模式使得它可以很简单安全的整合进您当前的架构中,同时可以保护你的web服务器不被暴露到 网络上。
本文出自 “清风明月” 博客,请务必保留此出处http://liqingbiao.blog.51cto.com/3044896/1949489
以上是关于HAproxy动静分离的主要内容,如果未能解决你的问题,请参考以下文章


