PXE+Kickstart+DHCP+TFTP实现无人值守安装操作系统
Posted
tags:
篇首语:本文由小常识网(cha138.com)小编为大家整理,主要介绍了PXE+Kickstart+DHCP+TFTP实现无人值守安装操作系统相关的知识,希望对你有一定的参考价值。
#系统环境
[[email protected] ~]# cat /etc/redhat-release
CentOS Linux release 7.2.1511 (Core)
[[email protected] ~]# uname -r
3.10.0-327.el7.x86_64
[[email protected] ~]# ip addr show enp0s8 | awk ‘NR==3{print $2}‘
192.168.235.36/24
#安装DHCP 给客户提供IP地址
[[email protected] ~]# yum install -y dhcp
[[email protected] ~]# vim /etc/dhcp/dhcpd.conf #编辑DHCP主配置文件
[[email protected] ~]# cat /etc/dhcp/dhcpd.conf | grep -v "#" | head -8
subnet 192.168.235.0 netmask 255.255.255.0 {
range 192.168.235.10 192.168.235.20;
default-lease-time 600;
max-lease-time 7200;
option domain-name-servers 192.168.235.36;
next-server 192.168.235.36;
filename "pxelinux.0";
}
[[email protected] ~]# systemctl start dhcpd
#安装 FTP 给客户机传输镜像文件
[[email protected] ~]# yum install -y vsftpd
[[email protected] ~]# systemctl start vsftpd #匿名用户访问即可
#安装 tftp 给客户机传输引导程序
[[email protected] ~]# yum install -y tftp-server
[[email protected] ~]# vim /etc/xinetd.d/tftp
[[email protected] ~]# cat /etc/xinetd.d/tftp | grep disable #将disable 修改为no
disable = no
[[email protected] ~]# systemctl start tftp.service
#安装 syslinux
#syslinux是用于提供引导加载的服务程序[[email protected] ~]# yum install -y syslinux
#挂载光盘
[[email protected] ~]# mount /dev/sr0 /mnt/cdrom/
#拷贝相关文件
[[email protected] ~]# cd /var/lib/tftpboot/
[[email protected] tftpboot]# cp /usr/share/syslinux/pxelinux.0 .
[[email protected] tftpboot]# cp /mnt/cdrom/images/pxeboot/initrd.img .
[[email protected] tftpboot]# cp /mnt/cdrom/isolinux/vesamenu.c32 .
[[email protected] tftpboot]# cp /mnt/cdrom/isolinux/boot.msg .
[[email protected] tftpboot]# cp /mnt/cdrom/images/pxeboot/vmlinuz .
[[email protected] tftpboot]# mkdir pxelinux.cfg
[[email protected] tftpboot]# cp /mnt/cdrom/isolinux/isolinux.cfg pxelinux.cfg/default
[[email protected] tftpboot]# chmod 777 /var/lib/tftpboot/pxelinux.cfg/default
[[email protected] tftpboot]# vim pxelinux.cfg/default
#将第一行修改为如下值
[[email protected] tftpboot]# sed -n ‘1p‘ /var/lib/tftpboot/pxelinux.cfg/default
default linux
#将第64行修改为如下值
[[email protected] tftpboot]# sed -n ‘64p‘ /var/lib/tftpboot/pxelinux.cfg/default
append initrd=initrd.img inst.stage2=ftp://192.168.235.36 ks=ftp://192.168.235.36/pub/ks.cfg quiet
[[email protected] tftpboot]# systemctl status vsftpd
[[email protected] tftpboot]# cp -r /mnt/cdrom/* /var/ftp/
[[email protected] tftpboot]# cp ~/anaconda-ks.cfg /var/ftp/pub/ks.cfg
[[email protected] tftpboot]# chmod +r /var/ftp/pub/ks.cfg
[[email protected] tftpboot]# vim /var/ftp/pub/ks.cfg
#注释第5行的cdrom 并增加如下几行值
install #安装指令
url --url=ftp://192.168.235.36 #镜像位置
selinux --disabled #关闭selinux
zerombr #清空MBR
reboot #重启
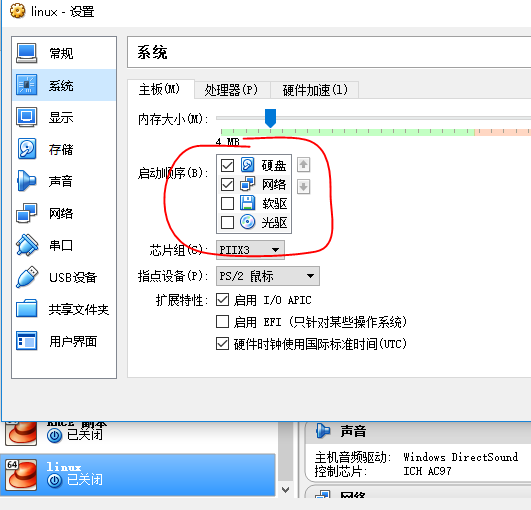
#用Vbox新建一台虚拟机 系统选项中 启动顺序改为如下设置
#并且网络在跟服务器一个网络中
#开启客户机 等待数分钟
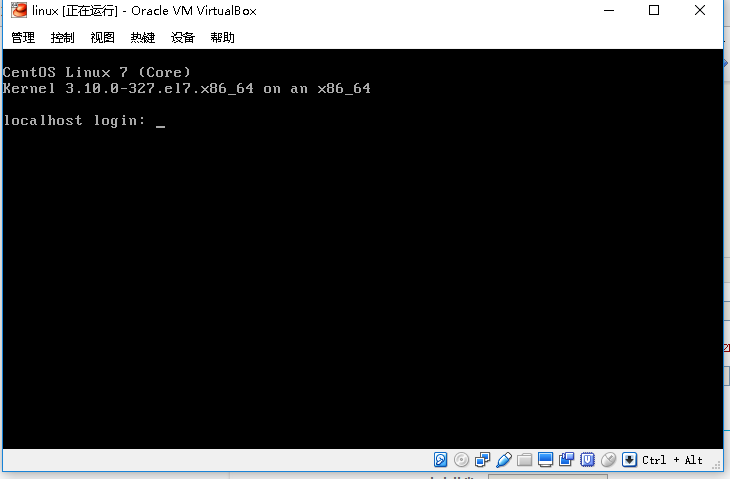
#自动安装成功
本文出自 “Chauncey” 博客,请务必保留此出处http://cqwujiang.blog.51cto.com/10808946/1913223
以上是关于PXE+Kickstart+DHCP+TFTP实现无人值守安装操作系统的主要内容,如果未能解决你的问题,请参考以下文章
PXE+Kickstart+DHCP+TFTP实现无人值守安装操作系统
DHCP+VSFTPD+TFTP+Kickstart搭建PXE环境实现批量自动化系统安装
kickstart+DHCP+NFS+TFTP+PXE 全自动化部署Linux系统
Linux centos PXE无人值守安装 DHCP+TFTP+HTTPD+Kickstart


