邮件收发系统
Posted
tags:
篇首语:本文由小常识网(cha138.com)小编为大家整理,主要介绍了邮件收发系统相关的知识,希望对你有一定的参考价值。
配置两台虚拟机的邮件环境
虚拟机
nm-connection-editor
//配置虚拟机1.ip为146虚拟机2.ip为246
更改两台主机名分别为mailwestos.westos.com和maillinux.linux.com
配置yum源
[rhel_dvd]
gpgcheck = 0
enabled = 1
baseurl = http://172.25.254.46/hzy
安装dns服务
yum install bind -y
systemctl start named
vim /etc/named.conf
-----------------------
10 options {
11 # listen-on port 53 { 127.0.0.1; }
12 # listen-on-v6 port 53 { ::1; };
13 directory "/var/named";
14 dump-file "/var/named/data
15 statistics-file "/var/named/data
16 memstatistics-file "/var/named/d
17 # allow-query { localhost; };
29 recursion yes;
30
31 dnssec-enable yes;
32 dnssec-validation no;
-------------------------
vim /etc/named.rfc1912.zones
-------------------------
25 zone "westos.com" IN {
26 type master;
27 file "westos.com.zone";
28 allow-update { none; };
29 };
30
31 zone "linux.com" IN {
32 type master;
33 file "linux.com.zone";
34 allow-update { none; };
35 };
---------------------------
cd /var/named
cp -p named.localhost westos.com.zone
vim westos.com.zone
--------------------------------
$TTL 1D
@ IN SOA dns.westos.com. root.westos.com. (
0 ; serial
1D ; refresh
1H ; retry
1W ; expire
3H ) ; minimum
NS dns.westos.com.
dns A 172.25.254.146
westos.com. MX 1 172.25.254.146.
-------------------------------------
cp -p westos.com.zone linux.com.zone
vim linux.com.zone
----------------------------------------
$TTL 1D
@ IN SOA dns.linux.com. root.linux.com. (
0 ; serial
1D ; refresh
1H ; retry
1W ; expire
3H ) ; minimum
NS dns.linux.com.
dns A 172.25.254.146
linux.com. MX 1 172.25.254.246.
-------------------------------------------
systemctl restart named
---------------------------------------------------------------------
postfix
yum install postfix -y
mailwestos主机和maillinux主机配置如下:
vim /etc/postfix/main.cf
75 #myhostname = host.domain.tld
76 myhostname = mailwestos.westos.com
77
82 #
83 mydomain = westos.com
84
98 #myorigin = $myhostname
99 myorigin = $mydomain
113 inet_interfaces = all
114 #inet_interfaces = $myhostname
115 #inet_interfaces = $myhostname, localhost
116 #inet_interfaces = localhost
163 #
164 mydestination = $myhostname, $mydomain, localhost
systemctl restart postfix
在mailwestos.westos.com上设置
群发邮件
vim /etc/postfix/users //群发邮件的目标用户配置文件
student
root
vim /etc/aliases
95 # Person who should get root‘s mail
96 #root: marc
97 admin: root //admin为root的别名
98 more: :include:/etc/postfix/users //群发用户的配置文件
postalias /etc/aliases //更新设置
systemctl restart postfix.service
mail [email protected]
在maiwestos.com查看邮件
mail -u student
mail -u root //查看root用户收到的邮件
postsuper -d //删除未发送的邮件队列
空壳邮件客户端配置
(1)收件地址伪装
vim /etc/postfix/virtual
# Yorktown Heights, NY 10598, USA
#
[email protected] [email protected]
@qq.com @westos.com //将westos.com 伪装为qq.com
#VIRTUAL(5)
vim /etc/named.rfc1912.zones //添加qq.com这个域
----------------------------------
zone "qq.com" IN {
32 type master;
33 file "qq.com.zone";
34 allow-update { none; };
35 };
-----------------------------------
vim /var/named/qq.com.zone
-----------------------------------
$TTL 1D
@ IN SOA dns.qq.com. root.qq.com. (
0 ; serial
1D ; refresh
1H ; retry
1W ; expire
3H ) ; minimum
NS dns.qq.com.
dns A 172.25.254.146
qq.com. MX 1 172.25.254.246.
-------------------------------------
postmap /etc/postfix/virtual //加密/virtual文件
postconf -e "virtual_alias_maps = hash:/etc/postfix/virtual" //使系统读取该加密文件,加密方式为hash加密
systemctl restart postfix.service
mail [email protected]
mailq
在 westos.com 上查看是否接受到邮件
& 1 //查看详细信息
(2)邮件回送方伪装
vim /etc/postfix/generic
[email protected] [email protected] //将回送方伪装为qq.com
postmap /etc/postfix/generic //加密generic文件
postconf -e "smtp_generic_maps = hash:/etc/postfix/generic" //使系统读取该加密文件,加密方式为hash加密
systemctl restart postfix.service //重启
postfix服务
从westos主机向linux发送邮件
mail [email protected]
在linux上查看
& 1 //查看那mail的详细信息
从linux回送邮件到westos
mail [email protected]
在westos上查看mail详细信息
telnet
yum install telnet -y
telnet 172.25.254.246 25
ehlo hello //打招呼,查看是否连接成功
mail from:[email protected]
250 2.1.0 ok
rcpt to:[email protected]
250 2.1.5 ok
data
354 End data with <CR><LF>.<CR><LF>
hello
hello
.
250 2.0.0 ok:queque as 025E224630C
quit
221 2.0.0 Bye
在westos上查看mail详细信息
在数据库上创建postfix用户,并为postfix用户设置插入读取权限
create user [email protected] identified by ‘postfix‘;
grant insert,select on email.* to [email protected];
cd /etc/postfix
----------------------------
vim mysql-user.cf
hosts = localhost
user = postfix
password = postfix
dbname = email
table = hzy
select_field = username
where_field = username
-----------------------------
vim mysql-domain.cf
hosts = localhost
user = postfix
password = postfix
dbname = email
table = hzy
select_field = domain
where_field = domain
------------------------------
vim mysql-mailbox.cf
hosts = localhost
user = postfix
password = postfix
dbname = email
table = hzy
select_field = maildir
where_field = username
------------------------------
groupadd -g 888 vmail
useradd -u 888 -g 888 vmail
postconf -e "virtual_alias_maps = mysql:/etc/postfix/mysql-user.cf"
postconf -e "virtual_mailbox_domains = mysql:/etc/postfix/mysql-domain.cf"
postconf -e "virtual_mailbox_maps = mysql:/etc/postfix/mysql-mailbox.cf"
postconf -e "virtual_mailbox_base = /home/vmail"
postconf -e "virtual_minimum_uid = static:888"
postconf -e "virtual_minimum_gid = static:888"
************postfix的配置***********
vim /etc/postfix/main.cf
--------------------------------------
76 myhostname = mailwestos.westos.com //发送邮件的主机名
83 mydomain = westos.com //本地发布的邮件域名
99 myorigin = $mydomain //显示邮件发送方的域
113 inet_interfaces = all //设定接收传入电子邮件的网络接口,这里设定为接收所有接口
164 mydestination = $myhostname, $mydomain, localhost //设定邮件接收方的格式,
681 virtual_alias_maps = mysql:/etc/postfix/mysql-user.cf
682 virtual_mailbox_domains = mysql:/etc/postfix/mysql-domain.cf
683 virtual_mailbox_maps = mysql:/etc/postfix/mysql-mailbox.cf
684 virtual_mailbox_base = /home/vmail
685 virtual_minimum_uid = static:888
686 virtual_minimum_gid = static:888
-----------------------------------------
dovecot
yum install dovecot -y //安装豆腐块
yum install dovecot-mysql -y //安装豆腐块与数据库联系的插件
mysql -uroot -pwestos //登陆数据库
create user [email protected] identified by ‘postfix‘; //创建用户postfix,
grant insert,select on email.* to [email protected]; //给用户postfix赋予插入和读取权限
vim /etc/dovecot/dovecot.conf //编辑豆腐块的配置文件
48 login_trusted_networks = 0.0.0.0/0 //允许登陆的网络ip
49 disable_plaintext_auth = no //禁止明码登陆设定关闭
vim /etc/dovecot/conf.d/10-auth.conf
122 !include auth-system.conf.ext
123 !include auth-sql.conf.ext //开启数据库的连接
cp /usr/share/doc/dovecot-2.2.10/example-config/dovecot-sql.conf.ext /etc/dovecot/dovecot-sql.conf.ext
vim /etc/dovecot/dovecot-sql.conf.ext
31 # Database driver: mysql, pgsql, sqlite
32 driver = mysql //添加数据库驱动
71 connect = host=localhost dbname=email user=postfix password=postfix //连接方式为:本地连接;数据库名:email;登陆用户名user为:postfix 登陆密码为:postfix
78 default_pass_scheme = PLAIN //默认密码认证为明文
107 password_query = \
108 SELECT username, domain, password \
109 FROM hzy WHERE username = ‘%u‘ AND domain = ‘%d‘
125 user_query = SELECT maildir, 888 AS uid, 888 AS gid FROM hzy WHERE username = ‘%u‘ //hzy为表名,用户名格式为: %u (带域的完整用户名) %d 为域
vim /etc/dovecot/conf.d/10-mail.conf
30 mail_location = maildir:/home/vmail/%d/%n //接收到的邮件的存放目录
systemctl restart dovecot //重启豆腐块服务
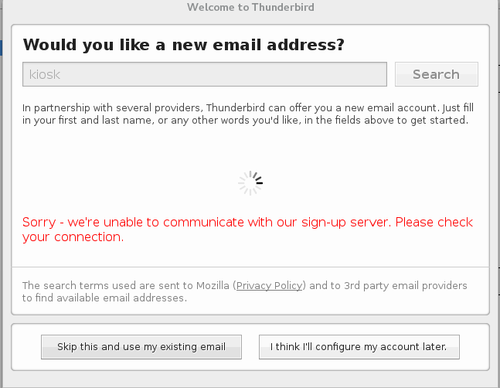
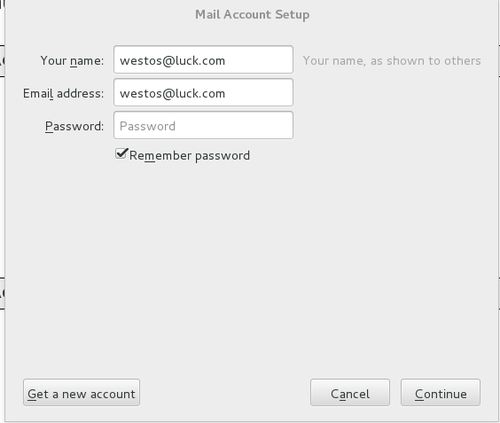
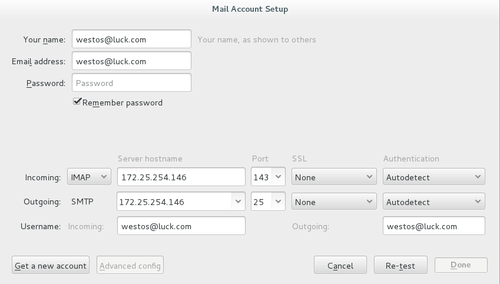
安装雷鸟
yum install thunderbird-31.2.0-1.el7.x86_64.rpm -y
测试:在172.25.254.146主机上发送邮件
mail [email protected]
在雷鸟上查看:read messages
本文出自 “12444546” 博客,谢绝转载!
以上是关于邮件收发系统的主要内容,如果未能解决你的问题,请参考以下文章


