OpenCV——证件照自动抠图
Posted 铁杆
tags:
篇首语:本文由小常识网(cha138.com)小编为大家整理,主要介绍了OpenCV——证件照自动抠图相关的知识,希望对你有一定的参考价值。
今天去交社保,要白底的电子版照片,我目前手头就是一个蓝底的,又不想手动抠图,于是想做一个自动换背景的程序。
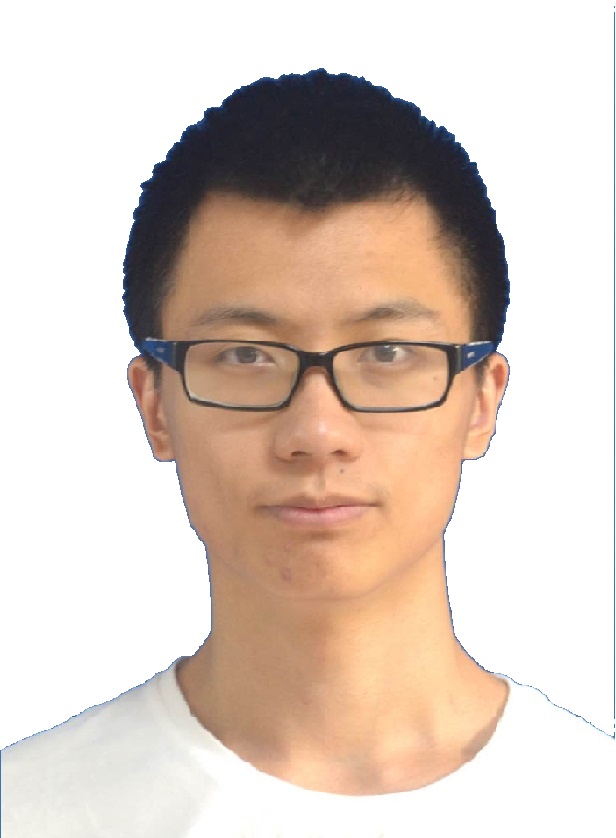
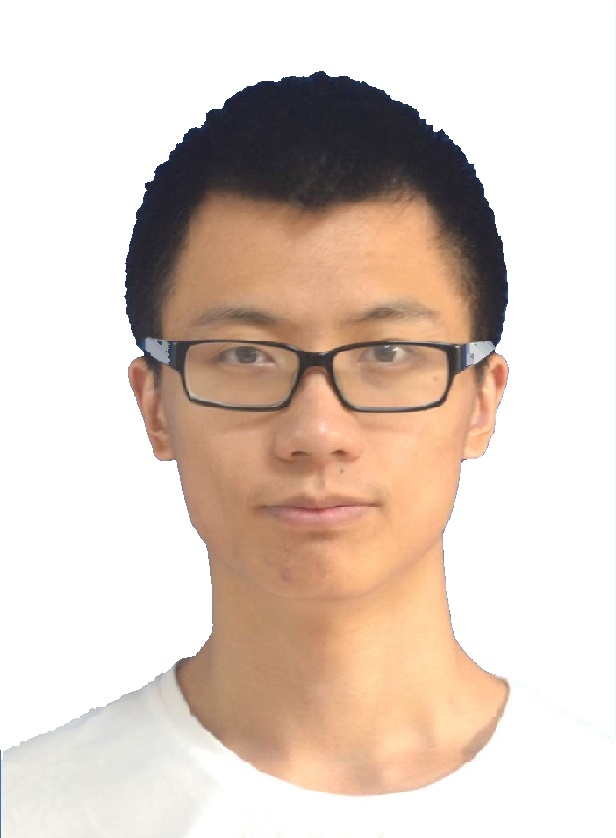
先上效果:


具体分三步,第一步是大体的背景转换,把蓝色变为白色:
void colortransfer(cv::Mat image) //蓝背景转白背景,有边缘残留
{
    int Diff;
    int num_row = image.rows;
    int num_col = image.cols;
    for (int r = 0; r < num_row; r++)
    {
        cv::Vec3b *data = image.ptr<cv::Vec3b>(r);
        for (int c = 0; c < num_col; c++)
        {
            Diff = data[c][0] - (data[c][1] + data[c][2]) / 2; //蓝色检测
            if (Diff > 60 && data[c][0]>150)//蓝色分量比GR分量的平均值高60且蓝色分量大于150
            {
                data[c][0] = 255;
                data[c][1] = 255;
                data[c][2] = 255;
            }
        }
    }
}
但是这步出来之后效果不太好,可以看出来有很明显的蓝色边缘,很多蓝底照片因为照的时候和背景过近,导致边缘颜色变化

接下来就是对这些深色的蓝边进行一个处理,这里采用了检测蓝边->中值滤波器的方法:
void Optimization(cv::Mat image)   //去边缘残留
{
    int num_row = image.rows;
    int num_col = image.cols;
    for (int i = 1; i < num_row-1; i++)
    {
        cv::Vec3b *last_r = image.ptr<cv::Vec3b>(i-1);
        cv::Vec3b *data = image.ptr<cv::Vec3b>(i);
        cv::Vec3b *next_r = image.ptr<cv::Vec3b>(i+1);
        for (int j = 1; j < num_col-1; j++)
        {
            if (data[j][0]>90 && data[j][0] - data[j][1]>9 && data[j][0] - data[j][2]>9)
            {
                int stat;
                cv::Vec3b Temp;
                cv::Vec3b array[9] = { last_r[j - 1], last_r[j], last_r[j + 1], data[j - 1], data[j], data[j + 1], next_r[j - 1], next_r[j], next_r[j + 1] };
                do
                {
                    stat = 0;
                    for (int m = 0; m < 8; m++)
                    {
                        if (array[m][0] + array[m][1] + array[m][2]> array[m + 1][0] + array[m + 1][1] + array[m + 1][2])
                        {
                            Temp=array[m + 1];
                            array[m + 1] = array[m];
                            array[m] = Temp;
                            stat = 1;
                        }

                    }
                } while (stat == 1);
                data[j][0] = array[7][0];
                data[j][1] = array[7][1];
                data[j][2] = array[7][2];
            }
        }
    }
}
中间用了冒泡算法进行排序,结果如下:

边缘基本去除了,但是头发这边显得非常不真实,没有边缘的毛躁感。这里我们检测到头发边缘后,对边缘区域进行一个低通滤波和颜色的加白处理,让边缘有层次感:

void hairilization(cv::Mat image) //毛躁化
{
    int num_row = image.rows / 3;
    int num_col = image.cols;
    for (int i = 2; i < num_row - 2; i=i+5)
    {
        cv::Vec3b *last_sec_r = image.ptr<cv::Vec3b>(i - 2);
        cv::Vec3b *last_r = image.ptr<cv::Vec3b>(i - 1);
        cv::Vec3b *data = image.ptr<cv::Vec3b>(i);
        cv::Vec3b *next_r = image.ptr<cv::Vec3b>(i + 1);
        cv::Vec3b *next_sec_r = image.ptr<cv::Vec3b>(i + 2);
        for (int j = 2; j < num_col; j = j + 5)
        {
            int count = 0;// check how many 255point in this area(boundary)
            cv::Vec3b array[5][5] = { last_sec_r[j - 2], last_sec_r[j - 1], last_sec_r[j], last_sec_r[j + 1], last_sec_r[j + 2], \\
                            last_r[j - 2], last_r[j - 1], last_r[j], last_r[j + 1], last_r[j + 2],\\
                            data[j - 2], data[j - 1], data[j], data[j + 1], data[j + 2],\\
                            next_r[j - 2], next_r[j - 1], next_r[j], next_r[j + 1], next_r[j + 2], \\
                        next_sec_r[j - 2], next_sec_r[j - 1], next_sec_r[j], next_sec_r[j + 1], next_sec_r[j + 2]};
            for (int r = 0; r < 5; r++)
            {
                for (int c = 0; c < 5; c++)
                {
                    if (array[r][c][1] >= 251)
                        count++;
                }
            }
            if (count >= 7 &&count<=18) //说明是头发边缘,开始处理
            {

                last_r[j - 1] = 1 / 9 * (array[0][0] + array[0][1] + array[0][2] + array[1][0] + array[1][1] + array[1][2] + array[2][0] + array[2][1] + array[2][2]) + cv::Vec3b(100, 100, 100);
                last_r[j] = 1 / 9 * (array[0][1] + array[0][2] + array[0][3] + array[1][1] + array[1][2] + array[1][3] + array[2][1] + array[2][2] + array[2][3]) + cv::Vec3b(80, 80, 80);
                last_r[j + 1] = 1 / 9 * (array[0][2] + array[0][3] + array[0][4] + array[1][2] + array[1][3] + array[1][4] + array[2][2] + array[2][3] + array[2][4]) + cv::Vec3b(100, 100, 100);

                data[j - 1] = (1 / 9 * array[1][0] + 1 / 9 * array[1][1] + 1 / 9 * array[1][2] + 1 / 9 * array[2][0] + 1 / 9 * array[2][1] + 1 / 9 * array[2][2] + 1 / 9 * array[3][0] + 1 / 9 * array[3][1] + 1 / 9 * array[3][2]) + cv::Vec3b(80, 80, 80);
                data[j] = (1 / 9 * array[1][1] + 1 / 9 * array[1][2] + 1 / 9 * array[1][3] + 1 / 9 * array[2][1] + 1 / 9 * array[2][2] + 1 / 9 * array[2][3] + 1 / 9 * array[3][1] + 1 / 9 * array[3][2] + 1 / 9 * array[3][3]) + cv::Vec3b(80, 80, 80);
                data[j + 1] =  (1 / 9 * array[1][2] + 1 / 9 * array[1][3] + 1 / 9 * array[1][4] + 1 / 9 * array[2][2] + 1 / 9 * array[2][3] + 1 / 9 * array[2][4] + 1 / 9 * array[3][2] + 1 / 9 * array[3][3] + 1 / 9 * array[3][4]) + cv::Vec3b(80, 80, 80);

                data[j - 1] =  (1 / 9 * array[2][0] + 1 / 9 * array[2][1] + 1 / 9 * array[2][2] + 1 / 9 * array[3][0] + 1 / 9 * array[3][1] + 1 / 9 * array[3][2] + 1 / 9 * array[4][0] + 1 / 9 * array[4][1] + 1 / 9 * array[4][2]) + cv::Vec3b(100, 100, 100);
                data[j] =  (1 / 9 * array[2][1] + 1 / 9 * array[2][2] + 1 / 9 * array[2][3] + 1 / 9 * array[3][1] + 1 / 9 * array[3][2] + 1 / 9 * array[3][3] + 1 / 9 * array[4][1] + 1 / 9 * array[4][2] + 1 / 9 * array[4][3]) + cv::Vec3b(80, 80, 80);
                data[j + 1] =  (1 / 9 * array[2][2] + 1 / 9 * array[2][3] + 1 / 9 * array[2][4] + 1 / 9 * array[3][2] + 1 / 9 * array[3][3] + 1 / 9 * array[3][4] + 1 / 9 * array[4][2] + 1 / 9 * array[4][3] + 1 / 9 * array[4][4]) + cv::Vec3b(100, 100, 100);

            }
        }
    }
}
这部分代码比较长,的所以隐藏了。
结果如下:

相比于:

可以看到头发的边缘上有很大提升,因为均值滤波把边缘的头发变浅,形成了一个层次感,模拟了在白幕照相的效果。
以上是关于OpenCV——证件照自动抠图的主要内容,如果未能解决你的问题,请参考以下文章
