UI控件之显示图像控件ImageView(下)
Posted MakeYourChance
tags:
篇首语:本文由小常识网(cha138.com)小编为大家整理,主要介绍了UI控件之显示图像控件ImageView(下)相关的知识,希望对你有一定的参考价值。
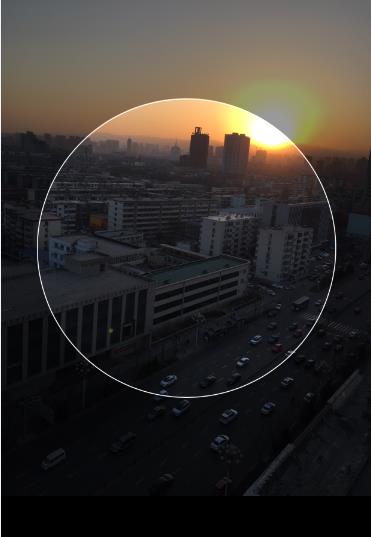
(一)绘制最简单的圆形ImageView

RoundedImageView
运行效果:

实现代码:
自定义ImageView代码:
package com.example.android_drawable_xml;

import android.content.Context;
import android.graphics.Bitmap;
import android.graphics.Canvas;
import android.graphics.Paint;
import android.graphics.PaintFlagsDrawFilter;
import android.graphics.Path;
import android.graphics.Rect;
import android.graphics.Region;
import android.util.AttributeSet;
import android.widget.ImageView;

public class RoundImageView extends ImageView {

    private Bitmap mBitmap;
    private Rect mRect = new Rect();
    private PaintFlagsDrawFilter pdf=new PaintFlagsDrawFilter(0, Paint.ANTI_ALIAS_FLAG);
    private Paint mPaint = new Paint();
    private Path mPath =  new Path();


    public RoundImageView(Context context, AttributeSet attrs) {
        super(context, attrs);

    }

    //传入一个Bitmap对象
    public void setmBitmap(Bitmap bitmap) {
        this.mBitmap = bitmap;
    }

    private void init(){
        mPaint.setStyle(Paint.Style.STROKE);
        mPaint.setFlags(Paint.ANTI_ALIAS_FLAG);
        mPaint.setAntiAlias(true);//抗锯齿
    }

    @Override
    protected void onDraw(Canvas canvas) {
        super.onDraw(canvas);
        if (mBitmap == null) {
            return;

        }
        mRect.set(0,0,getWidth(),getHeight());
        canvas.save();
        canvas.setDrawFilter(pdf);
        mPath.addCircle(getWidth() / 2 , getWidth() / 2 , getHeight() / 2 , Path.Direction.CCW);
        canvas.clipPath(mPath,Region.Op.REPLACE);
        canvas.drawBitmap(mBitmap, null, mRect, mPaint);
        canvas.restore();
    }
}
MainActivity.java
package com.example.android_drawable_xml;

import android.app.Activity;
import android.graphics.Bitmap;
import android.graphics.BitmapFactory;
import android.os.Bundle;


public class MainActivity extends Activity {

    private RoundImageView img_roundImageView;

    @Override
    protected void onCreate(Bundle savedInstanceState) {
        super.onCreate(savedInstanceState);
        setContentView(R.layout.activity_main2);
        RoundImageView img_roundImageView = (RoundImageView) findViewById(R.id.img_round);
        Bitmap bitmap = BitmapFactory.decodeResource(getResources(), R.drawable.bulunou);

        img_roundImageView.setmBitmap(bitmap);
    }

}
activity_main.xml文件
<LinearLayout xmlns:android="http://schemas.android.com/apk/res/android"
    xmlns:tools="http://schemas.android.com/tools"
    android:layout_width="match_parent"
    android:layout_height="match_parent"
    android:orientation="vertical"
    tools:context="com.example.android_drawable_xml.MainActivity" >

   <com.example.android_drawable_xml.RoundImageView
       android:id="@+id/img_round"
       android:layout_width="200dp"
       android:layout_height="200dp"
       android:layout_margin="5px"
       android:layout_gravity="center"/>

</LinearLayout>
(二)ImageView实现图片裁剪和显示的功能
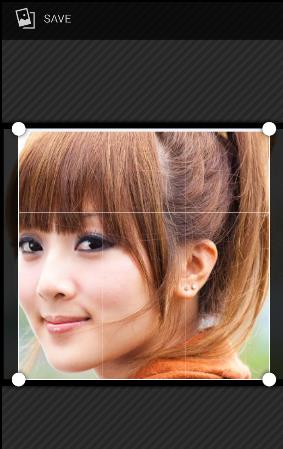
网上一张图:

这个是QQ的剪切图来设置头像的,其实就是一个ImageView的剪切与显示;
运行结果:

做的比较粗糙~~~你可以在此基础上精雕细琢下~
实现代码:
package com.example.android_imageview;


import android.app.Activity;
import android.content.Intent;
import android.graphics.Bitmap;
import android.graphics.BitmapFactory;
import android.net.Uri;
import android.os.Bundle;
import android.view.View;
import android.view.View.OnClickListener;
import android.widget.Button;
import android.widget.ImageView;

public class CutImageView extends Activity implements OnClickListener{


    private Button selectImageBtn;
    private Button cutImageBtn;
    private ImageView imageView;
    // 声明两个静态的整型变量,主要是用于意图的返回的标志
    private static final int IMAGE_SELECT = 1;// 选择图片
    private static final int IMAGE_CUT = 2;// 裁剪图片

    @Override
    public void onCreate(Bundle savedInstanceState) {
        super.onCreate(savedInstanceState);
        setContentView(R.layout.cut_imageview);
        selectImageBtn = (Button) this.findViewById(R.id.selectImgBtn);
        cutImageBtn = (Button) this.findViewById(R.id.cutImageBtn);
        imageView = (ImageView) this.findViewById(R.id.imageview3);
        selectImageBtn.setOnClickListener(this);
        cutImageBtn.setOnClickListener(this);
        // imageView.setImageBitmap(bm);
    }

    @Override
    protected void onActivityResult(int requestCode, int resultCode, Intent data) {
        // TODO Auto-generated method stub
        super.onActivityResult(requestCode, resultCode, data);
        if (resultCode == RESULT_OK) {
            // 处理图片按照手机的屏幕大小显示
            if (requestCode == IMAGE_SELECT) {
                Uri uri = data.getData();// 获得图片的路径
                int dw = getWindowManager().getDefaultDisplay().getWidth();// 获得屏幕的宽度
                int dh = getWindowManager().getDefaultDisplay().getHeight() / 2;
                try {
                    // 实现对图片的裁剪的类,是一个匿名内部类
                    BitmapFactory.Options factory = new BitmapFactory.Options();
                    factory.inJustDecodeBounds = true;// 如果设置为true,允许查询图片不是按照像素分配给内存
                    Bitmap bmp = BitmapFactory.decodeStream(
                            getContentResolver().openInputStream(uri), null,
                            factory);
                    // 对图片的宽度和高度对应手机的屏幕进行匹配

                    int hRatio = (int) Math
                            .ceil(factory.outHeight / (float) dh);
                    // 如果大于1 表示图片的高度大于手机屏幕的高度
                    int wRatio = (int) Math.ceil(factory.outWidth / (float) dw);
                    // 如果大于1 表示图片的宽度大于手机屏幕的宽度
                    // 缩放到1/radio的尺寸和1/radio^2像素
                    if (hRatio > 1 || wRatio > 1) {
                        if (hRatio > wRatio) {
                            factory.inSampleSize = hRatio;
                        } else {
                            factory.inSampleSize = wRatio;
                        }
                    }
                    // 对
                    factory.inJustDecodeBounds = false;
                    // 使用BitmapFactory对图片进行适屏的操作,
                    bmp = BitmapFactory.decodeStream(getContentResolver()
                            .openInputStream(uri), null, factory);
                    imageView.setImageBitmap(bmp);
                } catch (Exception e) {
                    // TODO: handle exception
                }
                // 表示裁剪图片
            } else if (requestCode == IMAGE_CUT) {
                Bitmap bitmap = data.getParcelableExtra("data");
                imageView.setImageBitmap(bitmap);
            }
        }
    }

    @Override
    public void onClick(View v) {
        // TODO Auto-generated method stub
        switch (v.getId()) {
        case R.id.selectImgBtn:
            // 如何提取手机的图片的,并且进行选择图片的功能
            Intent intent = new Intent(
                    Intent.ACTION_PICK,
                    android.provider.MediaStore.Images.Media.EXTERNAL_CONTENT_URI);// 打开手机的图片库
            startActivityForResult(intent, IMAGE_SELECT);
            break;

        case R.id.cutImageBtn:
            Intent intent2 = getImageClipIntent();
            startActivityForResult(intent2, IMAGE_CUT);
            break;
        }
    }

    private Intent getImageClipIntent() {
        // TODO Auto-generated method stub
        Intent intent = new Intent(Intent.ACTION_GET_CONTENT, null);
        // 实现对图片的裁剪,必须要设置图片的属性和大小
        intent.setType("image/*");// 获取任意的图片类型
        intent.putExtra("crop", "true");// 滑动选中图片区域
        intent.putExtra("aspectX", 1);// 表示剪切框的比例1:1的效果
        intent.putExtra("aspectY", 1);
        intent.putExtra("outputX", 80);// 指定输出图片的大小
        intent.putExtra("outputY", 80);
        intent.putExtra("return-data", true);
        return intent;
    }
}
cut_imageview.xml
<?xml version="1.0" encoding="utf-8"?>
<LinearLayout xmlns:android="http://schemas.android.com/apk/res/android"
    android:layout_width="match_parent"
    android:layout_height="match_parent"
    android:orientation="vertical" >

    <Button android:layout_width="match_parent"
        android:layout_height="wrap_content"
        android:id="@+id/selectImgBtn"
        android:text="选择图片"/>
    <Button android:layout_width="match_parent"
        android:layout_height="wrap_content"
        android:id="@+id/cutImageBtn"
        android:text="选择图片进行裁剪"/>
    <!-- 用于显示图片的信息 -->
    <ImageView android:layout_width="match_parent"
        android:layout_height="wrap_content"
        android:id="@+id/imageview3"/>
</LinearLayout>
(三)ImageView实现图片图片旋转
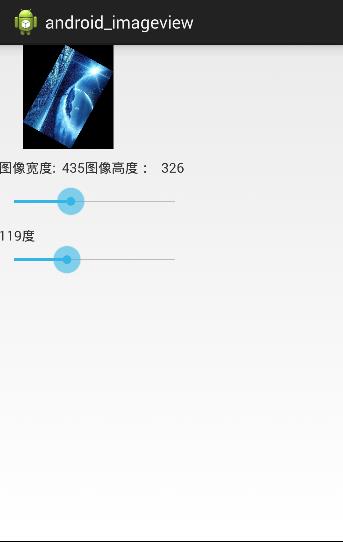
在开发中实现对图像的缩放有很多方法,最简单的方法是改变ImageView控件的大小,我们只要将<ImageView>标签的android:scaleType的属性值设置为fitCenter,
要是想实现图像的旋转可以使用android.graphics.Matirx类的setRotate来实现.
运行效果如下:

实现代码:
public class ImageViewRotateText extends Activity  implements OnSeekBarChangeListener{

    private int minWidth=80;
    private ImageView imageView;
    private TextView textView1 ,textView2;
    private Matrix matrix = new Matrix();

    @Override
    protected void onCreate(Bundle savedInstanceState) {
        // TODO Auto-generated method stub
        super.onCreate(savedInstanceState);
        setContentView(R.layout.rotate_imageview);
        imageView = (ImageView) this.findViewById(R.id.imageview5);
        SeekBar seekBar1 = (SeekBar) this.findViewById(R.id.seekbar1);
        SeekBar seekBar2 = (SeekBar) this.findViewById(R.id.seekbar2);
        textView1 = (TextView) this.findViewById(R.id.textview1);
        textView2 = (TextView) this.findViewById(R.id.textview2);
        seekBar1.setOnSeekBarChangeListener(this);
        seekBar2.setOnSeekBarChangeListener(this);

        //
        DisplayMetrics dm = new DisplayMetrics();
        getWindowManager().getDefaultDisplay().getMetrics(dm);
        seekBar1.setMax(dm.widthPixels - minWidth);
    }

    @Override
    public void onProgressChanged(SeekBar seekBar, int progress,
            boolean fromUser) {
        // TODO Auto-generated method stub
        if (seekBar.getId() == R.id.seekbar1) {
            int newWidth = progress + minWidth;
            int newHeight = (int)(newWidth * 3 / 4);//按照原图进行缩放的功能
            imageView.setLayoutParams( new LinearLayout.LayoutParams(newWidth , newHeight));
            textView1.setText("图像宽度:  "+newWidth+"图像高度:   "+newHeight);

        }else if (seekBar.getId() == R.id.seekbar2) {
            Bitmap bitmap = ((BitmapDrawable)(getResources()
                    .getDrawable(R.drawable.xingkong))).getBitmap();
            matrix.setRotate(progress);//设置翻转的角度
            bitmap = Bitmap.createBitmap(bitmap ,0,0,bitmap.getWidth(),
                    bitmap.getHeight() , matrix, true);
            imageView.setImageBitmap(bitmap);
            textView2.setText(progress+"度");


        }

    }

    @Override
    public void onStartTrackingTouch(SeekBar seekBar) {
        // TODO Auto-generated method stub

    }

    @Override
    public void onStopTrackingTouch(SeekBar seekBar) {
        // TODO Auto-generated method stub

    }


}
xml文件
<?xml version="1.0" encoding="utf-8"?>
<LinearLayout xmlns:android="http://schemas.android.com/apk/res/android"
    android:layout_width="match_parent"
    android:layout_height="match_parent"
    android:orientation="vertical" >

    <Button android:layout_width="match_parent"
        android:layout_height="wrap_content"
        android:id="@+id/selectImgBtn"
        android:text="选择图片"/>
    <Button android:layout_width="match_parent"
        android:layout_height="wrap_content"
        android:id="@+id/cutImageBtn"
        android:text="选择图片进行裁剪"/>
    <!-- 用于显示图片的信息 -->
    <ImageView android:layout_width="match_parent"
        android:layout_height="wrap_content"
        android:id="@+id/imageview3"/>
</LinearLayout>
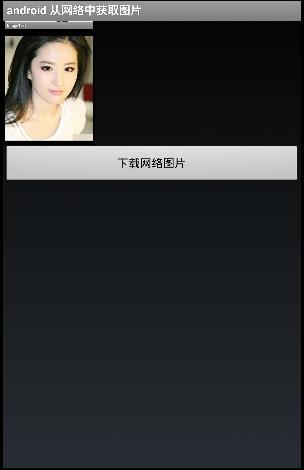
(四)使用ImageView获取网络图片
运行效果:

实现代码:
xml文件
<?xml version="1.0" encoding="utf-8"?>
<LinearLayout xmlns:android="http://schemas.android.com/apk/res/android"
    android:orientation="vertical" android:layout_width="fill_parent"
    android:layout_height="fill_parent">
    <ImageView android:id="@+id/imageview" android:layout_width="wrap_content"
        android:layout_height="wrap_content" />

    <Button android:id="@+id/button" android:layout_width="fill_parent"
        android:layout_height="wrap_content" android:text="下载网络图片" />
</LinearLayout>
main.java
public class Main extends Activity {

    private Button button;
    private ImageView imageView;
    @Override
    public void onCreate(Bundle savedInstanceState) {
        super.onCreate(savedInstanceState);
        setContentView(R.layout.main);
        button = (Button) this.findViewById(R.id.button);
        imageView = (ImageView) this.findViewById(R.id.imageview);
        button.setOnClickListener(new View.OnClickListener() {
            @Override
            public void onClick(View v) {
                // TODO Auto-generated method stub
                // try {
                // InputStream inputStream = HttpUtils
                // .getImageViewInputStream();
                // Bitmap bitmap = BitmapFactory.decodeStream(inputStream);
                // imageView.setImageBitmap(bitmap);
                // } catch (IOException e) {
                // // TODO: handle exception
                // }
                byte[] data = HttpUtils.getImageViewArray();
                Bitmap bitmap = BitmapFactory.decodeByteArray(data, 0,
                        data.length);
                imageView.setImageBitmap(bitmap);

            }
        });
    }
}
使用Http协议获取网络图片
HttpUtils.java
public class HttpUtils {

    private final static String URL_PATH = "https://img-my.csdn.net/uploads/201202/8/0_13287131646nNZ.gif";// 访问网路图片的路径

    public HttpUtils() {
        // TODO Auto-generated constructor stub
    }

    /**
     * 从网络中获取图片信息,以流的形式返回
     *
     * @return
     */
    public static InputStream getImageViewInputStream() throws IOException {
        InputStream inputStream = null;

        URL url = new URL(URL_PATH);
        if (url != null) {
            HttpURLConnection httpURLConnection = (HttpURLConnection) url
                    .openConnection();
            httpURLConnection.setConnectTimeout(3000);// 设置连接超时的时间
            httpURLConnection.setRequestMethod("GET");
            httpURLConnection.setDoInput(true);
            int response_code = httpURLConnection.getResponseCode();
            if (response_code == 200) {
                inputStream = httpURLConnection.getInputStream();
            }
        }
        return inputStream;
    }

    /**
     * 从网络中获取图片信息,以字节数组的形式返回
     *
     * @return
     */
    public static byte[] getImageViewArray() {
        byte[] data = null;
        InputStream inputStream = null;
        // 不需要关闭的输出流,直接写入到内存中
        ByteArrayOutputStream outputStream = new ByteArrayOutputStream();

        try {
            URL url = new URL(URL_PATH);
            if (url != null) {
                HttpURLConnection httpURLConnection = (HttpURLConnection) url
                        .openConnection();
                httpURLConnection.setConnectTimeout(3000);// 设置连接超时的时间
                httpURLConnection.setRequestMethod("GET");// 请求方法
                httpURLConnection.setDoInput(true);// 打开输入流
                int response_code = httpURLConnection.getResponseCode();
                int len = 0;
                byte[] b_data = new byte[1024];

                if (response_code == 200) {
                    inputStream = httpURLConnection.getInputStream();
                    while ((len = inputStream.read(b_data)) != -1) {
                        outputStream.write(b_data, 0, len);
                    }
                    data = outputStream.toByteArray();
                }
            }
        } catch (Exception e) {
            // TODO: handle exception
        } finally {
            if (inputStream != null) {
                try {
                    inputStream.close();
                } catch (IOException e) {
                    // TODO Auto-generated catch block
                    e.printStackTrace();
                }
            }
        }
        return data;
    }
}
不懂地方记得问搜索额,(~﹃~)~zZ <完>
以上是关于UI控件之显示图像控件ImageView(下)的主要内容,如果未能解决你的问题,请参考以下文章
UI组件之AdapterView及其子类Gallery画廊控件使用