python爬虫-爬取盗墓笔记
Posted 七夜的故事
tags:
篇首语:本文由小常识网(cha138.com)小编为大家整理,主要介绍了python爬虫-爬取盗墓笔记相关的知识,希望对你有一定的参考价值。
本来今天要继续更新 scrapy爬取美女图片 系列文章,可是发现使用免费的代理ip都非常不稳定,有时候连接上,有时候连接不上,所以我想找到稳定的代理ip,下次再更新 scrapy爬取美女图片之应对反爬虫 文章。(我的新书《Python爬虫开发与项目实战》出版了,大家可以看一下样章)
好了,废话不多说,咱们进入今天的主题。这一篇文章是关于爬取盗墓笔记,主要技术要点是scrapy的使用,scrapy框架中使用mongodb数据库,文件的保存。

这次爬取的网址是 http://seputu.com/。之前也经常在上面在线看盗墓笔记。
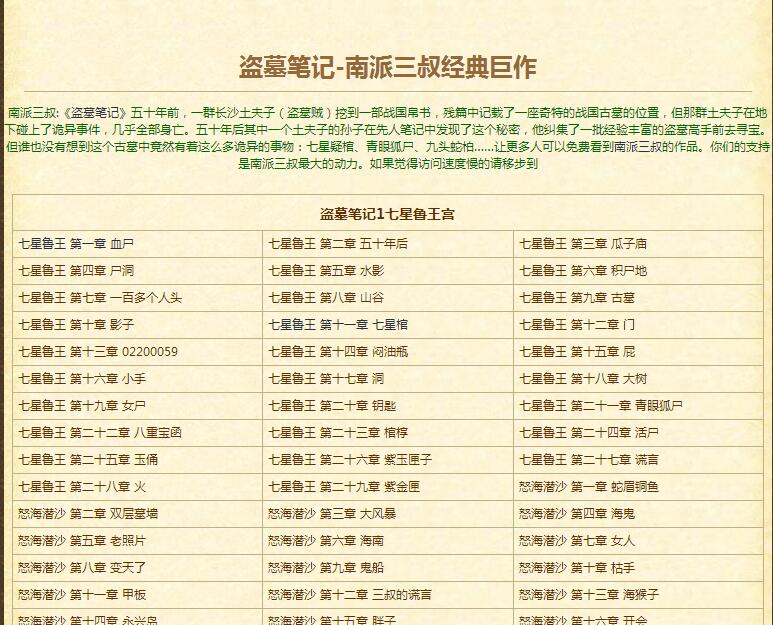
按照咱们之前的学习爬虫的做法,使用firebug审查元素,查看如何解析html。
这次咱们要把书的名称,章节,章节名称,章节链接抽取出来,存储到数据库中,同时将文章的内容提取出来存成txt文件。
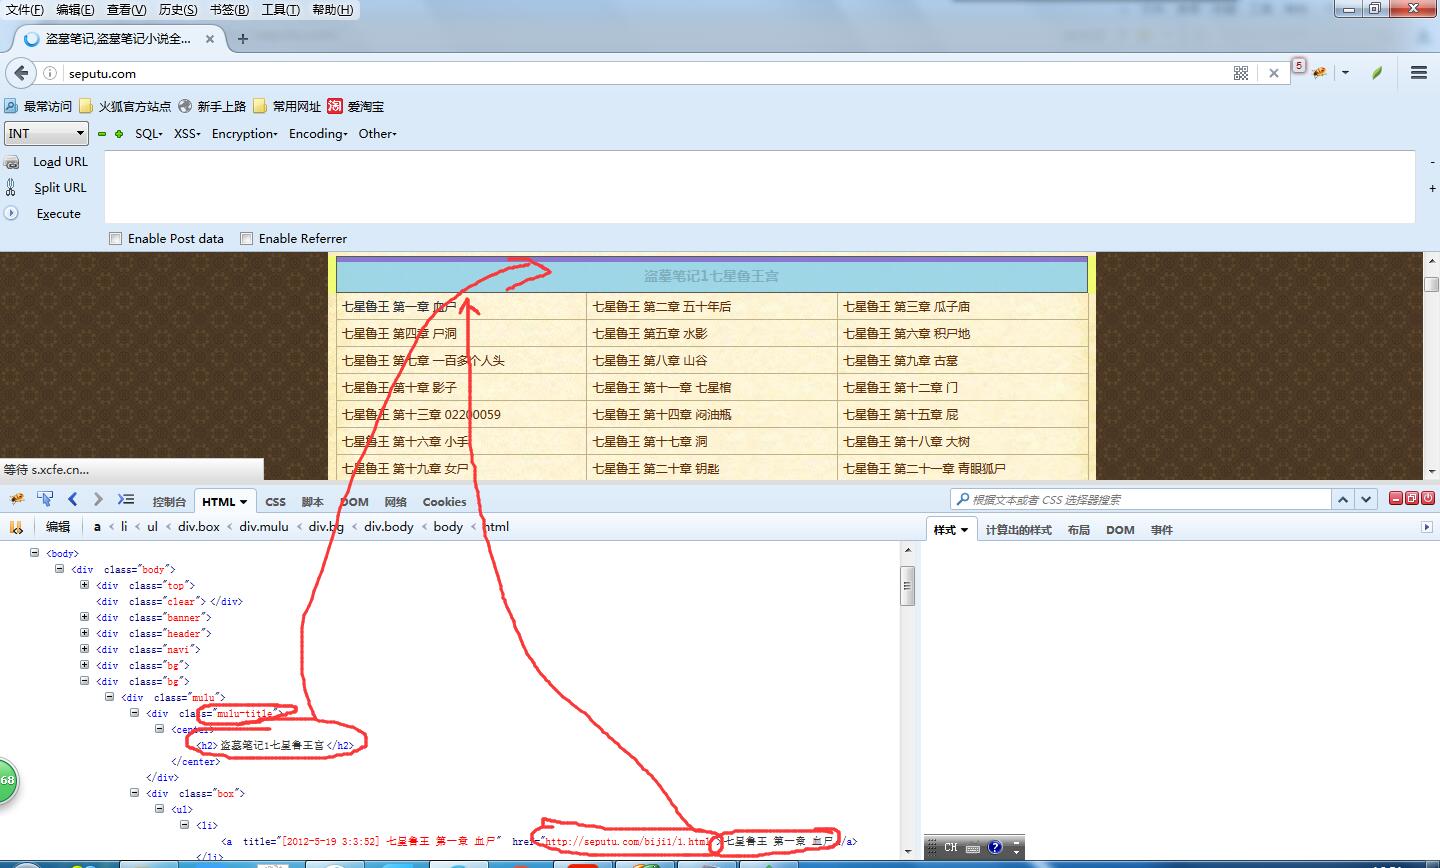
看一下html结构就会发现这个页面结构非常分明,标题的html节点是 div class = \'\'mulu-title",章节的节点是 div class= "box" ,每一章的节点是 div class= "box"中的<li>标签。
然后咱们将第一章的链接 http://seputu.com/biji1/1.html打开,上面就是文章的内容。
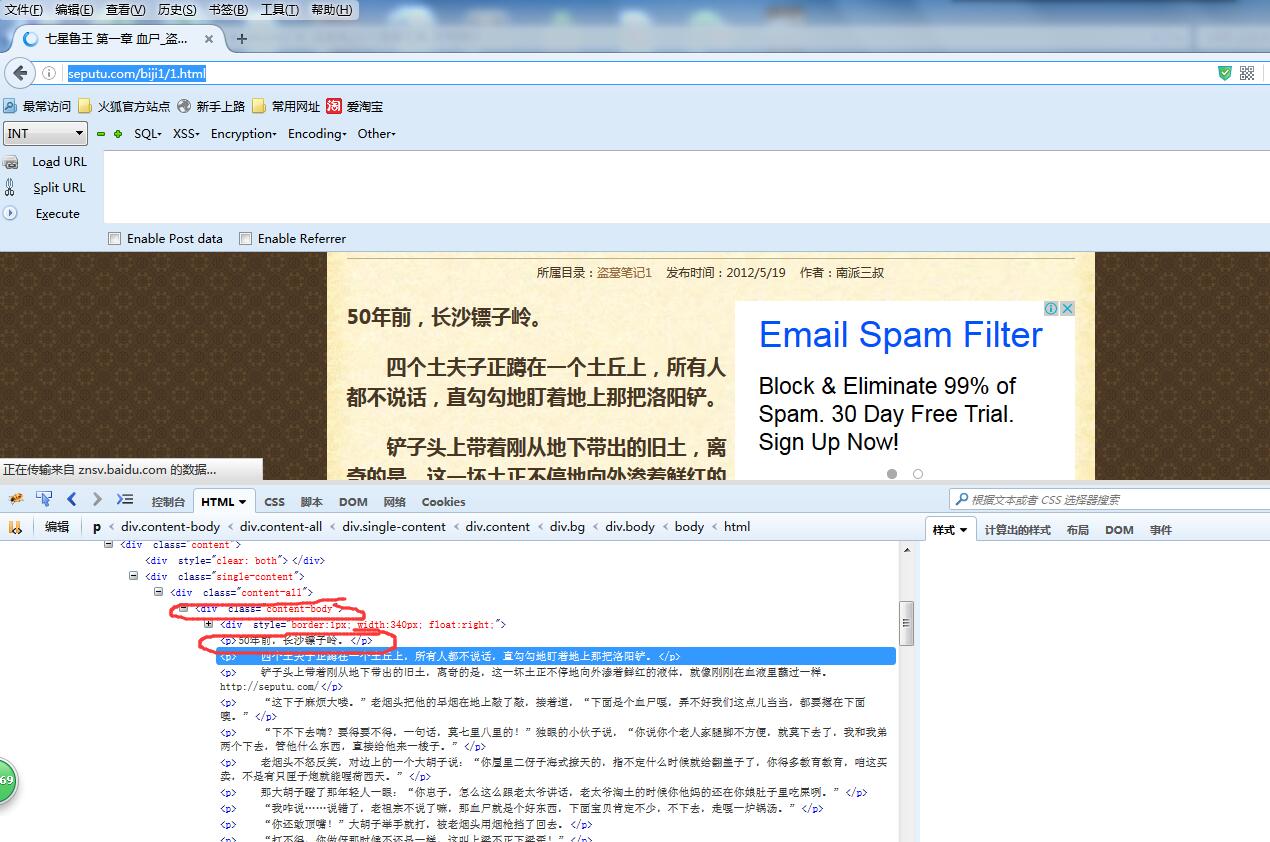
可以看到文章的内容是使用 div class ="content-body"中的<p>标签包裹起来的,总体来说提取难度挺小。
打开cmd,输入scrapy startproject daomubiji,这时候会生成一个工程,然后我把整个工程复制到pycharm中
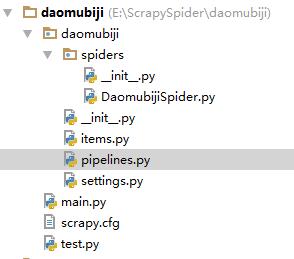
上图就是工程的结构。
DaomubijiSpider.py ------Spider 蜘蛛
items.py -----------------对要爬取数据的模型定义
pipelines.py-------------处理要存储的数据(存到数据库和写到文件)
settings.py----------------对Scrapy的配置
main.py -------------------启动爬虫
test.py -------------------- 测试程序(不参与整体运行)
下面将解析和存储的代码贴一下,完整代码已上传到github:https://github.com/qiyeboy/daomuSpider。
DaomubijiSpider.py (解析html)
#coding:utf-8
import scrapy
from scrapy.selector import Selector
from daomubiji.items import DaomubijiItem


class daomuSpider(scrapy.Spider):
    name = "daomu"
    allowed_domains = ["seputu.com"]
    start_urls = ["http://seputu.com/"]
    \'\'.split()

    def parse(self, response):
        selector = Selector(response)
        mulus= selector.xpath("//div[@class=\'mulu\']/div[@class=\'mulu-title\']/center/h2/text()").extract()#将目录提取出来
        boxs = selector.xpath("//div[@class=\'mulu\']/div[@class=\'box\']")#.extract()
        for i in range(len(mulus)):
            mulu = mulus[i]#提取出来一个目录
            box = boxs[i]#提取出来一个box
            texts = box.xpath(".//ul/li/a/text()").extract()#将文本提取出来
            urls  = box.xpath(".//ul/li/a/@href").extract()#将链接提取出来
            for j in range(len(urls)):
                item = DaomubijiItem()
                item[\'bookName\'] = mulu
                try:
                    item[\'bookTitle\'] = texts[j].split(\' \')[0]
                    item[\'chapterNum\'] = texts[j].split(\' \')[1]
                    item[\'chapterName\'] = texts[j].split(\' \')[2]
                    item[\'chapterUrl\'] = urls[j]
                    request = scrapy.Request(urls[j],callback=self.parseBody)
                    request.meta[\'item\'] = item
                    yield request


                except Exception,e:
                    print \'excepiton\',e
                    continue


    def parseBody(self,response):
        \'\'\'
        解析小说章节中的内容
        :param response:
        :return:
        \'\'\'
        item = response.meta[\'item\']
        selector = Selector(response)

        item[\'chapterContent\'] =\'\\r\\n\'.join(selector.xpath("//div[@class=\'content-body\']/p/text()").extract())
        yield item
   pipelines.py:(处理要存储的数据)

# -*- coding: utf-8 -*-

# Define your item pipelines here
#
# Don\'t forget to add your pipeline to the ITEM_PIPELINES setting
# See: http://doc.scrapy.org/en/latest/topics/item-pipeline.html
import os
from scrapy.pipelines.files import FilesPipeline
from daomubiji import settings
from pymongo import MongoClient

class DaomubijiPipeline(object):
    def process_item(self, item, spider):#将小说进行存储
        dir_path = \'%s/%s/%s\'%(settings.FILE_STORE,spider.name,item[\'bookName\']+\'_\'+item[\'bookTitle\'])#存储路径
        print \'dir_path\',dir_path
        if not os.path.exists(dir_path):
            os.makedirs(dir_path)
        file_path = \'%s/%s\'%(dir_path,item[\'chapterNum\']+\'_\'+item[\'chapterName\']+\'.txt\')
        with open(file_path,\'w\') as file_writer:
            file_writer.write(item[\'chapterContent\'].encode(\'utf-8\'))
            file_writer.write(\'\\r\\n\'.encode(\'utf-8\'))

        file_writer.close()
        return item

class DaomuSqlPipeline(object):

    def __init__(self):
    #连接mongo数据库,并把数据存储
        client = MongoClient()#\'mongodb://localhost:27017/\'///\'localhost\', 27017///\'mongodb://tanteng:123456@localhost:27017/\'
        db = client.daomu
        self.books = db.books

    def process_item(self, item, spider):
        print \'spider_name\',spider.name
        temp ={\'bookName\':item[\'bookName\'],
               \'bookTitle\':item[\'bookTitle\'],
               \'chapterNum\':item[\'chapterNum\'],
               \'chapterName\':item[\'chapterName\'],
               \'chapterUrl\':item[\'chapterUrl\']
               }
        self.books.insert(temp)

        return item

接下来切换到main.py所在目录,运行python main.py启动爬虫。
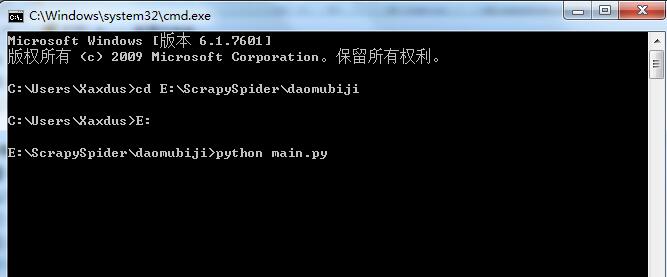
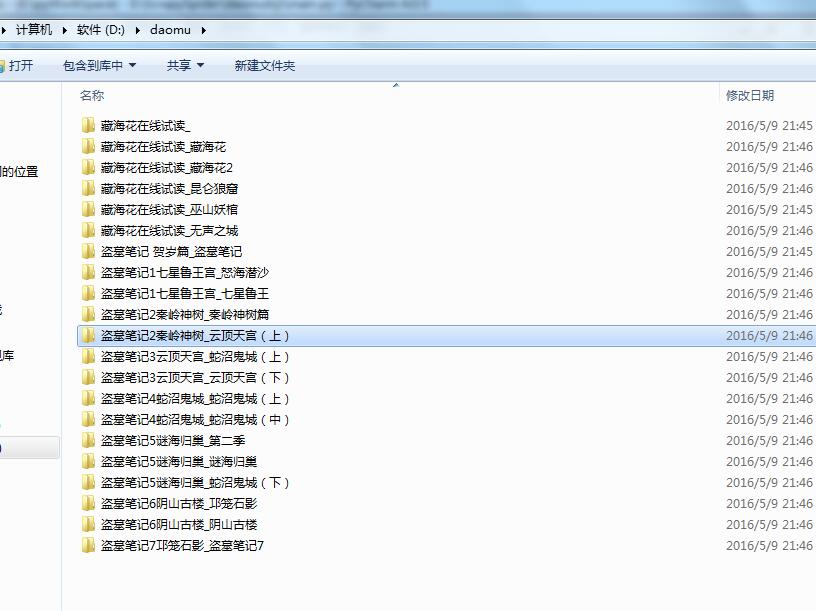
没过几分钟,爬虫就结束了,咱们看一下爬取的数据和文件。
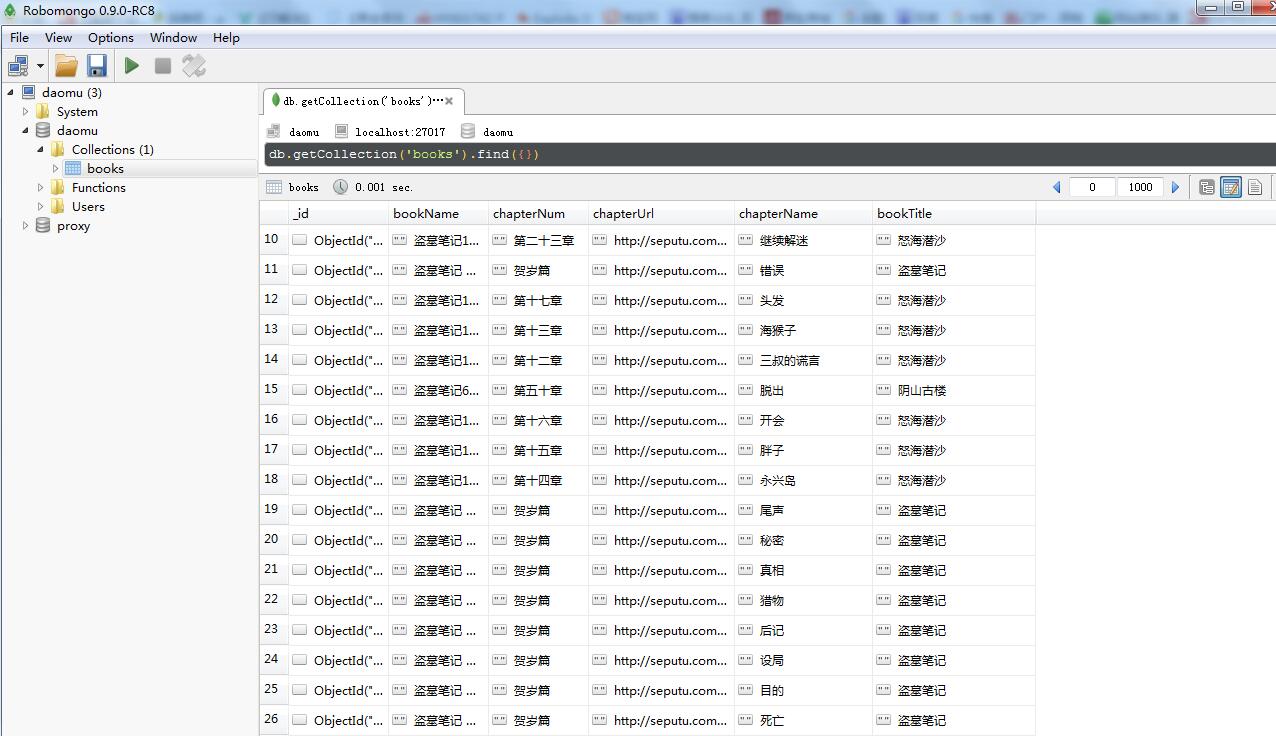
数据库数据:
今天的分享就到这里,如果大家觉得还可以呀,记得推荐呦。

欢迎大家支持我公众号:

本文章属于原创作品,欢迎大家转载分享。尊重原创,转载请注明来自:七夜的故事 http://www.cnblogs.com/qiyeboy/
以上是关于python爬虫-爬取盗墓笔记的主要内容,如果未能解决你的问题,请参考以下文章