Flutter 标签类控件大全Chip
Posted mengqd
tags:
篇首语:本文由小常识网(cha138.com)小编为大家整理,主要介绍了Flutter 标签类控件大全Chip相关的知识,希望对你有一定的参考价值。

老孟导读:Flutter内置了多个标签类控件,但本质上它们都是同一个控件,只不过是属性参数不同而已,在学习的过程中可以将其放在放在一起学习,方便记忆。
RawChip
Material风格标签控件,此控件是其他标签控件的基类,通常情况下,不会直接创建此控件,而是使用如下控件:
- Chip
- InputChip
- ChoiceChip
- FilterChip
- ActionChip
如果你想自定义标签类控件时通常使用此控件。
RawChip可以通过设置onSelected被选中,设置onDeleted被删除,也可以通过设置onPressed而像一个按钮,它有一个label属性,有一个前置(avatar)和后置图标(deleteIcon)。
基本用法如下:
RawChip(
  label: Text(‘老孟‘),
)
效果如下:

禁用状态设置:
RawChip(
  label: Text(‘老孟‘),
  isEnabled: false,
)
效果如下:

设置左侧控件,一般是图标:
RawChip(
  avatar: CircleAvatar(
    child: Text(‘孟‘),
  ),
  label: Text(‘老孟‘),
)
效果如下:

设置label的样式和内边距:
RawChip(
  label: Text(‘老孟‘),
  labelStyle: TextStyle(color: Colors.blue),
  labelPadding: EdgeInsets.symmetric(horizontal: 10),
)
效果如下:

设置删除相关属性:
RawChip(
  label: Text(‘老孟‘),
  onDeleted: (){
    print(‘onDeleted‘);
  },
  deleteIcon: Icon(Icons.delete),
  deleteIconColor: Colors.red,
  deleteButtonTooltipMessage: ‘删除‘,
)
效果如下:

点击删除图标,回调onDeleted。
设置形状、背景颜色及内边距:
RawChip(
  label: Text(‘老孟‘),
  shape: RoundedRectangleBorder(borderRadius: BorderRadius.circular(10)),
  backgroundColor: Colors.blue,
  padding: EdgeInsets.symmetric(vertical: 10),
)
效果如下:

设置阴影:
RawChip(
  label: Text(‘老孟‘),
  elevation: 8,
  shadowColor: Colors.blue,
)
效果如下:

materialTapTargetSize属性控制最小点击区域,详情查看:MaterialTapTargetSize
设置选中状态、颜色:
bool _selected = false;
RawChip(
  label: Text(‘老孟‘),
  selected: _selected,
  onSelected: (v){
    setState(() {
      _selected = v;
    });
  },
  selectedColor: Colors.blue,
  selectedShadowColor: Colors.red,
)
效果如下:
设置选中状态下“前置对勾”图标:
RawChip(
  label: Text(‘老孟‘),
  selected: true,
  showCheckmark: true,
  checkmarkColor: Colors.red,
)
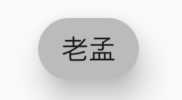
效果如下:
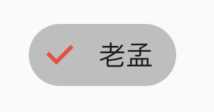
showCheckmark为false时,无“前置对勾”图标。
设置点击属性:
RawChip(
  label: Text(‘老孟‘),
  onPressed: (){
    print(‘onPressed‘);
  },
  pressElevation: 12,
)
效果如下:
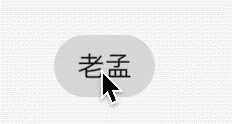
点击时有水波纹效果。
Chip
Chip是一个简单的标签控件,仅显示信息和删除相关属性,是一个简化版的RawChip,用法和RawChip一样。源代码如下:
@override
Widget build(BuildContext context) {
  assert(debugCheckHasMaterial(context));
  return RawChip(
    avatar: avatar,
    label: label,
    labelStyle: labelStyle,
    labelPadding: labelPadding,
    deleteIcon: deleteIcon,
    onDeleted: onDeleted,
    deleteIconColor: deleteIconColor,
    deleteButtonTooltipMessage: deleteButtonTooltipMessage,
    tapEnabled: false,
    shape: shape,
    clipBehavior: clipBehavior,
    focusNode: focusNode,
    autofocus: autofocus,
    backgroundColor: backgroundColor,
    padding: padding,
    materialTapTargetSize: materialTapTargetSize,
    elevation: elevation,
    shadowColor: shadowColor,
    isEnabled: true,
  );
}
InputChip
以紧凑的形式表示一条复杂的信息,例如实体(人,地方或事物)或对话文本。
InputChip 本质上也是RawChip,用法和RawChip一样。源代码如下:
@override
Widget build(BuildContext context) {
  assert(debugCheckHasMaterial(context));
  return RawChip(
    avatar: avatar,
    label: label,
    labelStyle: labelStyle,
    labelPadding: labelPadding,
    deleteIcon: deleteIcon,
    onDeleted: onDeleted,
    deleteIconColor: deleteIconColor,
    deleteButtonTooltipMessage: deleteButtonTooltipMessage,
    onSelected: onSelected,
    onPressed: onPressed,
    pressElevation: pressElevation,
    selected: selected,
    tapEnabled: true,
    disabledColor: disabledColor,
    selectedColor: selectedColor,
    tooltip: tooltip,
    shape: shape,
    clipBehavior: clipBehavior,
    focusNode: focusNode,
    autofocus: autofocus,
    backgroundColor: backgroundColor,
    padding: padding,
    materialTapTargetSize: materialTapTargetSize,
    elevation: elevation,
    shadowColor: shadowColor,
    selectedShadowColor: selectedShadowColor,
    showCheckmark: showCheckmark,
    checkmarkColor: checkmarkColor,
    isEnabled: isEnabled && (onSelected != null || onDeleted != null || onPressed != null),
    avatarBorder: avatarBorder,
  );
}
ChoiceChip
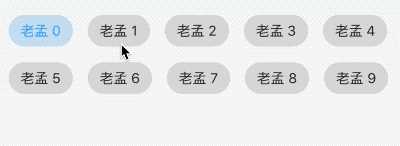
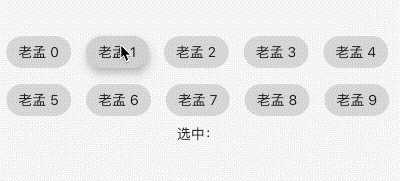
允许从一组选项中进行单个选择,创建一个类似于单选按钮的标签,本质上ChoiceChip也是一个RawChip,ChoiceChip本身不具备单选属性。
单选demo如下:
int _selectIndex = 0;
Wrap(
  spacing: 15,
  children: List.generate(10, (index) {
    return ChoiceChip(
      label: Text(‘老孟 $index‘),
      selected: _selectIndex == index,
      onSelected: (v) {
        setState(() {
          _selectIndex = index;
        });
      },
    );
  }).toList(),
)
效果如下:
本控件由共建者普通程序员提供。
FilterChip
FilterChip可以作为过滤标签,本质上也是一个RawChip,用法如下:
List<String> _filters = [];

Column(
  children: <Widget>[
    Wrap(
      spacing: 15,
      children: List.generate(10, (index) {
        return FilterChip(
          label: Text(‘老孟 $index‘),
          selected: _filters.contains(‘$index‘),
          onSelected: (v) {
            setState(() {
              if(v){
                _filters.add(‘$index‘);
              }else{
                _filters.removeWhere((f){
                  return f == ‘$index‘;
                });
              }
            });
          },
        );
      }).toList(),
    ),
    Text(‘选中:${_filters.join(‘,‘)}‘),
  ],
)
效果如下:
ActionChip
显示与主要内容有关的一组动作,本质上也是一个RawChip,用法如下:
ActionChip(
    avatar: CircleAvatar(
      backgroundColor: Colors.grey.shade800,
      child: Text(‘孟‘),
    ),
    label: Text(‘老孟‘),
    onPressed: () {
      print("onPressed");
    })
效果如下:
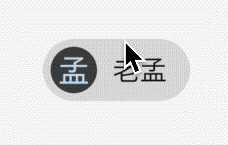
效果很像按钮类控件。
交流
老孟Flutter博客地址(近200个控件用法):http://laomengit.com
欢迎加入Flutter交流群(微信:laomengit)、关注公众号【老孟Flutter】:
 |
 |
以上是关于Flutter 标签类控件大全Chip的主要内容,如果未能解决你的问题,请参考以下文章
如何在你的 Flutter 中使用 input chip 标签组件