SpringBoot 入门demo
Posted chy18883701161
tags:
篇首语:本文由小常识网(cha138.com)小编为大家整理,主要介绍了SpringBoot 入门demo相关的知识,希望对你有一定的参考价值。
创建SpringBoot项目方式一
(1)新建maven项目,不使用骨架。
(2)在pom.xml中添加
    <!--springboot项目的依赖,统一管理版本-->
    <parent>
        <groupId>org.springframework.boot</groupId>
        <artifactId>spring-boot-starter</artifactId>
        <version>2.2.4.RELEASE</version>
    </parent>

    <dependencies>
        <!-- web项目要用的依赖,不设置版本,由<paren>统一管理版本 -->
        <dependency>
            <groupId>org.springframework.boot</groupId>
            <artifactId>spring-boot-starter-web</artifactId>
        </dependency>

    </dependencies>
(3)src/main/java下新建包com.chy.controller,包下新建TestController
@RestController  //相当于@Controller+@ResponseBody,会自动把此controller中所有业务方法返回的String、json加到响应体中。也可以用@Controller,然后在业务方法上标注@ResponseBody
@EnableAutoConfiguration  //允许自动配置
public class TestController {

    @RequestMapping("/handler")
    ublic String handler(){
        return "ok";
    }

}
(4)新建包com.chy.test,包下新建测试类Test,里面写一个main方法,标注为springboot的引导类
@SpringBootApplication  //标识为SpringBoot的引导类(程序入口)
public class Test {
    public static void main(String[] args) {
        SpringApplication.run(TestController.class);  //运行、部署指定的类
    }
}
引导类必须要有main方法。
如果把main方法写controller中,在controller上标注@SpringBootApplication ,则不必在controller上标注@EnableAutoConfiguration。
(5)点击Test类左边的绿色三角形运行,控制台打印springboot的标志,看到springboot内置的tomcat已经启动

![]()
浏览器地址栏输入 http://localhost:8080/handler ,看到页面显示“ok”。
注意内置的tomcat是直接部署到localhost下的,不是部署到项目名下的。
创建SpringBoot项目方式二
新建项目
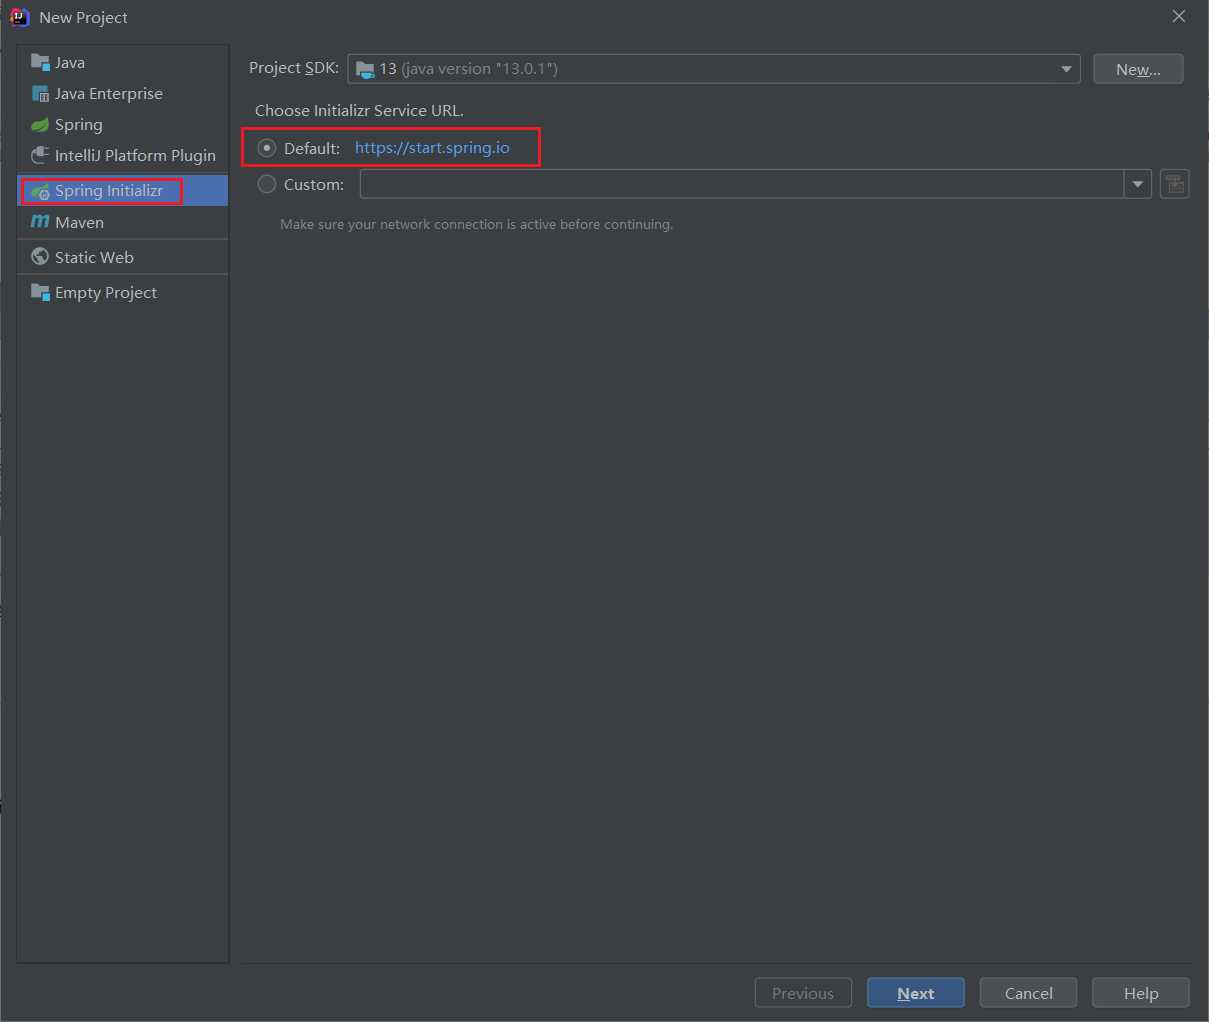
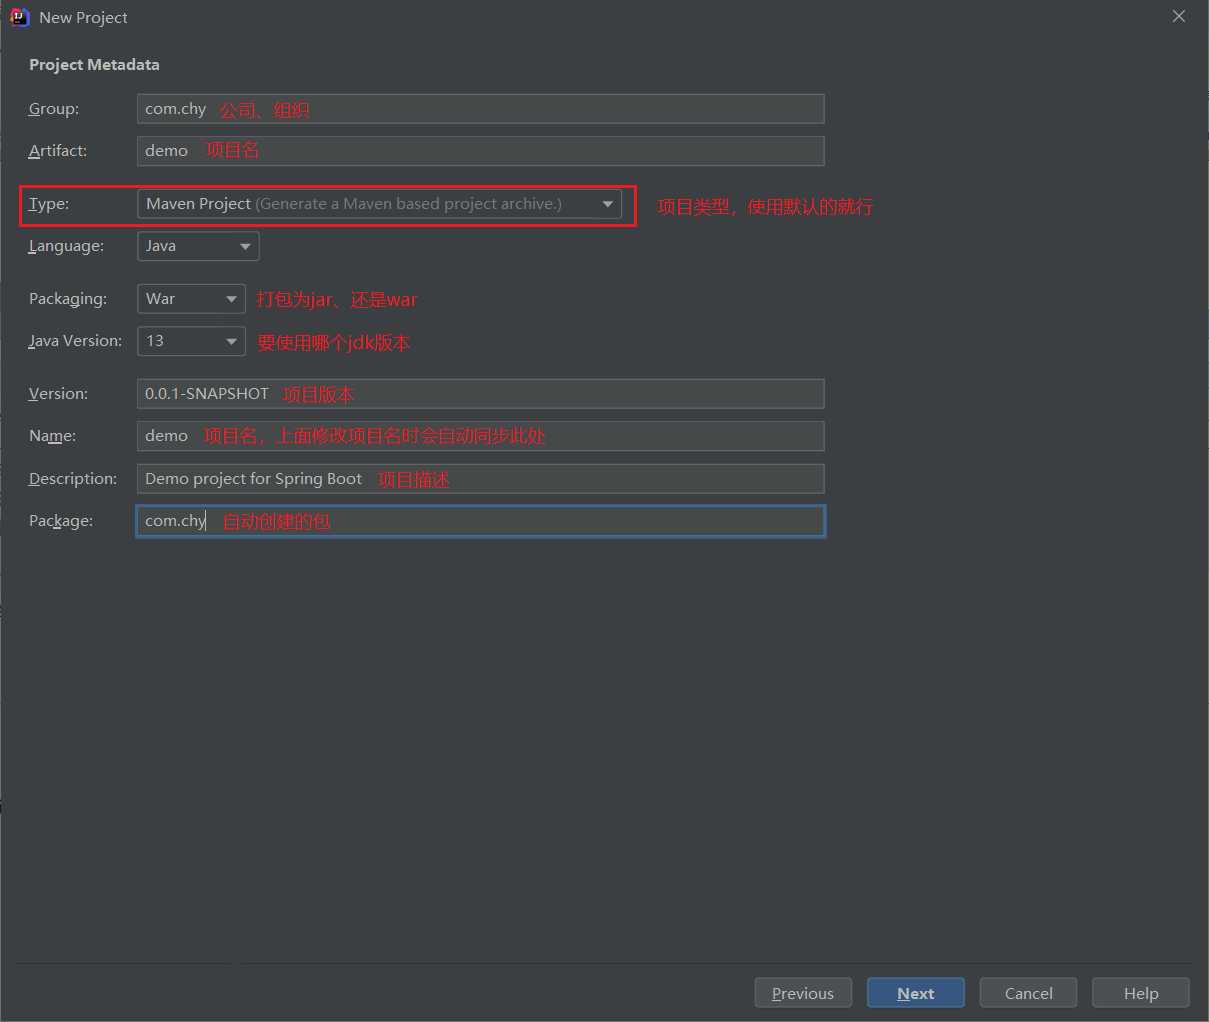
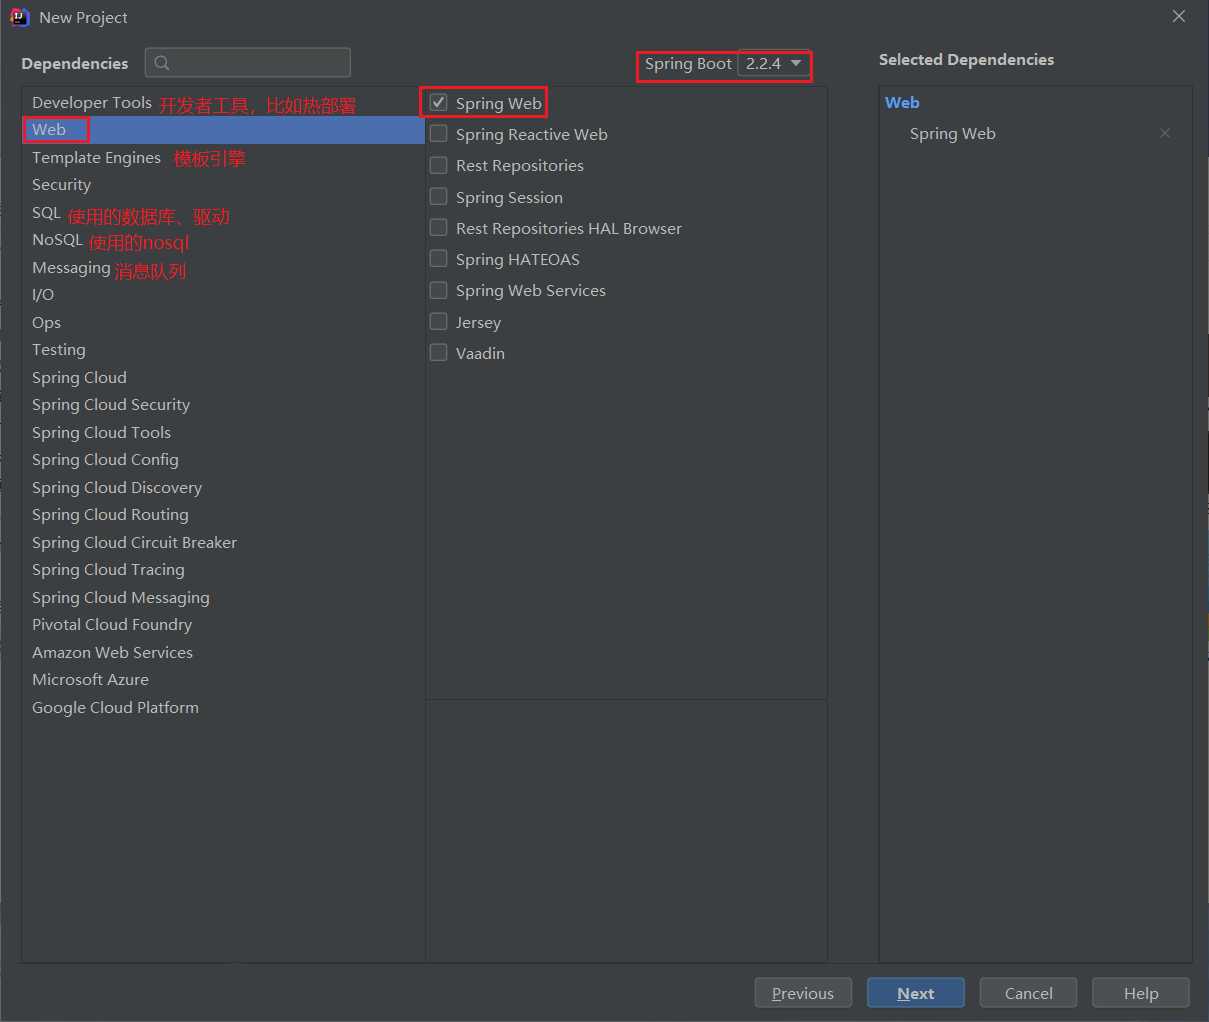
勾选Web -> Spring Web就行了。
IDEA已经在pom.xml中导入了所需的依赖,并自动生成了一些文件、包、类。
我个人更喜欢方式一,因为依赖都是自己导的,包、类都是自己建的,看起来比较简洁,不会自动生成杂七杂八的文件。
以上是关于SpringBoot 入门demo的主要内容,如果未能解决你的问题,请参考以下文章