GDI绘制柱状图
Posted luck1996
tags:
篇首语:本文由小常识网(cha138.com)小编为大家整理,主要介绍了GDI绘制柱状图相关的知识,希望对你有一定的参考价值。
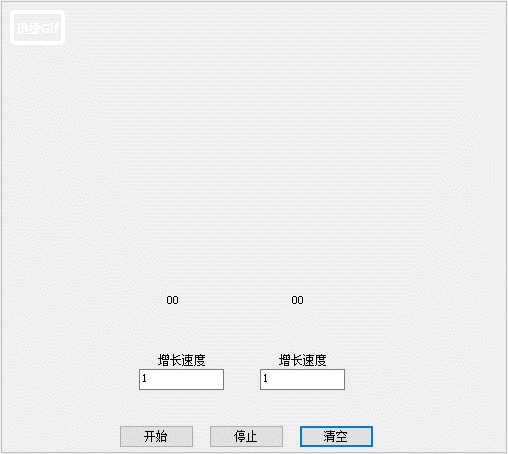
实现效果:

1,添加三个按钮
2,添加两个TextBox控件,利用KeyPress事件来控制不让有其他字母输进来。
3,添加两个Lable标签用来跟随图形移动,位置提前测量出来。
4.添加Timer组件,设置Enabled为True,然后再利用Timer的事件。

using System;
using System.Collections.Generic;
using System.ComponentModel;
using System.Data;
using System.Drawing;
using System.Linq;
using System.Text;
using System.Threading.Tasks;
using System.Windows.Forms;

namespace GDI柱状图
{
    public partial class Form1 : Form
    {
        public Form1()
        {
            InitializeComponent();
        }
        //定义1号柱状图参数
        int RECX1 = 215;
        int RECY1 = 325;
        int RECWidth1 = 20;
        int RECHeight1 = 0;

        //定义2号柱状图参数
        int RECX2 = 340;
        int RECY2 = 325;
        int RECWidth2 = 20;
        int RECHeight2 = 0;

        //定义启动
        bool run = false;
        //利用集合来清空画板
        public List<Graphics> g = new List<Graphics>();
        private void timer1_Tick(object sender, EventArgs e)
        {
            if (run == true)
            {
                //第一条柱状图
                if (Convert.ToInt32( textBox1.Text) !=0)
                {
                    //填充高度
                    RECHeight1 = RECHeight1 + Convert.ToInt32(this.textBox1.Text);
                    //每次填充Y点位置都要向上增加
                    RECY1 = RECY1 - Convert.ToInt32(this.textBox1.Text);
                    this.label3.Location = new Point(215, this.label3.Location.Y - Convert.ToInt32(this.textBox1.Text));
                    Graphics g1 = this.CreateGraphics();
                    this.label3.Text = (Convert.ToInt32(this.label3.Text) + 1).ToString();
                    g1.FillRectangle(Brushes.Blue, RECX1, RECY1, RECWidth1, RECHeight1);
                    g.Add(g1);
                }
                //第二条柱状图
                if (Convert.ToInt32(textBox2.Text) != 0)
                {
                    RECHeight2 = RECHeight2 + Convert.ToInt32(this.textBox2.Text);
                    RECY2 = RECY2 - Convert.ToInt32(this.textBox2.Text);
                    this.label4.Location = new Point(340, this.label4.Location.Y - Convert.ToInt32(this.textBox2.Text));
                    Graphics g2 = this.CreateGraphics();
                    this.label4.Text = (Convert.ToInt32(this.label4.Text) + 1).ToString();
                    g2.FillRectangle(Brushes.Blue, RECX2, RECY2, RECWidth2, RECHeight2);
                    g.Add(g2);
                }
            }
        }
        //启动按钮
        private void button1_Click(object sender, EventArgs e)
        {
            this.run = true;
        }
        //停止按钮
        private void button2_Click(object sender, EventArgs e)
        {
            this.run = false;
        }
        //清除按钮
        private void button3_Click(object sender, EventArgs e)
        {
            foreach (var item in g)
            {
                item.Clear(this.BackColor);
                this.label3.Location = new Point(215, 295);
                this.label3.Text = "00";
                this.label4.Location = new Point(340, 295);
                this.label4.Text = "00";
                RECX1 = 215;
                RECY1 = 325;
                RECWidth1 = 20;
                RECHeight1 = 0;
                RECX2 = 340;
                RECY2 = 325;
                RECWidth2 = 20;
                RECHeight2 = 0;
            }
        }

        private void textBox1_KeyPress(object sender, KeyPressEventArgs e)
        {
            if ((e.KeyChar != 8 && !char.IsDigit(e.KeyChar)) && e.KeyChar != 13)
            {
                MessageBox.Show("请输入数字", "提示", MessageBoxButtons.OKCancel, MessageBoxIcon.Information);
                e.Handled = true;
            }
        }

        private void textBox2_KeyPress(object sender, KeyPressEventArgs e)
        {
            if ((e.KeyChar != 8 && !char.IsDigit(e.KeyChar)) && e.KeyChar != 13)
            {
                MessageBox.Show("请输入数字", "提示", MessageBoxButtons.OKCancel, MessageBoxIcon.Information);
                e.Handled = true;
            }
        }
    }
}
以上是关于GDI绘制柱状图的主要内容,如果未能解决你的问题,请参考以下文章
100天精通Python(可视化篇)——第80天:matplotlib绘制不同种类炫酷柱状图代码实战(簇状堆积横向百分比3D柱状图)
MATLAB | 全网唯一 ,MATLAB绘制阴影柱状图(填充斜线)
