视觉高级篇20 # 如何用WebGL绘制3D物体?
Posted 凯小默
tags:
篇首语:本文由小常识网(cha138.com)小编为大家整理,主要介绍了视觉高级篇20 # 如何用WebGL绘制3D物体?相关的知识,希望对你有一定的参考价值。
说明
【跟月影学可视化】学习笔记。
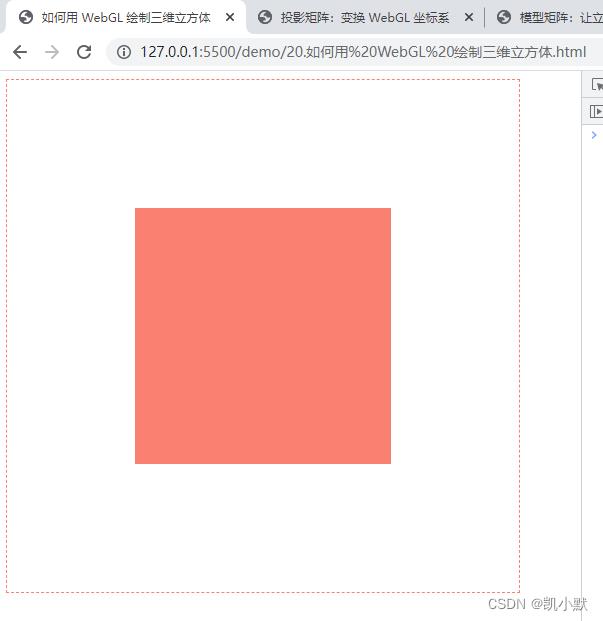
如何用 WebGL 绘制三维立方体
我们知道立方体有8个顶点,6个面,在 WebGL 中,需要用 12 个三角形来绘制它。把每个面的顶点分开,需要 24 个顶点。

绘制 3D 图形与绘制 2D 图形有一点不一样,必须要开启深度检测和启用深度缓冲区。
在 WebGL 中,可以通过 gl.enable(gl.DEPTH_TEST),来开启深度检测。
在清空画布的时候,也要用 gl.clear(gl.COLOR_BUFFER_BIT | gl.DEPTH_BUFFER_BIT),来同时清空颜色缓冲区和深度缓冲区。
<!DOCTYPE html>
<html lang="en">
    <head>
        <meta charset="UTF-8" />
        <meta http-equiv="X-UA-Compatible" content="IE=edge" />
        <meta name="viewport" content="width=device-width, initial-scale=1.0" />
        <title>如何用 WebGL 绘制三维立方体</title>
        <style>
            canvas
                border: 1px dashed salmon;

        </style>
    </head>
    <body>
        <canvas width="512" height="512"></canvas>
        <script src="./common/lib/gl-renderer.js"></script>
        <script type="module">
            const vertex = `
                attribute vec3 a_vertexPosition;
                attribute vec4 color;

                varying vec4 vColor;

                void main()
                    gl_PointSize = 1.0;
                    vColor = color;
                    gl_Position = vec4(a_vertexPosition, 1);

            `;

            const fragment = `
                #ifdef GL_ES
                precision highp float;
                #endif

                varying vec4 vColor;

                void main()
                    gl_FragColor = vColor;

            `;

            const canvas = document.querySelector("canvas");
            // 开启深度检测
            const renderer = new GlRenderer(canvas,
                depth: true
            );
            const program = renderer.compileSync(fragment, vertex);
            renderer.useProgram(program);

            // 用来生成立方体 6 个面的 24 个顶点,以及 12 个三角形的索引
            function cube(size = 1.0, colors = [[1, 0, 0, 1]])
                const h = 0.5 * size;
                // 立方体的顶点
                const vertices = [
                    [-h, -h, -h],
                    [-h, h, -h],
                    [h, h, -h],
                    [h, -h, -h],
                    [-h, -h, h],
                    [-h, h, h],
                    [h, h, h],
                    [h, -h, h],
                ];

                const positions = [];
                const color = [];
                const cells = [];

                let colorIdx = 0;
                let cellsIdx = 0;
                const colorLen = colors.length;

                function quad(a, b, c, d)
                    [a, b, c, d].forEach((i) =>
                        positions.push(vertices[i]);
                        color.push(colors[colorIdx % colorLen]);
                    );
                    cells.push(
                        [0, 1, 2].map(i => i + cellsIdx),
                        [0, 2, 3].map(i => i + cellsIdx),
                    );
                    colorIdx++;
                    cellsIdx += 4;

                // 立方体的六个面
                quad(1, 0, 3, 2);
                quad(4, 5, 6, 7);
                quad(2, 3, 7, 6);
                quad(5, 4, 0, 1);
                quad(3, 0, 4, 7);
                quad(6, 5, 1, 2);

                return  positions, color, cells ;


            const geometry = cube(1.0, [
                [250/255, 128/255, 114/255, 1], // salmon rgb(250 128 114)
                [218/255, 165/255, 32/255, 1],// goldenrod rgb(218, 165, 32)
                [46/255, 139/255, 87/255, 1], // seagreen rgb(46 139 87)
                [255/255, 192/255, 203/255, 1], // pink rgb(255, 192, 203)
                [135/255, 206/255, 235/255, 1],// skyblue rgb(135, 206, 235)
                [106/255, 90/255, 205/255, 1], // slateblue rgb(106, 90, 205)
            ]);

            renderer.setMeshData([

                    positions: geometry.positions,
                    attributes:
                        color: geometry.color,
                    ,
                    cells: geometry.cells,
                ,
            ]);
            renderer.render();
        </script>
    </body>
</html>
投影矩阵:变换 WebGL 坐标系
上面朝向我们的面应该是 goldenrod 颜色, WebGL 默认的剪裁坐标的 z 轴方向,的确是朝内的。WebGL 坐标系就是一个左手系而不是右手系。下面我们需要将 WebGL 的坐标系从左手系转换为右手系。
实际上就是将 z 轴坐标方向反转,对应的齐次矩阵如下:
[
  1, 0, 0, 0,
  0, 1, 0, 0,
  0, 0, -1, 0,
  0, 0, 0, 1
]
<!DOCTYPE html>
<html lang="en">
    <head>
        <meta charset="UTF-8" />
        <meta http-equiv="X-UA-Compatible" content="IE=edge" />
        <meta name="viewport" content="width=device-width, initial-scale=1.0" />
        <title>投影矩阵:变换 WebGL 坐标系</title>
        <style>
            canvas
                border: 1px dashed rgb(250, 128, 114);

        </style>
    </head>
    <body>
        <canvas width="512" height="512"></canvas>
        <script src="./common/lib/gl-renderer.js"></script>
        <script type="module">
            const vertex = `
                attribute vec3 a_vertexPosition;
                attribute vec4 color;

                varying vec4 vColor;
                uniform mat4 projectionMatrix;

                void main()
                    gl_PointSize = 1.0;
                    vColor = color;
                    gl_Position = projectionMatrix * vec4(a_vertexPosition, 1);

            `;

            const fragment = `
                #ifdef GL_ES
                precision highp float;
                #endif

                varying vec4 vColor;

                void main()
                    gl_FragColor = vColor;

            `;

            const canvas = document.querySelector("canvas");
            // 开启深度检测
            const renderer = new GlRenderer(canvas,
                depth: true
            );
            const program = renderer.compileSync(fragment, vertex);
            renderer.useProgram(program);

            // 用来生成立方体 6 个面的 24 个顶点,以及 12 个三角形的索引
            function cube(size = 1.0, colors = [[1, 0, 0, 1]])
                const h = 0.5 * size;
                // 立方体的顶点
                const vertices = [
                    [-h, -h, -h],
                    [-h, h, -h],
                    [h, h, -h],
                    [h, -h, -h],
                    [-h, -h, h],
                    [-h, h, h],
                    [h, h, h],
                    [h, -h, h],
                ];

                const positions = [];
                const color = [];
                const cells = [];

                let colorIdx = 0;
                let cellsIdx = 0;
                const colorLen = colors.length;

                function quad(a, b, c, d)
                    [a, b, c, d].forEach((i) =>
                        positions.push(vertices[i]);
                        color.push(colors[colorIdx % colorLen]);
                    );
                    cells.push(
                        [0, 1, 2].map(i => i + cellsIdx),
                        [0, 2, 3].map(i => i + cellsIdx),
                    );
                    colorIdx++;
                    cellsIdx += 4;

                // 立方体的六个面
                quad(1, 0, 3, 2);
                quad(4, 5, 6, 7);
                quad(2, 3, 7, 6);
                quad(5, 4, 0, 1);
                quad(3, 0, 4, 7);
                quad(6, 5, 1, 2);

                return  positions, color, cells ;


            const geometry = cube(1.0, [
                [250/255, 128/255, 114/255, 1], // salmon rgb(250 128 114)
                [218/255, 165/255, 32/255, 1],// goldenrod rgb(218, 165, 32)
                [46/255, 139/255, 87/255, 1], // seagreen rgb(46 139 87)
                [255/255, 192/255, 203/255, 1], // pink rgb(255, 192, 203)
                [135/255, 206/255, 235/255, 1],// skyblue rgb(135, 206, 235)
                [106/255, 90/255, 205/255, 1], // slateblue rgb(106, 90, 205)
            ]);

            // 将 z 轴坐标方向反转,对应的齐次矩阵如下,转换坐标的齐次矩阵,又被称为投影矩阵(ProjectionMatrix)
            renderer.uniforms.projectionMatrix = [
                1, 0, 0, 0,
                0, 1, 0, 0,
                0, 0, -1, 0,
                0, 0, 0, 1,
            ];

            renderer.setMeshData([

                    positions: geometry.positions,
                    attributes:
                        color: geometry.color,
                    ,
                    cells: geometry.cells,
                ,
            ]);
            renderer.render();
        </script>
    </body>
</html>

模型矩阵:让立方体旋转起来
用立方体沿 x、y、z 轴的旋转来生成模型矩阵。以 x、y、z 三个方向的旋转得到三个齐次矩阵,然后将它们相乘,就能得到最终的模型矩阵。
<!DOCTYPE html>
<html lang="en">
<head>
<meta charset="UTF-8" />
<meta http-equiv="X-UA-Compatible" content="IE=edge" />
<meta name="viewport" content="width=device-width, initial-scale=1.0" />
<title>模型矩阵:让立方体旋转起来</title>
<style>
canvas
border: 1px dashed rgb(250, 128, 114);
</style>
</head>
<body>
<canvas width="512" height="512"></canvas>
<script src="./common/lib/gl-renderer.js"></script>
<script type="module">
import multiply from 视觉高级篇22 # 如何用仿射变换来移动和旋转3D物体?
视觉高级篇21 # 如何添加相机,用透视原理对物体进行投影?