Vue_(基础)Vue中的指令
Posted 1138720556gary
tags:
篇首语:本文由小常识网(cha138.com)小编为大家整理,主要介绍了Vue_(基础)Vue中的指令相关的知识,希望对你有一定的参考价值。
Vue.js中文文档 传送门

Vue的指令:其实就是单个JavaScript表达式,一般来说是带有v-前缀
Vue指令:
v-model:数据双向绑定;
v-text:以纯文本方式显示数据;
v-html:可以识别HTML标签;
v-once:只渲染元素或组件一次;
v-pre:不进行编译,直接显示内容;
v-for:对集合或对象进行遍历;
项目结构
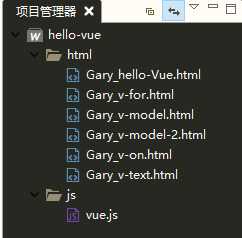
【每个demo下方都存有html源码】
Hello World入门
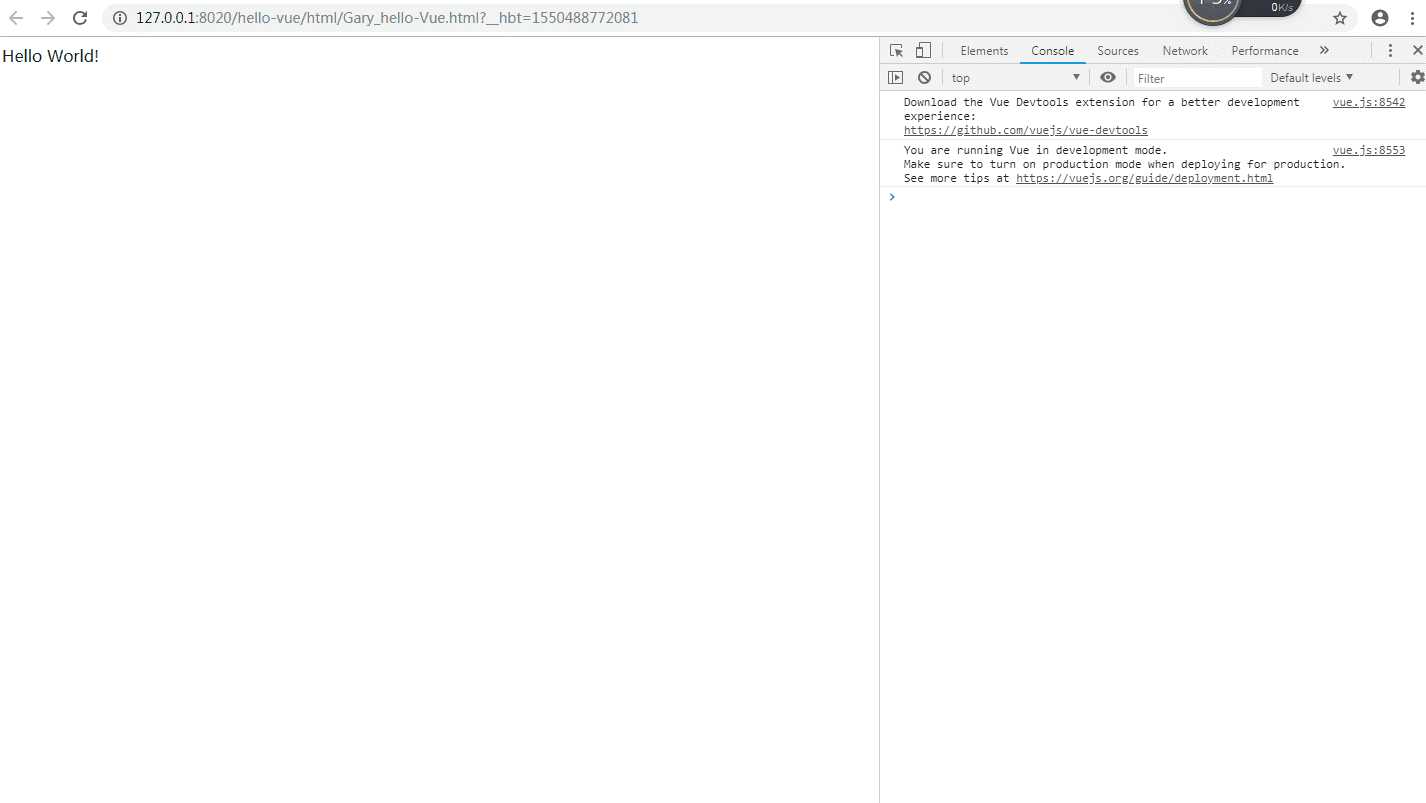
在浏览器中打印Hello World信息,并在Console控制台中可通过双向绑定快速修改app.msg中的信息
   app = new Vue({
                //获取id元素
                el:‘#Gary‘,
                //输出信息
                data:{
                    msg:‘Hello World!‘
                }
            });
        <div id="Gary">
            {{msg}}
        </div>

<!DOCTYPE html>
<html>
    <head>
        <meta charset="UTF-8">
        <title>hello-vue</title>
        <script type="text/javascript" src="../js/vue.js" ></script>
        <script>
            var app = null ;
            //js加载顺序
            window.onload = function(){
                app = new Vue({
                //获取id元素
                el:‘#Gary‘,
                //输出信息
                data:{
                    msg:‘Hello World!‘
                }
            });
            }
        </script>
    </head>
    <body>
        <div id="Gary">
            {{msg}}
        </div>
    </body>
</html>
v-model指令 传送门
v-model:数据双向绑定
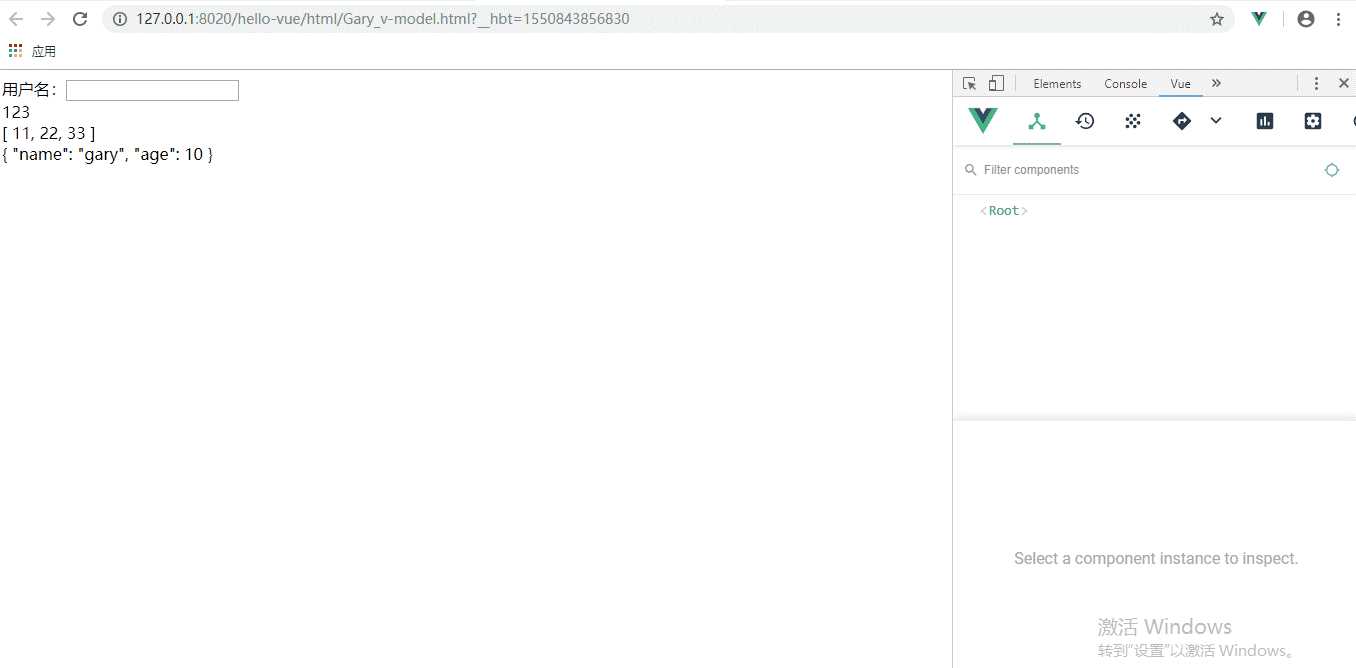
v-model绑定了input组件,获得input文本框中输入的值并通过{{username}}显示出来
   new Vue({
                    el:‘#Gary‘,
                    data:{
                        username:‘‘,
                        num:123,
                        arr:[11,22,33],
                        user:{
                            name:‘gary‘,
                            age:10
                        }
                    }
                })
用户名:<input type="text" v-model="username" />
            {{username}}<br/>

<!DOCTYPE html>
<html>
    <head>
        <meta charset="UTF-8">
        <title>v-model</title>
        <script type="text/javascript" src="../js/vue.js" ></script>
        <script>

            window.onload = () =>{
                new Vue({
                    el:‘#Gary‘,
                    data:{
                        username:‘‘,
                        num:123,
                        arr:[11,22,33],
                        user:{
                            name:‘gary‘,
                            age:10
                        }
                    }
                })
            }
        </script>
    </head>
    <body>
        <div id="Gary">
            <!--username为用户输入的名字-->
            用户名:<input type="text" v-model="username" />
            {{username}}<br/>

            {{num}}<br/>
            {{arr}}<br/>
            {{user}}<br/>
        </div>
    </body>
</html>
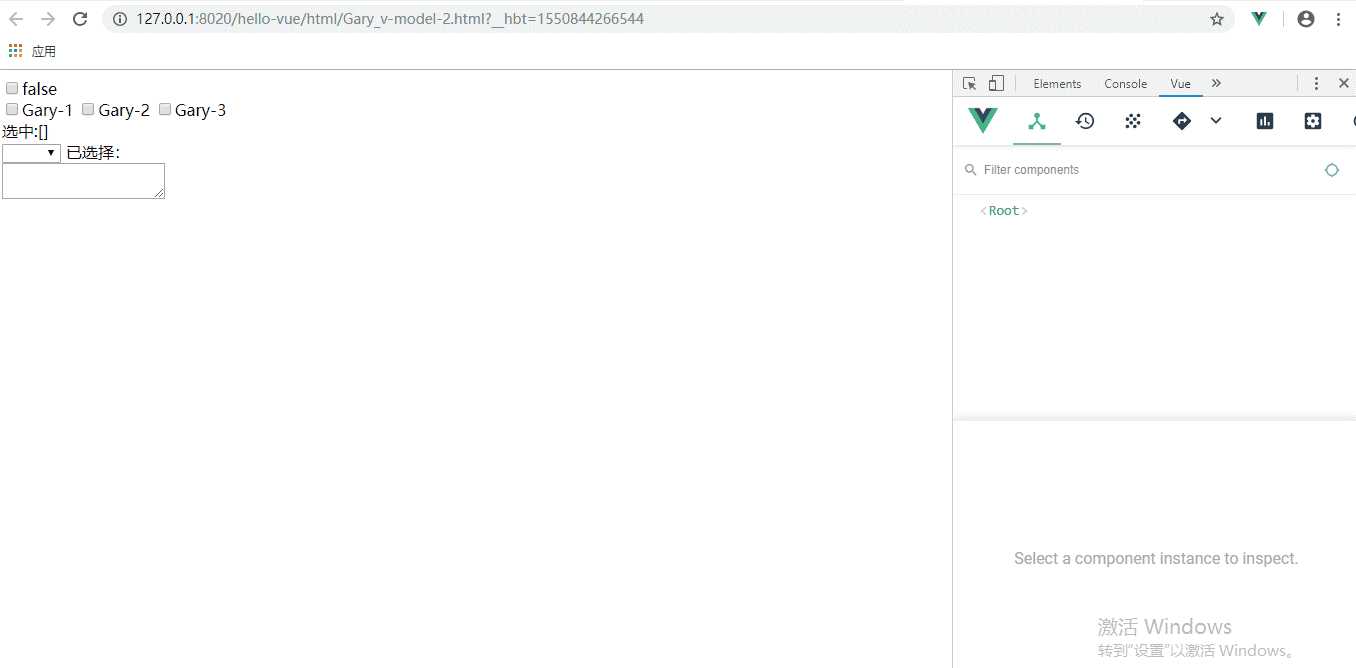
v-model指令与其它组件用法:checkbox、multi-checkbox、select、textarea组件

<!DOCTYPE html>
<html>
    <head>
        <meta charset="UTF-8">
        <title>v-model</title>
        <script type="text/javascript" src="../js/vue.js" ></script>
        <script>

            window.onload = () =>{
                new Vue({
                    el:‘#Gary‘,
                    data:{
                        checked:false,
                        users:[],
                        selected:‘‘,
                        msg:‘‘
                    }
                });
            }
        </script>
    </head>
    <body>
        <div id="Gary">
             <div id="checkbox">
                     <input type="checkbox" v-model="checked"/>{{checked}}
             </div>

              <div id="multi-checkbox">
                     <input type="checkbox"  value="Gary-1" v-model="users"/>Gary-1
                     <input type="checkbox"  value="Gary-2" v-model="users"/>Gary-2
                     <input type="checkbox"  value="Gary-3" v-model="users"/>Gary-3
                     <br />
                     选中:{{users}}
             </div>

             <div id="select" >
                 <select v-model="selected">
                     <option>选择1</option>
                     <option>选择2</option>
                     <option>选择3</option>
                     <option>选择4</option>
                 </select>
                 <span>已选择:{{selected}}</span>
             </div>

             <div id="textarea">
                 <textarea v-model="msg"></textarea>
                 <p">{{msg}}</p>
             </div>

        </div>
    </body>
</html>
v-text指令 传送门
v-text:以纯文本方式显示数据
v-cloak:可以隐藏未编译的 Mustache 标签直到实例准备完毕,也就是隐藏{{}};
                new Vue({
                    el:‘#Gary‘,
                    data:{
                           msg:‘大家好我叫Gary‘
                    },
                    created:function(){
                        alert(1);
                    }
                });
        <div id="Gary">
            <input type="text" v-model="msg"/>
                 <h2 v-cloak>{{msg}}</h2>
                 <h2 v-text="msg"></h2>
                 <h2 v-html="msg"></h2>

                 <!--用来显示原始 Mustache 标签-->
                 <!--<h2 v-pre>{{msg}}</h2>-->
        </div>
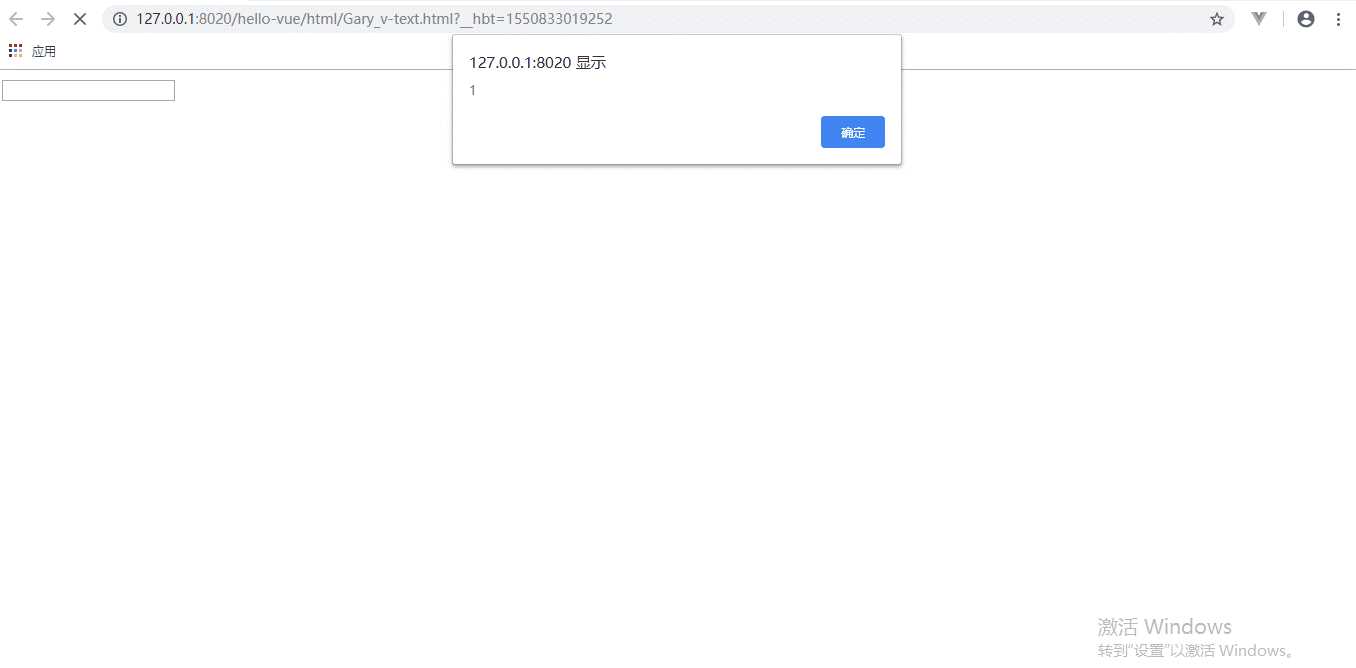
生命周期钩子created:该钩子在服务器端渲染期间不被调用 传送门
  created:function(){
                        alert(1);
                    }

<!DOCTYPE html>
<html>
    <head>
        <meta charset="UTF-8">
        <title>v-model</title>
        <script type="text/javascript" src="../js/vue.js" ></script>
        <script>

            window.onload = () =>{
                new Vue({
                    el:‘#Gary‘,
                    data:{
                           msg:‘大家好我叫Gary‘
                    },
                    created:function(){
                        alert(1);
                    }
                });
            }

        </script>
    </head>
    <style type="text/css">
        [v-cloak]{
            display:none;
        }
    </style>

    <body>
        <div id="Gary">
            <input type="text" v-model="msg"/>
                 <h2 v-cloak>{{msg}}</h2>
                 <h2 v-text="msg"></h2>
                 <h2 v-html="msg"></h2>

                 <!--用来显示原始 Mustache 标签-->
                 <!--<h2 v-pre>{{msg}}</h2>-->
        </div>

    </body>
</html>
v-for指令 传送门
v-for:对集合或对象进行遍历
  new Vue({
                    el:‘#Gary‘,
                    data:{
                           arr:[11,22,33,44],
                           user:{
                               id:‘01‘,
                               name:‘Gary‘
                           },
                           users:[
                           {id:‘01‘,name:"Gary01"},
                           {id:‘02‘,name:"Gary02"},
                           {id:‘03‘,name:"Gary03"}
                           ]
                    }
                });
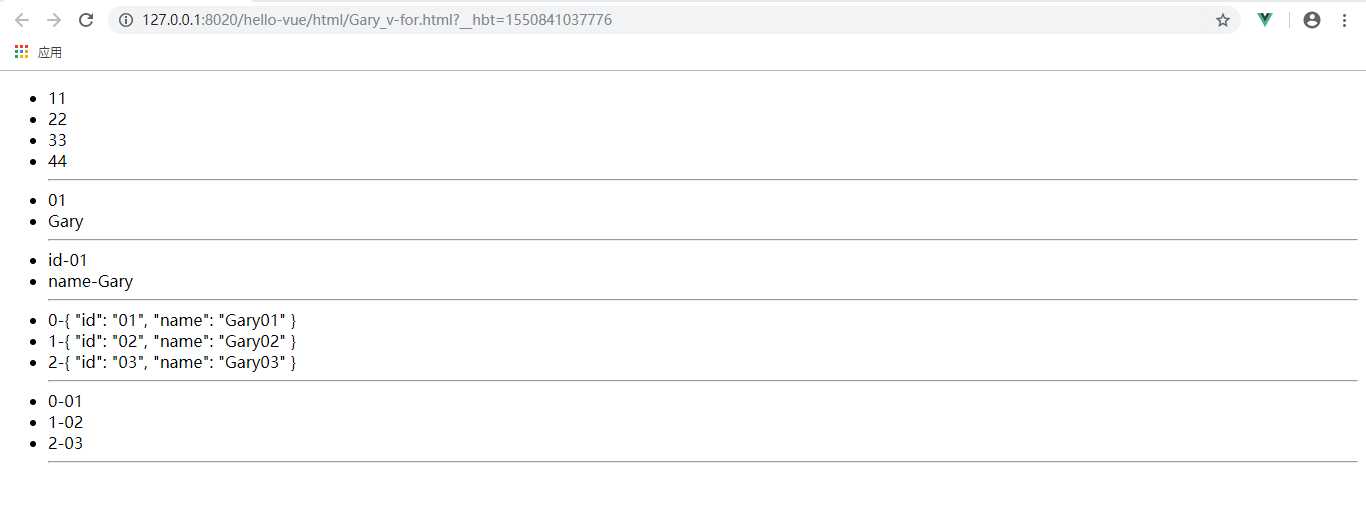
 <div id="Gary">
                <ul>
                    <li v-for="value in arr">{{value}}</li><hr>
                    <li v-for="value in user">{{value}}</li><hr>
                    <!--输出value和key键值对  隐藏索引index,下标0开始-->
                    <li v-for="(value,key) in user">{{key}}-{{value}}</li><hr>
                    <!--获取元素下标可以用value.id-->
                    <li v-for="(value,index) in users">{{index}}-{{value}}</li><hr>
                </ul>
        </div>
key 传送门
为保证key都有的唯一性id,可以使用key="value.id"
<li v-for="(value,index) in users" :key="value">{{index}}-{{value.id}}</li><hr>

<!DOCTYPE html>
<html>
    <head>
        <meta charset="UTF-8">
        <title>v-model</title>
        <script type="text/javascript" src="../js/vue.js" ></script>
        <script>

            window.onload = () =>{
                new Vue({
                    el:‘#Gary‘,
                    data:{
                           arr:[11,22,33,44],
                           user:{
                               id:‘01‘,
                               name:‘Gary‘
                           },
                           users:[
                           {id:‘01‘,name:"Gary01"},
                           {id:‘02‘,name:"Gary02"},
                           {id:‘03‘,name:"Gary03"}
                           ]
                    }
                });
            }

        </script>
    </head>

    <body>
        <div id="Gary">
                <ul>
                    <li v-for="value in arr">{{value}}</li><hr>
                    <li v-for="value in user">{{value}}</li><hr>
                    <!--输出value和key键值对  隐藏索引index,下标0开始-->
                    <li v-for="(value,key) in user">{{key}}-{{value}}</li><hr>
                    <!--获取元素下标可以用value.id-->
                    <li v-for="(value,index) in users">{{index}}-{{value}}</li><hr>

                    <li v-for="(value,index) in users" :key="value">{{index}}-{{value.id}}</li><hr>

                </ul>
        </div>

    </body>
</html>
v-on指令 传送门
v-on:绑定事件监听器
  new Vue({
                    el:‘#Gary‘,
                    data:{
                           result:0
                    },
                    methods:{
                        //无参
                        show:function(){
                            console.log("show");
                        },
                        //带参
                        add(a,b){
                            this.result+=a+b;
                        }
                    }
                });
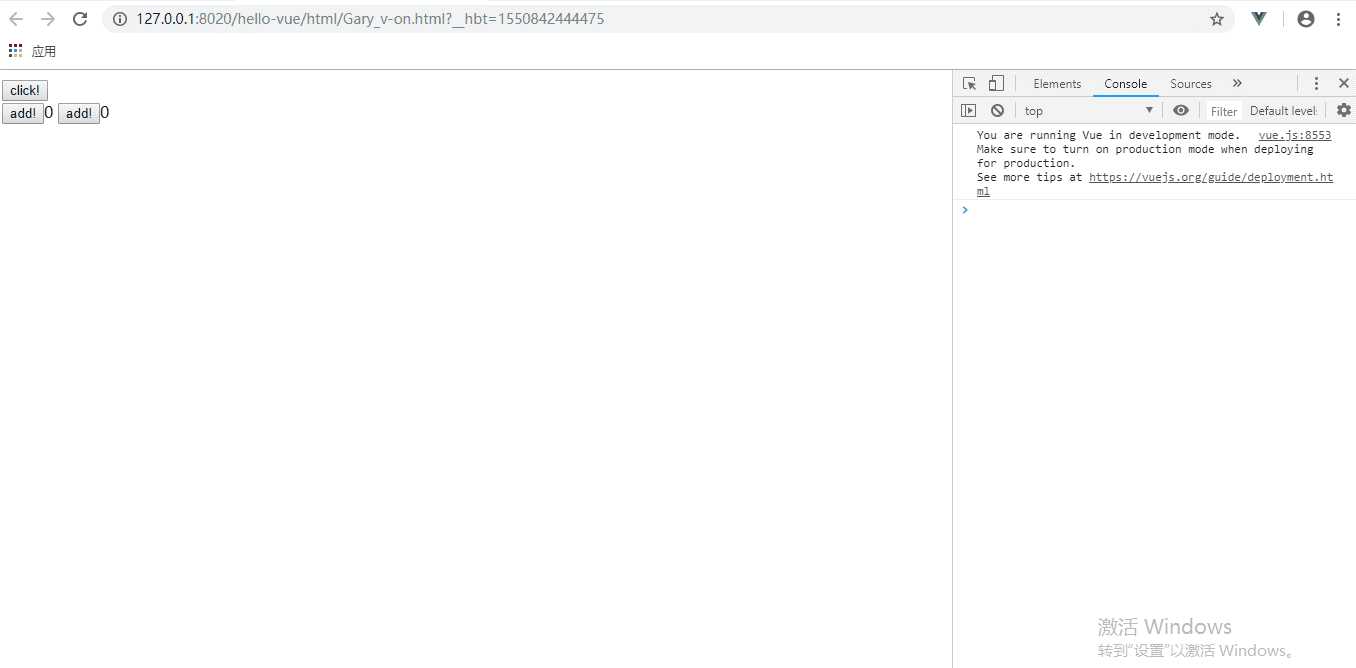
v-on:click:鼠标点击按钮事件
v-on:mouseenter:鼠标进入按钮触碰事件
        <div id="Gary">
                <button v-on:click="show">click!</button><br />
                <!--@相当于v-on鼠标简写-->
                <button @click="show">click!</button><br />
                <!--鼠标点击-->
                <button v-on:click="add(1,2)">add!</button>{{result}}
                <!--鼠标进入-->
                <button v-on:mouseenter="add(10,20)">add!</button>{{result}}
        </div>

<!DOCTYPE html>
<html>
    <head>
        <meta charset="UTF-8">
        <title>v-model</title>
        <script type="text/javascript" src="../js/vue.js" ></script>
        <script>

            window.onload = () =>{
                new Vue({
                    el:‘#Gary‘,
                    data:{
                           result:0
                    },
                    methods:{
                        //无参
                        show:function(){
                            console.log("show");
                        },
                        //带参
                        add(a,b){
                            this.result+=a+b;
                        }
                    }
                });
            }

        </script>
    </head>


    <body>
        <div id="Gary">
                <button v-on:click="show">click!</button><br />
                <!--@相当于v-on鼠标简写-->
                <button @click="show">click!</button><br />
                <!--鼠标点击-->
                <button v-on:click="add(1,2)">add!</button>{{result}}
                <!--鼠标进入-->
                <button v-on:mouseenter="add(10,20)">add!</button>{{result}}
        </div>

    </body>
</html>
