opencv常用api简单分析:几个基本绘图操作(LineRectangleCircleEllipse...)
Posted arvik
tags:
篇首语:本文由小常识网(cha138.com)小编为大家整理,主要介绍了opencv常用api简单分析:几个基本绘图操作(LineRectangleCircleEllipse...)相关的知识,希望对你有一定的参考价值。
曲线与形状
标量
CvScalar定义如下,它内部有一个double类型的数组,4个成员存放的是RGBA值,通常只用到前3个值
typedef struct CvScalar

    double val[4];

#ifdef __cplusplus
    CvScalar()
    CvScalar(double d0, double d1 = 0, double d2 = 0, double d3 = 0)  val[0] = d0; val[1] = d1; val[2] = d2; val[3] = d3;
    template<typename _Tp>
    CvScalar(const cv::Scalar_<_Tp>& s)  val[0] = s.val[0]; val[1] = s.val[1]; val[2] = s.val[2]; val[3] = s.val[3];
    template<typename _Tp>
    operator cv::Scalar_<_Tp>() const  return cv::Scalar_<_Tp>(cv::saturate_cast<_Tp>(val[0]), cv::saturate_cast<_Tp>(val[1]), cv::saturate_cast<_Tp>(val[2]), cv::saturate_cast<_Tp>(val[3]));
    template<typename _Tp, int cn>
    CvScalar(const cv::Vec<_Tp, cn>& v)

        int i;
        for( i = 0; i < (cn < 4 ? cn : 4); i++ ) val[i] = v.val[i];
        for( ; i < 4; i++ ) val[i] = 0;

#endif

CvScalar;
颜色值
CV_RGB创建一个色彩值,opencv的颜色通道顺序是 BGR[A]
#define CV_RGB(r, g, b) cv::Scalar((b), (g), (r), 0)连线
连接两个点的线段
void line( InputOutputArray _img, Point pt1, Point pt2, const Scalar& color, int thickness, int line_type, int shift )
参数:
img 图像矩阵
pt1 线段的第一个端点
pt2 线段的第二个端点
color 线段的颜色
thickness 线段的粗细程度,默认1
line_type 线段的类型,默认8 (8-connected line 、4-connected line、CV_AA-antialiased ),见CVLINE的描述
shift 坐标点的小数点尾数,默认0
说明
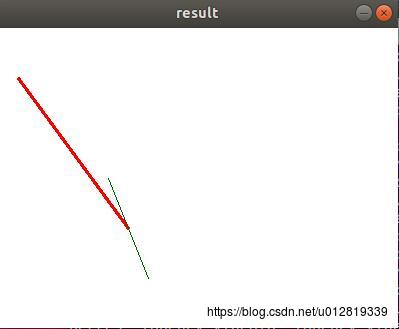
该函数在图像中的点1和点2之间画一条线段。线段被图像或感兴趣的矩形(ROI rectangle)所剪裁。对于具有整数坐标的非抗锯齿线条使用 8-connected line 或者4-connected line Bresenham算法,画粗线条的时候结尾是圆形的。画antialiased线条使用高斯滤波。可以用宏CV_RGB(r,g,b)指定线段颜色
例子:
int main(int argc, char *argv[])

    cv::Mat src(300, 400, CV_8UC3, cv::Scalar(255,255,255));

    cv::Point p1(20,50), p2(130, 200);
    cv::line(src, p1, p2, cv::Scalar(0,0,255), 2 );
    cv::line(src, p2 - p1, p2 + p1, cv::Scalar(0,100,0), 1 );
    cv::imshow("result", src);
    cv::waitKey();
    return 0;
效果:
矩形框
绘制简单、指定粗细或者带填充的矩形
void rectangle( InputOutputArray _img, Point pt1, Point pt2, const Scalar& color, int thickness, int lineType, int shift )
void rectangle( Mat& img, Rect rec, const Scalar& color, int thickness, int lineType, int shift )
参数:
pt1 矩形对角线上的一个顶点
pt2 矩形对角线上的另外一个顶点
rec:矩形框区域
其他参数同line()参数
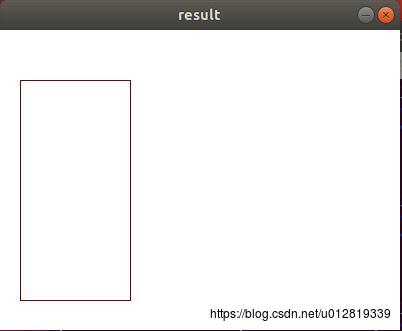
例子:
int main(int argc, char *argv[])

    cv::Mat src(300, 400, CV_8UC3, cv::Scalar(255,255,255));

    cv::Point p1(20,50), p2(130, 270);
    cv::rectangle(src, p1, p2, cv::Scalar(0,0,125), 1);
    cv::imshow("result", src);
    cv::waitKey();
    return 0;
效果:
圆形
绘制圆形
void circle( InputOutputArray _img, Point center, int radius, const Scalar& color, int thickness, int line_type, int shift )
参数:
center 圆心坐标
radius 圆半径
其他参数同line()参数
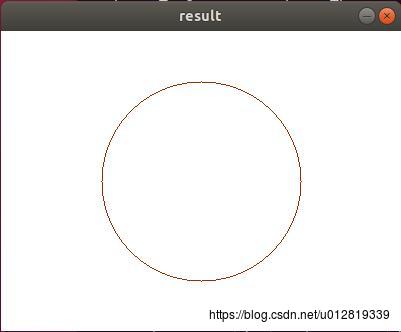
例子:
int main(int argc, char *argv[])

    cv::Mat src(300, 400, CV_8UC3, cv::Scalar(255,255,255));

    cv::Point center( src.cols/2, src.rows/2); //x坐标代表列, y坐标代表行
    cv::circle(src, center, 100, cv::Scalar(0,50,150), 1);
    cv::imshow("result", src);
    cv::waitKey();
    return 0;
效果:
椭圆
绘制椭圆圆弧和椭圆扇形
void ellipse( InputOutputArray _img, Point center, Size axes, double angle, double start_angle, double end_angle, const Scalar& color, int thickness, int line_type, int shift )
void ellipse(InputOutputArray _img, const RotatedRect& box, const Scalar& color, int thickness, int lineType)
参数:
center 椭圆圆心
axes 轴 的长度
angle 偏转的角度
start_angle 圆弧起始角的角度
end_angle 圆弧终结角的角度
RotatedRect 旋转矩形
其他参数同line()参数
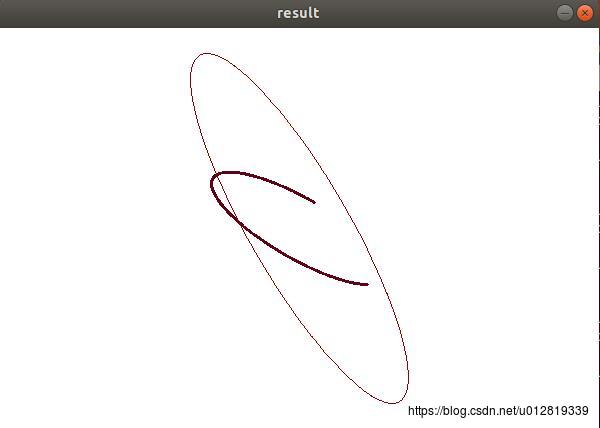
例子:
int main(int argc, char *argv[])

    cv::Mat src(400, 600, CV_8UC3, cv::Scalar(255,255,255));

    cv::Point center( src.cols/2, src.rows/2);
    cv::Size axes(100, 30);
    cv::ellipse(src, center, axes, 30, 30.0, 270.0, cv::Scalar(20,0,100), 2);
    cv::Size axes1(200, 50);
    cv::ellipse(src, center, axes1, 60, 0, 360.0, cv::Scalar(0,0,150), 1);
    cv::imshow("result", src);
    cv::waitKey();
    return 0;
效果:
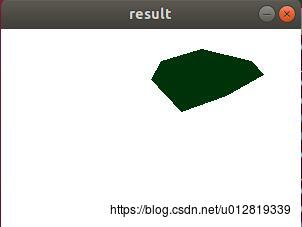
多边形内部填充
填充多边形内部
void fillPoly( Mat& img, const Point** pts, const int* npts, int ncontours, const Scalar& color, int line_type, int shift, Point offset )
参数:
pts 指向多边形的数组指针
npts 多边形的顶点个数的数组
contours 组成填充区域的线段的数量
其他参数同line()参数
例子:
int main(int argc, char *argv[])

    cv::Mat src(200, 300, CV_8UC3, cv::Scalar(255,255,255));


    cv::Point pts[] =
        cv::Point(200, 20),
        cv::Point(250, 32),
        cv::Point(262, 45),
        cv::Point(225, 66),
        cv::Point(180, 82),
        cv::Point(150, 50),
        cv::Point(160, 32)
        ;

    const int npts = 7;
    const cv::Point* ppt[1] = pts;
    cv::fillPoly(src, ppt, &npts, 1, CV_RGB(0,50,10));
    cv::imshow("result", src);
    cv::waitKey();
    return 0;
效果:
填充凸多边形
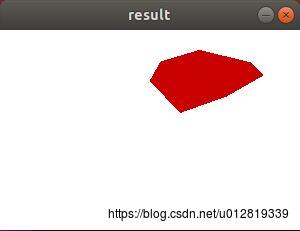
void fillConvexPoly( Mat& img, const Point* pts, int npts, const Scalar& color, int line_type, int shift )
“
例子:
int main(int argc, char *argv[])

    cv::Mat src(200, 300, CV_8UC3, cv::Scalar(255,255,255));


    cv::Point pts[] =
        cv::Point(200, 20),
        cv::Point(250, 32),
        cv::Point(262, 45),
        cv::Point(225, 66),
        cv::Point(180, 82),
        cv::Point(150, 50),
        cv::Point(160, 32)
        ;

    const int npts = 7;
    cv::fillConvexPoly(src, pts, npts, CV_RGB(200,0,0), 1);

    cv::imshow("result", src);
    cv::waitKey();
    return 0;
效果:
多边形连线
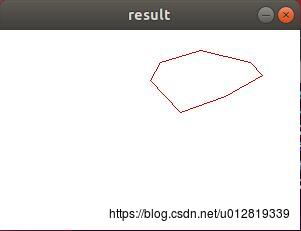
void polylines( Mat& img, const Point* const* pts, const int* npts, int ncontours, bool isClosed,
 const Scalar& color, int thickness, int line_type, int shift )
例子:
int main(int argc, char *argv[])

    cv::Mat src(200, 300, CV_8UC3, cv::Scalar(255,255,255));


    const cv::Point pts[] =
        cv::Point(200, 20),
        cv::Point(250, 32),
        cv::Point(262, 45),
        cv::Point(225, 66),
        cv::Point(180, 82),
        cv::Point(150, 50),
        cv::Point(160, 32)
        ;

    const int npts = 7;
    const cv::Point* ppt[1] = pts;
    cv::polylines(src, ppt, &npts, 1, true, CV_RGB(200,0,0), 1);

    cv::imshow("result", src);
    cv::waitKey();
    return 0;
效果:
文字标注
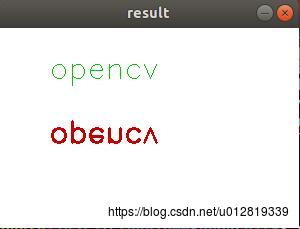
void putText( InputOutputArray _img, const String& text, Point org, int fontFace, double fontScale, Scalar color, int thickness, int line_type, bool bottomLeftOrigin )
参数:
text 要显示的字符串
org 编辑框原点坐标(编辑框的左下角)
fontFace 字体
fontScale 缩放比例
bottomleftOrigin 默认为false, 为true时,文字沿自身水平中轴线翻转180度
其他参数同line()参数
字体有以下几种:
enum HersheyFonts
    FONT_HERSHEY_SIMPLEX        = 0, //!< normal size sans-serif font
    FONT_HERSHEY_PLAIN          = 1, //!< small size sans-serif font
    FONT_HERSHEY_DUPLEX         = 2, //!< normal size sans-serif font (more complex than FONT_HERSHEY_SIMPLEX)
    FONT_HERSHEY_COMPLEX        = 3, //!< normal size serif font
    FONT_HERSHEY_TRIPLEX        = 4, //!< normal size serif font (more complex than FONT_HERSHEY_COMPLEX)
    FONT_HERSHEY_COMPLEX_SMALL  = 5, //!< smaller version of FONT_HERSHEY_COMPLEX
    FONT_HERSHEY_SCRIPT_SIMPLEX = 6, //!< hand-writing style font
    FONT_HERSHEY_SCRIPT_COMPLEX = 7, //!< more complex variant of FONT_HERSHEY_SCRIPT_SIMPLEX
    FONT_ITALIC                 = 16 //!< flag for italic font
;
例子:
int main(int argc, char *argv[])

    cv::Mat src(200, 300, CV_8UC3, cv::Scalar(255,255,255));

    cv::Point org(50,50);
    cv::putText(src, "opencv", org, cv::FONT_HERSHEY_SIMPLEX, 1.0, CV_RGB(0, 200, 0));
    cv::Point org1(50,100);
    cv::putText(src, "opencv", org1, cv::FONT_HERSHEY_SIMPLEX, 1.0, CV_RGB(200, 0, 0), 2, 8, true );
    cv::imshow("result", src);
    cv::waitKey();
    return 0;
效果:
以上是关于opencv常用api简单分析:几个基本绘图操作(LineRectangleCircleEllipse...)的主要内容,如果未能解决你的问题,请参考以下文章