在前面介绍了很多篇相关的《Bootstrap开发框架》的系列文章,这些内容基本上覆盖到了我这个Bootstrap框架的各个主要方面的内容,总体来说基本达到了一个稳定的状态,随着时间的推移可以会引入一些更好更新的内容进行完善,本篇继续这个系列,主要介绍如何实现Web页面内容的打印预览和保存操作。
1、Web页面打印的问题
在此之前,我一般使用比较好用的LODOP来执行打印的操作,这个在我之前有很多文章都有涉及,这个控件是一个ActiveX的控件,需要下载安装后就可以在页面是进行打印的排版设计,预览,打印等操作,还是很方便的一个控件,因此都很适合普通内容的打印,证件的套打等操作。
不过随着浏览器技术的更新,这个插件在Chrome或者FireFox上好像不受支持了,基本上摒弃了这种插件的处理方式了。例如如果我在页面上需要打印对话框里面的内容,如下所示。
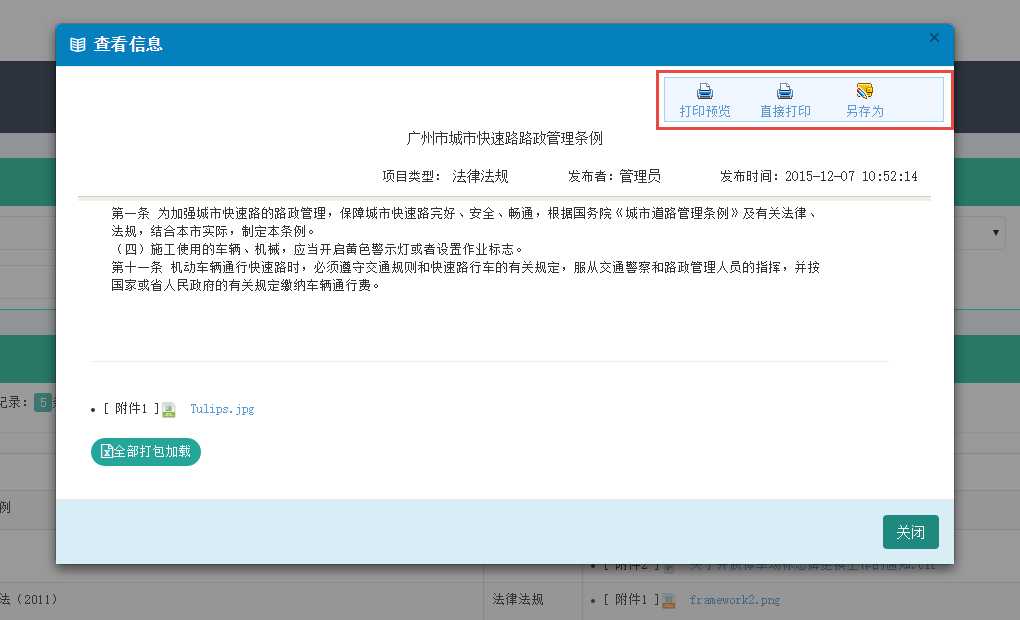
如果按正常使用LODOP的方式来进行处理的话,那么会得到Chrome浏览器的提示,并且这个不管你重新下载安装、更新LODOP控件,都会继续这个错误提示的。

这个在一篇《Lodop页面总提示"未安装"或"请升级"的可能原因》,以及《Lodop用户应对谷歌浏览器停用Plugin技术的处理办法》都有说明,因此我们需要另辟蹊径来处理这个页面打印等的处理了。
对于替代方式,这里就是本篇内容介绍的主题了,我一直喜欢寻找一些比较好的方式的方式来实现自己需要的功能,于是找到了PrintThis的这个插件(https://github.com/jasonday/printThis)以及jquery-print-preview-plugin(https://github.com/etimbo/jquery-print-preview-plugin),对比两者我比较喜欢第一个的简洁方便的使用。
2、PrintThis打印插件的使用
有了上面的问题,我们引入一个新的打印方式,也就是JQuery插件来实现我们所需要页面内容的打印操作。
这个插件的使用非常简洁方便,首先需要在页面里面引入对应的JS文件,如下所示。
<script src="~/Content/JQueryTools/printThis/printThis.js"></script>
我们再在页面顶部增加两个按钮,如打印和导出操作,代码如下所示
<div class="toolbar">
 <a href="#" onclick="javascript:Preview();"><img alt="打印预览" src="~/Content/images/print.gif" /><br />打印预览</a>
 <a href="#" onclick="javascript:SaveAs();"><img alt="另存为" src="~/Content/images/saveas.gif" /><br />另存为</a>
</div>

然后我们还需要声明一个DIV用来放置显示的Web页面内容,这样也方便对它调用进行打印操作。
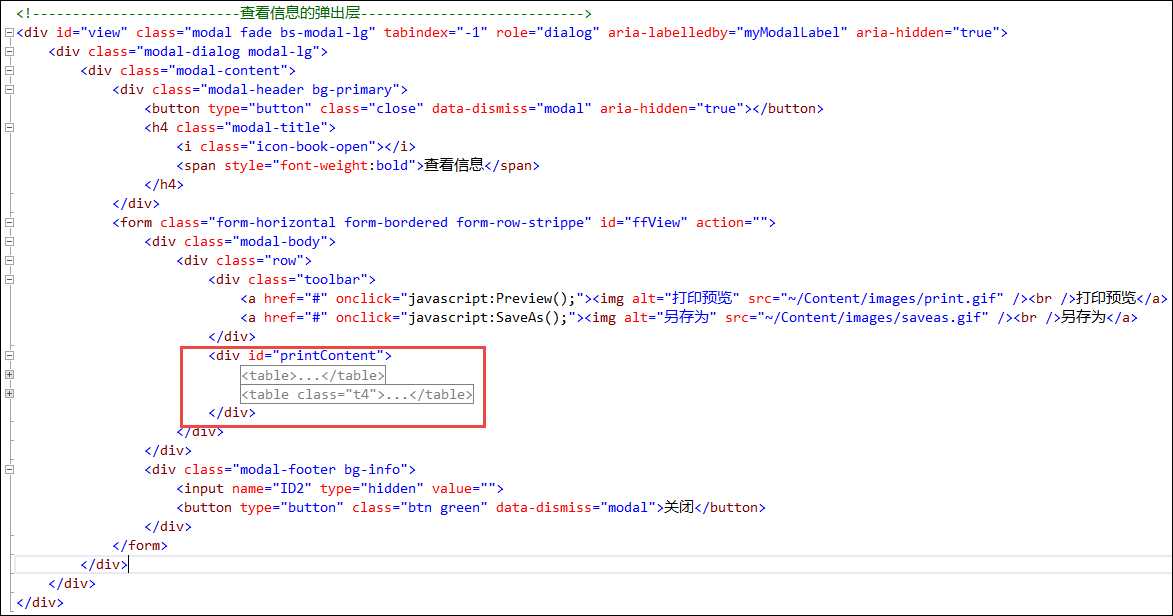
我们打印的处理代码也很简单,就是直接对层进行打印处理就可以了,可以看到下面的使用代码非常简单。
        //打印预览
        function Preview() {
            $("#printContent").printThis({
                debug: false,
                importCSS: true,
                importStyle: true,
                printContainer: true,
                loadCSS: "/Content/Themes/Default/style.css",
                pageTitle: "通知公告",
                removeInline: false,
                printDelay: 333,
                header: null,
                formValues: true
            });
        };
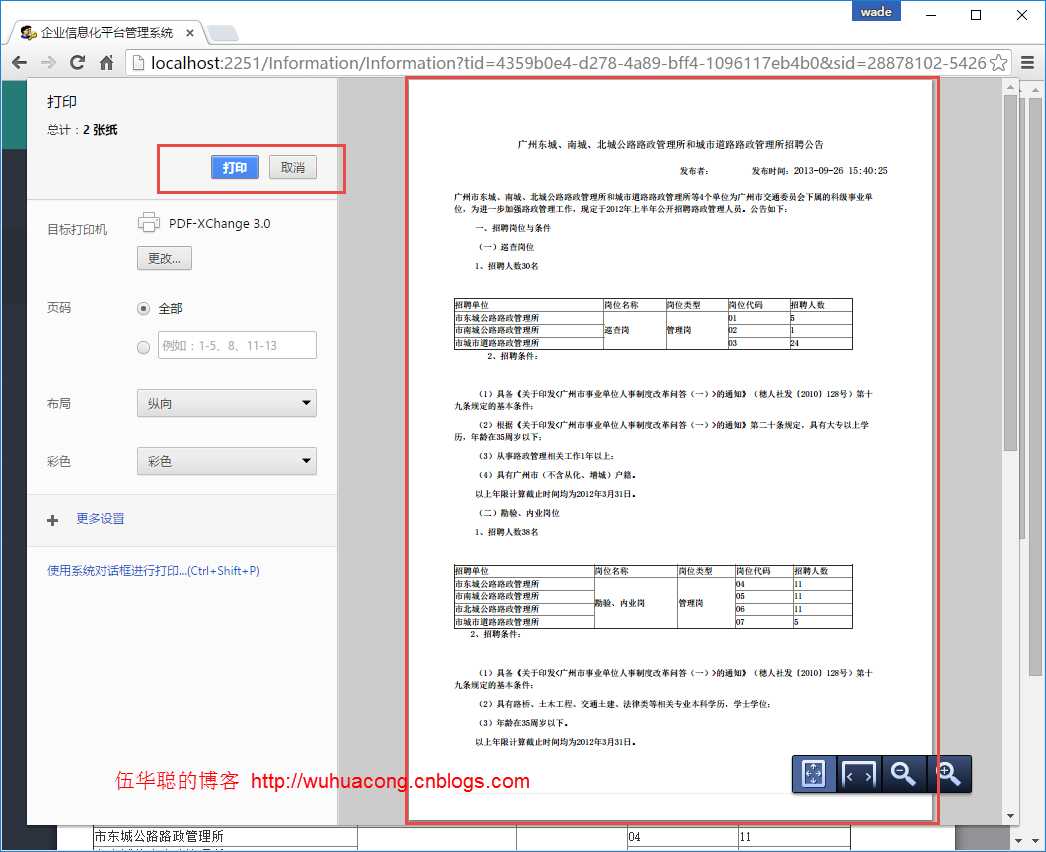
打印执行后,IE和Chrome都会弹出一个打印预览对话框,确认是否进行打印的操作。
3、页面内容的保存操作
有时候,为了方便业务处理,我们一般也可以提供给用户一个导出打印内容的操作,如下所示代码就是把打印的内容导出到Word里面给用户加工等用途。
        function SaveAs() {
            var id = $(‘#ID2‘).val();
            window.open(‘/Information/ExportWordById?id=‘ + id );
        }
上面的操作,主要就是调用了MVC的控制器方法进行处理,传入一个id就可以把内容提取出来,然后把它生成所需的Word内容即可。
这里后台我们主要利用Apose.Word控件来进行模板化的文档生成,具体可以参考一下我前面介绍过的使用方法文章《利用Aspose.Word控件实现Word文档的操作》、《利用Aspose.Word控件和Aspose.Cell控件,实现Word文档和Excel文档的模板化导出》。
其中我们可以在书签里面定义或者查看一些书签的信息,如下图所示。
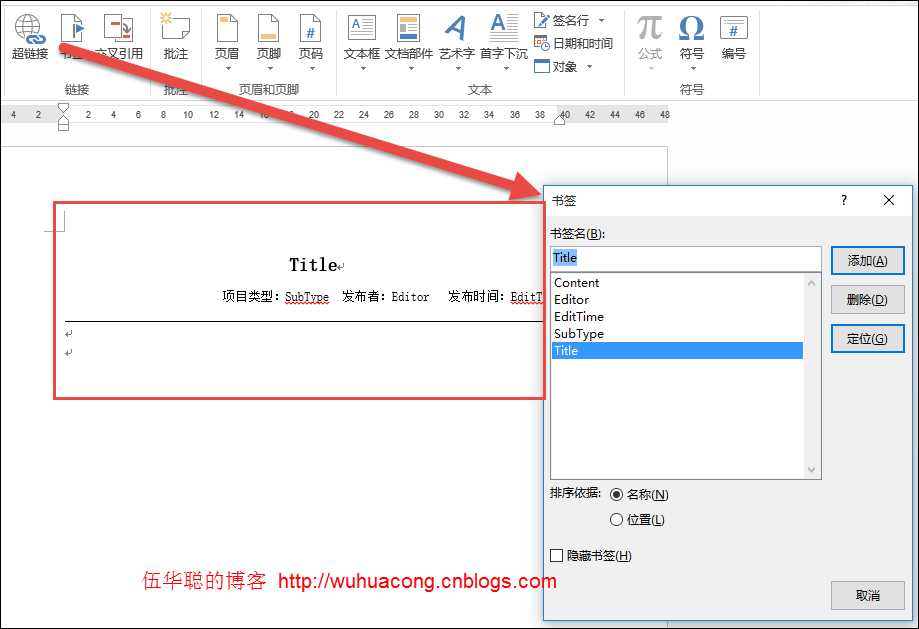
这样我们在代码里面,就可以获取信息并指定这个Word模板了。
            InformationInfo info = BLLFactory<Information>.Instance.FindByID(id);
            if (info != null)
            {
                string template = "~/Content/Template/政策法规模板.doc";
                string templateFile = Server.MapPath(template);
                Aspose.Words.Document doc = new Aspose.Words.Document(templateFile);
WORD模板的内容,可以使用文本替换方式,如下所示。
SetBookmark(ref doc, "Content", info.Content);
也可以使用书签BookMark方式查询替换,如下代码所示。
            Aspose.Words.Bookmark bookmark = doc.Range.Bookmarks[title];
            if (bookmark != null)
            {
                bookmark.Text = value;
            }
对于主体的html内容,这需要特殊对待,一般需要使用插入HTML的专用方式进行写入内容,否则就显示HTML代码了,使用专用HTML方法写入的内容,和我们在网页上看到的基本没有什么差异了。如下代码所示。
                DocumentBuilder builder = new DocumentBuilder(doc);
                Aspose.Words.Bookmark bookmark = doc.Range.Bookmarks["Content"];
                if (bookmark != null)
                {
                    builder.MoveToBookmark(bookmark.Name);
                    builder.InsertHtml(info.Content);
                }
整个导入WORD文档的方法就是利用这些内容的整合,实现一个标准文档的生成,这种业务文档是固定模板的,因此很适合在实际业务中使用,比起使用其他方式自动生成的HTML文件或者文档,有更好的可塑性和美观性。
整个代码如下所示。
        public FileStreamResult ExportWordById(string id)
        {
            if (string.IsNullOrEmpty(id)) return null;

            InformationInfo info = BLLFactory<Information>.Instance.FindByID(id);
            if (info != null)
            {
                string template = "~/Content/Template/政策法规模板.doc";
                string templateFile = Server.MapPath(template);
                Aspose.Words.Document doc = new Aspose.Words.Document(templateFile);

                #region 使用文本方式替换
                //Dictionary<string, string> dictSource = new Dictionary<string, string>();
                //dictSource.Add("Title", info.Title);
                //dictSource.Add("Content", info.Content);
                //dictSource.Add("Editor", info.Editor);
                //dictSource.Add("EditTime", info.EditTime.ToString());
                //dictSource.Add("SubType", info.SubType);
                //foreach (string name in dictSource.Keys)
                //{
                //    doc.Range.Replace(name, dictSource[name], true, true);
                //}
                #endregion

                //使用书签方式替换
                SetBookmark(ref doc, "Title", info.Title);
                SetBookmark(ref doc, "Editor", info.Editor);
                SetBookmark(ref doc, "EditTime", info.EditTime.ToString());
                SetBookmark(ref doc, "SubType", info.SubType);

                //SetBookmark(ref doc, "Content", info.Content);
                //对于HTML内容,需要通过InsertHtml方式进行写入
                DocumentBuilder builder = new DocumentBuilder(doc);
                Aspose.Words.Bookmark bookmark = doc.Range.Bookmarks["Content"];
                if (bookmark != null)
                {
                    builder.MoveToBookmark(bookmark.Name);
                    builder.InsertHtml(info.Content);
                }

                doc.Save(System.Web.HttpContext.Current.Response, info.Title, Aspose.Words.ContentDisposition.Attachment,
                    Aspose.Words.Saving.SaveOptions.CreateSaveOptions(Aspose.Words.SaveFormat.Doc));

                HttpResponseBase response = ControllerContext.HttpContext.Response;
                response.Flush();
                response.End();
                return new FileStreamResult(Response.OutputStream, "application/ms-word");
            }
            return null;
        }

        private void SetBookmark(ref Aspose.Words.Document doc, string title, string value)
        {
            Aspose.Words.Bookmark bookmark = doc.Range.Bookmarks[title];
            if (bookmark != null)
            {
                bookmark.Text = value;
            }
        }
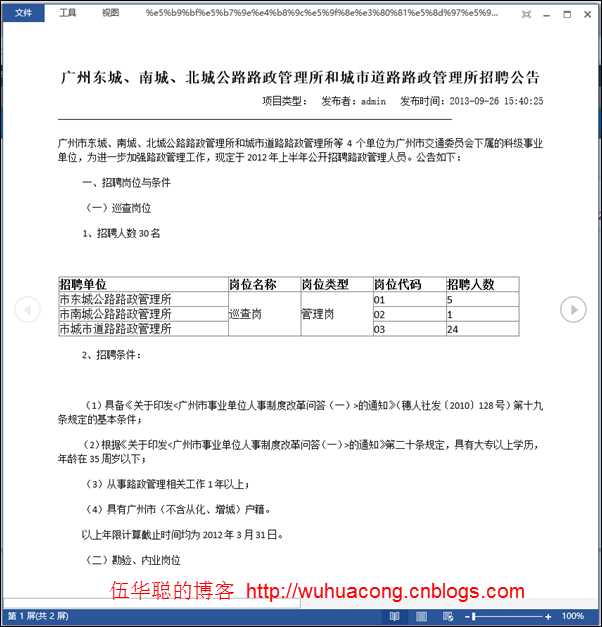
最后导出的WORD文档就是模板化的具体文档内容了,WORD预览界面如下所示。
如果有兴趣,可以继续参考系列文章:
基于Metronic的Bootstrap开发框架经验总结(1)-框架总览及菜单模块的处理
基于Metronic的Bootstrap开发框架经验总结(2)--列表分页处理和插件JSTree的使用
基于Metronic的Bootstrap开发框架经验总结(3)--下拉列表Select2插件的使用
基于Metronic的Bootstrap开发框架经验总结(4)--Bootstrap图标的提取和利用
基于Metronic的Bootstrap开发框架经验总结(5)--Bootstrap文件上传插件File Input的使用
基于Metronic的Bootstrap开发框架经验总结(6)--对话框及提示框的处理和优化
基于Metronic的Bootstrap开发框架经验总结(7)--数据的导入、导出及附件的查看处理
基于Metronic的Bootstrap开发框架经验总结(8)--框架功能总体界面介绍
基于Metronic的Bootstrap开发框架经验总结(9)--实现Web页面内容的打印预览和保存操作
