我的C/C++语言学习进阶之旅介绍一下NDK开发之C的简单易用图像库stb
Posted 字节卷动
tags:
篇首语:本文由小常识网(cha138.com)小编为大家整理,主要介绍了我的C/C++语言学习进阶之旅介绍一下NDK开发之C的简单易用图像库stb相关的知识,希望对你有一定的参考价值。
一、stb_image 地址
stb 的Github地址为:https://github.com/nothings/stb
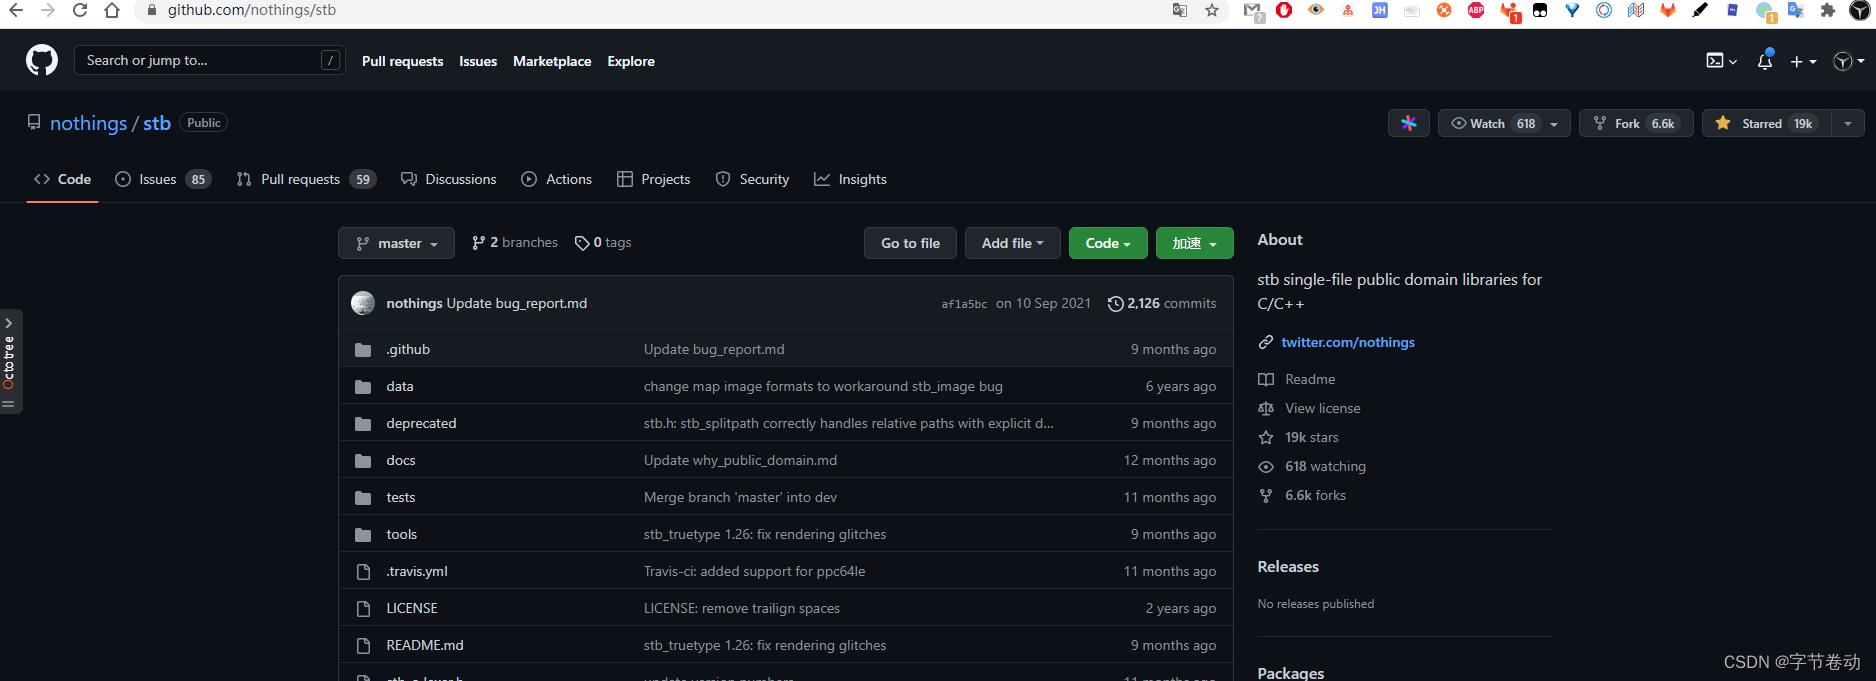
这个库已经有19K的人starred,有6.6k的人fork。非常受欢迎。
而且在LearnOpenGL网站的demo代码里面也是使用这个库来加载图片的。
二、 为什么叫stb库呢?
因为stb作者名字的首字母,作者名叫Sean T. Barrett。这不是出于自大的选择,而是作为对文件名和源函数名称进行命名空间的一种适度理智的方式。
三、stb库的几个库
我们着重关注下下面三个库即可。
- 图像加载器:stb_image.h
主要用于图像加载 - 图像写入器:stb_image_write.h
主要用于写入图像文件 - 图像调整器:stb_image_resize.h
主要用于改变图像的尺寸
四、怎么引入这些库?
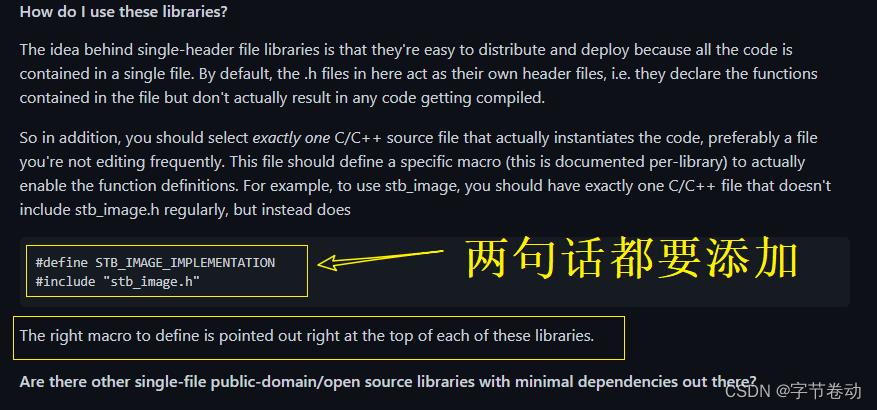
单头文件库背后的想法是它们易于分发和部署,因为所有代码都包含在单个文件中。默认情况下,此处的 .h 文件充当它们自己的头文件,即它们声明文件中包含的函数,但实际上不会导致任何代码被编译。
因此,此外,您应该准确选择一个实际实例化代码的 C/C++ 源文件,最好是您不经常编辑的文件。这个文件应该定义一个特定的宏(每个库都有文档记录)来实际启用函数定义。
4.1 引入stb_image库
例如,要使用 stb_image,您应该有将 stb_image.h 的 C/C++ 文件添加到工程中,然后在C++文件添加下面的代码
#define STB_IMAGE_IMPLEMENTATION
#include "stb_image.h"
通过定义STB_IMAGE_IMPLEMENTATION,预处理器会修改头文件,让其只包含相关的函数定义源码,等于是将这个头文件变为一个 .cpp 文件了。现在只需要在你的程序中包含stb_image.h并编译就可以了
4.2 引入stb_image_write.h库
要使用 stb_image_write,您应该有将 stb_image_write.h 的 C/C++ 文件添加到工程中,然后在C++文件添加下面的代码
#define STB_IMAGE_WRITE_IMPLEMENTATION
#include "stb_image_write.h"
4.3 引入stb_image_resize.h库
要使用 stb_image_resize,您应该有将 stb_image_resize.h 的 C/C++ 文件添加到工程中,然后在C++文件添加下面的代码
#define STB_IMAGE_RESIZE_IMPLEMENTATION
#include "stb_image_resize.h"
4.4 注意事项
上面的几个库的引用方式介绍了,但是千万要注意,别只引用了.h文件,而不引用配套的宏定义
比如使用stb_image库,应该添加下面两行代码
#define STB_IMAGE_IMPLEMENTATION
#include "stb_image.h"
但是如果你只添加了.h头文件,而不添加宏定义的话,则会编译失败
#include "stb_image.h"
则会报错 error: undefined reference to 'stbi_load' 和 error: undefined reference to 'stbi_image_free'之类的错误,如下所示:

上面的错误是我第一次添加stb_image.h库的时候犯的错误。直到我认真读完stb的README文件才解决这个问题。
通过定义STB_IMAGE_IMPLEMENTATION,预处理器会修改头文件,让其只包含相关的函数定义源码,等于是将这个头文件变为一个.cpp文件了。现在只需要在你的程序中包含stb_image.h并编译就可以了。(工程中不要放stb_image.c文件,否则会报其他错误)
五、实践一下
5.1 准备工作
我们来测试一下上面三个库
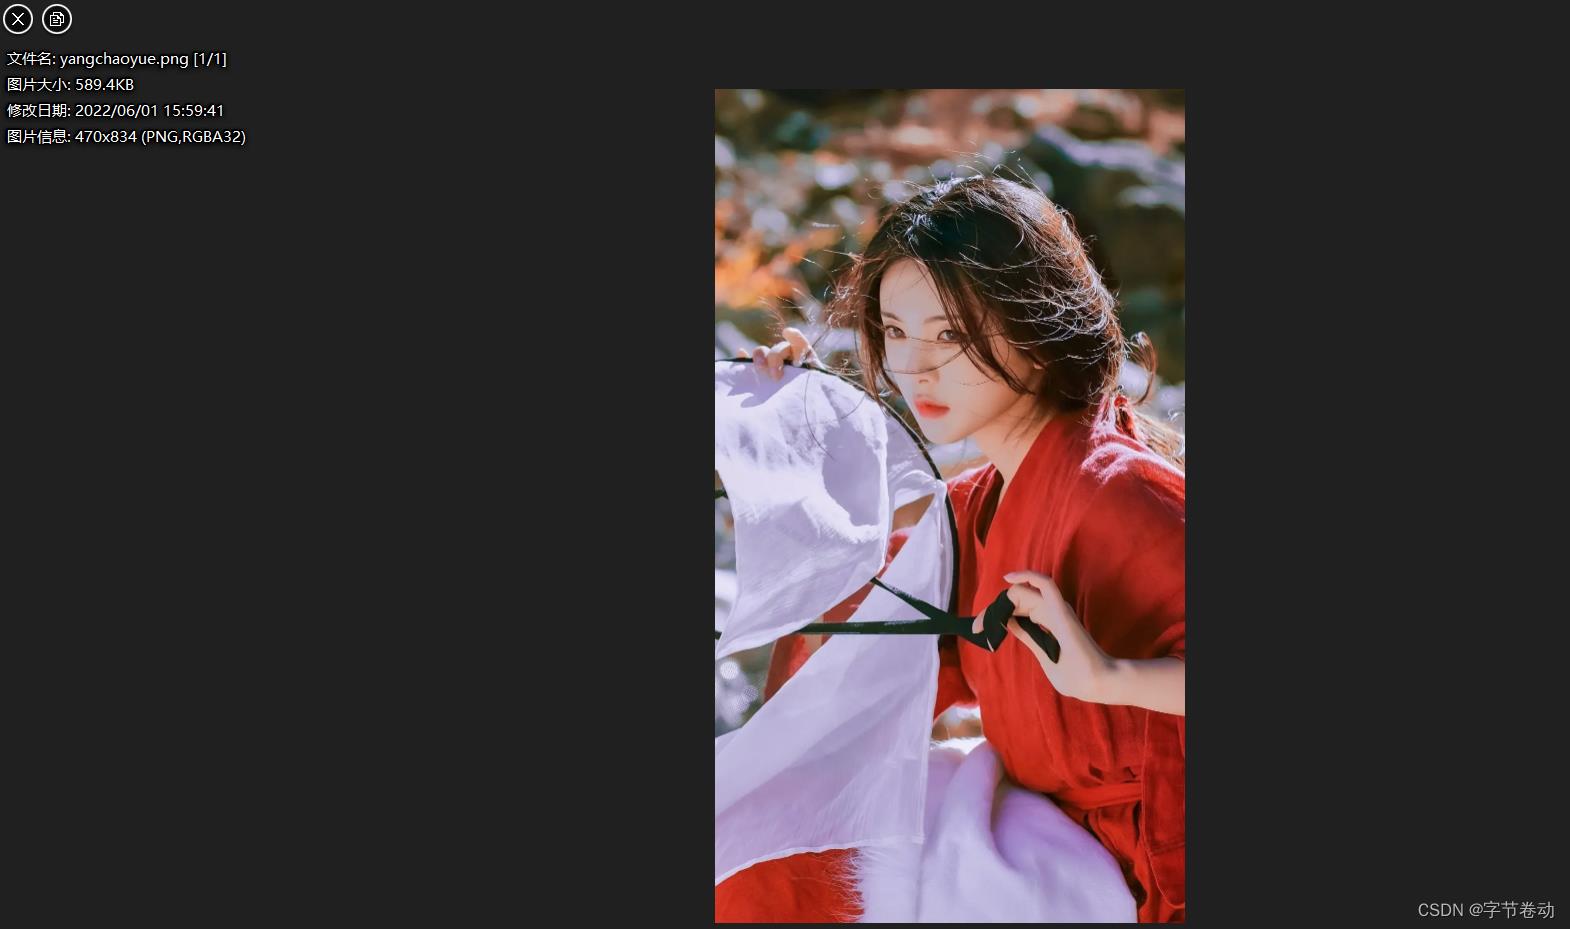
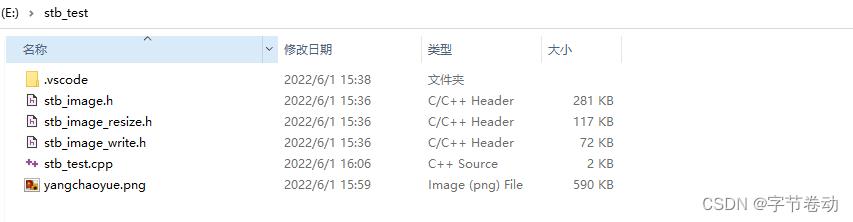
我们准备读取下面这张yangchaoyue.png图片
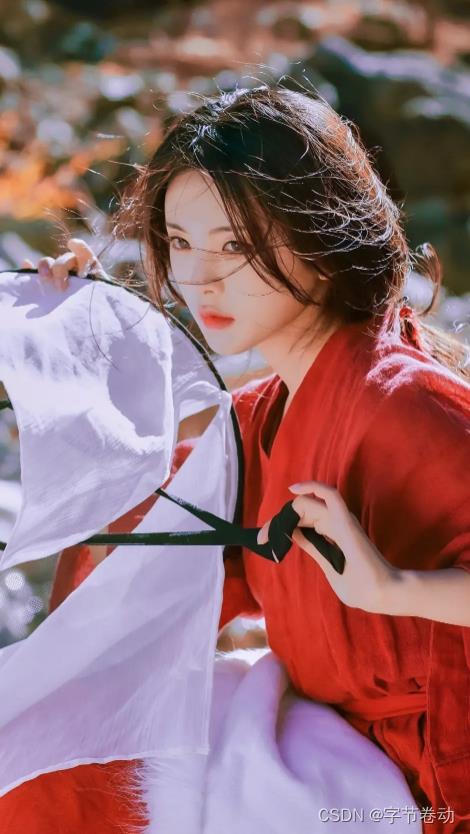
这张yangchaoyue.png图片的信息如下:
文件名: yangchaoyue.png [1/1]
图片大小: 589.4KB
修改日期: 2022/06/01 15:59:41
图片信息: 470x834 (PNG,RGBA32)
5.2 测试思路
然后我们分别执行下面几个步骤:
- 读取图片信息
- 改变图片尺寸
- 重新写入到新的图片
5.3 测试代码
5.3.1 项目结构
如下图所示,我们分别将stb_image.h,stb_image_resize.h,stb_image_write.h三个头文件添加到项目中,然后写一个stb_test.cpp用来测试。
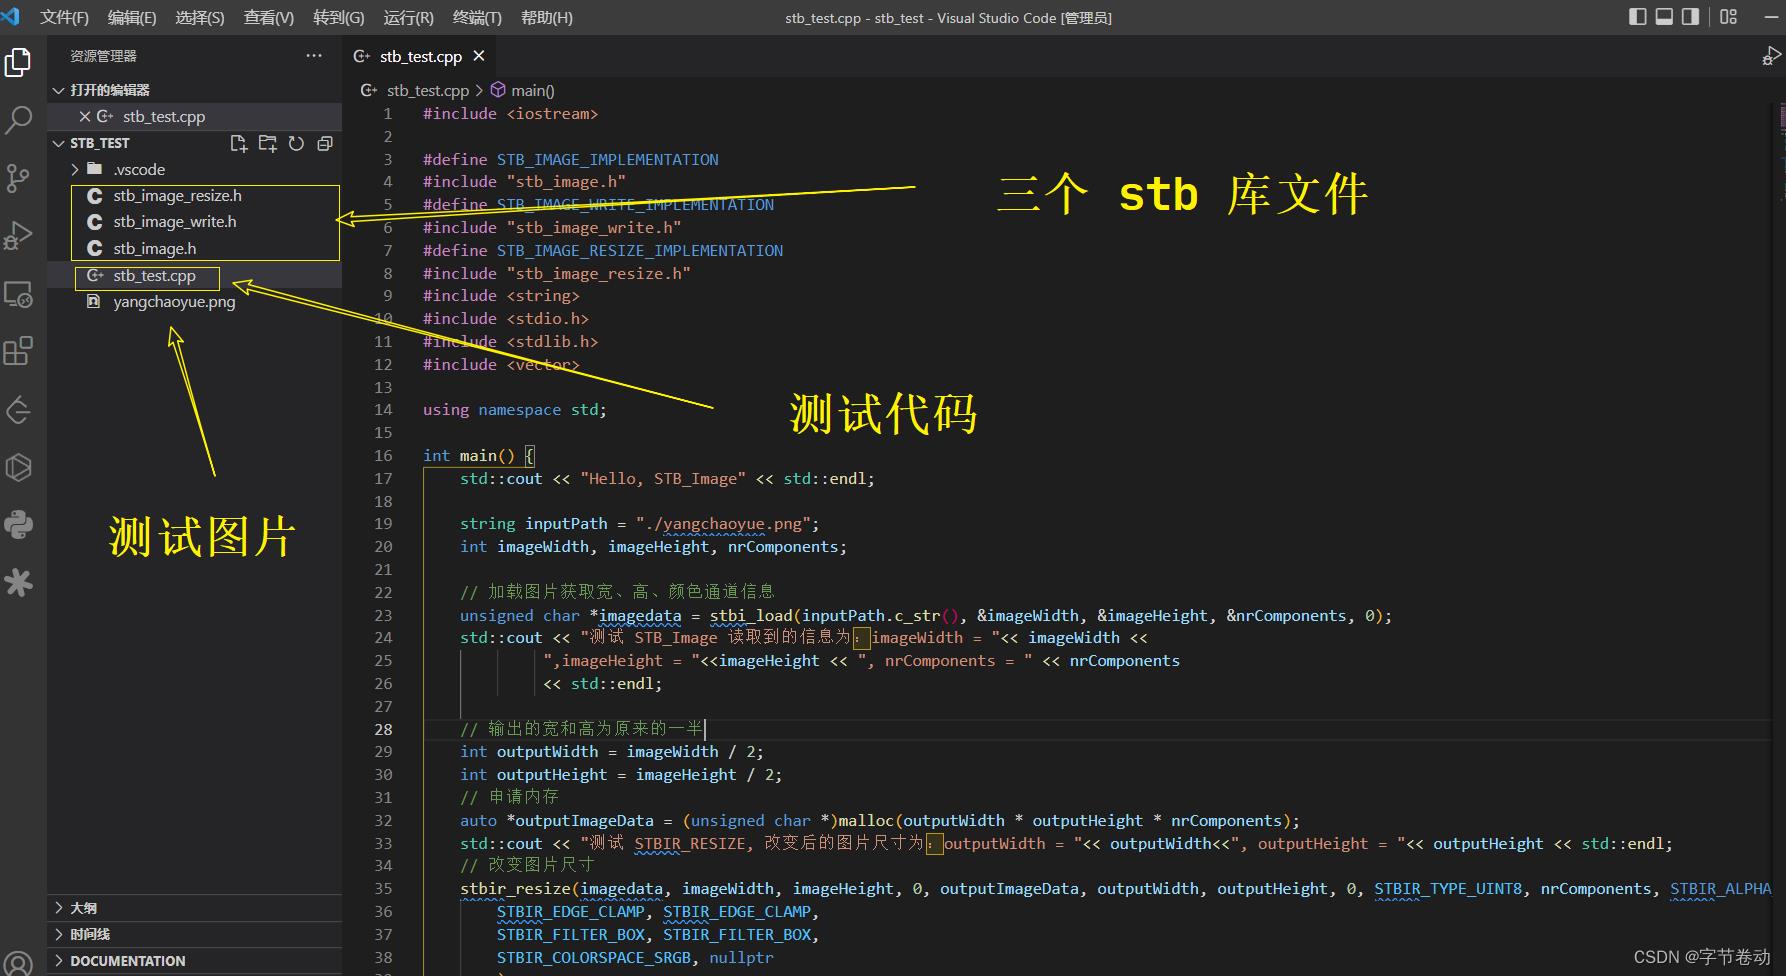
5.3.2 测试代码
stb_test.cpp代码如下所示:
#include <iostream>

#define STB_IMAGE_IMPLEMENTATION
#include "stb_image.h"
#define STB_IMAGE_WRITE_IMPLEMENTATION
#include "stb_image_write.h"
#define STB_IMAGE_RESIZE_IMPLEMENTATION
#include "stb_image_resize.h"
#include <string>
#include <stdio.h>
#include <stdlib.h>
#include <vector>

using namespace std;

int main()
	std::cout << "Hello, STB_Image" << std::endl;

	string inputPath = "./yangchaoyue.png";
	int imageWidth, imageHeight, nrComponents;

	// 加载图片获取宽、高、颜色通道信息
	unsigned char *imagedata = stbi_load(inputPath.c_str(), &imageWidth, &imageHeight, &nrComponents, 0);
    std::cout << "测试 STB_Image 读取到的信息为:imageWidth = "<< imageWidth <<
             ",imageHeight = "<<imageHeight << ", nrComponents = " << nrComponents
             << std::endl;

    // 输出的宽和高为原来的一半
	int outputWidth = imageWidth / 2;
	int outputHeight = imageHeight / 2;
    // 申请内存
	auto *outputImageData = (unsigned char *)malloc(outputWidth * outputHeight * nrComponents);
    std::cout << "测试 STBIR_RESIZE, 改变后的图片尺寸为:outputWidth = "<< outputWidth<<", outputHeight = "<< outputHeight << std::endl;
	// 改变图片尺寸
	stbir_resize(imagedata, imageWidth, imageHeight, 0, outputImageData, outputWidth, outputHeight, 0, STBIR_TYPE_UINT8, nrComponents, STBIR_ALPHA_CHANNEL_NONE, 0,
		STBIR_EDGE_CLAMP, STBIR_EDGE_CLAMP,
		STBIR_FILTER_BOX, STBIR_FILTER_BOX,
		STBIR_COLORSPACE_SRGB, nullptr
		);

	string outputPath = "./yangchaoyue_output.png";
    std::cout << "测试 STB_WRITE 要写入的地址为: "<< outputPath << std::endl;
	// 写入图片
	stbi_write_png(outputPath.c_str(), outputWidth, outputHeight, nrComponents, outputImageData, 0);

	stbi_image_free(imagedata);
	stbi_image_free(outputImageData);
	return 0;
5.3 测试结果
上面代码运行如下所示:
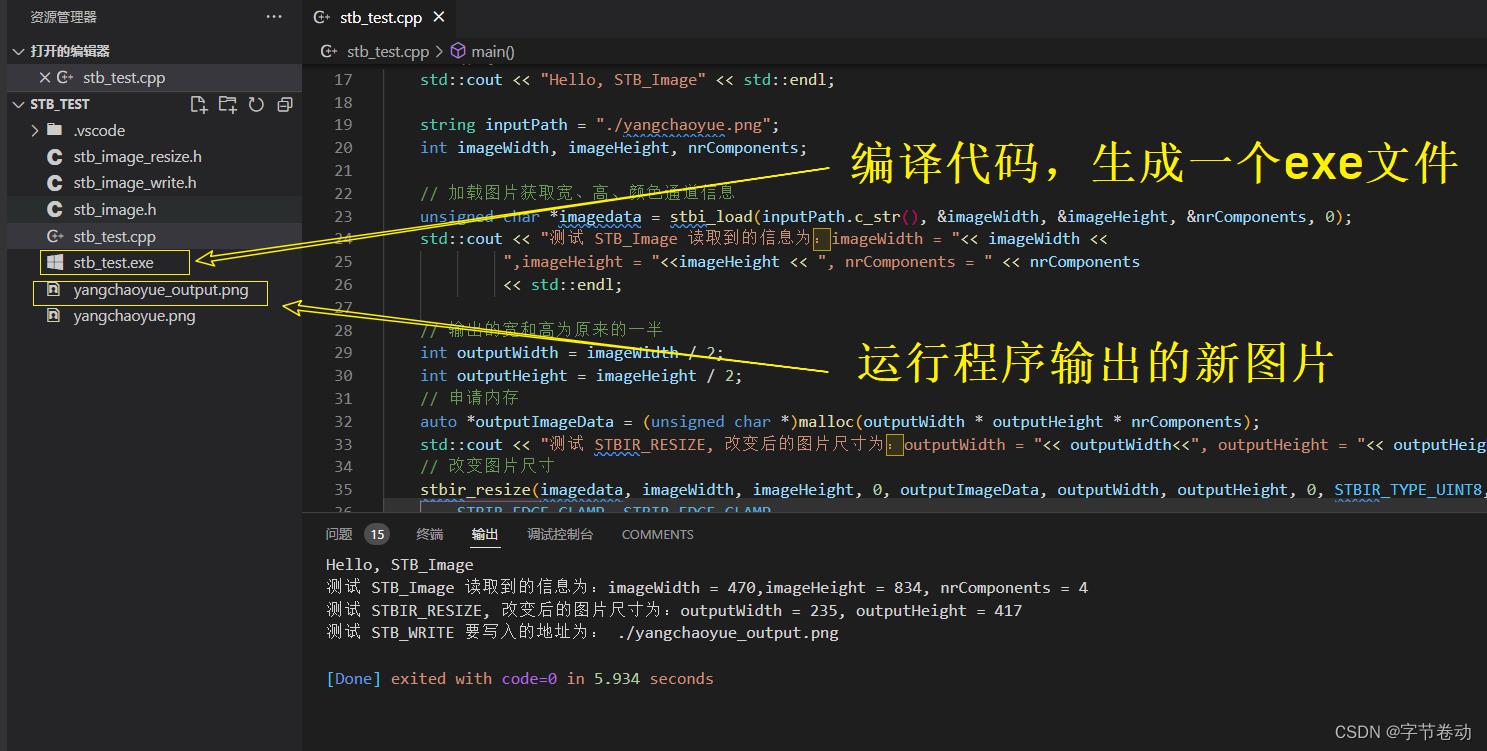
Hello, STB_Image
测试 STB_Image 读取到的信息为:imageWidth = 470,imageHeight = 834, nrComponents = 4
测试 STBIR_RESIZE, 改变后的图片尺寸为:outputWidth = 235, outputHeight = 417
测试 STB_WRITE 要写入的地址为: ./yangchaoyue_output.png
可以看得出来,我们正常读取到了原图的信息,并将原图尺寸的宽和高改成原来的一半,并输出到新的图片yangchaoyue_output.png。
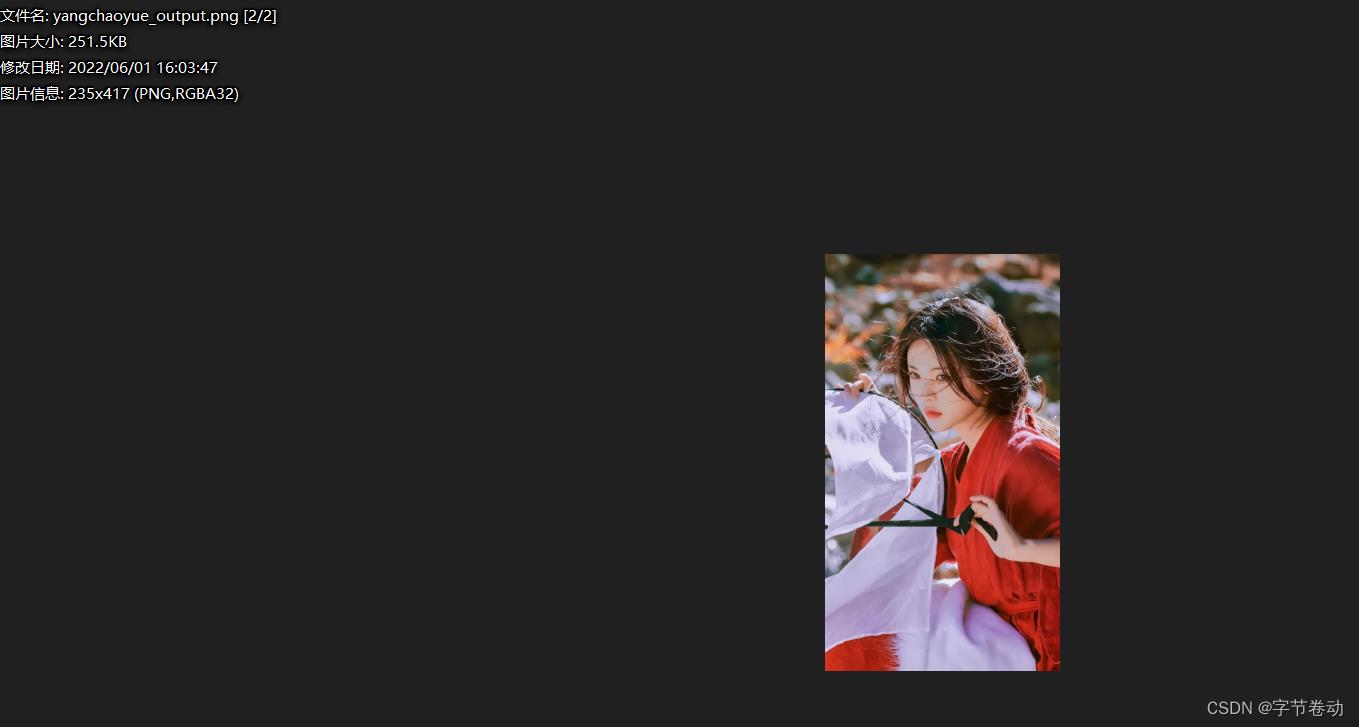
yangchaoyue_output.png 打开如下所示:

文件名: yangchaoyue_output.png [2/2]
图片大小: 251.5KB
修改日期: 2022/06/01 16:03:47
图片信息: 235x417 (PNG,RGBA32)
六、API介绍
上面代码运行完毕之后,我们来介绍下用法。
6.1 stb_image

STBIDEF stbi_uc *stbi_load(char const *filename, int *x, int *y, int *comp, int req_comp)

   FILE *f = stbi__fopen(filename, "rb");
   unsigned char *result;
   if (!f) return stbi__errpuc("can't fopen", "Unable to open file");
   result = stbi_load_from_file(f,x,y,comp,req_comp);
   fclose(f);
   return result;


STBIDEF stbi_uc *stbi_load_from_file(FILE *f, int *x, int *y, int *comp, int req_comp)

   unsigned char *result;
   stbi__context s;
   stbi__start_file(&s,f);
   result = stbi__load_and_postprocess_8bit(&s,x,y,comp,req_comp);
   if (result)
      // need to 'unget' all the characters in the IO buffer
      fseek(f, - (int) (s.img_buffer_end - s.img_buffer), SEEK_CUR);

   return result;
我们调用的代码
string inputPath = "./yangchaoyue.png";
int imageWidth, imageHeight, nrComponents;

// 加载图片获取宽、高、颜色通道信息
unsigned char *imagedata = stbi_load(inputPath.c_str(), &imageWidth, &imageHeight, &nrComponents, 0);
std::cout << "测试 STB_Image 读取到的信息为:imageWidth = "<< imageWidth <<
             ",imageHeight = "<<imageHeight << ", nrComponents = " << nrComponents
             << std::endl;
我们首先是调用 stbi_load 方法去加载图像数据,并获取相关信息。传入的参数除了图片文件地址,还有宽、高、颜色通道信息的引用。
变量 nrComponents 就代表图片的颜色通道值,通常有如下的情况:
- 1 : 灰度图
- 2 : 灰度图加透明度
- 3 : 红绿蓝 RGB 三色图
- 4 : 红绿蓝加透明度 RGBA 图
最后一个参数,我们传入了0,实际上就是STBI_default ,它还可以传入下面几个参数。
enum

   STBI_default = 0, // only used for desired_channels

   STBI_grey       = 1,
   STBI_grey_alpha = 2,
   STBI_rgb        = 3,
   STBI_rgb_alpha  = 4
;

返回的结果就是图片像素数据的指针了。
stbi_load 不仅仅支持 png 格式,把上面例子中的图片改成 jpg 格式后缀的依旧可行。
它支持的所有格式如下:
- png
- jpg
- tga
- bmp
- psd
- gif
- hdr
- pic
格式虽多,不过一般用到 png 和 jpg 就好了。
6.2 sbt_image_resize
加载完图片像素数据之后,就可以通过 stbir_resize 方法改变图片的尺寸。
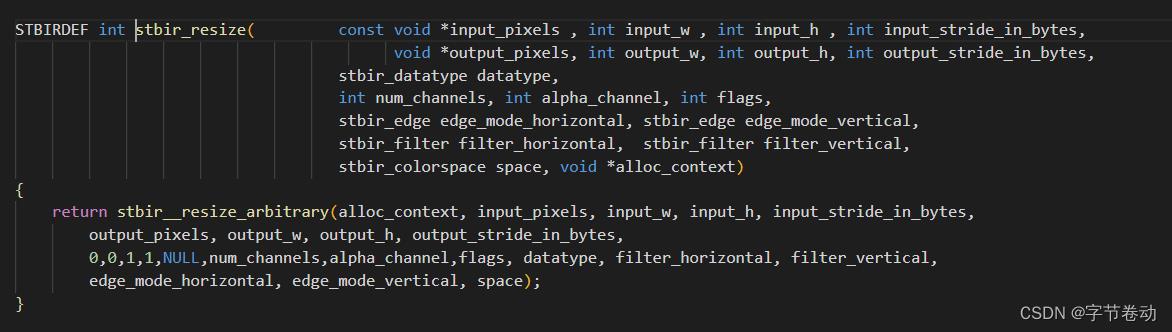
STBIRDEF int stbir_resize(         const void *input_pixels , int input_w , int input_h , int input_stride_in_bytes,
                                         void *output_pixels, int output_w, int output_h, int output_stride_in_bytes,
                                   stbir_datatype datatype,
                                   int num_channels, int alpha_channel, int flags,
                                   stbir_edge edge_mode_horizontal, stbir_edge edge_mode_vertical,
                                   stbir_filter filter_horizontal,  stbir_filter filter_vertical,
                                   stbir_colorspace space, void *alloc_context)

    return stbir__resize_arbitrary(alloc_context, input_pixels, input_w, input_h, input_stride_in_bytes,
        output_pixels, output_w, output_h, output_stride_in_bytes,
        0,0,1,1,NULL,num_channels,alpha_channel,flags, datatype, filter_horizontal, filter_vertical,
        edge_mode_horizontal, edge_mode_vertical, space);
stbir_edge 和 stbir_filter 类型的参数,stb_image_resize 提供了多种类型:

typedef enum

    STBIR_EDGE_CLAMP   = 1,
    STBIR_EDGE_REFLECT = 2,
    STBIR_EDGE_WRAP    = 3,
    STBIR_EDGE_ZERO    = 4,
 stbir_edge;

typedef enum

    STBIR_FILTER_DEFAULT      = 0,  // use same filter type that easy-to-use API chooses
    STBIR_FILTER_BOX          = 1,  // A trapezoid w/1-pixel wide ramps, same result as box for integer scale ratios
    STBIR_FILTER_TRIANGLE     = 2,  // On upsampling, produces same results as bilinear texture filtering
    STBIR_FILTER_CUBICBSPLINE = 3,  // The cubic b-spline (aka Mitchell-Netrevalli with B=1,C=0), gaussian-esque
    STBIR_FILTER_CATMULLROM   = 4,  // An interpolating cubic spline
    STBIR_FILTER_MITCHELL     = 5,  // Mitchell-Netrevalli filter with B=1/3, C=1/3
 stbir_filter;
6.3 stb_image_write
最后就是调用 stbi_write_png 方法将像素数据写入文件中

#ifndef STBI_WRITE_NO_STDIO
STBIWDEF int stbi_write_png(char const *filename, int x, int y, int comp, const void *data, int stride_bytes)

   FILE *f;
   int len;
   unsigned char *png = stbi_write_png_to_mem((const unsigned char *) data, stride_bytes, x, y, comp, &len);
   if (png == NULL) return 0;

   f = stbiw__fopen(filename, "wb");
   if (!f)  STBIW_FREE(png); return 0;
   fwrite(png, 1, len, f);
   fclose(f);
   STBIW_FREE(png);
   return 1;

#endif
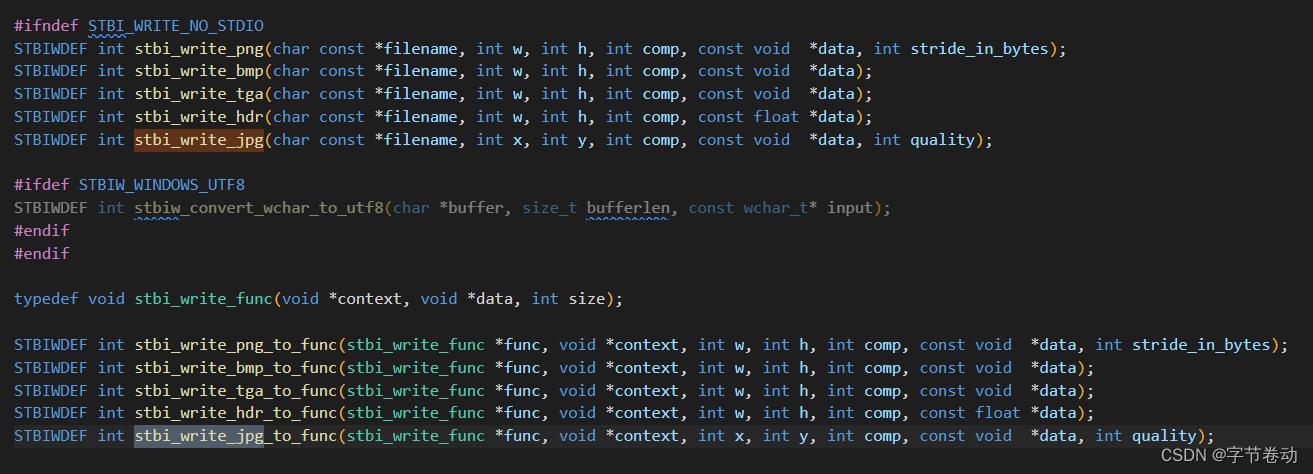
除此之外,stb_image_write 还提供了
stbi_write_jpg方法来保存jpg格式图片。stbi_write_bmp方法来保存bmp格式图片。stbi_write_tga方法来保存tga格式图片。stbi_write_hdr方法来保存hdr格式图片。
根据格式的不同,方法调用的参数也是不一样的。
#ifndef STBI_WRITE_NO_STDIO
STBIWDEF int stbi_write_png(char const *filename, int w, int h, int comp, const void  *data, int stride_in_bytes);
STBIWDEF int stbi_write_bmp(char const *filename, int w, int h, int comp, const void  *data);
STBIWDEF int stbi_write_tga(char const *filename, int w, int h, int comp, const void  *data);
STBIWDEF int stbi_write_hdr(char const *filename, int w, int h, int comp, const float *data);
STBIWDEF int stbi_write_jpg(char const *filename, int x, int y, int comp, const void  *data, int quality);
七、总结
stb库还是很简单的就可以使用了。
读者可以通过本项目源代码 https://github.com/ouyangpeng/stb_test 来测试学习。
以上是关于我的C/C++语言学习进阶之旅介绍一下NDK开发之C的简单易用图像库stb的主要内容,如果未能解决你的问题,请参考以下文章
我的C/C++语言学习进阶之旅NDK开发之Native层使用fopen打开Android设备上的文件
我的C/C++语言学习进阶之旅NDK开发之Native层使用fopen打开Android设备上的文件
我的C/C++语言学习进阶之旅NDK开发之解决错误:signal 5 (SIGTRAP), code 1 (TRAP_BRKPT), fault addr 0xXXX
我的C/C++语言学习进阶之旅NDK开发之解决错误:signal 5 (SIGTRAP), code 1 (TRAP_BRKPT), fault addr 0xXXX