部署LNMP动态网站和配置PHP服务
Posted lian123
tags:
篇首语:本文由小常识网(cha138.com)小编为大家整理,主要介绍了部署LNMP动态网站和配置PHP服务相关的知识,希望对你有一定的参考价值。
部署LNMP动态网站:
第一步:上传文件,解压文件
cd /usr/local/src
tar xzvf FileName.tar.gz
cd cmake-2.8.11.2/
./config
make&make install
cd ..
useradd mysql -s /sbin/nologin
mkdir -p /usr/local/mysql/var
chown -Rf mysql:mysql /usr/local/mysql
解压、编译、安装MySQL数据库服务程序
删除/etc目录中的默认配置文件,然后在MySQL数据库程序的保存目录scripts内找到MySQL_install_db的脚本程序
rm -rf /etc/my.cnf
cd/usr/local/mysql
./scripts/mysql_install_db –user=mysql –basedir=/usr/local/mysql –datadir=/usr/local/mysql/var
把系统新生成的MySQL数据库配置文件链接到/etc目录中
然后把开机文件复制到/etc/rc.d/init.d目录中,权限修改成755
把46、47行的basedir与datadir参数分别修改为MySQL数据库程序的保存目录和真实数据库的文件内容
Vim /etc/rc.d/init.d/mysql
使用service命令启动服务
编辑/etc/profile文件并写入追加的命令目录,也可以使用source命令加载一下/etc/profile文件
vim /etc/profile
Source /var/lib/mysql
配置php服务:
cd ..
tar zxvf yasm-1.2.0.tar.gz
cd yasm-1.2.0
./configure
make
make install
cd ..
tar zxvf libmcrypt-2.5.8.tar.gz
cd libmcrypt-2.5.8
./configure
make
make install
cd ..
tar xjvf libvpx-v1.3.0.tar.bz2
cd libvpx-v1.3.0
./configure --prefix=/usr/local/libvpx --enable-shared --enable-vp9
make
make install
cd ..
tar zxvf tiff-4.0.3.tar.gz
cd tiff-4.0.3
./configure --prefix=/usr/local/tiff --enable-shared
make
make install
cd ..
tar zxvf libpng-1.6.12.tar.gz
cd libpng-1.6.12
./configure --prefix=/usr/local/libpng --enable-shared
make
make install
cd ..
tar zxvf freetype-2.5.3.tar.gz
cd freetype-2.5.3
./configure --prefix=/usr/local/freetype --enable-shared
make
make install
cd ..
tar zxvf jpegsrc.v9a.tar.gz
cd jpeg-9a
./configure --prefix=/usr/local/jpeg --enable-shared
make
make install
cd ..
tar zxvf libgd-2.1.0.tar.gz
cd libgd-2.1.0
./configure --prefix=/usr/local/libgd --enable-shared --with-jpeg=/usr/local/jpeg --with-png=/usr/local/libpng --with-freetype=/usr/local/freetype --with-fontconfig=/usr/local/freetype --with-xpm=/usr/ --with-tiff=/usr/local/tiff --with-vpx=/usr/local/libvpx
make
make install
安装后把/usr/lib64目录中的函数文件链接到/usr/lib目录中
cd ..
tar zxvf t1lib-5.1.2.tar.gz
cd t1lib-5.1.2
./configure --prefix=/usr/local/t1lib --enable-shared
make
make install
ln -s /usr/lib64/libltdl.so /usr/lib/libltdl.so
cp -frp /usr/lib64/libXpm.so* /usr/lib/
开始编译php源码包之前,先定义全局环境变量. 编译php服务源码包时,除了定义要安装到的目录以外,还需要依次定义配置php服务程序配置文件的保存目录、MySQL数据库服务程序所在目录、MySQL数据库服务程序配置文件所在目录,以及libpng、jpeg、freetype、libvpx、zlib、t1lib等服务程序的安装目录路径,并通过参数启动php服务程序的诸多默认功能
cd ..
tar -zvxf php-5.5.14.tar.gz
cd php-5.5.14
export LD_LIBRARY_PATH=/usr/local/libgd/lib
./configure --prefix=/usr/local/php --with-config-file-path=/usr/local/php/etc --with-mysql=/usr/local/mysql --with-mysqli=/usr/local/mysql/bin/mysql_config --with-mysql-sock=/tmp/mysql.sock --with-pdo-mysql=/usr/local/mysql --with-gd --with-png-dir=/usr/local/libpng --with-jpeg-dir=/usr/local/jpeg --with-freetype-dir=/usr/local/freetype --with-xpm-dir=/usr/ --with-vpx-dir=/usr/local/libvpx/ --with-zlib-dir=/usr/local/zlib --with-t1lib=/usr/local/t1lib --with-iconv --enable-libxml --enable-xml --enable-bcmath --enable-shmop --enable-sysvsem --enable-inline-optimization --enable-opcache --enable-mbregex --enable-fpm --enable-mbstring --enable-ftp --enable-gd-native-ttf --with-openssl --enable-pcntl --enable-sockets --with-xmlrpc --enable-zip --enable-soap --without-pear --with-gettext --enable-session --with-mcrypt --with-curl --enable-ctype
make
make install
php源码包程序安装完成后,需要删除当前默认的配置文件, 将php服务程序目录中相应的配置文件复制过来
rm -rf /etc/php.ini
ln -s /usr/local/php/etc/php.ini /etc/php.ini
cp php.ini-production /usr/local/php/etc/php.ini
cp /usr/local/php/etc/php-fpm.conf.default /usr/local/php/etc/php-fpm.conf
ln -s /usr/local/php/etc/php-fpm.conf /etc/php-fpm.conf
启用该配置文件中第25行左右的pid文件保存目录,然后分别将第148和149行的user与group参数分别修改为www账户和用户组名称
vim /usr/local/php/etc/php-fpm.conf
25 pid = run/php-fpm.pid
148 user = www
149 group = www
把用于管理php服务的脚本文件复制到/etc/rc.d/init.d中, 赋予755权限
cp sapi/fpm/init.d.php-fpm /etc/rc.d/init.d/php-fpm
chmod 755 /etc/rc.d/init.d/php-fpm
chkconfig php-fpm on
编辑php.ini配置文件,在305行的disable_functions参数后面追加上要禁止的功能
vim /usr/local/php/etc/php.ini
305 disable_functions = passthru,exec,system,chroot,scandir,chgrp,chown,shell_exec,proc_open,proc_get_status,ini_alter,ini_alter,ini_restor e,dl,openlog,syslog,readlink,symlink,popepassthru,stream_socket_server,escapeshellcmd,dll,popen,disk_free_space,checkdnsrr,checkdnsrr,g etservbyname,getservbyport,disk_total_space,posix_ctermid,posix_get_last_error,posix_getcwd,posix_getegid,posix_geteuid,posix_getgid,po six_getgrgid,posix_getgrnam,posix_getgroups,posix_getlogin,posix_getpgid,posix_getpgrp,posix_getpid,posix_getppid,posix_getpwnam,posix_ getpwuid,posix_getrlimit,posix_getsid,posix_getuid,posix_isatty,posix_kill,posix_mkfifo,posix_setegid,posix_seteuid,posix_setgid,posix_ setpgid,posix_setsid,posix_setuid,posix_strerror,posix_times,posix_ttyname,posix_uname
编辑nginx服务程序的主配置文件,把第2行的井号(#)删除, 在后面写上负责运行Nginx服务程序的账户名称和用户组名称;在第45行的index参数后面写上网站的首页名称, 最后是将第65~71行参数前的井号(#)删除来启用参数,主要是修改第69行的脚本名称路径参数,其中$document_root变量即为网站信息存储的根目录路径,若没有设置该变量,则Nginx服务程序无法找到网站信息,因此会提示“404页面未找到”的报错信息。在确认参数信息填写正确后便可重启Nginx服务与php-fpm服务。
vim /usr/local/nginx/conf/nginx.conf
2 user www www;
45 index index.html index.htm index.php;
65 location ~ .php$ {
66 root html;
67 fastcgi_pass 127.0.0.1:9000;
68 fastcgi_index index.php;
69 fastcgi_param SCRIPT_FILENAME $document_root$fastcgi_script_name;
70 include fastcgi_params;
71 }
systemctl restart nginx
systemctl restart php-fpm
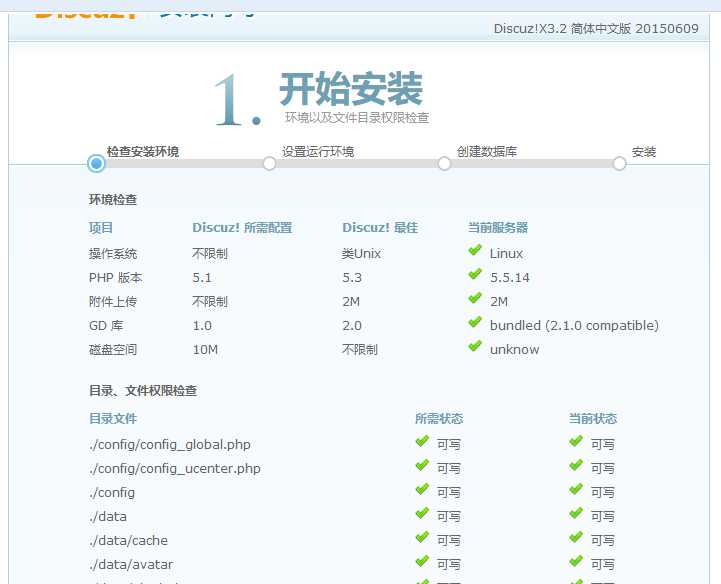
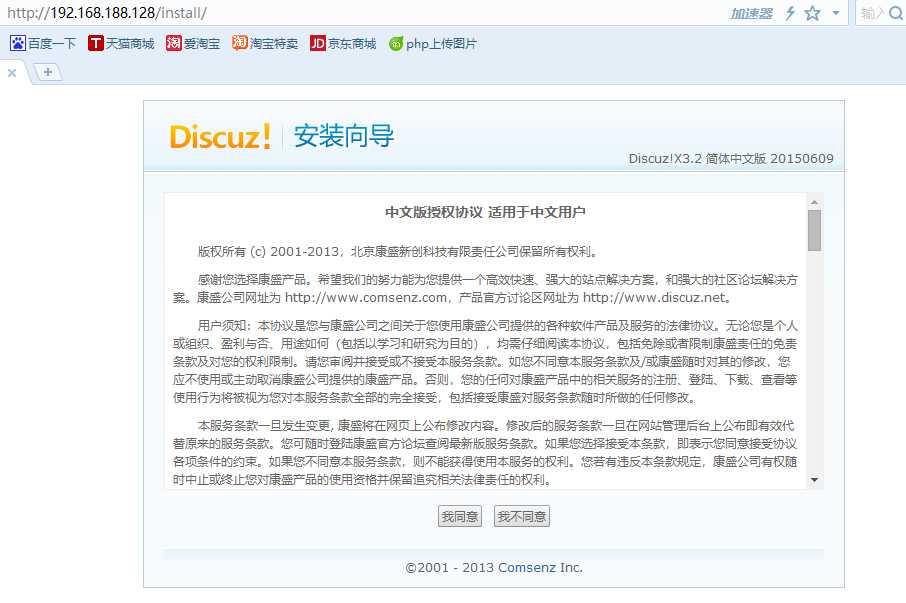
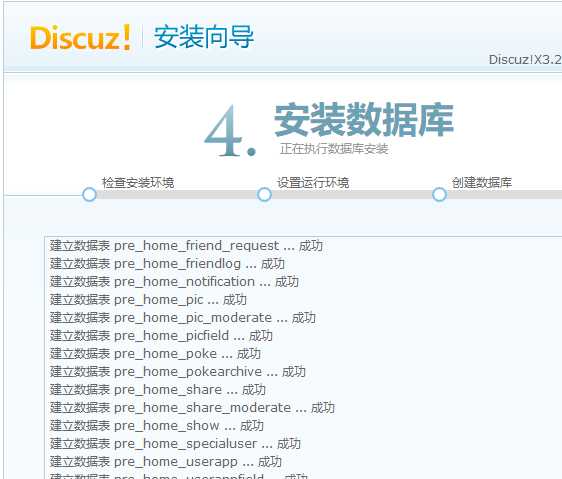
搭建Discuz论坛
cd /usr/local/src/
uzip Discuz_X3.2_SC_GBK.zip
rm -rf /usr/local/nginx/html/{index.html,50x.html}*
mv upload/* /usr/local/nginx/html/
chown -Rf www:www /usr/local/nginx/html
chmod -Rf 755 /usr/local/nginx/html


以上是关于部署LNMP动态网站和配置PHP服务的主要内容,如果未能解决你的问题,请参考以下文章