Php-webdriver 是 Facebook 开发的基于 php 语言实现的 Selenium WebDriver 客户端组件,可以用它来操作浏览器。常见的操作包括:自动化测试、采集数据等。
安装浏览器(Google Chrome 或 Firefox)
以 Ubuntu server 16.04 安装 Google Chrome 浏览器为例(参考链接)。
下载最新版的 64 位 Google Chrome:
wget https://dl.google.com/linux/direct/google-chrome-stable_current_amd64.deb
安装 Google Chrome 并自动安装依赖:
sudo dpkg -i --force-depends google-chrome-stable_current_amd64.deb
若提示 dependency problems 出错信息,表示某些依赖库没有安装,键入以下命令来自动安装好依赖:
sudo apt-get install -f
测试 Google Chrome:
# 安装中文字体
sudo apt-get install fonts-noto-cjk
# 运行 Google Chrome headless 并截图保存
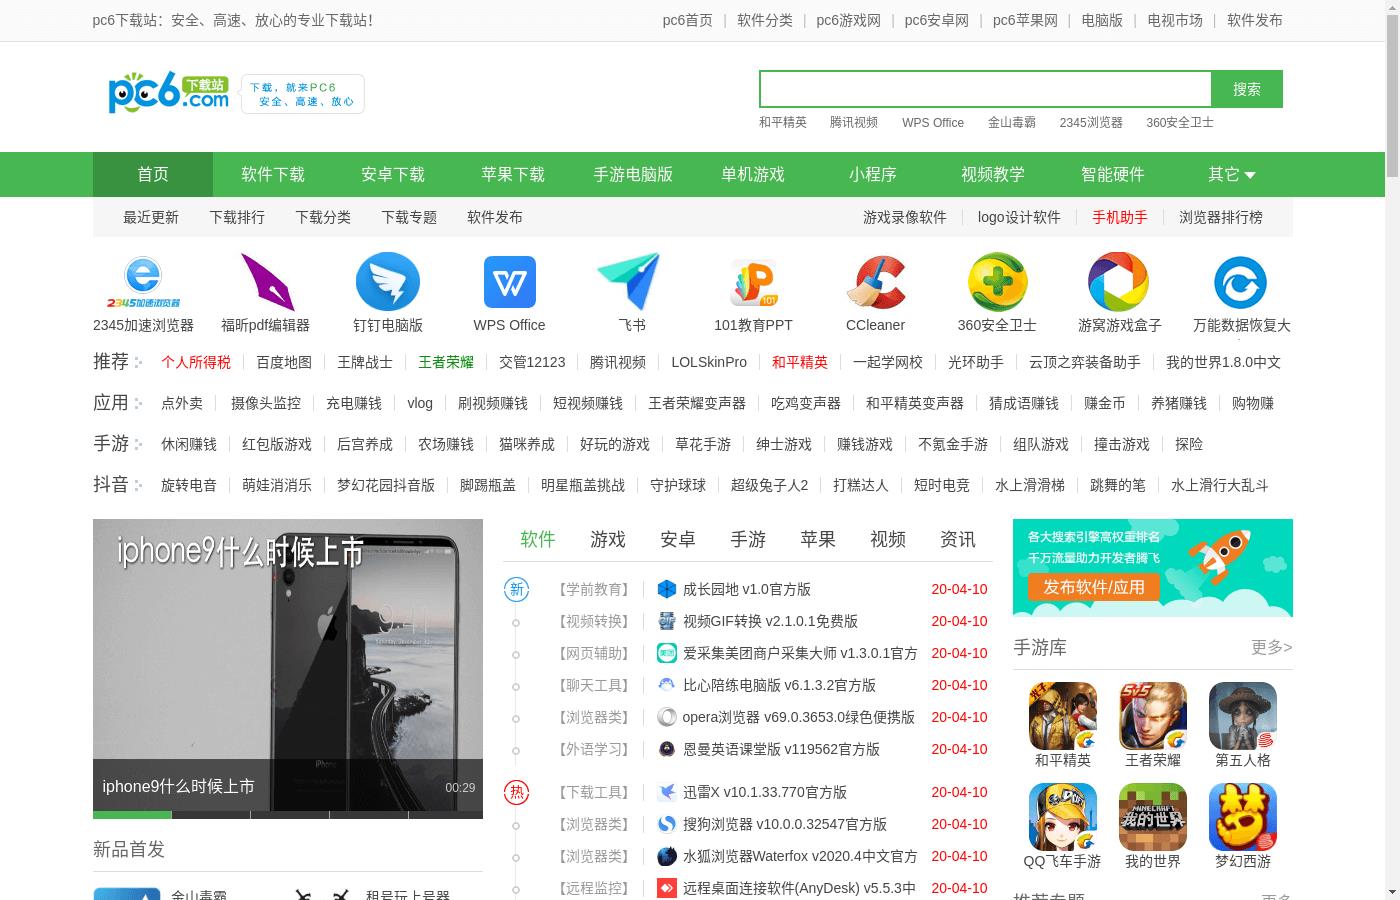
LANGUAGE=ZH-CN.UTF-8 google-chrome --headless https://www.pc6.com --no-sandbox --screenshot --window-size=1400,900
看到如下的图片就表明安装成功了。

安装浏览器驱动程序(Chromedriver 或 Geckodriver)
以安装 Chromdriver 为例。
要保证 Chromedriver 和 Google Chrome 是相匹配的版本。在 Chromedriver 的官方下载页面有版本说明,按照需要下载。
如果安装的 Google Chrome 的版本号是 81,那么根据 Chromdriver 官方说明,也需要下载对应的版本号是 81 的 Chromdriver。
# 查询 Google Chrome 的版本号
root@aeb9f39e9e04:/tmp# google-chrome --version
Google Chrome 81.0.4044.92

下载完成后,解压缩出二进制的可执行文件,这就是我们需要的浏览器驱动程序(WebDriver)了。通过 Chromedriver 可以控制 Google Chrome 的操作。
启动 Chromedriver 并监听 4444 端口。
LANGUAGE=ZH-CN.UTF-8 ./chromedriver --port=4444
安装 Php-webdriver
当做完前面两步准备工作,安装好了浏览器(Google Chrome)与浏览器驱动程序(Chromdriver)之后,总算可以进入主题,安装与使用 Php-webdriver 了。
安装 Php-webdriver
composer require php-webdriver/webdriver
使用 Php-webdriver
打开浏览器
$options = new ChromeOptions();
$options->addArguments([
     \'--window-size=1400,900\',
     \'--headless\',
]);

$capabilities = DesiredCapabilities::chrome();
$capabilities->setCapability(ChromeOptions::CAPABILITY, $options);

$host = \'http://localhost:4444\';
$driver = RemoteWebDriver::create($host, $capabilities);
以上代码加上了打开浏览器的同时加上了窗口大小和无头浏览器的参数,可以按需增减。更多关于 ChromeOptions 的参数请查看 https://sites.google.com/a/chromium.org/chromedriver/capabilities。
打开 URL
$driver->get(\'https://www.baidu.com/\');
$driver->navigate()->to(\'https://www.sogou.com/\');
刷新页面
$driver->navigate()->refresh();
查找单个元素
$element = $driver->findElement(WebDriverBy::cssSelector(\'div.header\'));
查找多个元素
$elements = $driver->findElements(WebDriverBy::cssSelector(\'ul.foo > li\'));
WebDriverBy 提供了多种查询方式:
WebDriverBy::id($id) 根据 ID 查找元素
WebDriverBy::className($className) 根据 class 查找元素
WebDriverBy::cssSelector($selctor) 根据通用的 css 选择器查询
WebDriverBy::name($name) 根据元素的 name 属性查询
WebDriverBy::linkText($text) 根据可见元素的文本锚点查询
WebDriverBy::tagName($tagName) 根据元素标签名称查询
WebDriverBy::xpath($xpath) 根据 xpath 表达式查询
输入内容
$driver->findElement(WebDriverBy::cssSelector(\'input[name=username]\'))->sendKeys(\'imzhi\');
点击元素
$driver->findElement(WebDriverBy::cssSelector(\'button#login\'))->click();
截图
$driver->takeScreenshot(__DIR__ . \'/screenshot.png\');
执行 JS
RemoteWebDriver::executeScript($script, $args) 执行同步 JS 代码
RemoteWebDriver::executeAsyncScript($script, $args) 执行异步 JS 代码
$driver->executeScript("document.body.style.backgroundColor = \'red\';");
关于 Php-webdriver 的更多使用详情可以去官方 wiki 或者去官方 API 文档上查阅。
最后用一个小例子结束这篇教程。
抓取豆瓣电影的DEMO
抓取豆瓣电影里韩国分类下最新上映的前 120 部影视剧的标题与 LOGO 到本地文件夹中。
https://gist.github.com/imzhi/ae547a504e8344e6f2333213eddec97e
采集结果截图:
