webpack基本使用教程
Posted lazy-cat
tags:
篇首语:本文由小常识网(cha138.com)小编为大家整理,主要介绍了webpack基本使用教程相关的知识,希望对你有一定的参考价值。
安装
本地安装
npm install --save-dev webpack
npm install --save-dev webpack-cli   //4.x以上版本,用于cli命令
全局安装
npm install -g webpack
npm install -g webpack-cli
初始化项目
npm init -y  //自动生成一个package.json文件
npm install webpack webpack-cli --save-dev
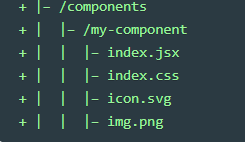
基本目录结构

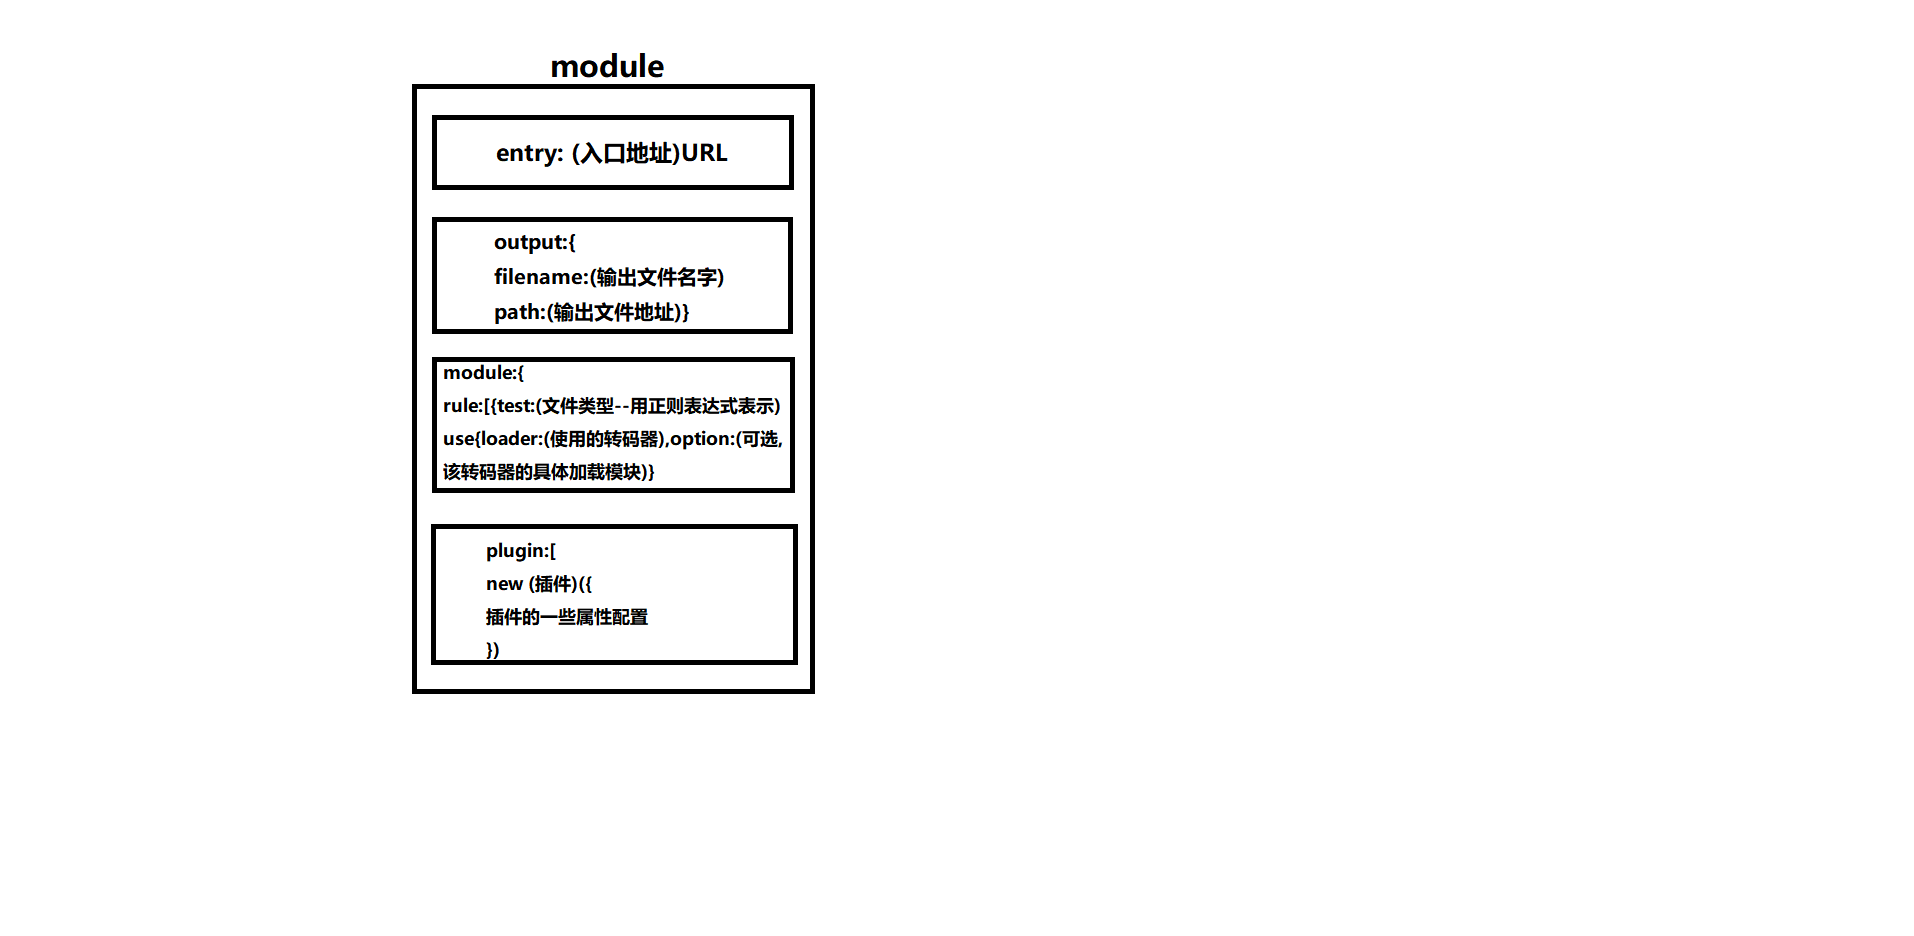
webpack配置表

按项目结构编写代码
//package.json

  {
    "name": "webpack-demo",
    "version": "1.0.0",
    "description": "",
    "main": "index.js",
    "scripts": {
      "test": "echo "Error: no test specified" && exit 1",
    },
    "keywords": [],
    "author": "",
    "license": "ISC",
    "devDependencies": {
      "webpack": "^4.0.1",
      "webpack-cli": "^2.0.9",
      "lodash": "^4.17.5"
    }
  }

//webpack.config.js

const path = require('path');

    module.exports = {
      entry: './src/index.js',
      output: {
        filename: 'bundle.js',
        path: path.resolve(__dirname, 'dist')
      }
    };

//index.html

<!doctype html>
<html>
  <head>
    <title>demo</title>
  </head>
  <body>
    <script src="./src/index.js"></script>
  </body>
</html>

//index.js

function component() {

    var element = document.createElement('div');
    var node = document.createTextNode("hello,webpack!");
    element.appendChild(node);
    return element;
}
document.body.appendChild(component());
下载安装包
//production模式
npm install --save [+安装包名称]

//development模式
npm install --save-dev
运行项目
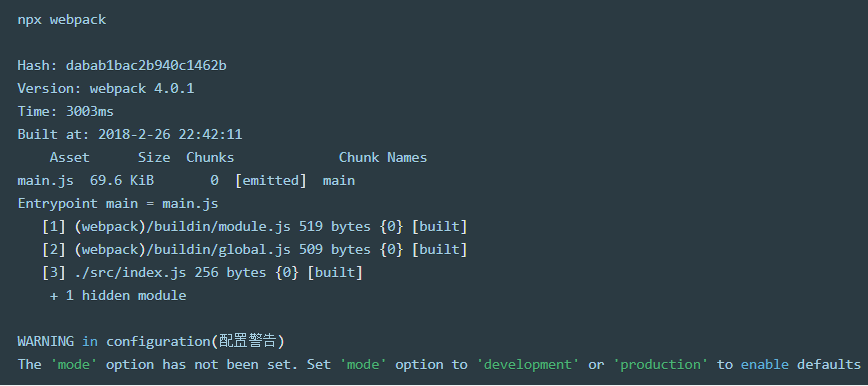
以项目脚本为入口起点,输出main.js
npx webpack
添加npm脚本到package.json设置一个快捷方式运行本地的webpack
//package.json

  {
    "name": "webpack-demo",
    "version": "1.0.0",
    "description": "",
    "main": "index.js",
    "scripts": {
      "test": "echo "Error: no test specified" && exit 1",
+     "build": "webpack"  //新增
    },
    "keywords": [],
    "author": "",
    "license": "ISC",
    "devDependencies": {
      "webpack": "^4.0.1",
      "webpack-cli": "^2.0.9",
      "lodash": "^4.17.5"
    }
  }
loader
加载css文件
react默认不支持css文件,所以需要进行转码.
// webpack.config.js

   module: {
     rules: [
       {
         test: /.css$/,
         use: [
           'style-loader',
           'css-loader'
         ]
       }
     ]
   }
加载图片
    module: {
      rules: [
       {
         test: /.(png|svg|jpg|gif)$/,
         use: [
           'file-loader'
         ]
       }
    ]
   }
加载字体
    module: {
      rules: [

       {
         test: /.(woff|woff2|eot|ttf|otf)$/,
         use: [
           'file-loader'
         ]
       }
      ]
    }
加载数据
    module: {
      rules: [
       {
         test: /.(csv|tsv)$/,
         use: [
           'csv-loader'
         ]
       },
       {
         test: /.xml$/,
         use: [
           'xml-loader'
         ]
       }
      ]
    }
全局资源
通过这些方式加载资源,更加直观和可移植

插件的使用
比如使用一个HtmlWebpackPlugin
安装
npm install --save-dev html-webpack-plugin使用
const HtmlWebpackPlugin = require('html-webpack-plugin');
  module.exports = {
    entry: './src/index.js',

+   plugins: [
+     new HtmlWebpackPlugin({
+       title: 'Output Management'
+     })
+   ],

    output: {
      filename: '[name].bundle.js',
      path: path.resolve(__dirname, 'dist')
    }
  };
source map
准确追踪错误和警告
// webpack.config.js

    const path = require('path');

    module.exports = {
      entry: './src/index.js',
+     devtool: 'source-map',
      output: {
        filename: 'bundle.js',
        path: path.resolve(__dirname, 'dist')
      }
    };
开发工具
帮助你在代码发生变化后自动编译代码
有webpack‘s Watch Mode,webpack-dev-server,webpack-dev-middleware 三种.开发常用webpack-dev-server
安装
npm install --save-dev webpack-dev-server使用
//webpack.config.js

  const path = require('path');

  module.exports = {
    entry: './src/index.js',
+   devServer: {
+     contentBase: './dist'
+   },
    output: {
      filename: 'bundle.js',
      path: path.resolve(__dirname, 'dist')
    }
  };
以上是关于webpack基本使用教程的主要内容,如果未能解决你的问题,请参考以下文章