Virtualbox创建虚拟机for Centos7
Posted 93bok
tags:
篇首语:本文由小常识网(cha138.com)小编为大家整理,主要介绍了Virtualbox创建虚拟机for Centos7相关的知识,希望对你有一定的参考价值。
本文源链接地址:https:www.93bok.com
1、宿主机上创建vbox的虚拟机目录、硬盘目录、iso目录
mkdir -p /vms/virtualbox/disk
mkdir -p /vms/virtualbox/iso
mkdir -p /vms/virtualbox/vms
2、创建虚拟机
VBoxManage createvm --name centos6 --ostype Linux_64 --register --basefolder /vms/virtualbox/vms/3、创建虚拟磁盘(20G)
VBoxManage createvdi --filename /vms/virtualbox/disk/centos6.vdi --size 200004、创建虚拟机的硬盘控制器
VBoxManage storagectl centos6 --name store_controller_1 --add ide5、挂载虚拟硬盘和虚拟光驱
VBoxManage storageattach centos6 --storagectl store_controller_1 --type hdd --port 0 --device 0 --medium /vms/virtualbox/disk/centos6.vdi

VBoxManage storageattach centos6 --storagectl store_controller_1 --type dvddrive --port 1 --device 0 --medium /vms/virtualbox/iso/CentOS-6.5-x86_64-minimal.iso
这里将已经创建好的虚拟磁盘挂载在虚拟机上,同时挂载一个虚拟光驱,加载ISO镜像文件。
6、设置启动顺序
将光驱设置为第一启动顺序,以便安装操作系统。
VBoxManage modifyvm centos6 --boot1 dvd
VBoxManage modifyvm centos6 --boot2 disk
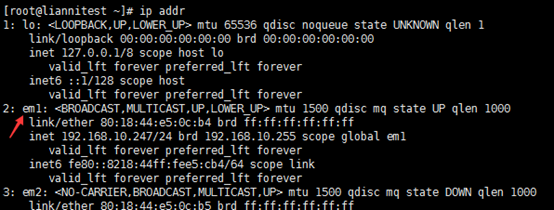
7、查看自己的网卡,并创建桥接网络

我的网卡是em1,所以将vbox nic1网卡绑定到它。
VBoxManage modifyvm centos6 --nic1 bridged --cableconnected1 on --nictype1 82540EM --bridgeadapter1 em1 --intnet1 brigh1 --macaddress1 auto8、启动vrde模块
VBoxManage modifyvm centos6 --vrde onVRDE模块用于启动RDP协议,使用微软的3389客户端即可连接。最后操作系统安装、设置完成后可以考虑关闭此屏幕输出:VBoxManage modifyvm centos6 --vrde off
9、调整系统参数
可以此时调整虚拟机的CPU、内存等参数
VBoxManage modifyvm centos6 --memory 1024
VBoxManage modifyvm centos6 --cpus 2
10、启动虚拟机
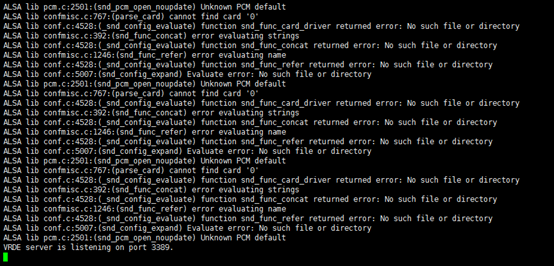
VBoxHeadless -startvm centos6

上图报错解决
yum update11、再次启动虚拟机
VBoxHeadless -startvm centos6
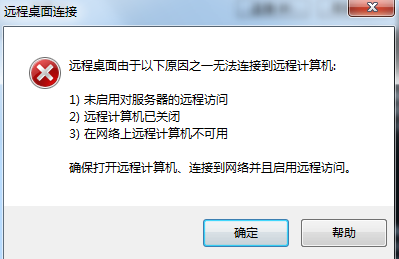
12、mstsc远程输入宿主机IP地址安装操作系统即可(需开启防火墙3389端口)
13、安装完重启之后配置网络就可远程连接正常使用了
14、关闭vrde模块禁止桌面远程连接
1)安装完成之后先关闭虚拟机
2)关闭vrde模块(虚拟机开机状态是没法关闭的)
VBoxManage modifyvm centos6 --vrde off
3)开启虚拟机在后台运行
VBoxManage startvm centos6 -type headless
4)检查mstsc是否还可以远程连接
5)ssh连接试试是否可行
以上是关于Virtualbox创建虚拟机for Centos7的主要内容,如果未能解决你的问题,请参考以下文章
win10安装virtualBox创建CentOS6.5虚拟机
CentOS8上安装virtualbox6并创建Windows10虚拟机