QLabelCV——专门给OpenCV做的PyQt QLabel控件
Posted ren_meng
tags:
篇首语:本文由小常识网(cha138.com)小编为大家整理,主要介绍了QLabelCV——专门给OpenCV做的PyQt QLabel控件相关的知识,希望对你有一定的参考价值。
QLabelCV——专门给OpenCV库做的PyQt QLabel控件
很多小伙伴在用PyQt和OpenCV时,不知道如何将视频帧显示到QLabel控件上。笔者这里写了一个控件,可以让大家一步做到,同时也增加了其他功能。具体请看下文:
github地址:https://github.com/la-vie-est-belle/QLabelCV
简单示例
from PyQt5.QtWidgets import QApplication
from QLabelCV import QLabelCV
import sys


if __name__ == '__main__':
    app = QApplication(sys.argv)

    label_cv = QLabelCV()
    label_cv.show()
    label_cv.set_camera(0)

    sys.exit(app.exec_())
只需要使用set_camera() 就能将视频帧显示到QLabel控件上,可传入不同的整数来使用不同的摄像头设备,内部就是通过cv2.VideoCapture()来实现的。

可以直接在屏幕上画出ROI区域:

可以使用 get_rect()获取ROI矩形的坐标:
>>> print(label_cv.get_rect())
(161, 72, 316, 228)
或者这样:
>>> print(label_cv.roi_top_left_x)
161
>>> print(label_cv.roi_top_left_y)
72
>>> print(label_cv.roi_bottom_right_x)
316
>>> print(label_cv.roi_bottom_right_y)
228
可以使用 save_frame()将帧保存到本地:
>>> label_cv.save_frame(path='frame.jpg')
如果想要在图上留有ROI区域,可以传入True:
>>> label_cv.save_frame(path='frame.jpg', with_roi_rect=True)
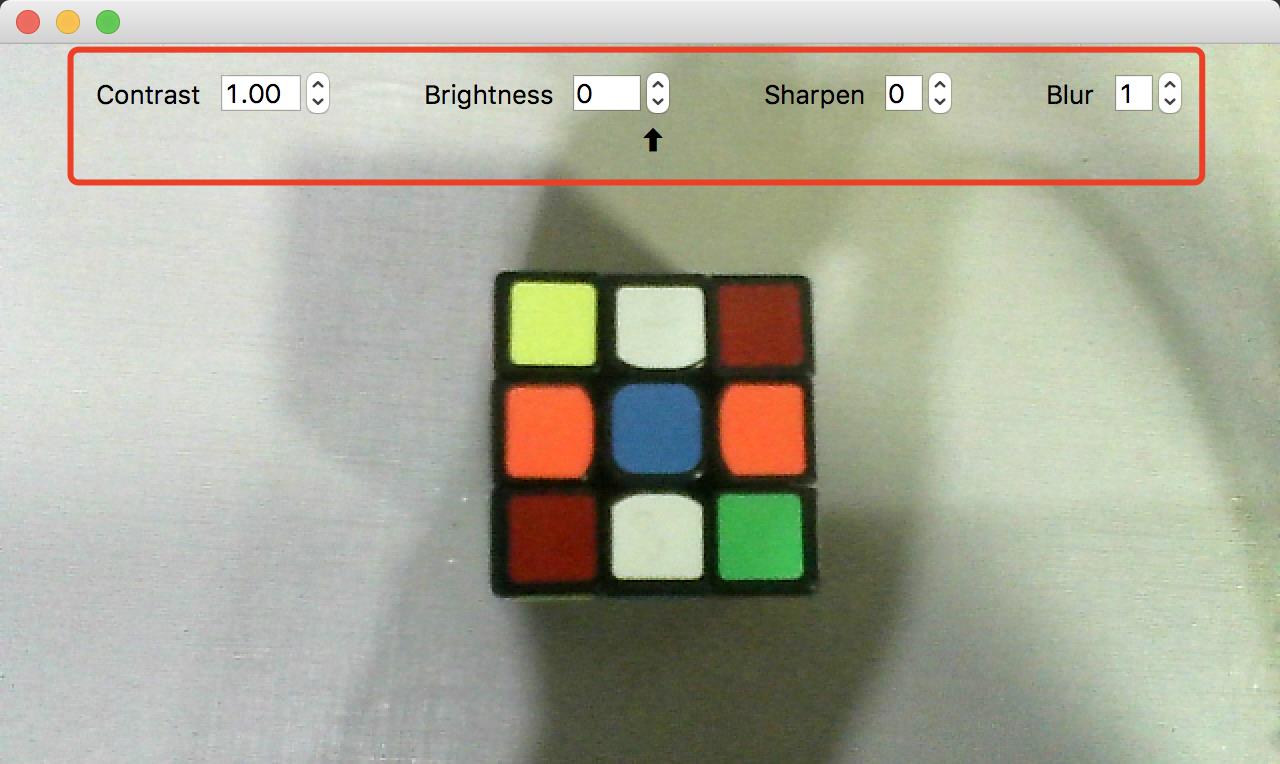
除此之外, 你还可以直接优化图片。点击屏幕上的小箭头,呼出图像调节区域:


你可以在调节区域中调整图像的对比度、亮度、锐化程度和模糊度。
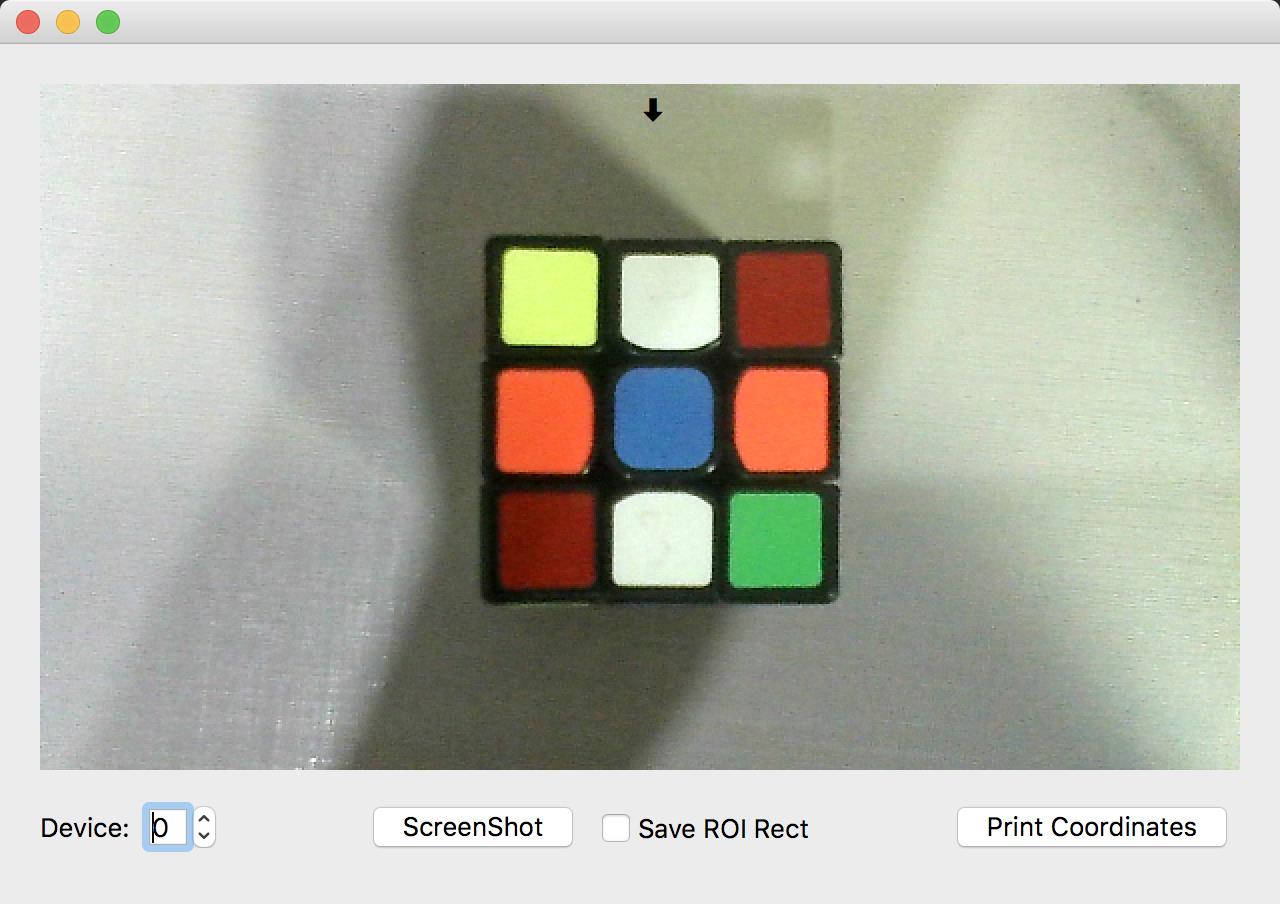
程序示例:
from PyQt5.QtWidgets import QApplication, QWidget,QLabel, QPushButton, QSpinBox, QCheckBox, QHBoxLayout, QVBoxLayout
from QLabelCV import QLabelCV
import sys


class Demo(QWidget):
    def __init__(self):
        super(Demo, self).__init__()
        self.resize(640, 430)

        self.label_cv = None
        self.device_spin = None
        self.screenshot_btn = None
        self.print_coords_btn = None
        self.with_roi_rect_checkbox = None

        self.main()

    def main(self):
        self.init_ui()

    def init_ui(self):
        self.generate_widgets()
        self.connect_signals()
        self.set_layouts()

    def generate_widgets(self):
        self.label_cv = QLabelCV()
        self.label_cv.set_camera(0)
        self.device_spin = QSpinBox()
        self.screenshot_btn = QPushButton('ScreenShot')
        self.print_coords_btn = QPushButton('Print Coordinates')
        self.with_roi_rect_checkbox = QCheckBox('Save ROI Rect')

    def connect_signals(self):
        self.device_spin.valueChanged.connect(self.set_camera)
        self.screenshot_btn.clicked.connect(self.screenshot)
        self.print_coords_btn.clicked.connect(self.print_coordinates)

    def set_layouts(self):
        v_layout = QVBoxLayout()
        h_layout = QHBoxLayout()
        h_layout.addWidget(QLabel('Device:'))
        h_layout.addWidget(self.device_spin)
        h_layout.addStretch(1)
        h_layout.addWidget(self.screenshot_btn)
        h_layout.addWidget(self.with_roi_rect_checkbox)
        h_layout.addStretch(1)
        h_layout.addWidget(self.print_coords_btn)
        v_layout.addWidget(self.label_cv)
        v_layout.addLayout(h_layout)
        self.setLayout(v_layout)

    def set_camera(self):
        self.label_cv.set_camera(self.device_spin.value())

    def screenshot(self):
        if self.with_roi_rect_checkbox.isChecked():
            self.label_cv.save_frame('frame.jpg', True)
        else:
            self.label_cv.save_frame('frame.jpg')

    def print_coordinates(self):
        print('roi rect: ', self.label_cv.get_rect())
        print('roi_top_left_x: ', self.label_cv.roi_top_left_x)
        print('roi_top_left_y: ', self.label_cv.roi_top_left_y)
        print('roi_bottom_left_x: ', self.label_cv.roi_bottom_right_x)
        print('roi_bottom_left_y: ', self.label_cv.roi_bottom_right_y)


if __name__ == '__main__':
    app = QApplication(sys.argv)
    demo = Demo()
    demo.show()
    sys.exit(app.exec_())

以上是关于QLabelCV——专门给OpenCV做的PyQt QLabel控件的主要内容,如果未能解决你的问题,请参考以下文章
当我专门双击左键时,Pyqt5 崩溃而没有错误(双右键有效)
OpenCV-PyQT项目实战OpenCV 与PyQt的图像转换