Jenkins+GitLab+Docker持续集成LNMP
Posted 礁之
tags:
篇首语:本文由小常识网(cha138.com)小编为大家整理,主要介绍了Jenkins+GitLab+Docker持续集成LNMP相关的知识,希望对你有一定的参考价值。
文章目录
一、实验环境
| 系统 | 主机名 | ip地址 | 所用软件 | 扮演角色 |
|---|---|---|---|---|
| Centos7.4 | gitlab | 192.168.100.202 | gitlab | Gitlab仓库 |
| Centos7.4 | jenkins | 192.168.100.203 | jenkins、docker、docker-compose | Jenkins |
| Centos7.4 | test | 192.168.100.204 | docker、docker-compose | 测试环境 |
| Centos7.4 | true | 192.168.100.205 | docker、docker-compose | 生产环境 |
| Centos7.4 | harbor | 192.168.100.206 | harbor、docker、docker-compose | harbor镜像仓库 |
二、实验步骤
-目的
Jenkins+gitlab配合发布docker容器项目
-思路:
- 构建gitlab仓库,创建新项目
- 构建jenkins,把密钥传给其他的主机
- 构建harbor仓库,上传mysql、php、nginx的镜像
- 在测试主机、生产主机安装docker与docker-compose
- 使用jenkins登录git复制仓库,然后把compose-lnmp传到仓库
- 在jenkins创建流水线项目,使用流水线脚本,创建脚本先拉gitlab仓库的内容,在测试环境拉取harbor仓库的镜像,然后把jenkins拉取的gitlab数据scp到测试主机,然后在测试主机执行docker-compose up -d 命令构建lnmp,要记得scp的路径要和docker-compose.yml文件中挂载的目录相同
- 在测试主机测试成功后,再次创建一个流水线项目,这次写的流水线脚本是scp到生产主机,其他不变即可
(1)搭建Gitlab仓库,创建新项目
******(1)先做基础配置
[root@Centos7 ~]# hostnamectl set-hostname gitlab
[root@Centos7 ~]# su
[root@gitlab ~]# systemctl stop firewalld
[root@gitlab ~]# setenforce 0
setenforce: SELinux is disabled
[root@gitlab ~]# mount /dev/cdrom /mnt/
mount: /dev/sr0 写保护,将以只读方式挂载
mount: /dev/sr0 已经挂载或 /mnt 忙
       /dev/sr0 已经挂载到 /mnt 上
******(2)安装依赖包,安装gitlab
[root@gitlab ~]# yum install -y curl policycoreutils openssh-server openssh-clients postfix policycoreutils-python
。。。。。。
完毕!
[root@gitlab ~]# systemctl enable postfix       #开启邮件服务
[root@gitlab ~]# systemctl start postfix
[root@gitlab ~]# ll      #上传gitlab软件包
总用量 625204
-rw-------. 1 root root      1264 1月  12 2021 anaconda-ks.cfg
-rw-r--r--  1 root root 640204790 6月  29 18:41 gitlab-ce-12.0.2-ce.0.el7.x86_64.rpm
[root@gitlab ~]# yum -y install gitlab-ce-12.0.2-ce.0.el7.x86_64.rpm    #安装gitlab-ce
。。。。。。
完毕!
[root@gitlab ~]# vim /etc/gitlab/gitlab.rb
  12 ##! https://docs.gitlab.com/omnibus/settings/configuration.html#configuring-the-external-url-for-gitlab
  13 external_url 'http://192.168.100.202'       #修改为本机ip地址
  14
  15 ## Ro
#保存退出
[root@gitlab ~]# gitlab-ctl reconfigure  #修改完配置文件需要重置,等待重置完成
Running handlers:
Running handlers complete
Chef Client finished, 509/1343 resources updated in 02 minutes 39 seconds
gitlab Reconfigured!      #重置完成
[root@gitlab ~]# netstat -anpt | grep 80   #验证端口
tcp        0      0 127.0.0.1:8080          0.0.0.0:*               LISTEN      2027/unicorn master
tcp        0      0 0.0.0.0:80              0.0.0.0:*               LISTEN      2091/nginx: master
tcp        0      0 127.0.0.1:8082          0.0.0.0:*               LISTEN      2047/sidekiq 5.2.7
tcp        0      0 0.0.0.0:8060            0.0.0.0:*               LISTEN      2091/nginx: master
tcp        0      0 127.0.0.1:50362         127.0.0.1:8082          ESTABLISHED 2537/prometheus
tcp        0      0 127.0.0.1:8060          127.0.0.1:49838         ESTABLISHED 2092/nginx: worker
tcp        0      0 127.0.0.1:8082          127.0.0.1:50362         ESTABLISHED 2047/sidekiq 5.2.7
tcp        0      0 127.0.0.1:8080          127.0.0.1:35318         TIME_WAIT   -
tcp        0      0 127.0.0.1:8080          127.0.0.1:35326         TIME_WAIT   -
tcp        0      0 127.0.0.1:49838         127.0.0.1:8060          ESTABLISHED 2537/prometheus
tcp        0      0 127.0.0.1:8080          127.0.0.1:35320         TIME_WAIT   -
(3)过一两分钟后访问gitlab,直接访问80端口即可,因为gitlab默认使用nginx作为web
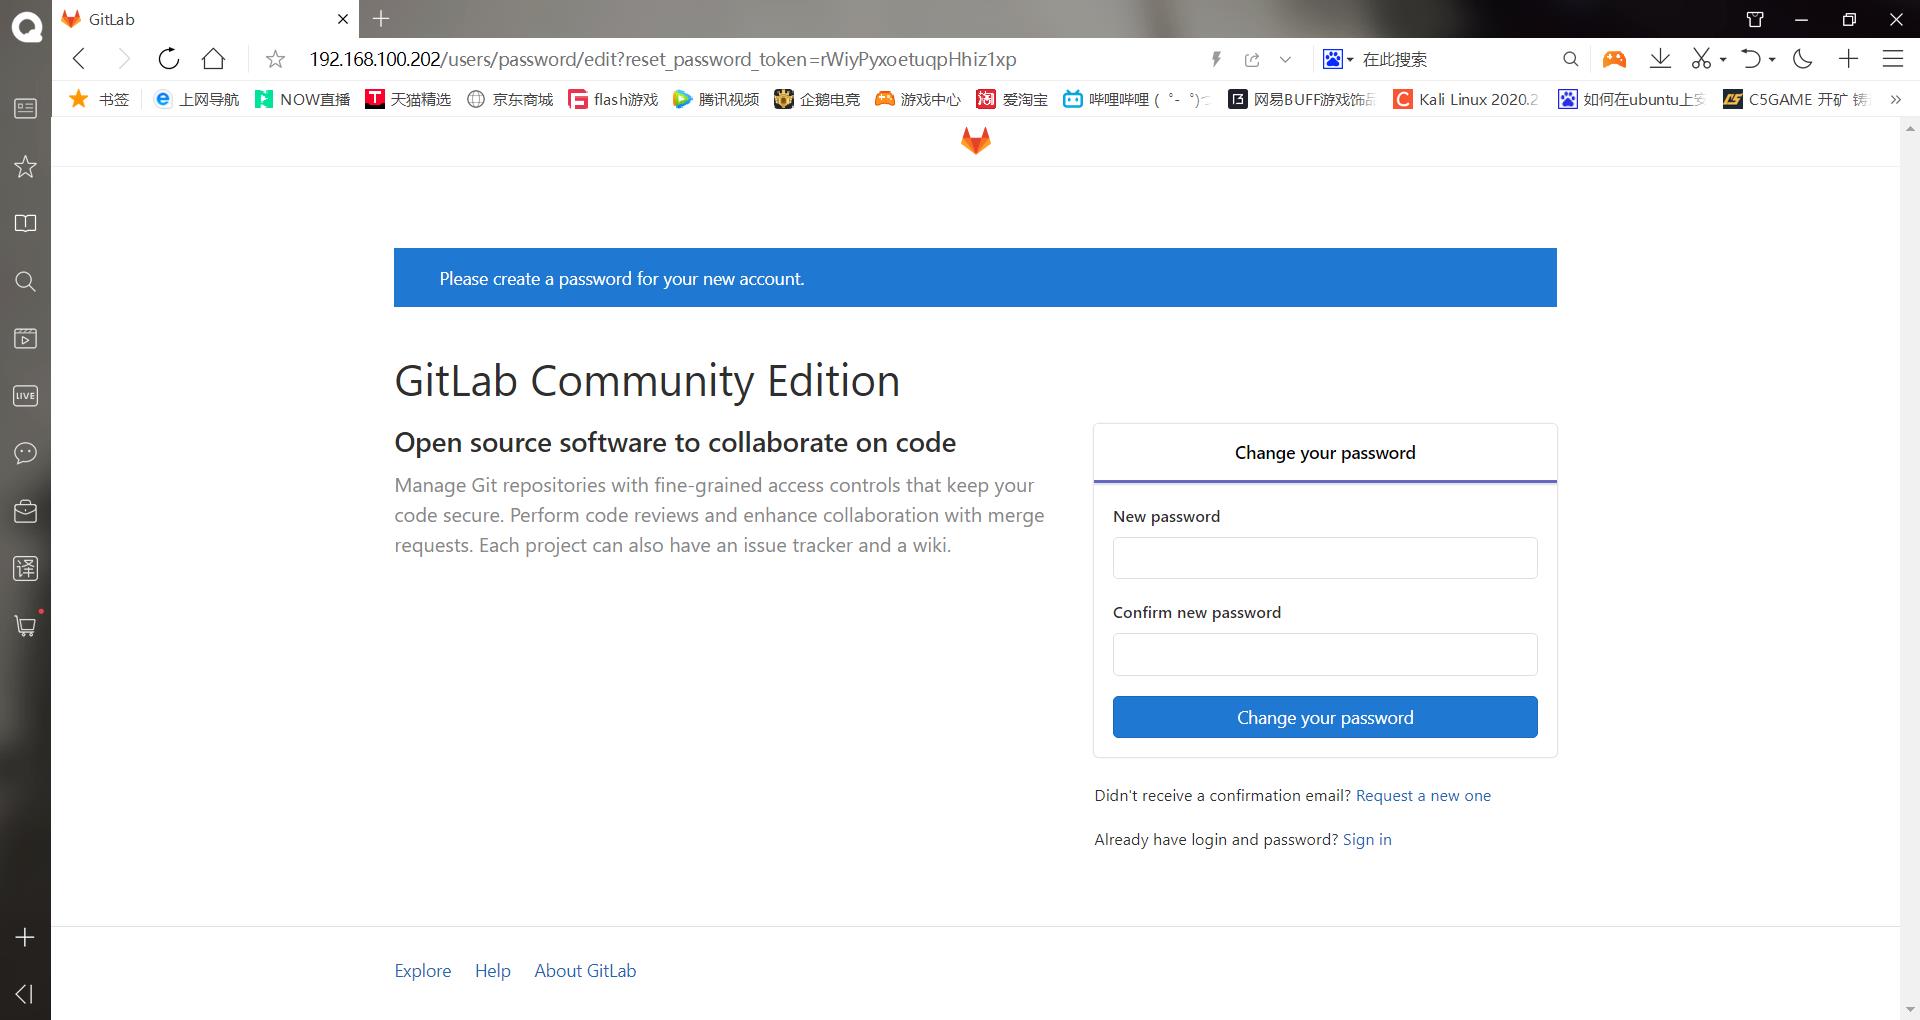
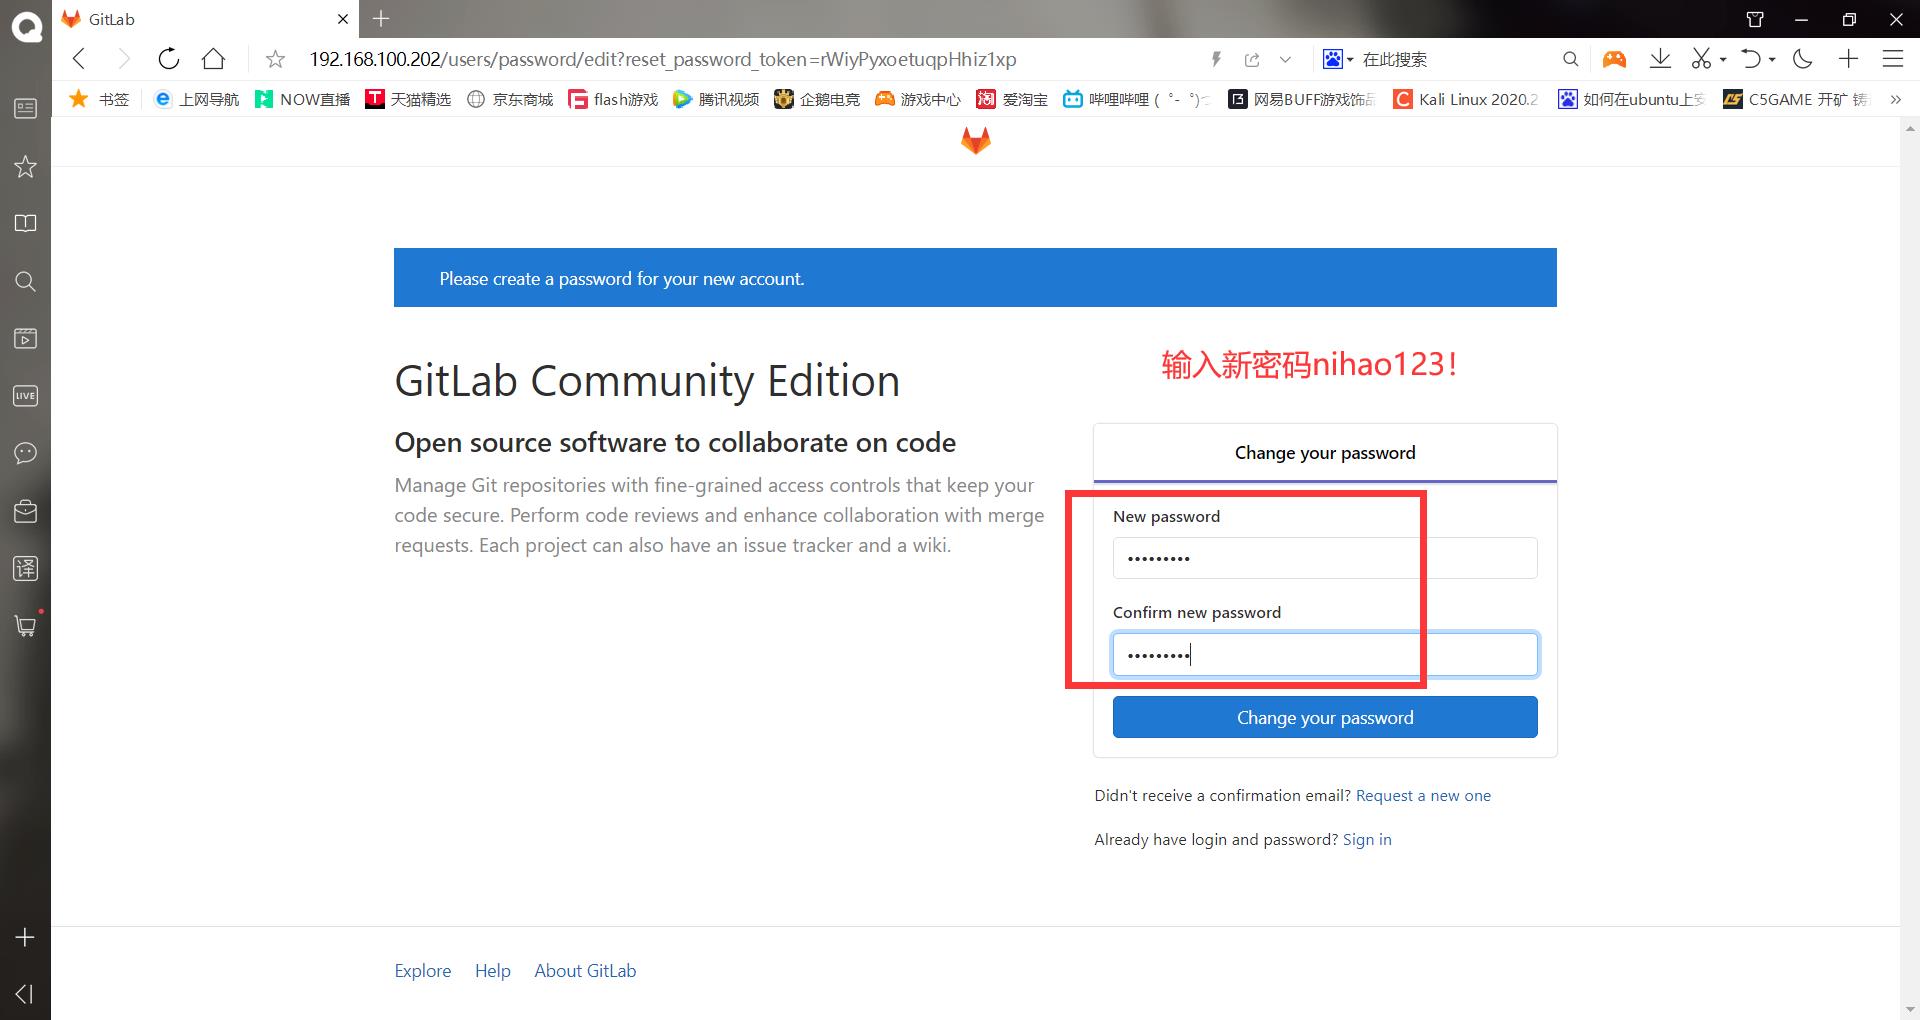
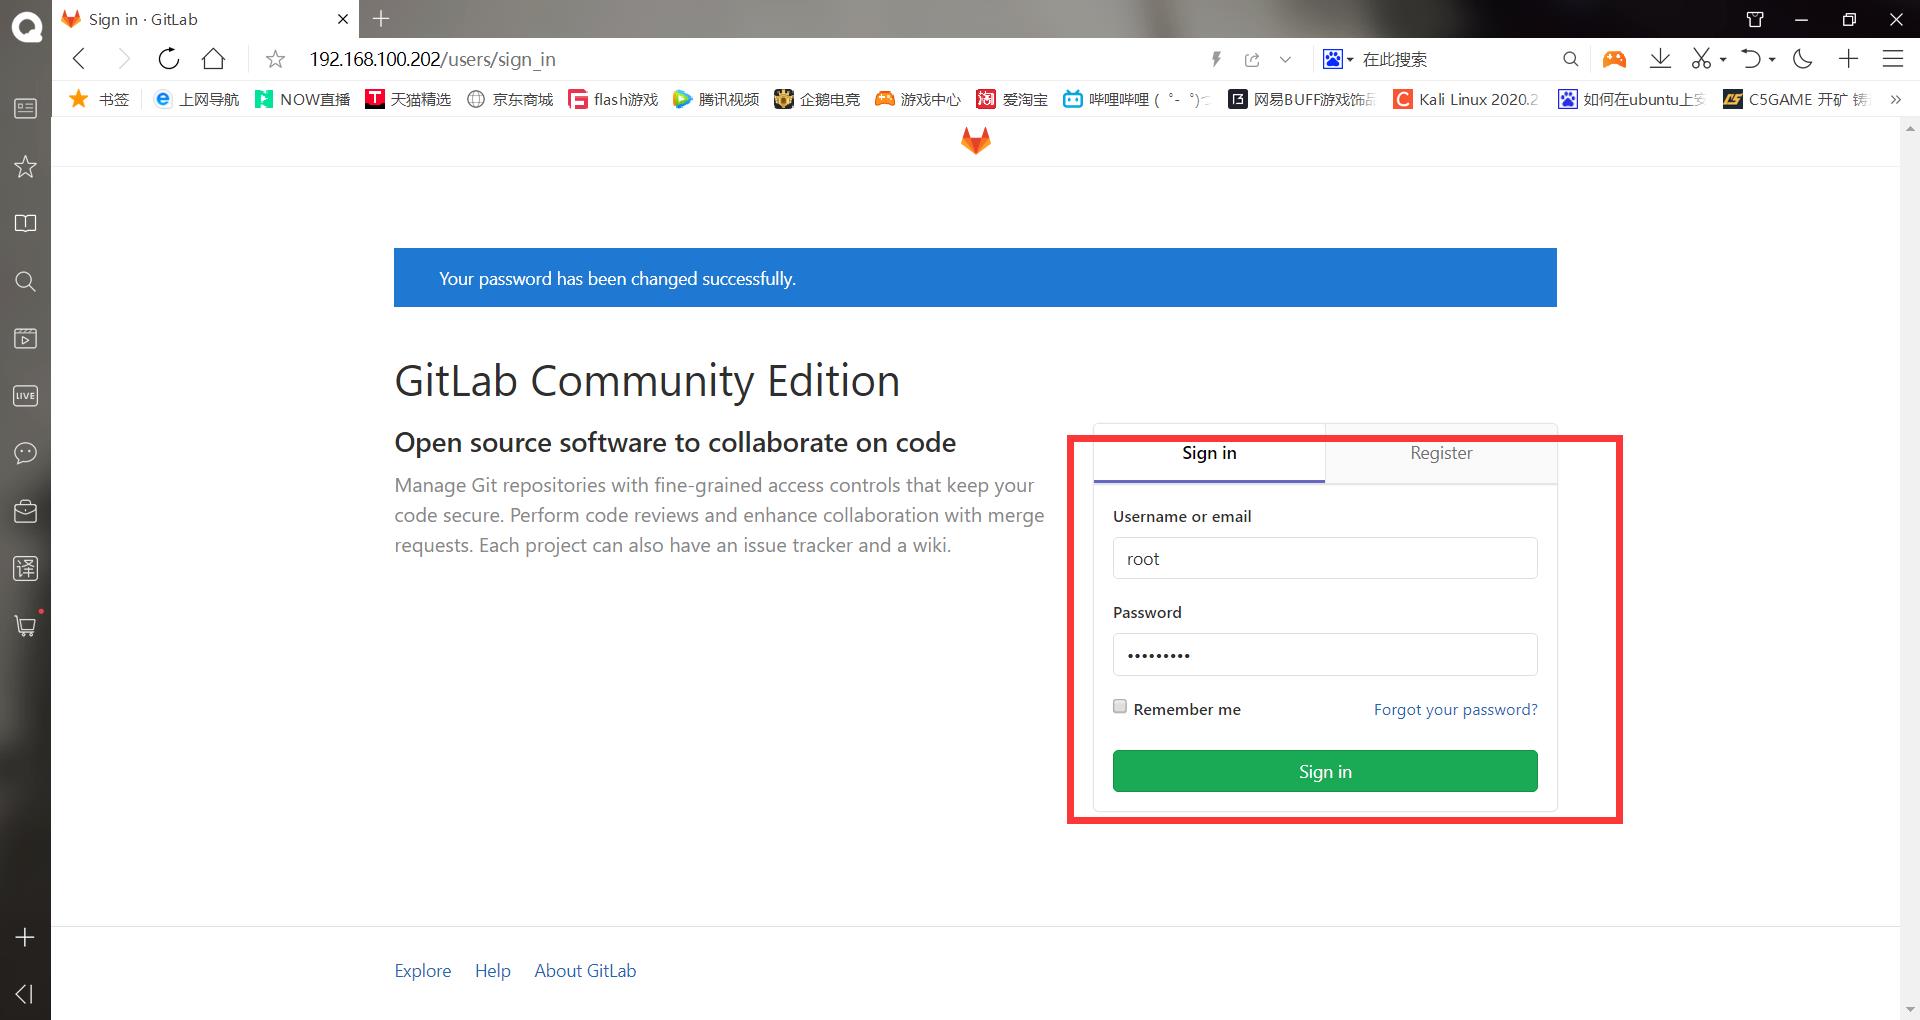
成功访问!!!

******(4)汉化gitlab
[root@gitlab ~]# ll
总用量 699968
-rw-------. 1 root root      1264 1月  12 2021 anaconda-ks.cfg
-rw-r--r--  1 root root  76557595 6月  29 17:01 gitlab-12-0-stable-zh.tar.gz   #上传汉化包
-rw-r--r--  1 root root 640204790 6月  29 18:41 gitlab-ce-12.0.2-ce.0.el7.x86_64.rpm
[root@gitlab ~]# tar xf gitlab-12-0-stable-zh.tar.gz
[root@gitlab ~]# cat gitlab-12-0-stable-zh/VERSION   #确认版本
12.0.3
[root@gitlab ~]# gitlab-ctl stop   #先停止gitlab
ok: down: alertmanager: 1s, normally up
ok: down: gitaly: 0s, normally up
ok: down: gitlab-monitor: 1s, normally up
ok: down: gitlab-workhorse: 0s, normally up
ok: down: grafana: 1s, normally up
ok: down: logrotate: 0s, normally up
ok: down: nginx: 1s, normally up
ok: down: node-exporter: 0s, normally up
ok: down: postgres-exporter: 0s, normally up
ok: down: postgresql: 1s, normally up
ok: down: prometheus: 0s, normally up
ok: down: redis: 1s, normally up
ok: down: redis-exporter: 0s, normally up
ok: down: sidekiq: 0s, normally up
ok: down: unicorn: 0s, normally up
[root@gitlab ~]# unalias cp   #删除cp别名
[root@gitlab ~]# cp -rf gitlab-12-0-stable-zh/* /opt/gitlab/embedded/service/gitlab-rails/
cp: 无法以目录"gitlab-12-0-stable-zh/log" 来覆盖非目录"/opt/gitlab/embedded/service/gitlab-rails/log"  #报错不用管
cp: 无法以目录"gitlab-12-0-stable-zh/tmp" 来覆盖非目录"/opt/gitlab/embedded/service/gitlab-rails/tmp"
[root@gitlab ~]# gitlab-ctl start   #开启gilab
ok: run: alertmanager: (pid 3470) 0s
ok: run: gitaly: (pid 3478) 1s
ok: run: gitlab-monitor: (pid 3498) 0s
ok: run: gitlab-workhorse: (pid 3502) 1s
ok: run: grafana: (pid 3510) 0s
ok: run: logrotate: (pid 3523) 1s
ok: run: nginx: (pid 3529) 0s
ok: run: node-exporter: (pid 3534) 1s
ok: run: postgres-exporter: (pid 3538) 0s
ok: run: postgresql: (pid 3619) 0s
ok: run: prometheus: (pid 3628) 1s
ok: run: redis: (pid 3637) 0s
ok: run: redis-exporter: (pid 3641) 1s
ok: run: sidekiq: (pid 3646) 0s
ok: run: unicorn: (pid 3652) 1s
同样过一两分钟再访问

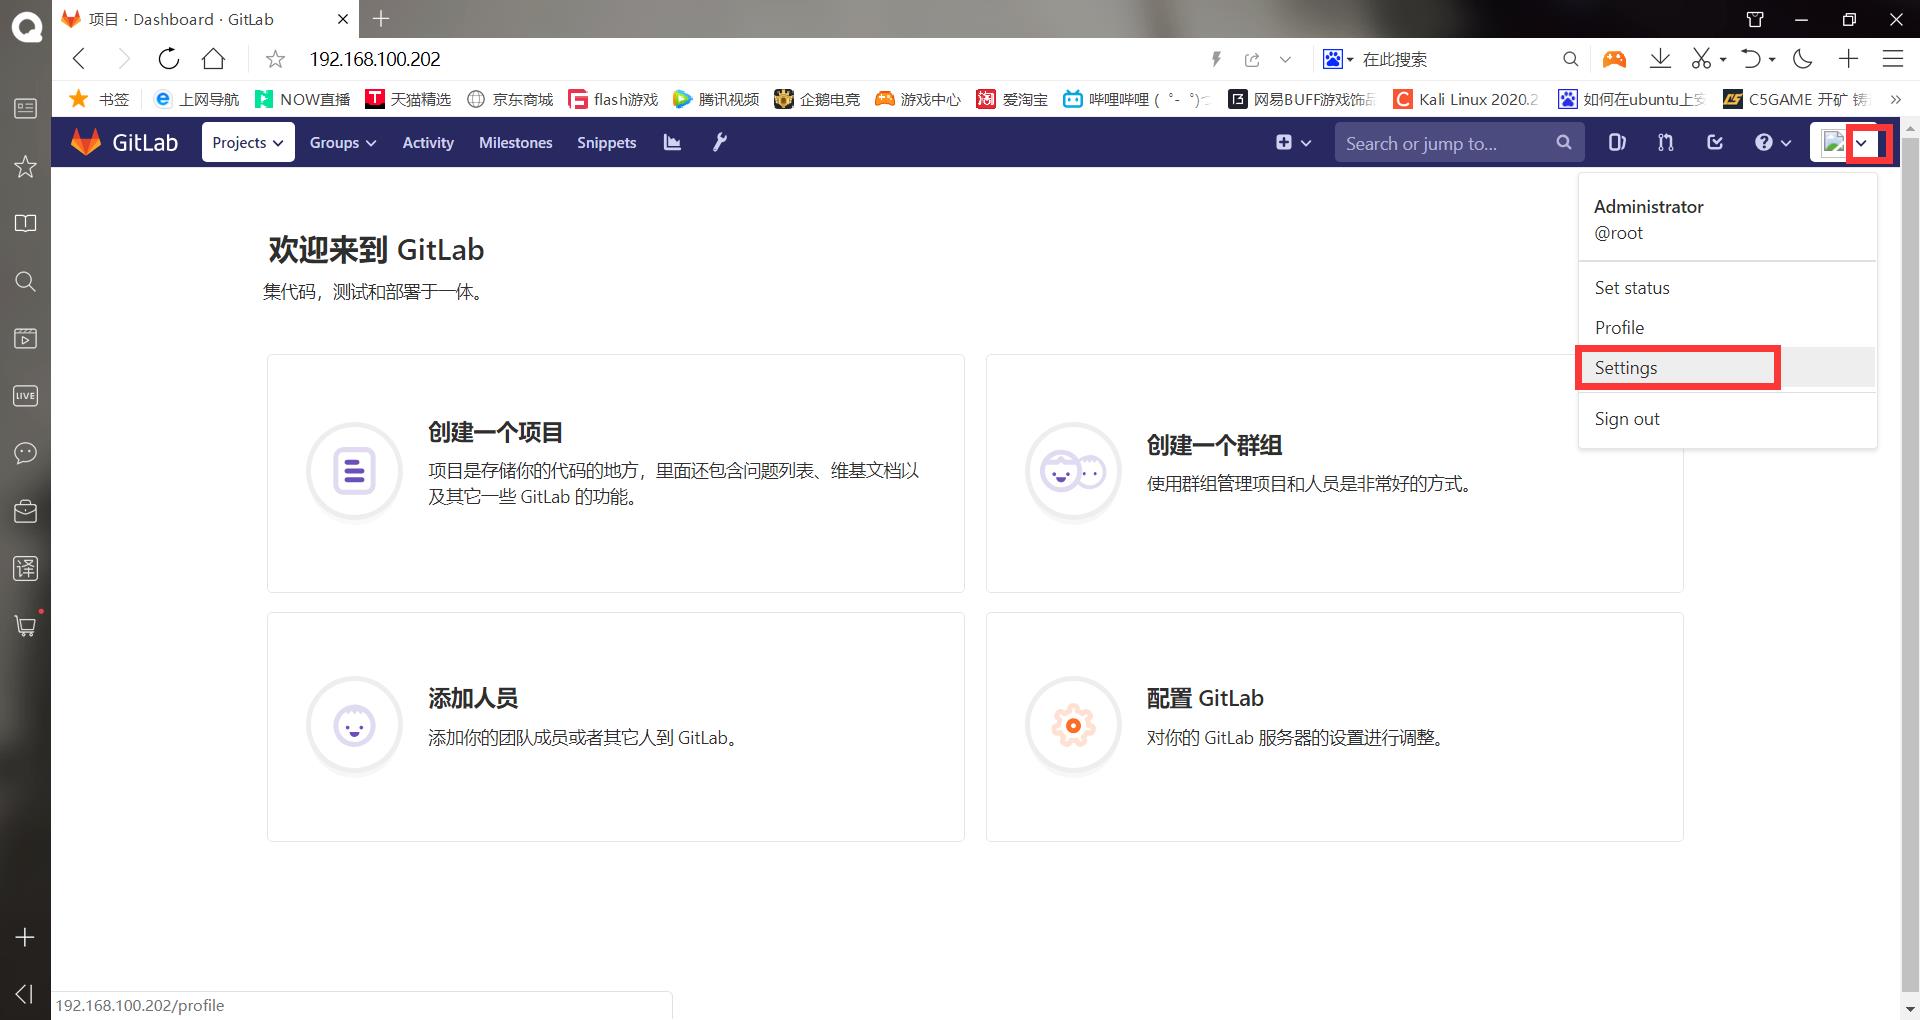
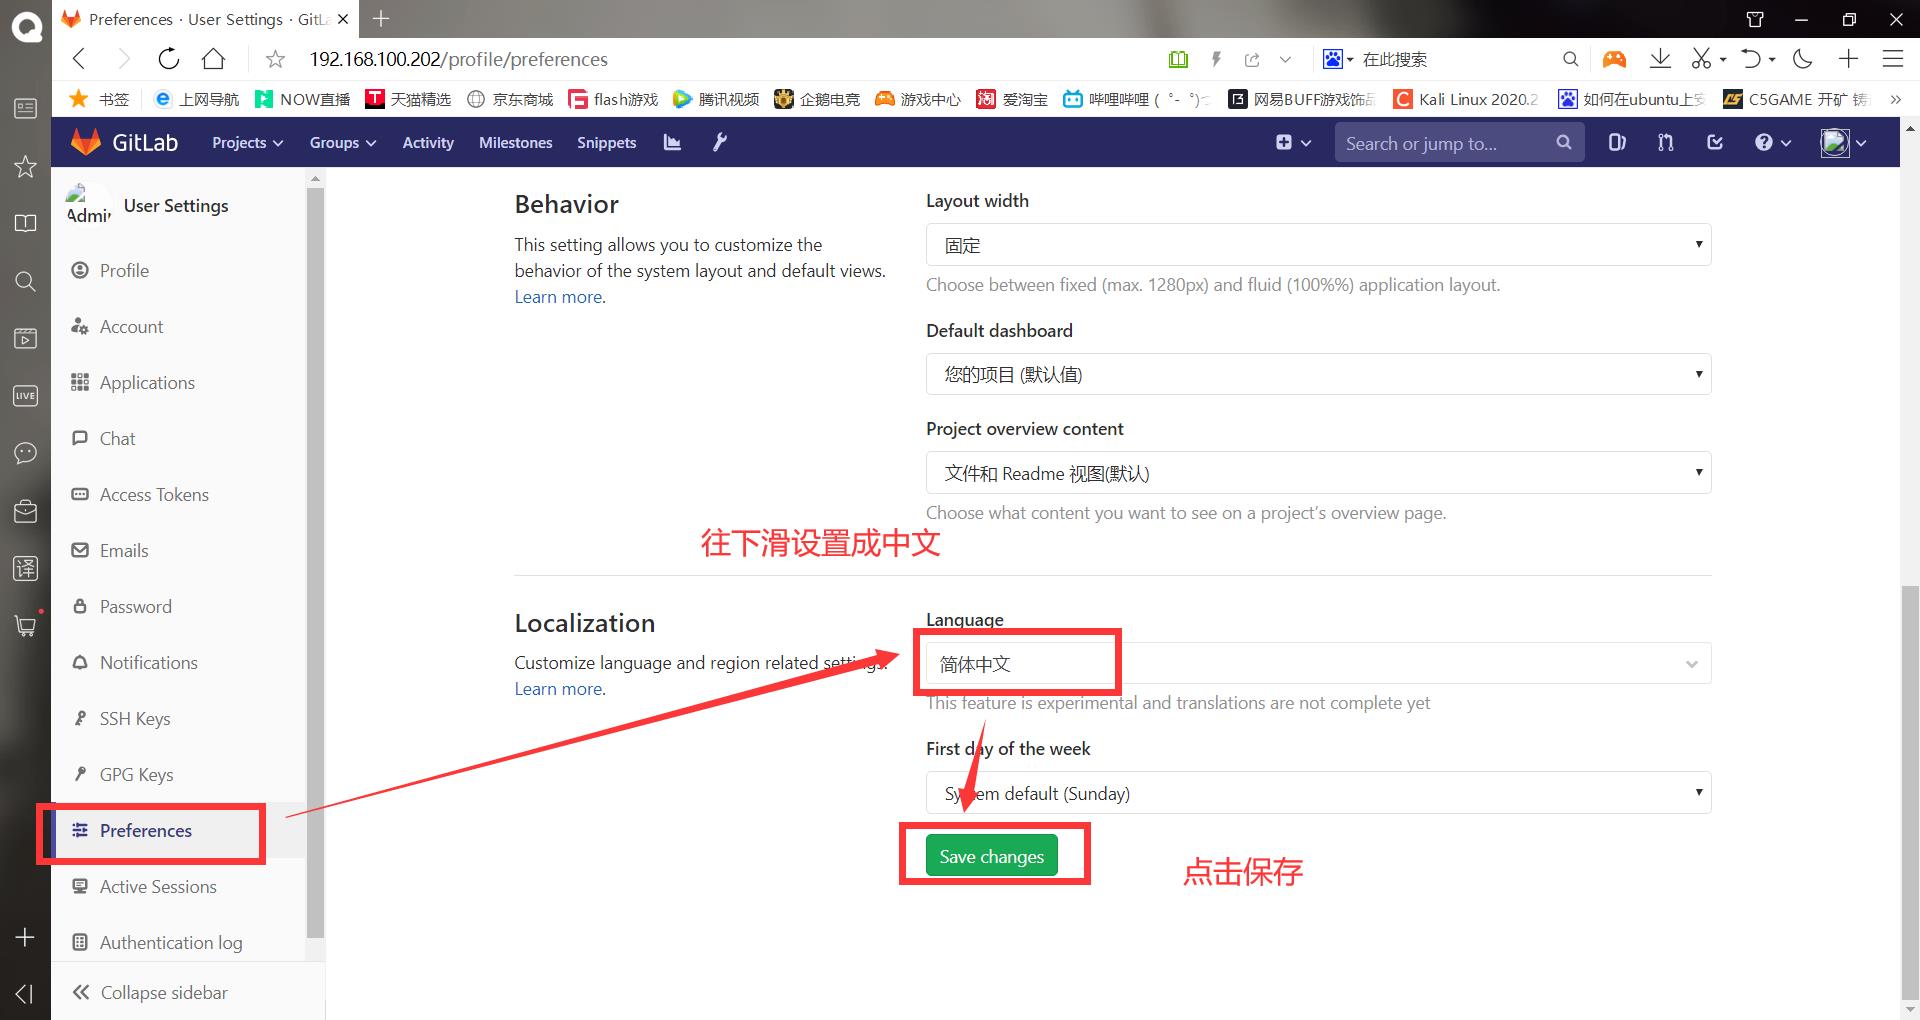
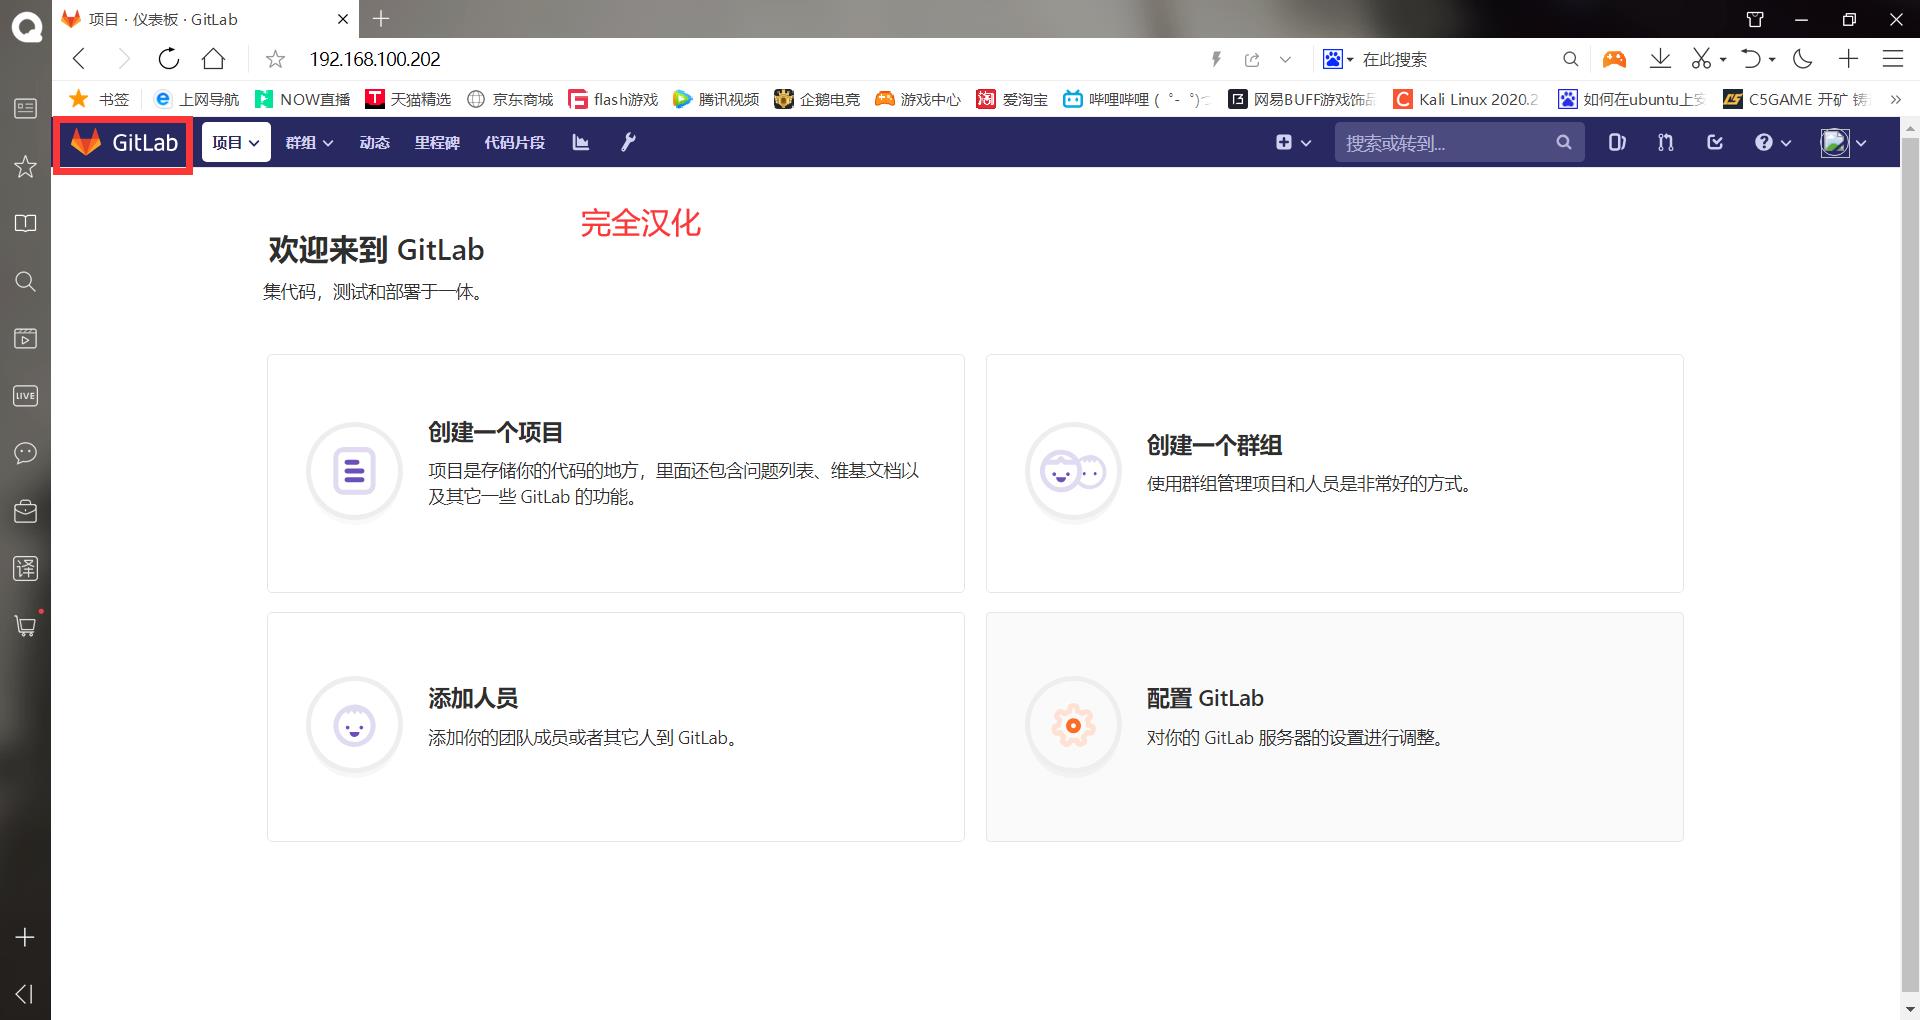
Gitlan仓库搭建完成!!!
(5)创建一个新项目
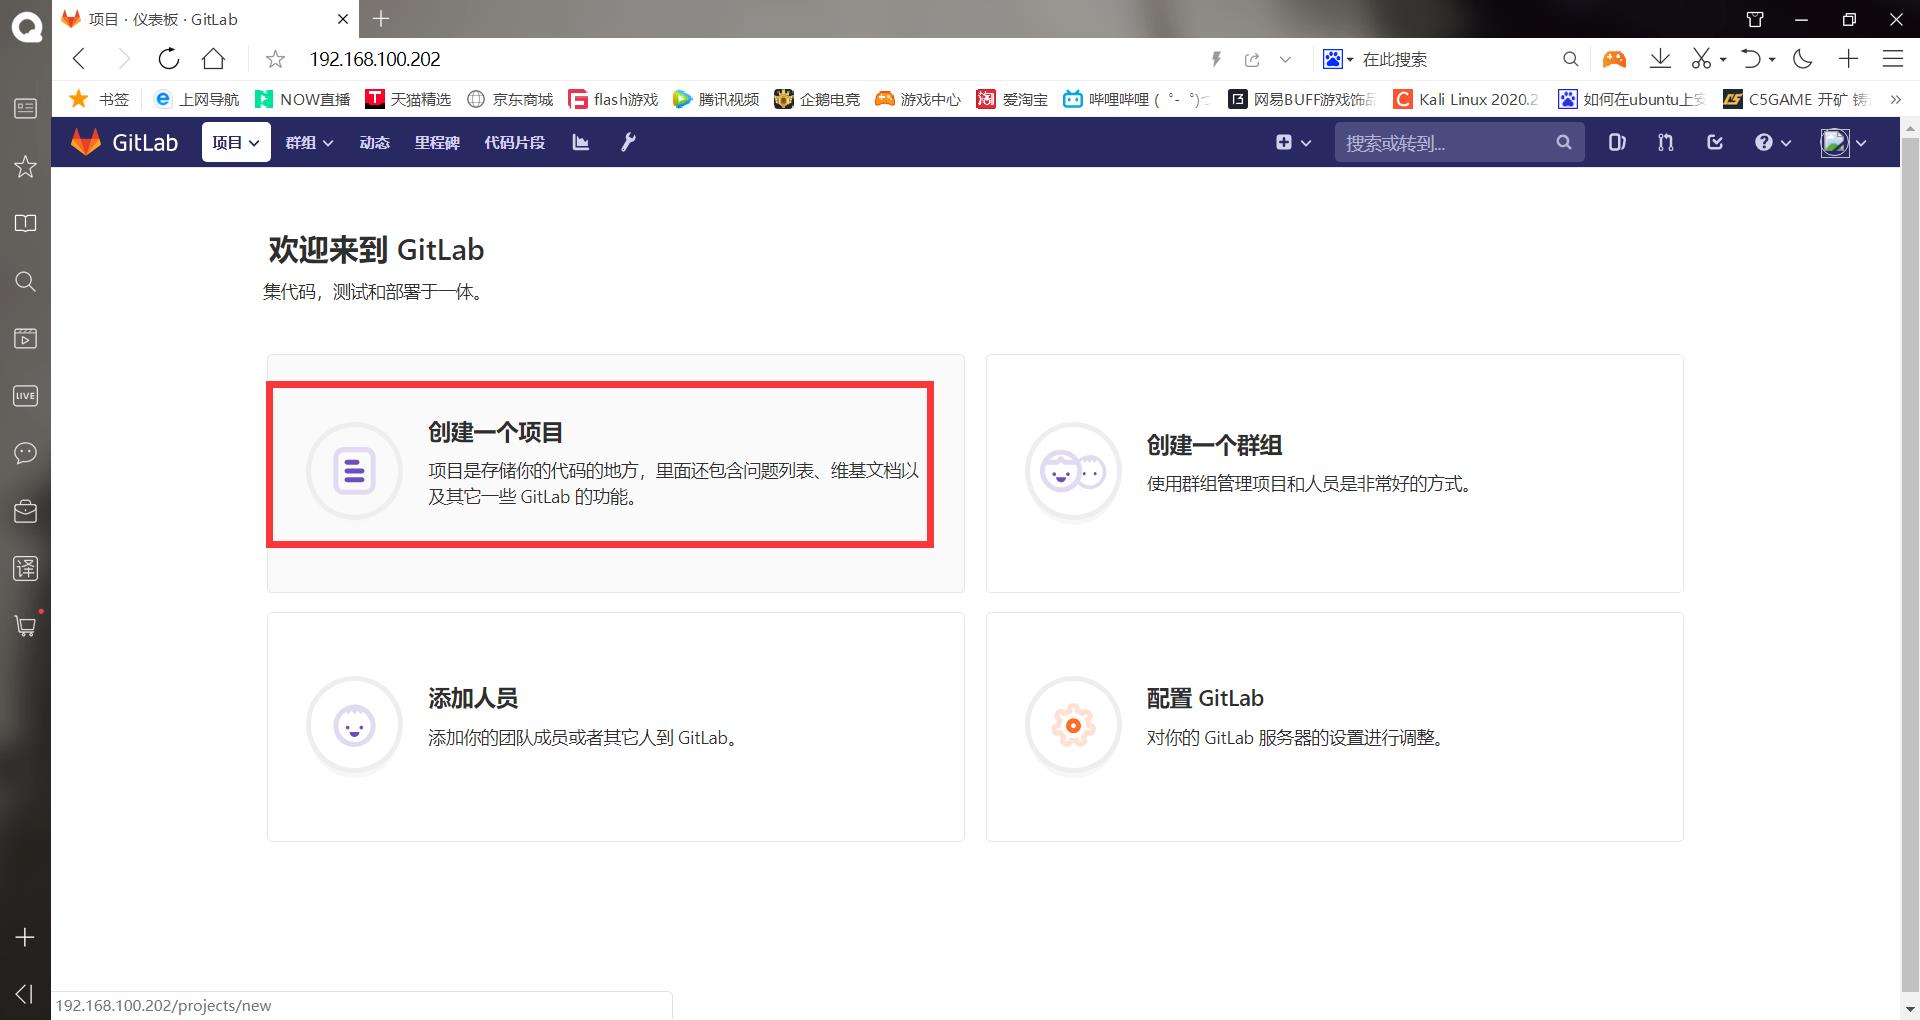
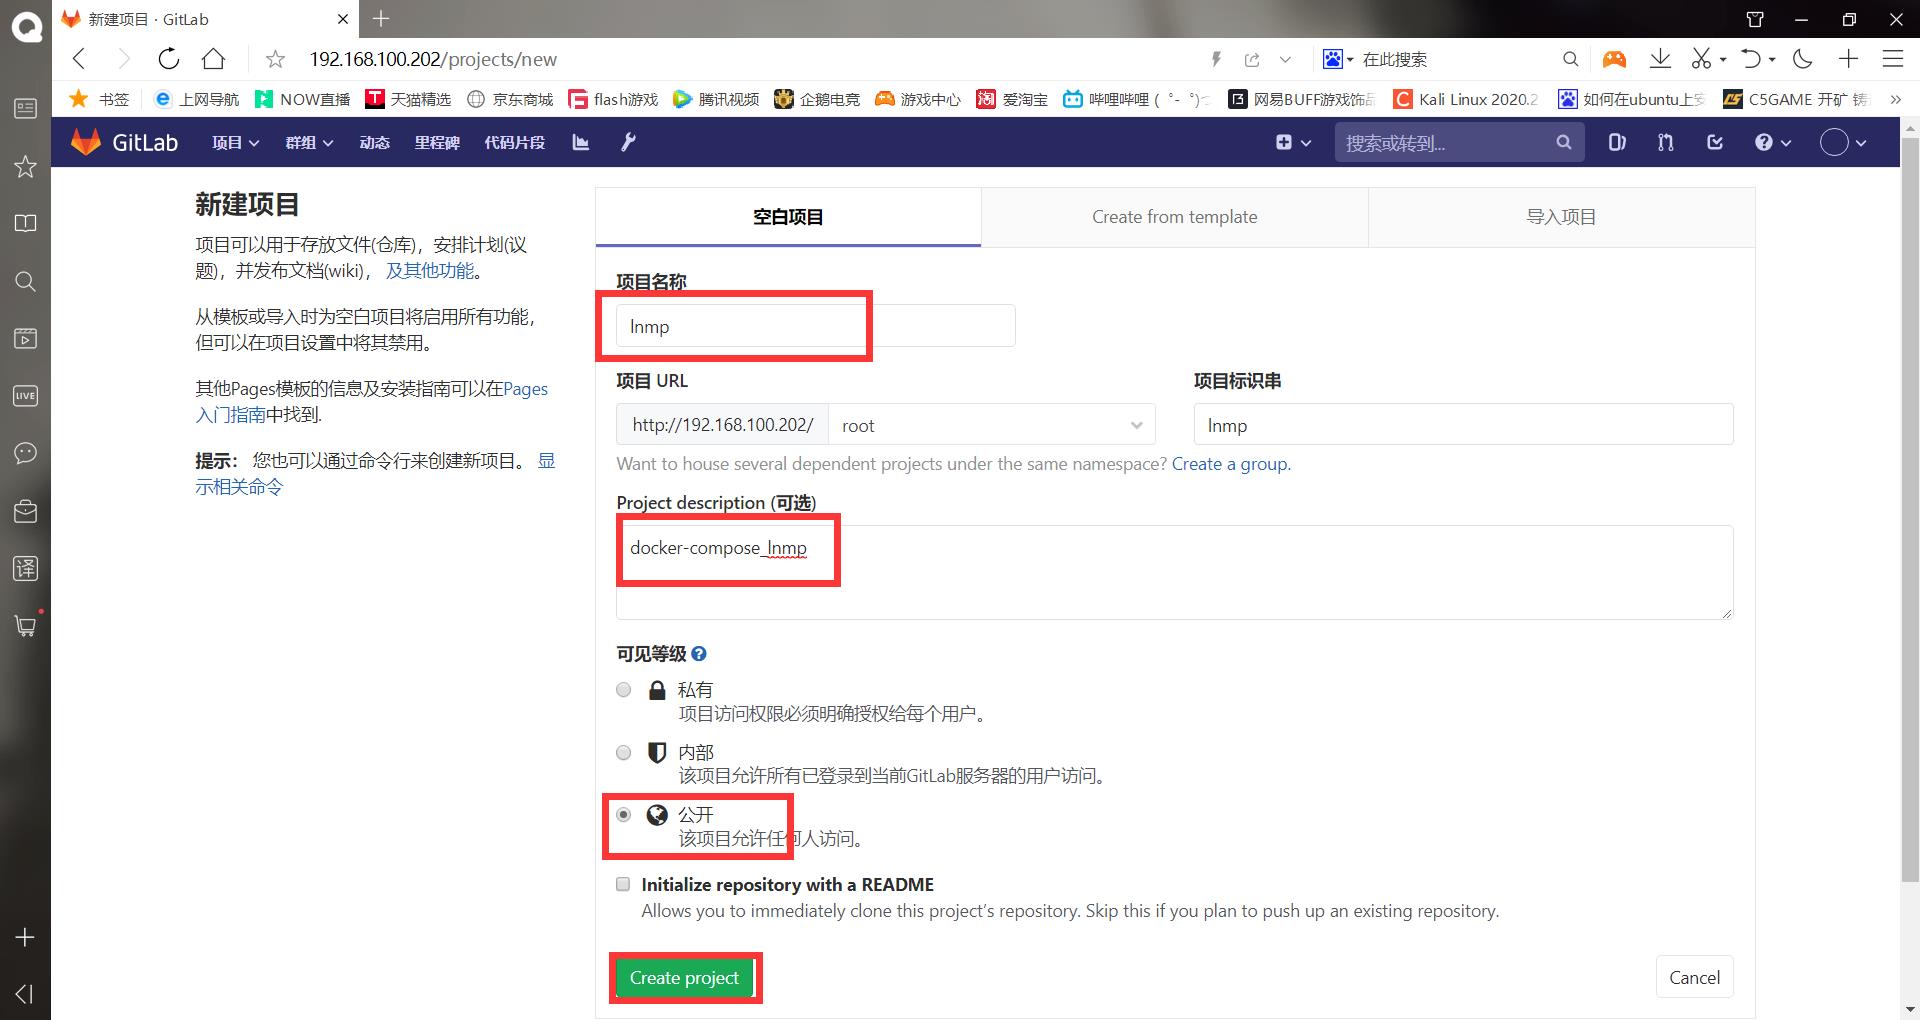
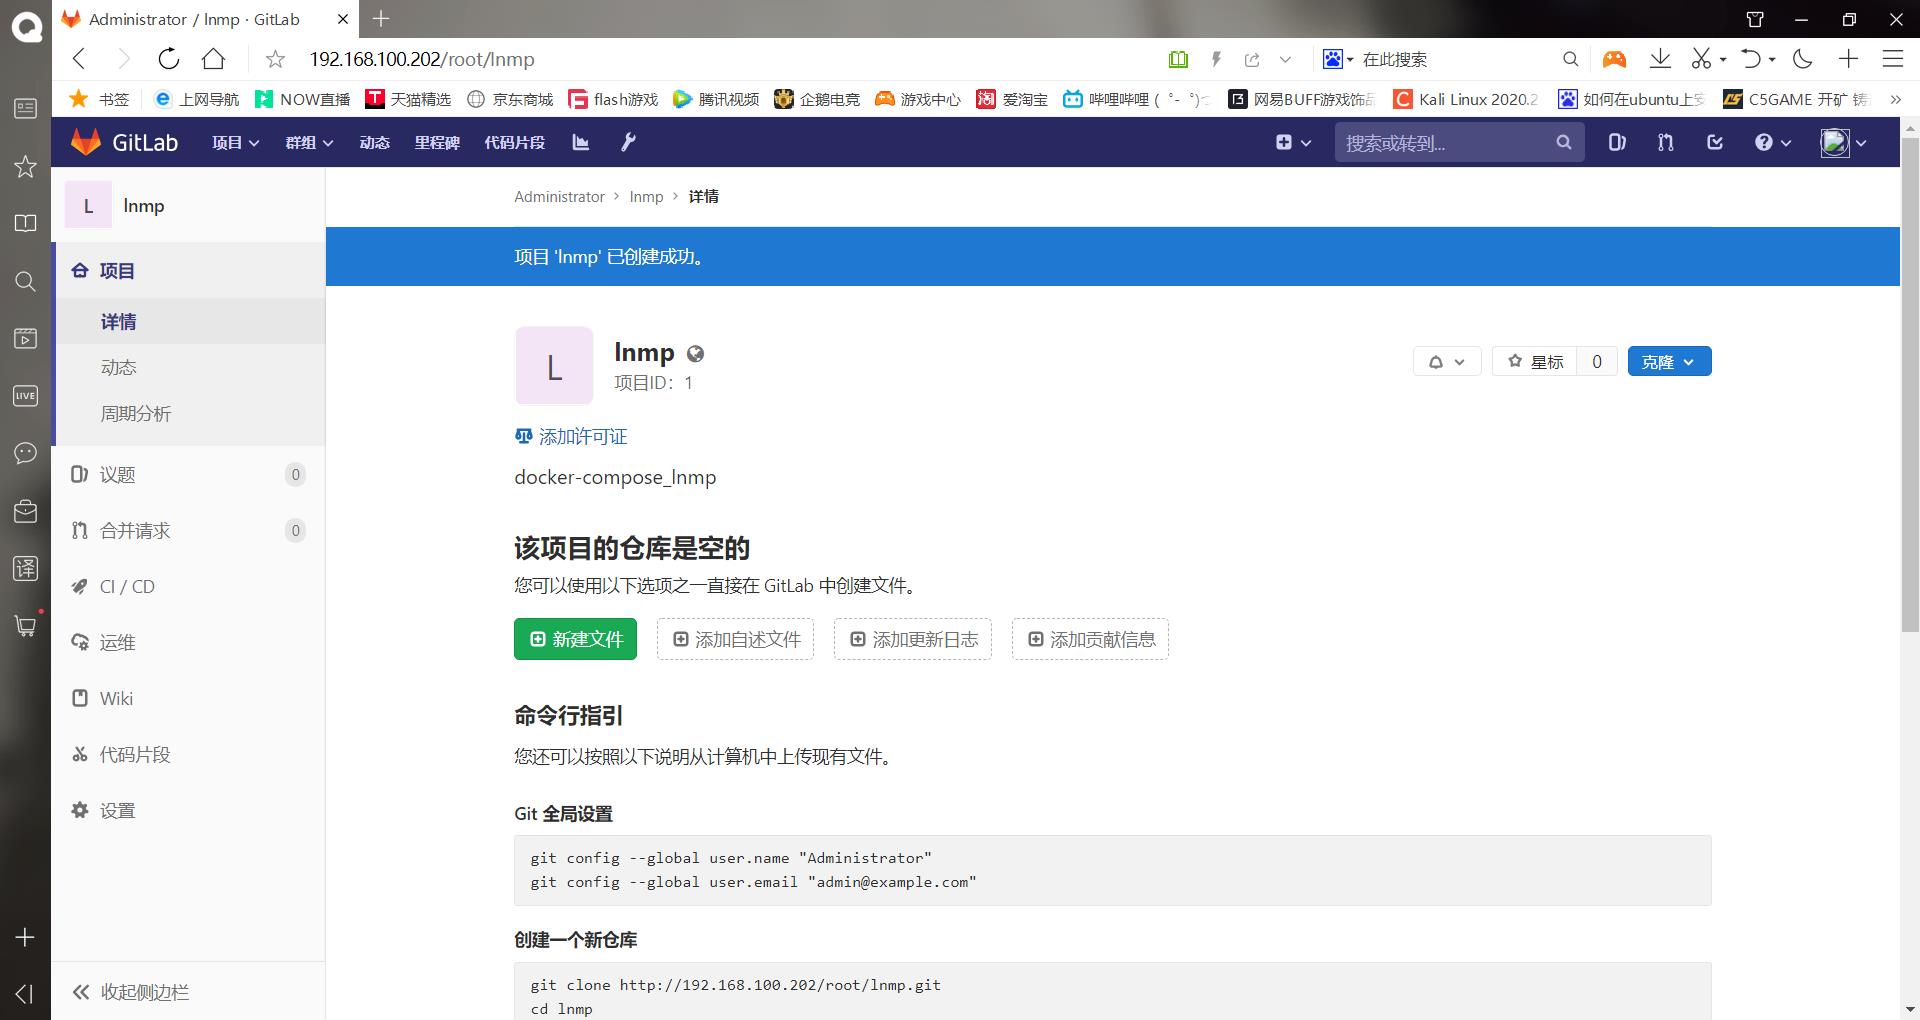
成功创建项目!
(6)生成ssh密钥,因为是要配合jenkins,所有这里使用的密钥直接在jenkins主机上操作即可
[root@jenkins ~]# ssh-keygen -t rsa
Generating public/private rsa key pair.
Enter file in which to save the key (/root/.ssh/id_rsa):
Created directory '/root/.ssh'.
Enter passphrase (empty for no passphrase):
Enter same passphrase again:
Your identification has been saved in /root/.ssh/id_rsa.
Your public key has been saved in /root/.ssh/id_rsa.pub.
The key fingerprint is:
SHA256:e1olz2v3yPkgpuuP+C9bLRj5vDsRup46cH13uQq51y8 root@jenkins
The key's randomart image is:
+---[RSA 2048]----+
|                 |
|                 |
|                 |
|           ..    |
|        S.+...  .|
|      . ..oX+....|
|       o. +=Xo+..|
|        .=o*=BE* |
|        +*XOB==+=|
+----[SHA256]-----+
[root@jenkins ~]# cat .ssh/id_rsa.pub  #查看公钥,复制公钥
ssh-rsa AAAAB3NzaC1yc2EAAAADAQABAAABAQClc2b0yoL8i4O2TTO+n9w0EslQ3S5ekealEeMRnYxbWIDqW+d4X3SP2HacJWlkDl7unVNegzTrrXrzy4UWU1qgDI8C+94yVqKD2zF0PMZPO8e5ORD5N7gy5CIjEupbWHA2Xg7Hl8VX1h99VZcoERk1mnAtnZtSZyFtdGbg8QsX5PzW+mvHWwvilXJpXQHXeVHlPATGcObsVM5vkKxHajbYq1LZtYRA51J2jkKeUqPohqmYZZ+re9MXhVJl7uL+NgutxN+LcwpesH7Er7hF+iUD6JVrBKW7HkmZHZZpIllAMQI7aa9nqOWGkXIKr1jTDuiQIN+akPGfUEbWd5dxyC37 root@jenkins
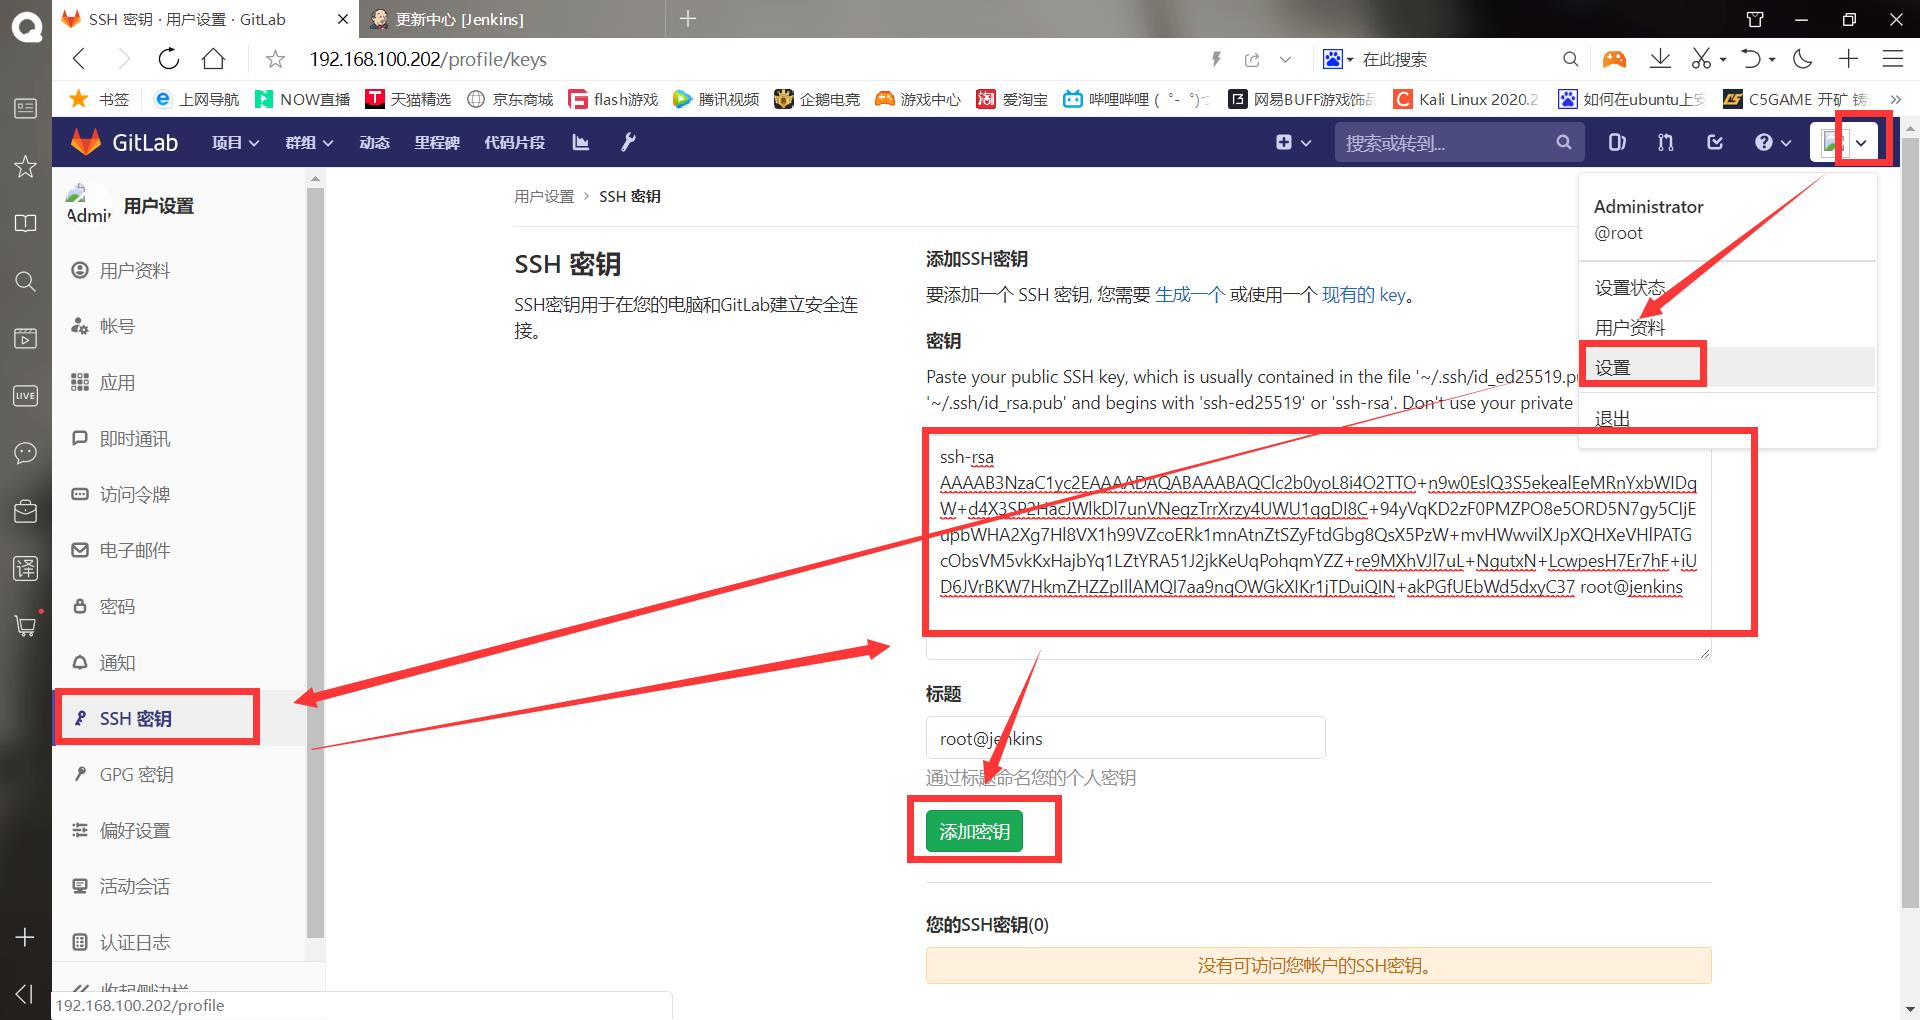
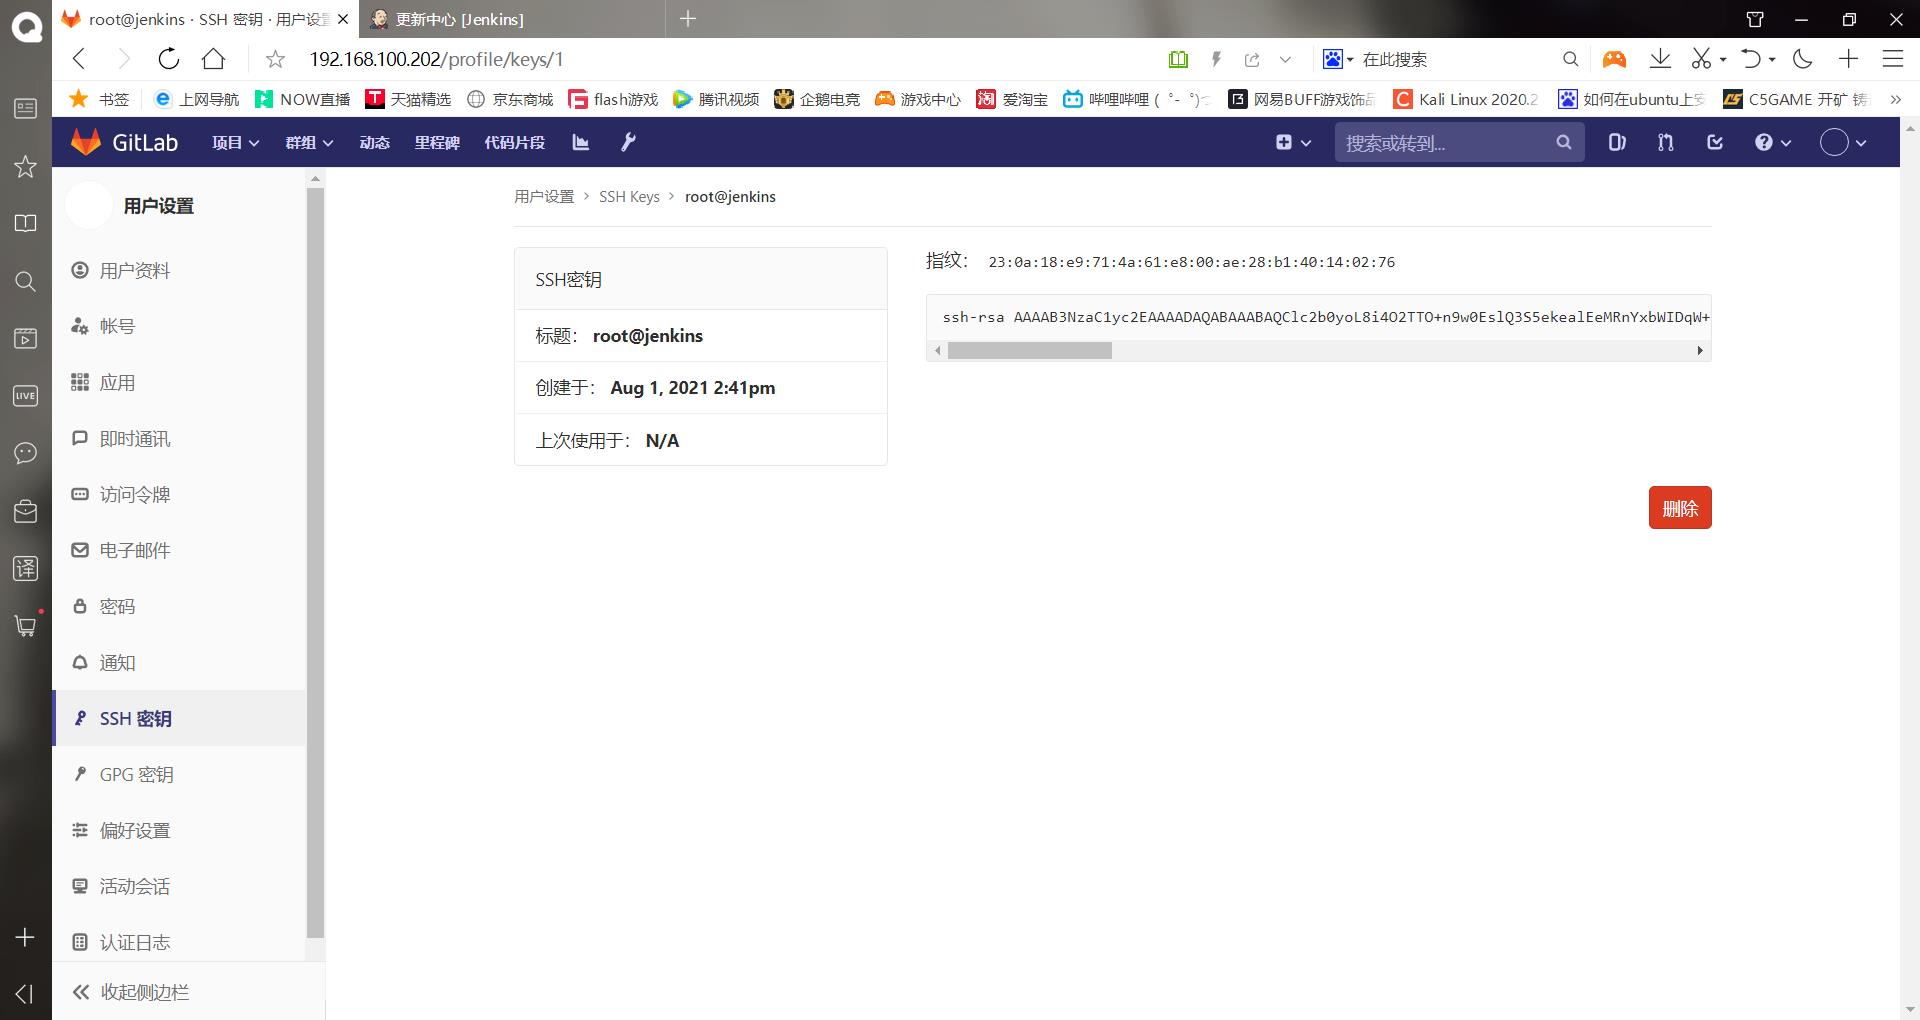
(2)搭建Jenkins主机,把密钥传给其他的主机,把root用户的私钥放到自己上,方便拉取gitlab仓库的数据
这里做的时候直接把插件包上传了,然后重启jenkins就可以了
******(1)先做基础配置
[root@Centos7 ~]# hostnamectl set-hostname jenkins
[root@Centos7 ~]# su
[root@jenkins ~]# systemctl stop firewalld
[root@jenkins ~]# setenforce 0
setenforce: SELinux is disabled
[root@jenkins ~]# mount /dev/cdrom /mnt/
mount: /dev/sr0 写保护,将以只读方式挂载
mount: /dev/sr0 已经挂载或 /mnt 忙
       /dev/sr0 已经挂载到 /mnt 上
******(2)安装JDK环境
[root@jenkins ~]# ll
总用量 177124
-rw-------. 1 root root      1264 1月  12 2021 anaconda-ks.cfg
-rw-r--r--  1 root root 181367942 6月  30 2017 jdk-8u91-linux-x64.tar.gz
[root@jenkins ~]# tar xf jdk-8u91-linux-x64.tar.gz -C /usr/local/
[root@jenkins ~]# mv /usr/local/jdk1.8.0_91 /usr/local/java
[root@jenkins ~]# ls /usr/local/
bin  etc  games  include  java  lib  lib64  libexec  sbin  share  src
[root@jenkins ~]# vim /etc/profile
。。。。。。最后一行添加
JAVA_HOME=/usr/local/java
PATH=$JAVA_HOME/bin:$PATH
CLASSPATH=$JAVA_HOME/jre/lib/ext:$JAVA_HOME/lib/tools.jar
export PATH JAVA_HOME CLASSPATH
#保存退出
[root@jenkins ~]# vim /etc/profile
[root@jenkins ~]# source /etc/profile   #使配置生效
[root@jenkins ~]# java -version        #查看java版本,确认jdk环境
java version "1.8.0_91"
Java(TM) SE Runtime Environment (build 1.8.0_91-b14)
Java HotSpot(TM) 64-Bit Server VM (build 25.91-b14, mixed mode)
******(3)上传Jenkins软件包,安装、配置
[root@jenkins ~]# ll
总用量 241624
-rw-------. 1 root root      1264 1月  12 2021 anaconda-ks.cfg
-rw-r--r--  1 root root 181367942 6月  30 2017 jdk-8u91-linux-x64.tar.gz
-rw-r--r--  1 root root  66044542 6月  29 17:03 jenkins-2.222.4-1.1.noarch.rpm
[root@jenkins ~]# yum -y install jenkins-2.222.4-1.1.noarch.rpm
。。。。。。
完毕!
[root@jenkins ~]# vim /etc/sysconfig/jenkins  #修改配置文件
 28 #
 29 JENKINS_USER="root"            #待会需要使用root传输密钥,所以这里要改一下
 30
#保存退出
[root@jenkins ~]# ln -s /usr/local/java/bin/java /usr/bin/ #优化命令执行路径
[root@jenkins ~]# /etc/init.d/jenkins start   #开启jenkins
Starting jenkins (via systemctl):                          [  确定  ]
[root@jenkins ~]# netstat -anpt | grep 8080  #验证端口
tcp6       0      0 :::8080                 :::*                    LISTEN      1241/java
[root@jenkins ~]# chkconfig jenkins on
(4)使用浏览器访问8080端口,解锁jenkins
提前获得密码
[root@jenkins ~]# cat /var/lib/jenkins/secrets/initialAdminPassword
b90fe608d1024dd5ab9dd97b4251fdb0
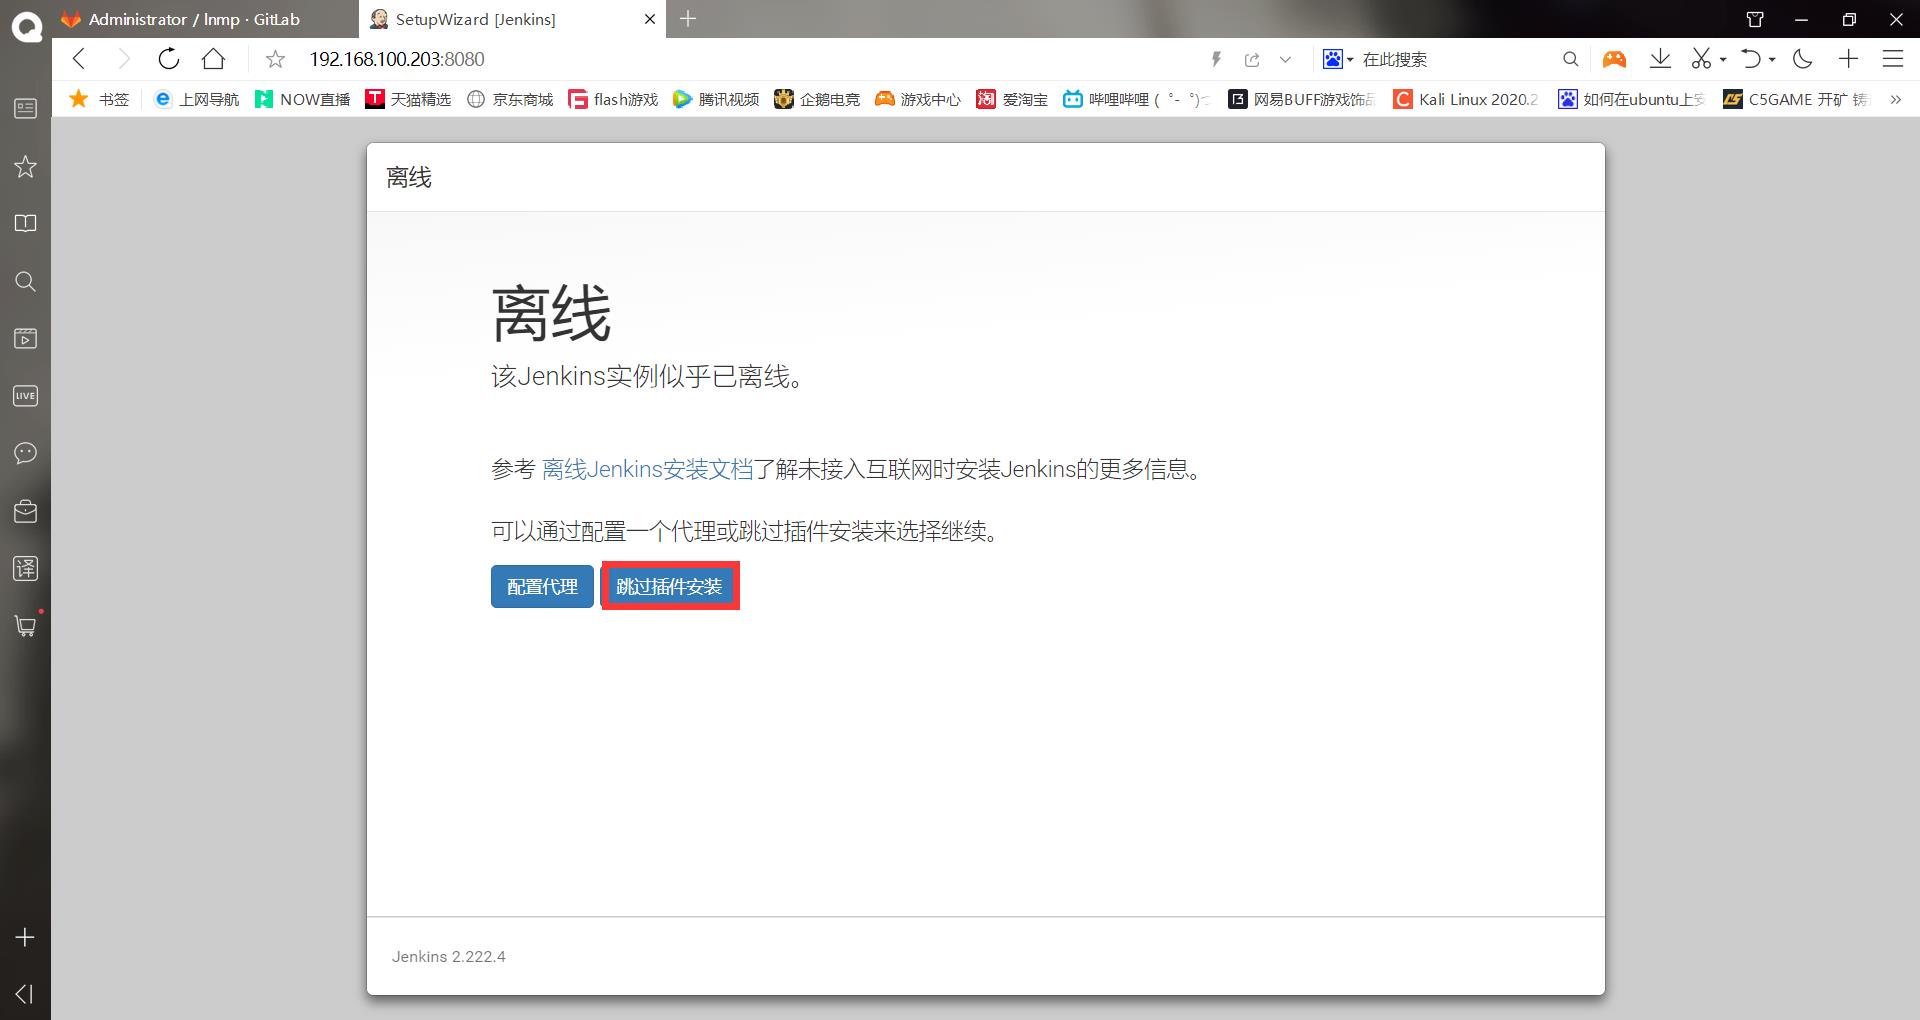
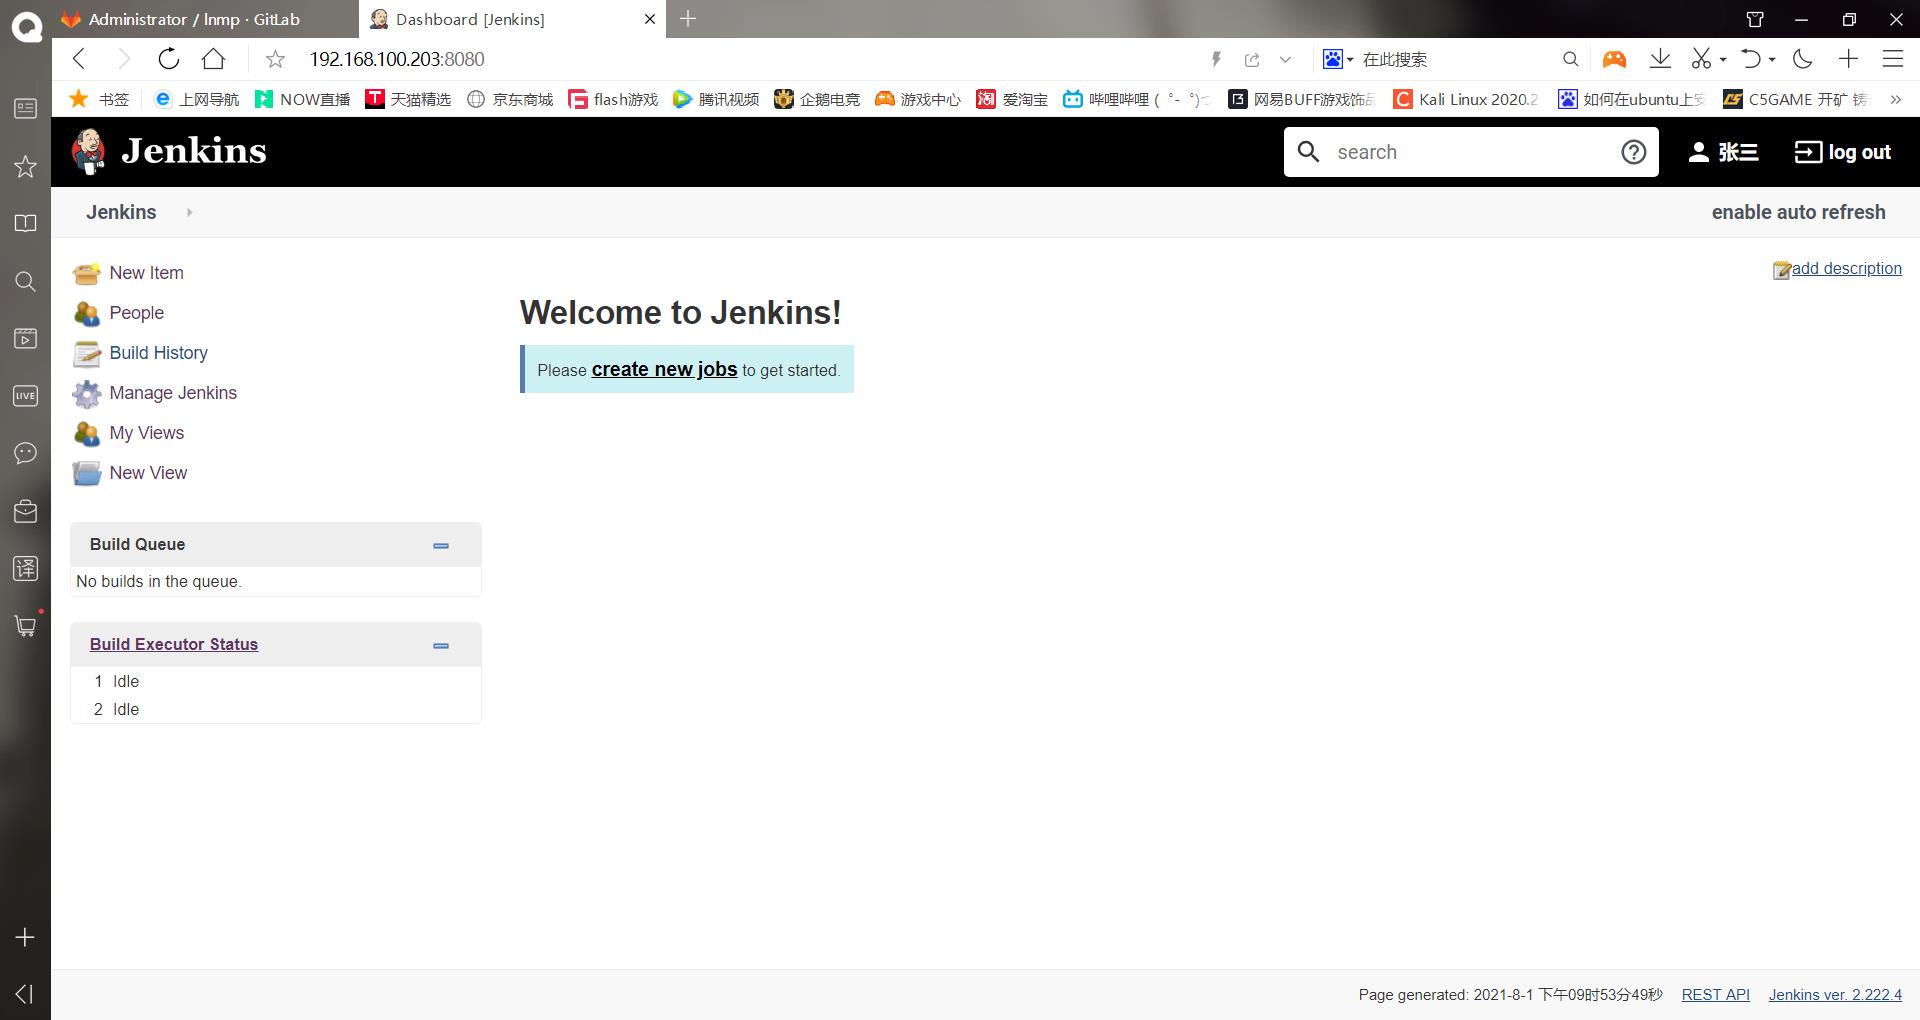
这里如果机器是联网的话需要先断网再点击继续,因为下一步是下载插件,如果使用jenkins官网的会下载的很慢,可以先跳过插件安装
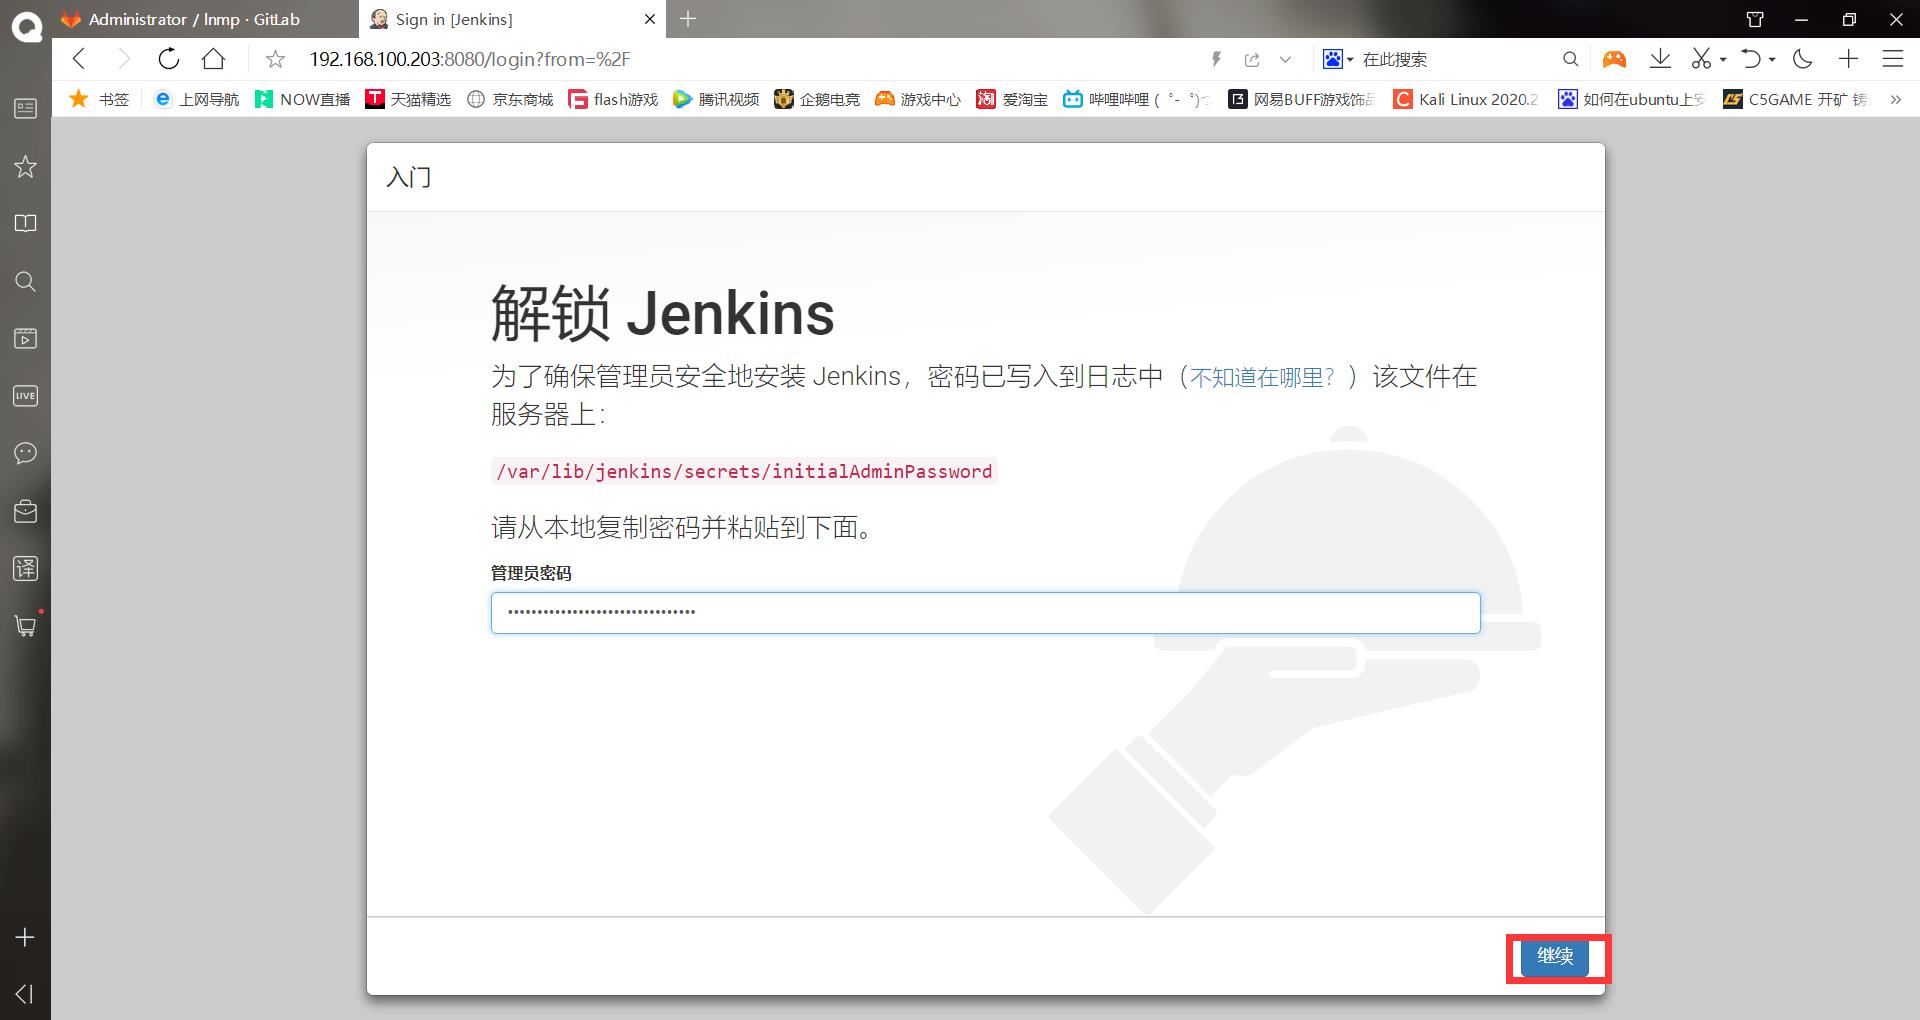
点击跳过插件安装
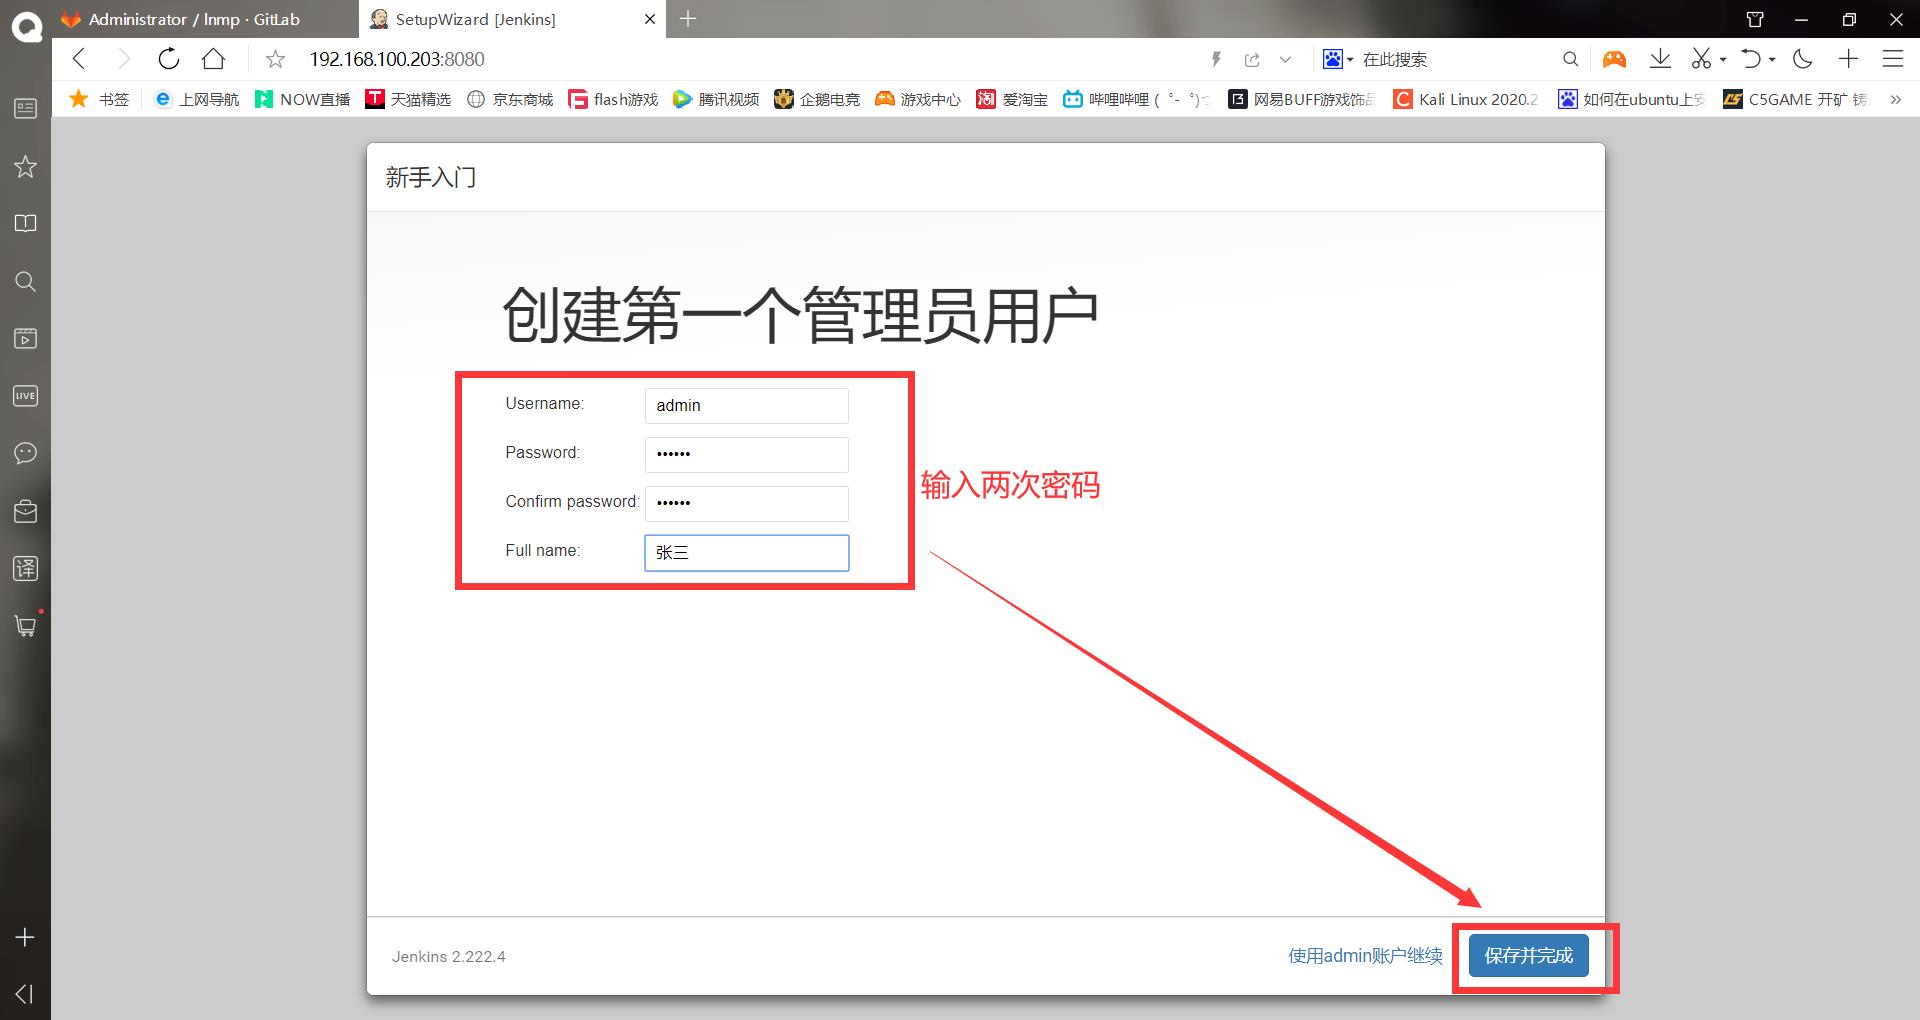
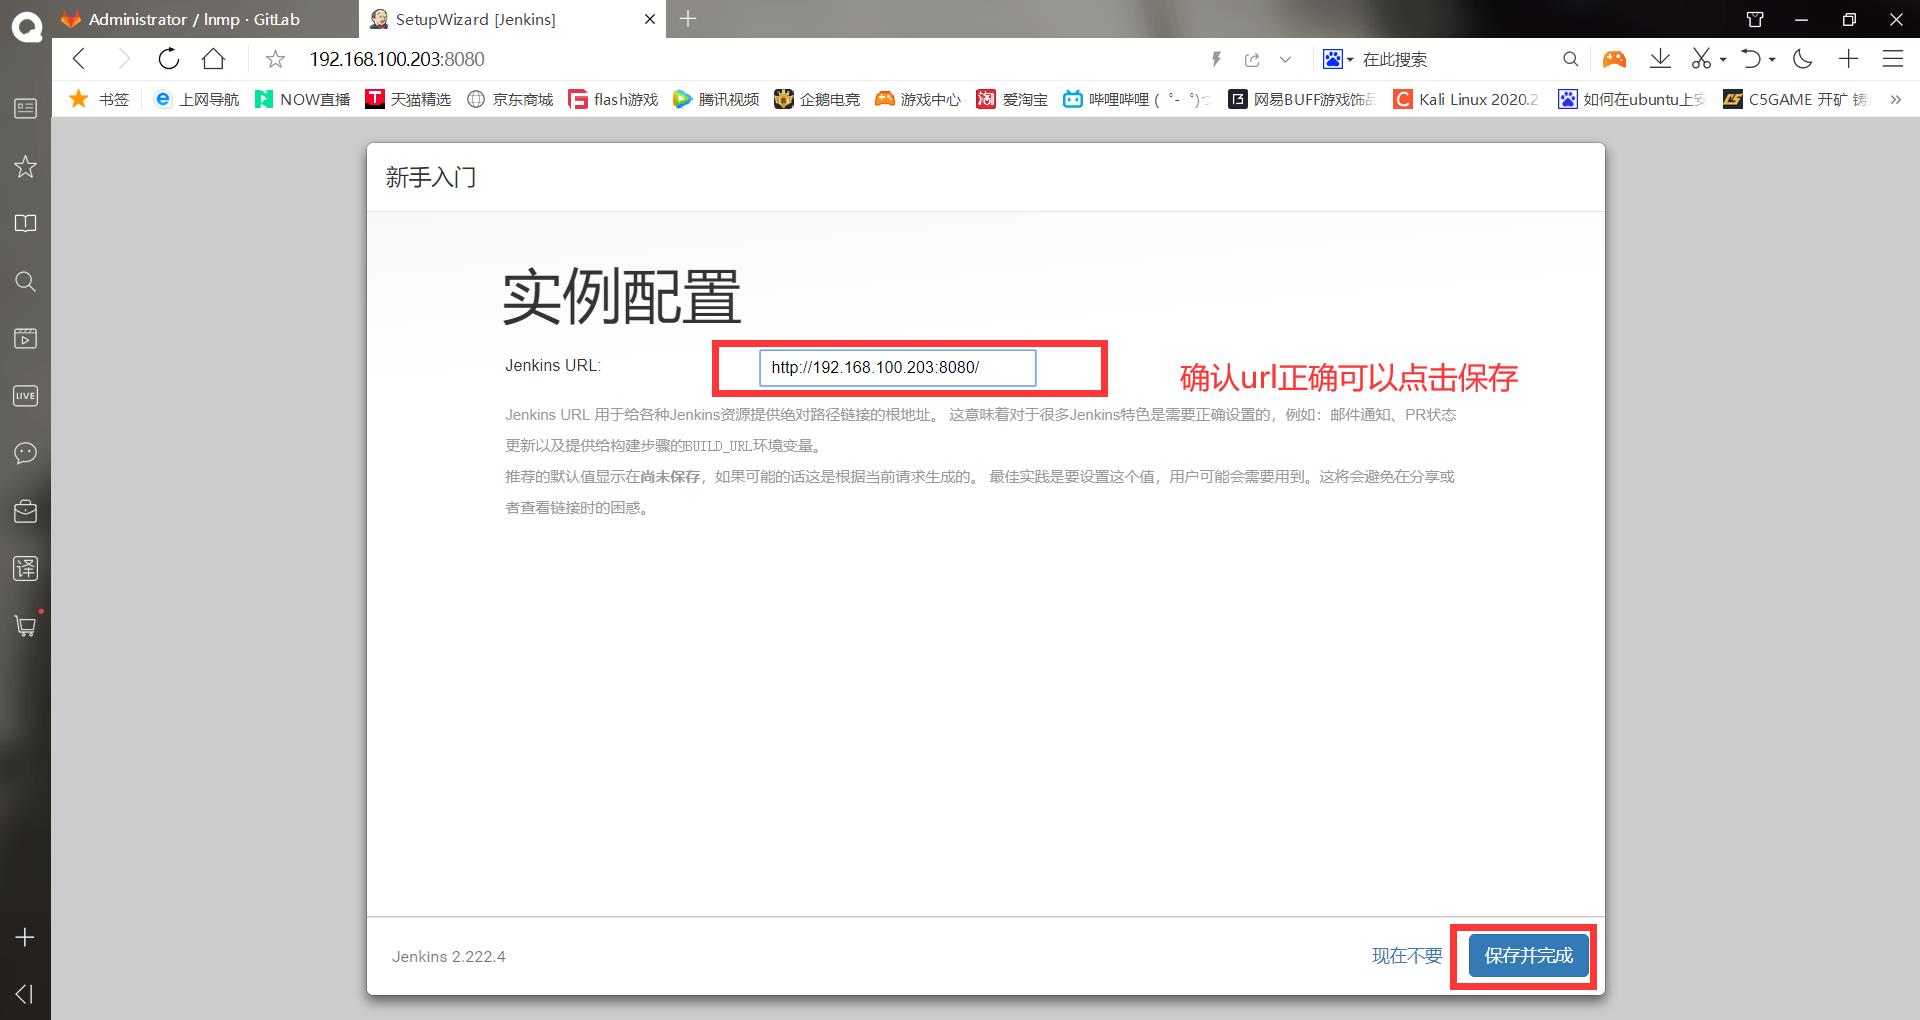
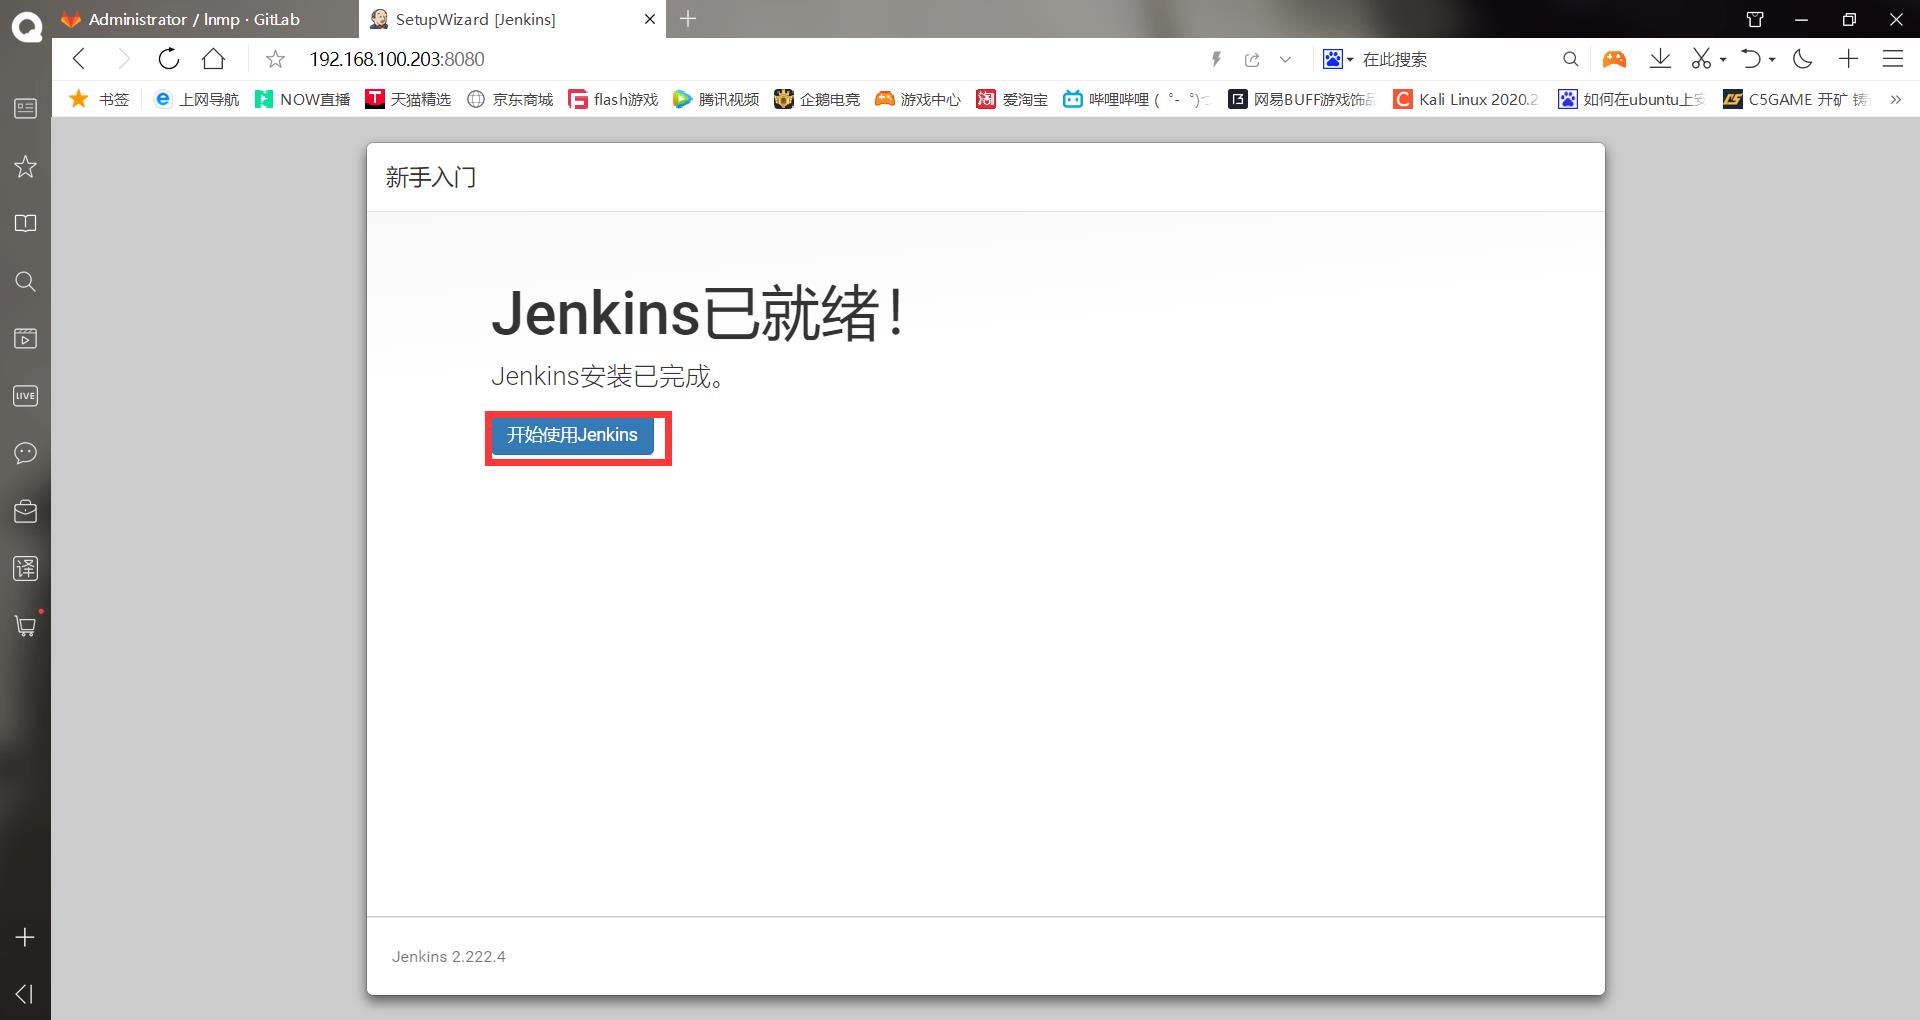
(5)升级jenkins(可以不升级)
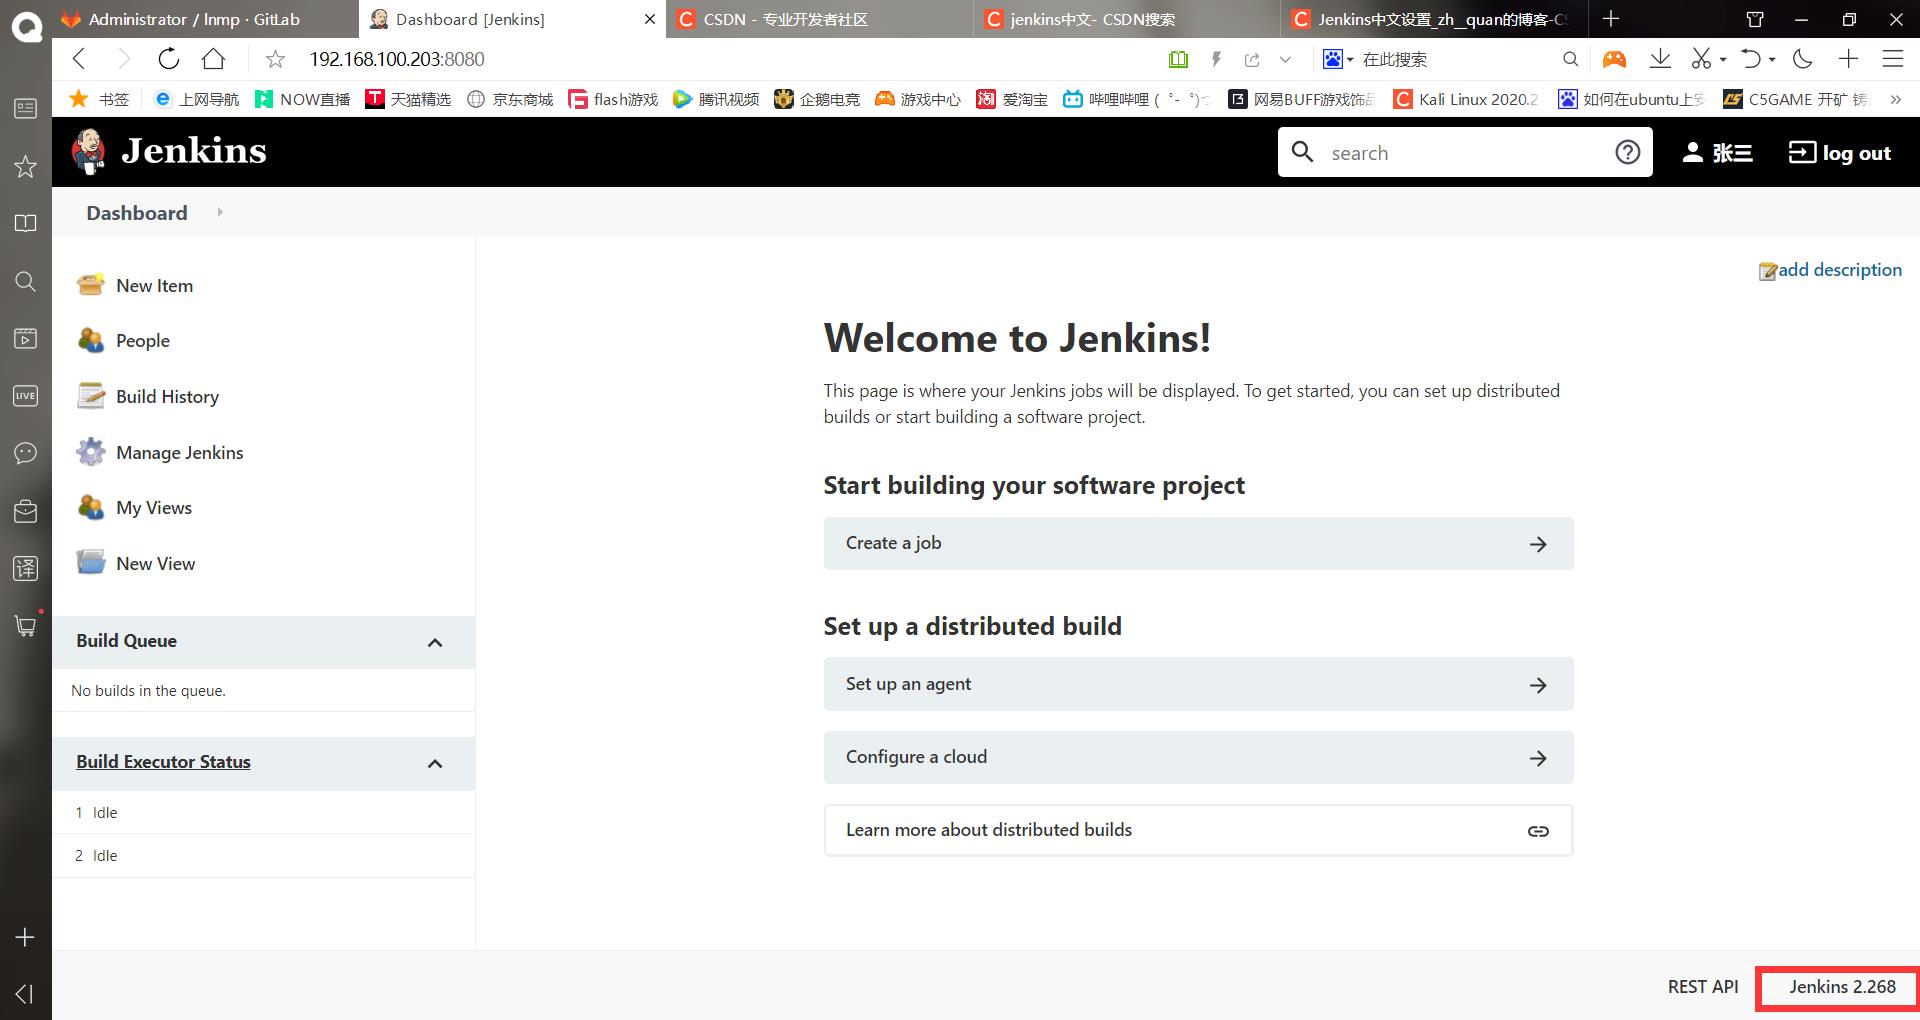
[root@jenkins ~]# cd /usr/lib/jenkins/
[root@jenkins jenkins]# ll
总用量 64688
-rw-r--r-- 1 root root 66239216 5月  28 2020 jenkins.war
[root@jenkins jenkins]# mv jenkins.war jenkins.war.bak  #把原来的包备份
[root@jenkins jenkins]# rz
z waiting to receive.**B0100000023be50
[root@jenkins jenkins]# ll
总用量 133996
-rw-r--r-- 1 root root 70969355 11月 30 2020 jenkins.war    #上传新的war包
-rw-r--r-- 1 root root 66239216 5月  28 2020 jenkins.war.bak
[root@jenkins jenkins]# systemctl restart jenkins     #重启jenkins
重新使用浏览器访问jenkins

(6)修改jenkins插件下载地址
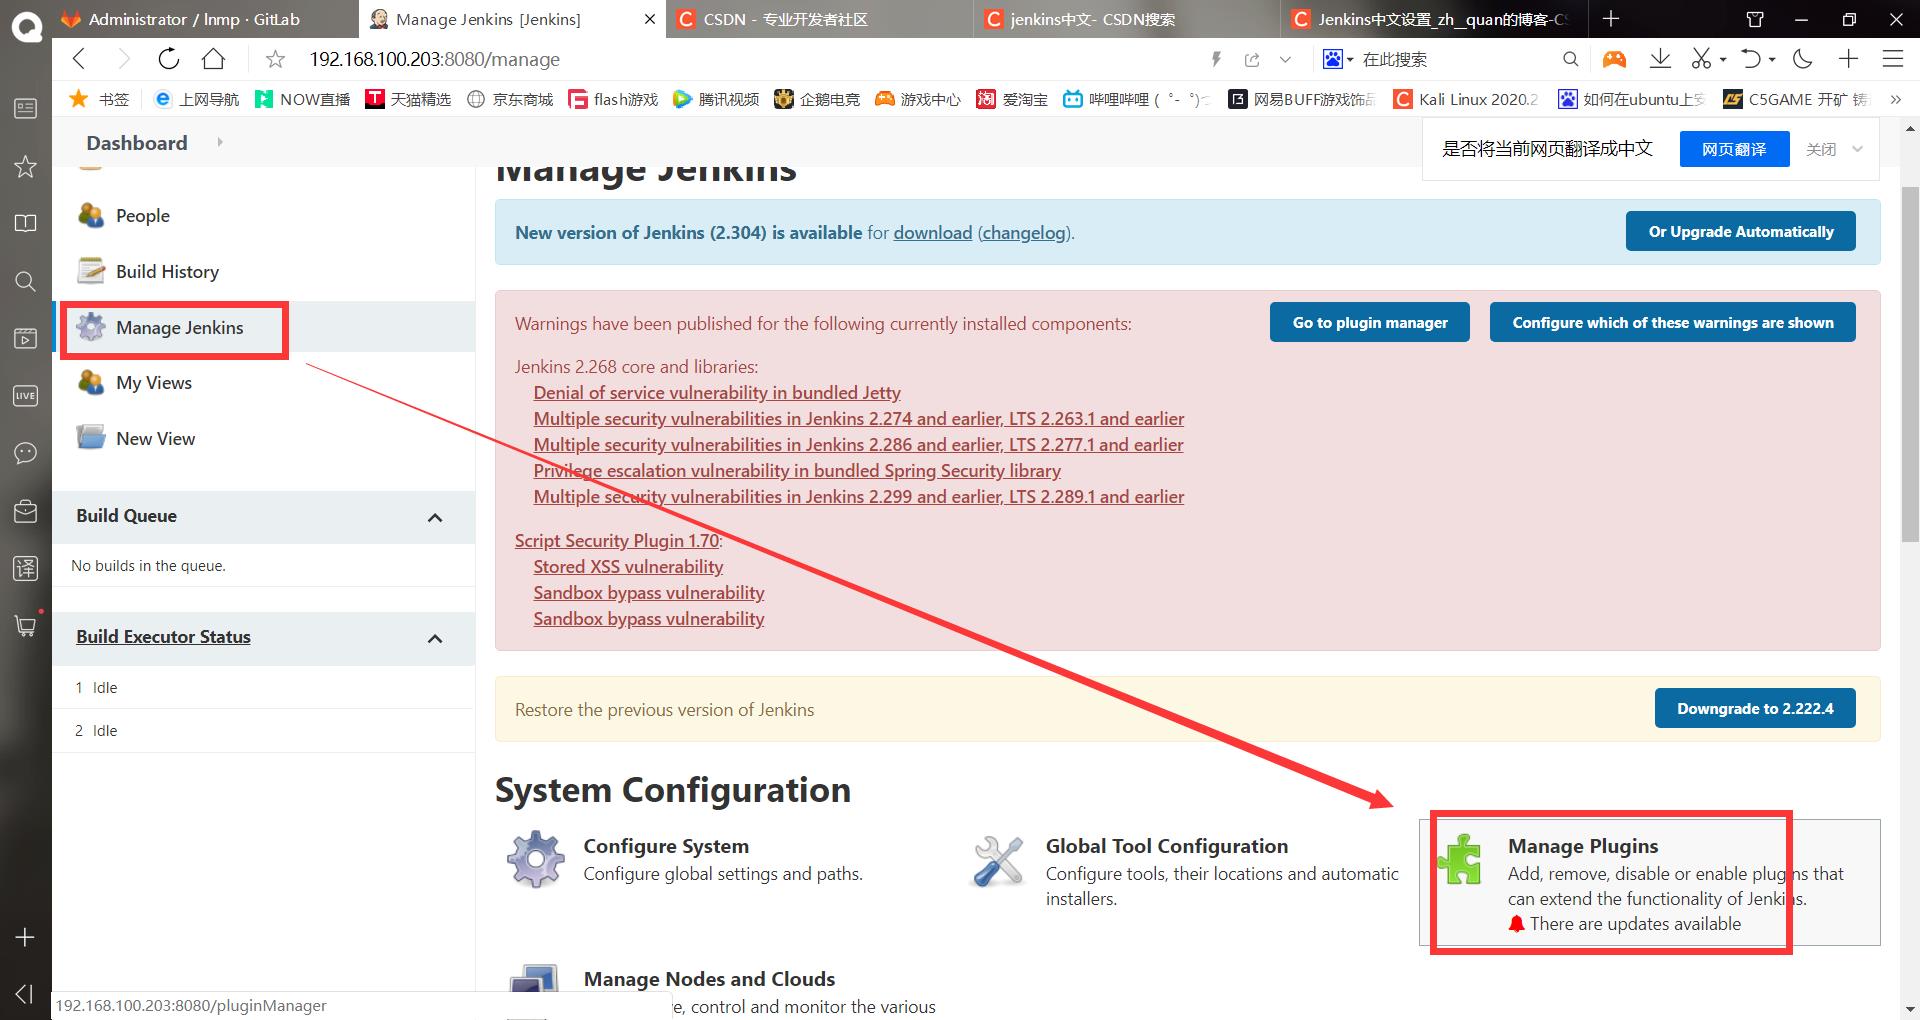
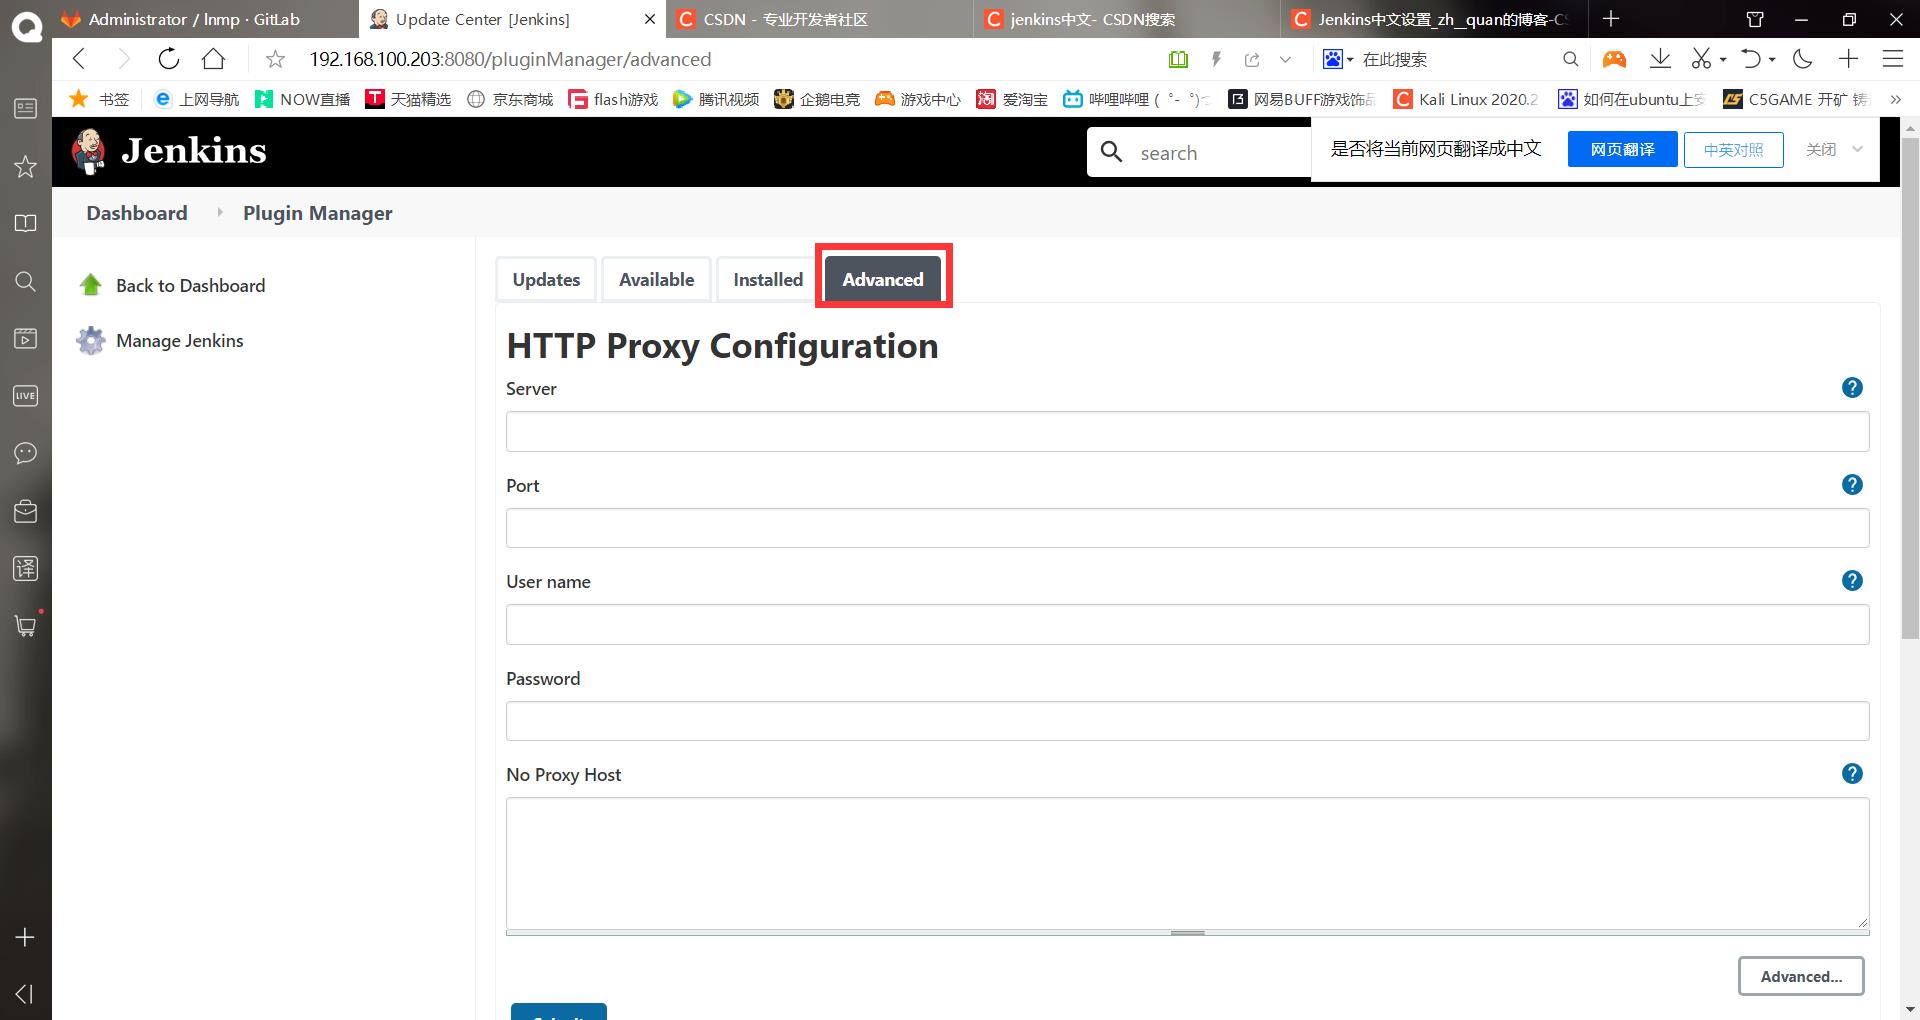
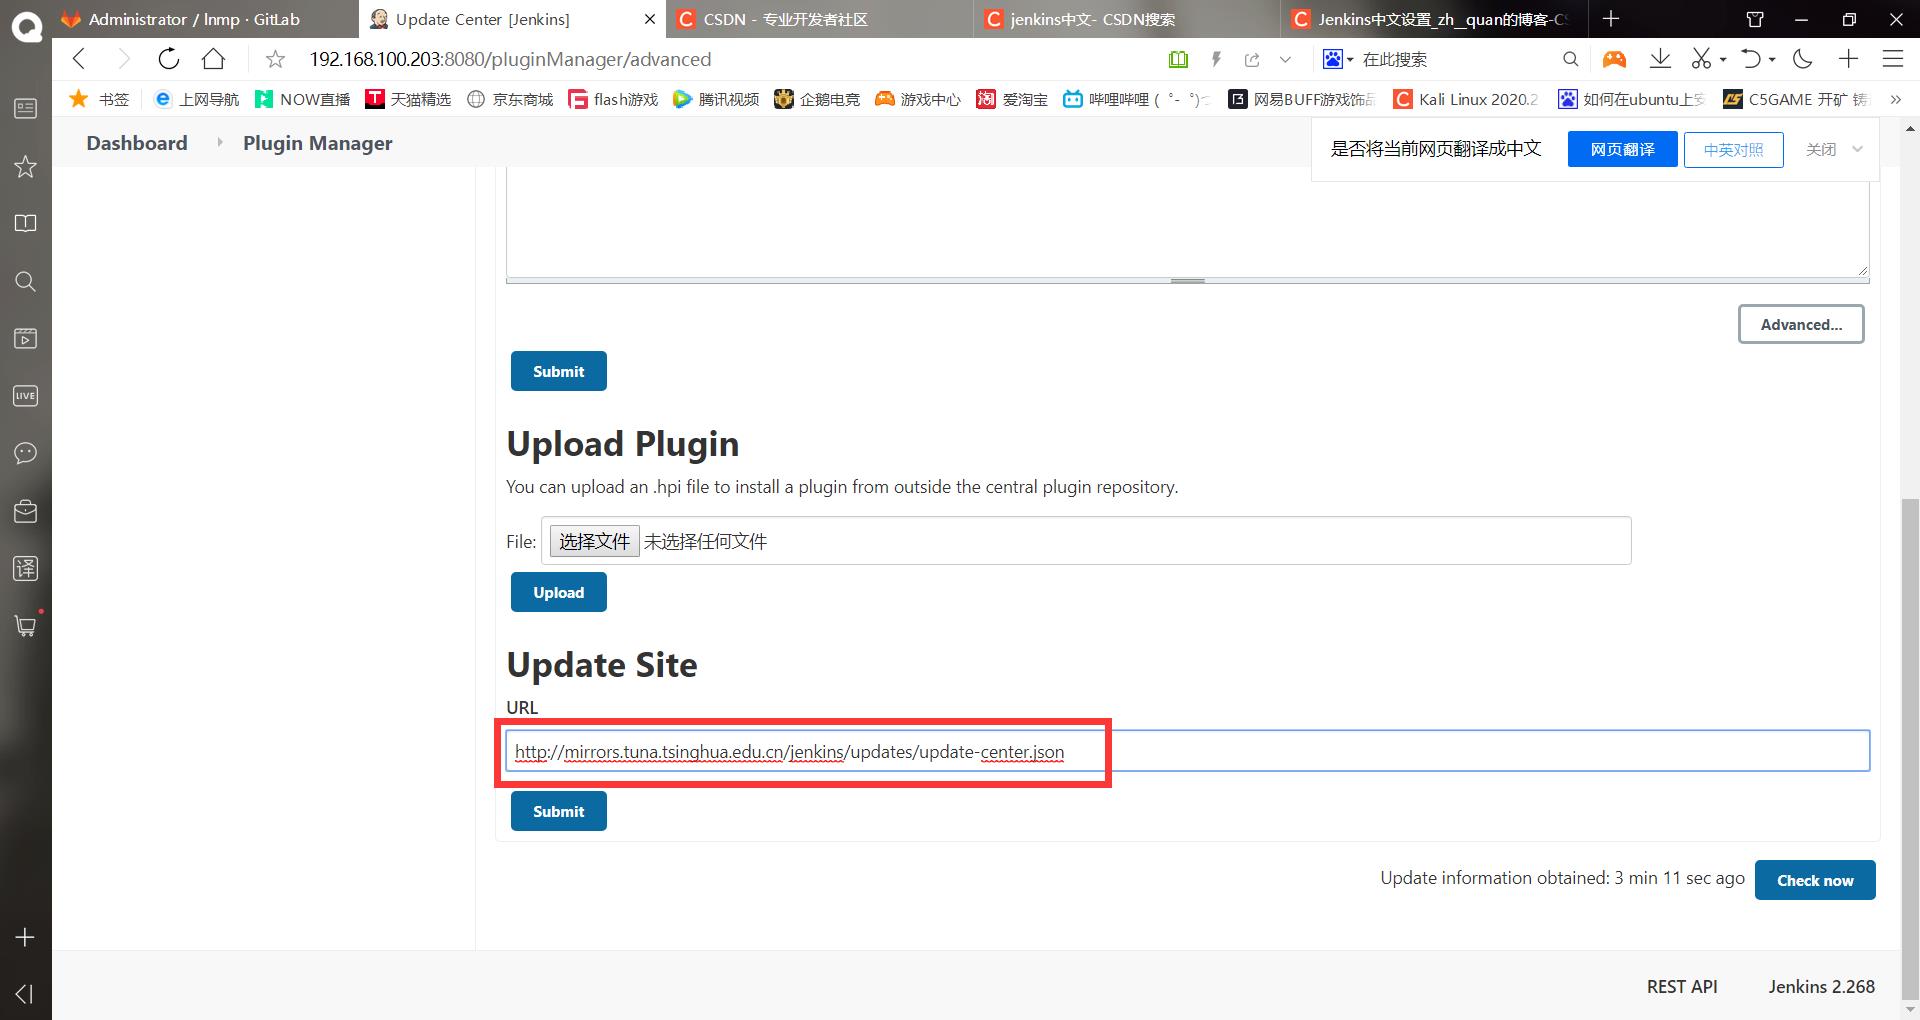
修改为http://mirrors.tuna.tsinghua.edu.cn/jenkins/updates/update-center.json
进入命令行修改配置文件重启jenkins
[root@jenkins ~]# cd /var/lib/jenkins/updates/
[root@jenkins updates]# sed -i 's/http:\\/\\/updates.jenkins-ci.org\\/download/https:\\/\\/mirrors.tuna.tsinghua.edu.cn\\/jenkins/g' default.json && sed -i 's/http:\\/\\/www.google.com/https:\\/\\/www.baidu.com/g' default.json
[root@jenkins updates]# systemctl restart jenkins
[root@jenkins updates]# cd
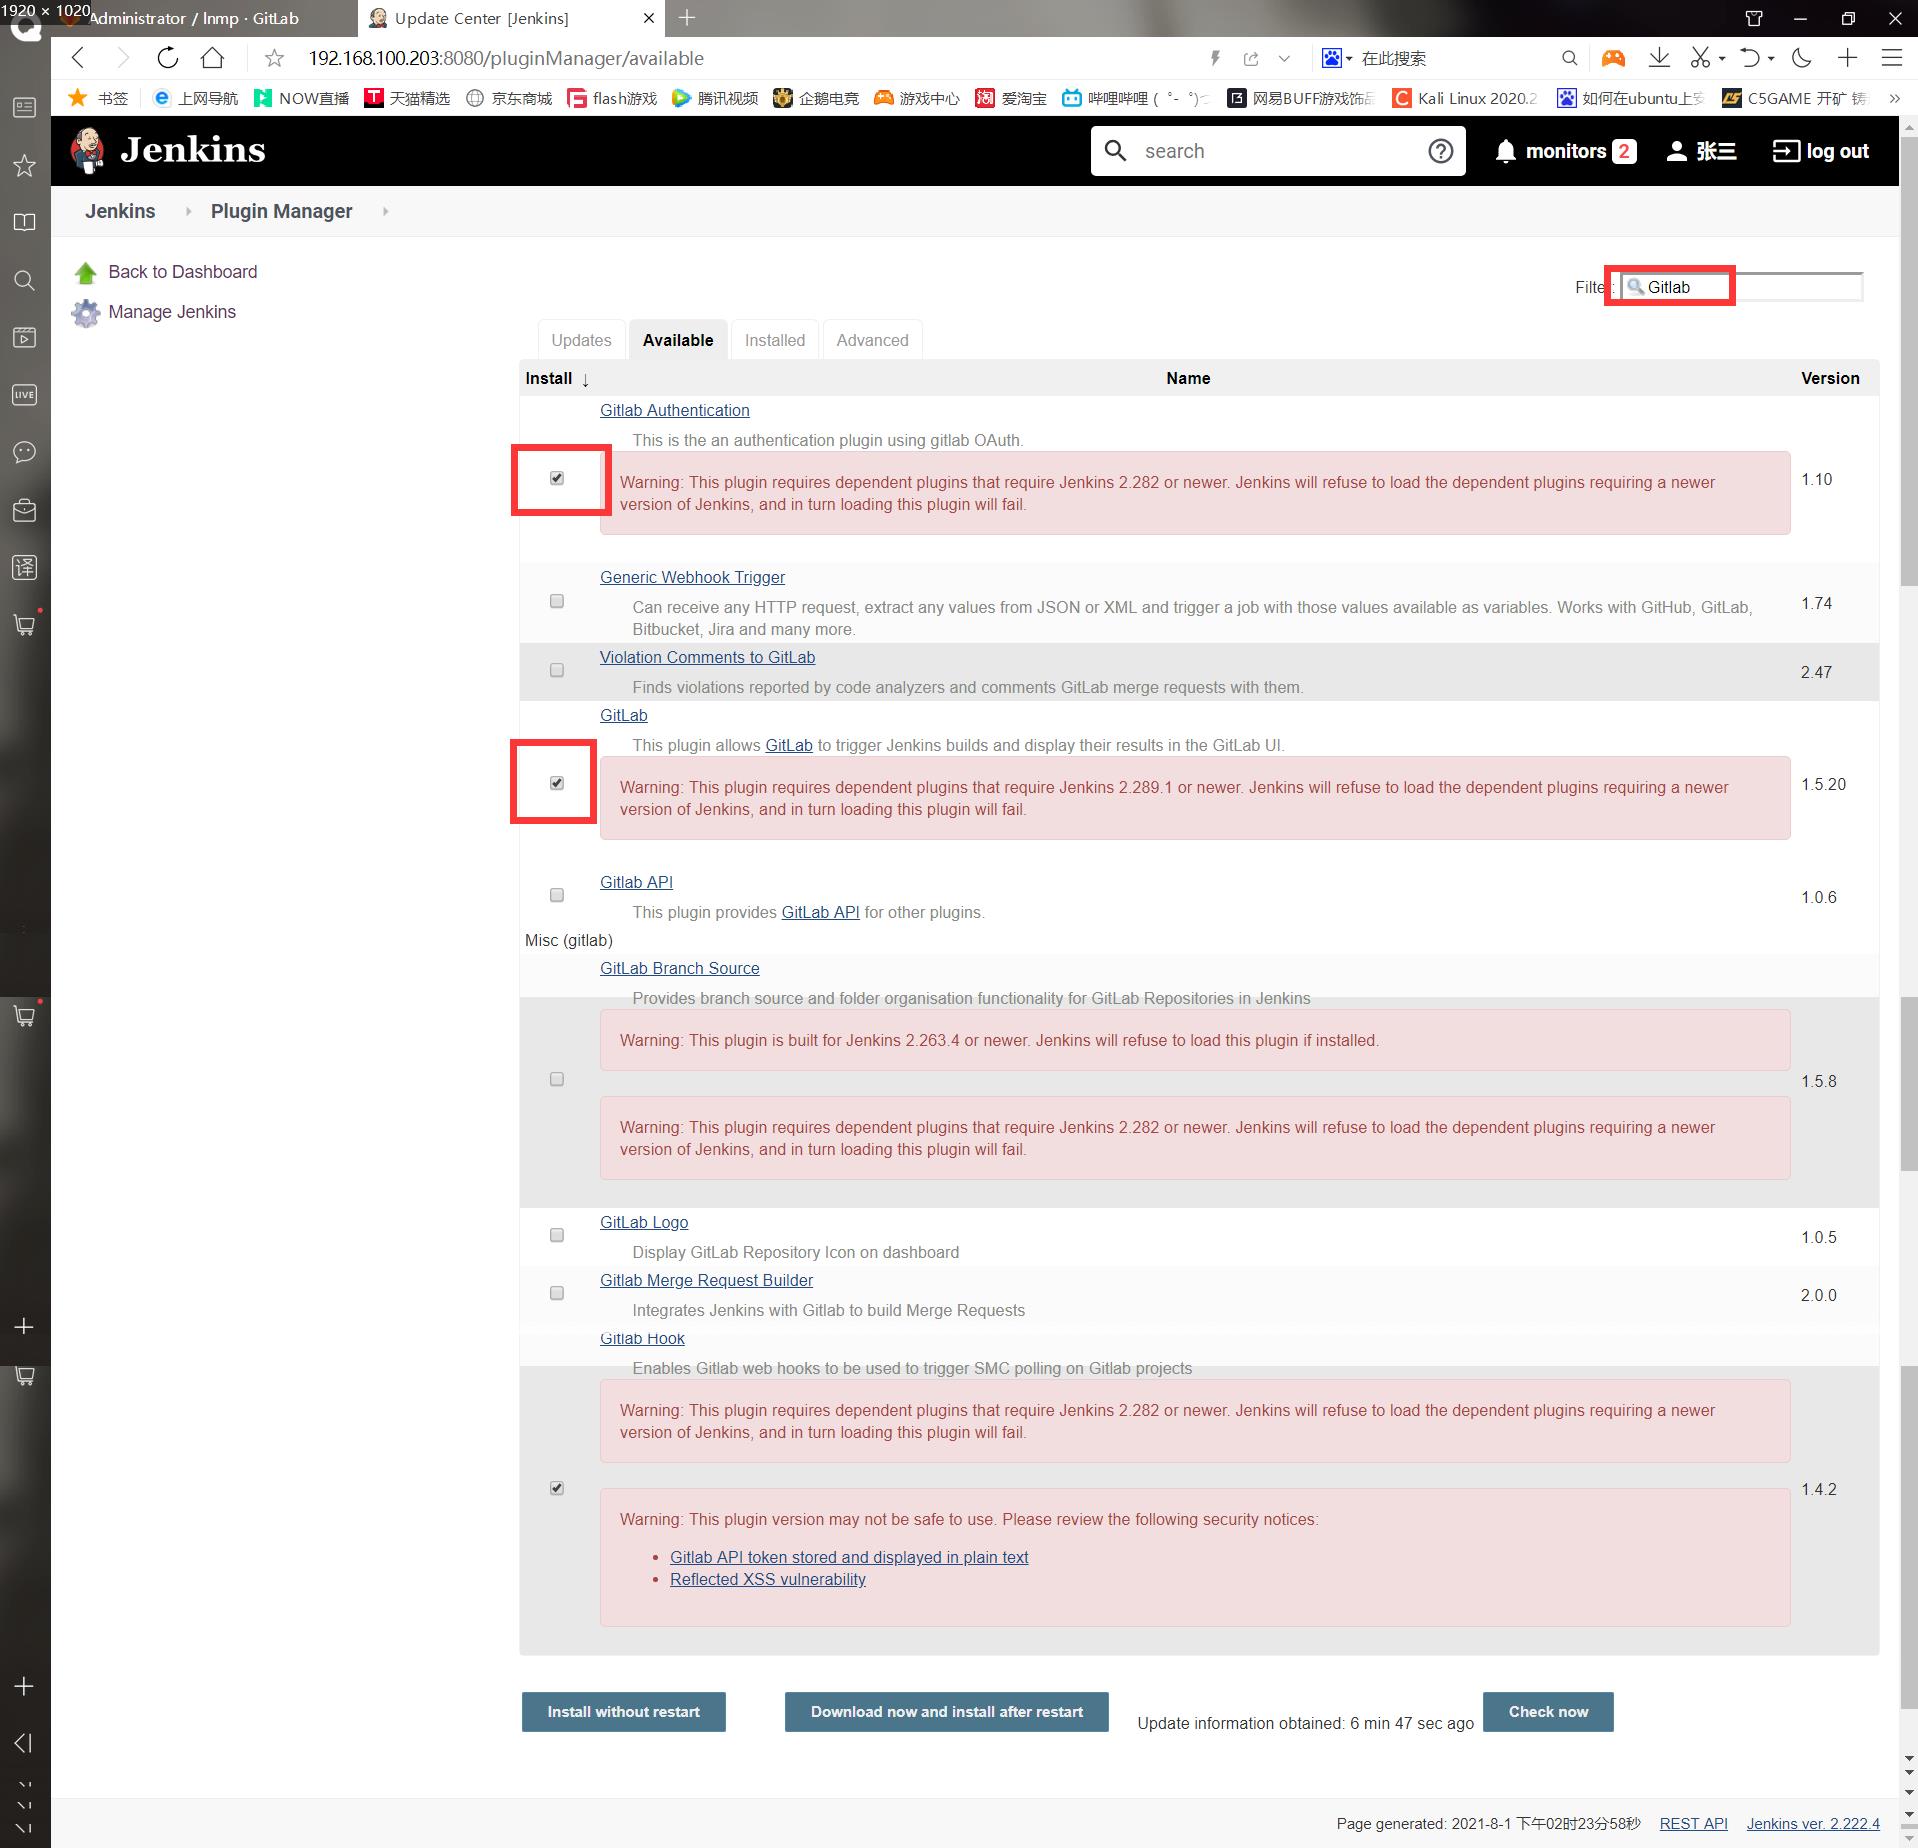
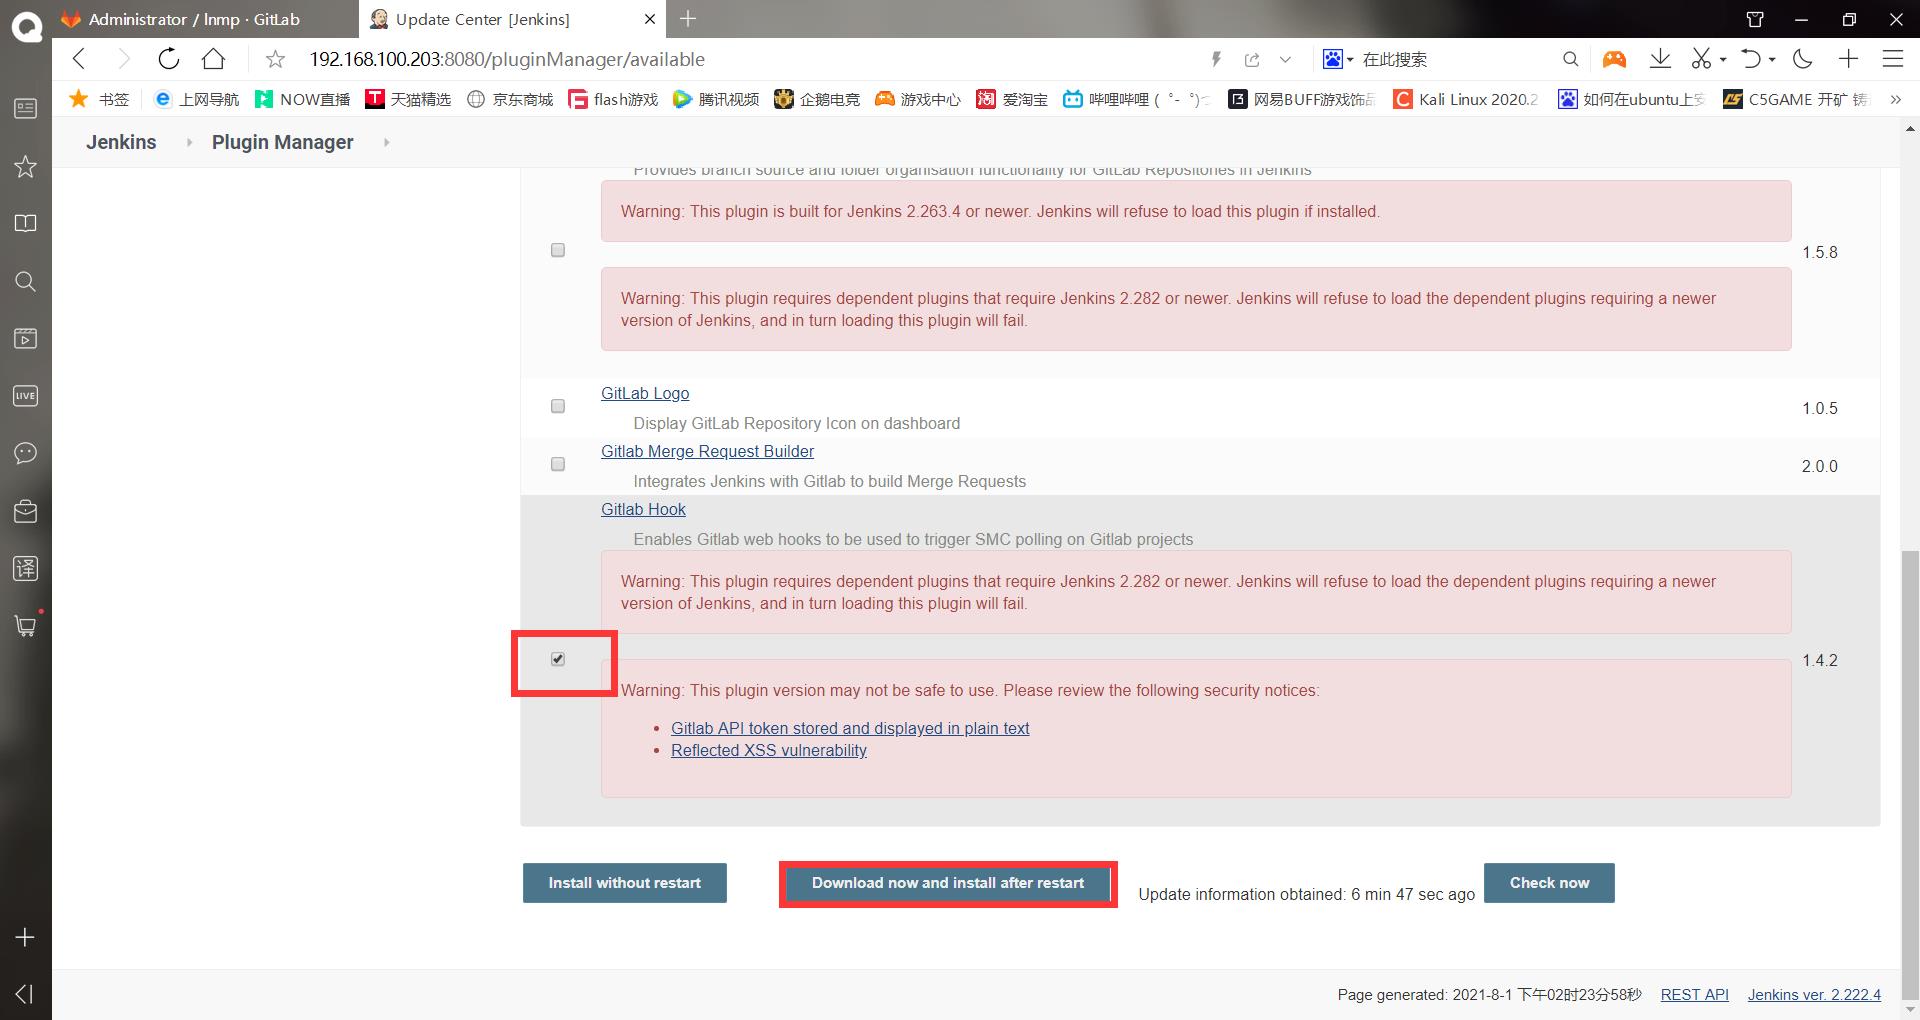
)]
点击这个可以下载,但是如果下载无法成功的话,可以直接替换/var/lib/jenkins下的plugins插件包目录,然后重启即可,我这里直接俄上传替换了
这里上传后因为插件包的原因还变成了中文
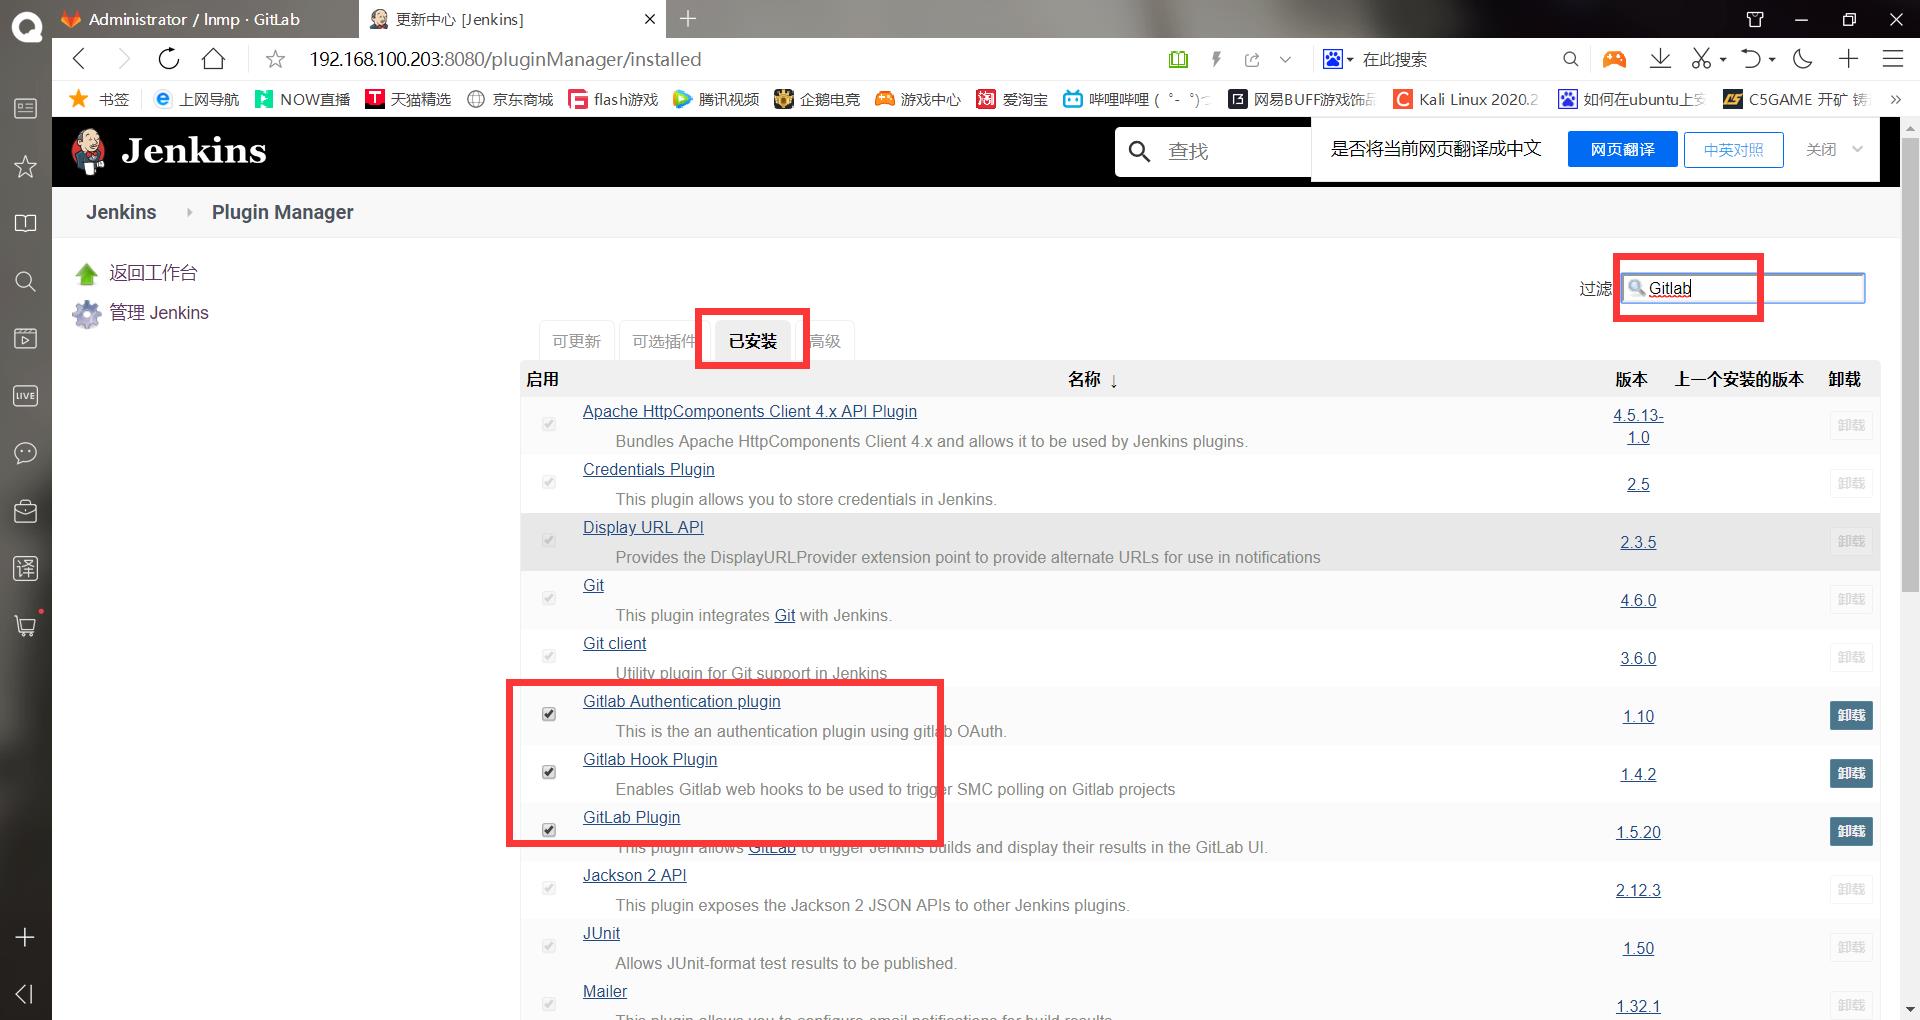
至此成功搭建Jenkins
(7)上传自己root账户的私钥到jenkins上
[root@jenkins ~]# cat .ssh/id_rsa  #复制私钥
-----BEGIN RSA PRIVATE KEY-----
MIIEowIBAAKCAQEApXNm9MqC/IuDtk0zvp/cNBLJUN0uXpHmpRHjEZ2MW1iA6lvn
eF90j9h2nCVpZA5e7p1TXoM0661688uFFlNaoAyPAvveMlaig9sxdDzGTzvHuTkQ
+Te4MuQiIxLqW1hwNl4Ox5fFV9YffVWXKBEZNZpwLZ2bUmchbXRm4PELF+T81vpr
x1sL4pVyaV0B13lR5TwExnDm7FTOb5CsR2o22KtS2bWEQOdSdo5CnlKj6IapmGWf
q3vTF4VSZe7i/jYLrcTfi3MKXrB+xK+4RfolA+iVawSlux5JmR2WaSJZQDECO2mv
Z6jlhpFyCq9Y0w7okCDfmpDxn1BG1neXccgt+wIDAQABAoIBAEj7X+YJUsBuFlqb
MYEb6Tm7M7yM5IBo4ZHdEwnZMmm036EBi1ho2vT86k00n4m4YR3mnjjprbVsX/kc
xIc1m5tQDuGlEr2nw6ZgUS9SA7Q9zXsh9h/I+WLRiVFpbaF/oHgLA3/9rdpyJI/X
6oaNDE694k/s3u/5eCBdIWiGS3ttHHyqe3xRPRb3yLWmqb+a0uEeOFIVkfTAmMyv
GHpBuR9ohjPoKB/Ii/gVMIDVr0JJSMAjGdfdc8w2s2lrSg+3OhGyeAe8gDdgWMGg
rhj8h0RnjyxjhTYV76BYVlmi3mnSLSqZ1rUWn9+8BrYo0LGgZFBdSrBYmKFOTeJP
J3bHzXECgYEA1bkQmXE0lko7WC/elXtmCuiKUCdyuBD4rGLeClDVhdLLpG7dgRs+
tGngSeC4EAOqsPKIGKgPQn9Yn//KRTiAaVsACFagE2/JNA1fD/OlrPgO4Tz8or7l
GW9BOf+Tg8FL1Z/abD5+Y6zK5O/pG7CgmQp0LnFGEjKT5bRXKh3QnXMCgYEAxi3V
6dTkClrO6F1vO5c7pQgbnKfd8LT+V0JRaHiTcITsyCf2/zmGMJv3i7aLX0jSoOe3
GGIsiNuYUc2zTrqsVDg3OllrK9GPhmtSv/NgiVvwoBHY7B2Ersi1dAMbsipdjedT
fqSbZVeRKsOWq0YSsYbY06W3gHgtdft2uYUsi1kCgYEAmVtML+5tX5Iwdx0SSIzd
MeKerNlBlhaHeZsP3LMYJAiYG4t54dRc8DQwvpJDQSqAZqwBQEAHgx3ByD1RNM5Q
RkkIAvO1tXy3EWSu29FnBnCQrMqINXdpCREt6qIbhaVD9yvXHWjSZE9u30vPJxFc
i7RWnaSmNRSZz2/SQ+RU90UCgYBJufGTzSSNCZ1h6qif9bI1wh9rlzPFAcCBO+XH
RNwtBvaDvAJyjrbyTIO6UU3mQ9RAEhQWmSdSPsea3ziuuFm19zfsmCl7ormPW0vs
pyEp2K9bDWiy5oRe9cIzh5h9Hq+xQ/bW7Wv2Nq6Fxz+9NhNsQetWSZdLzumys7tG
Z1nb+QKBgCIgZ0bPnRl8Tv3KwCqYn5OAK0jnxwRU5LPkHKSr/3zLIPIALHHCSpgL
zep1WzlWb/FEsdb3xHD/n+MqHcGxLzly+OA3NAqr675aQC/qSQtqEPPL6LTawuOz
EkZzROrU03xGPRl0nJ1ikoqYfw9+pAm9fiH28BWWdWSOG4cBmIXU
-----END RSA PRIVATE KEY-----
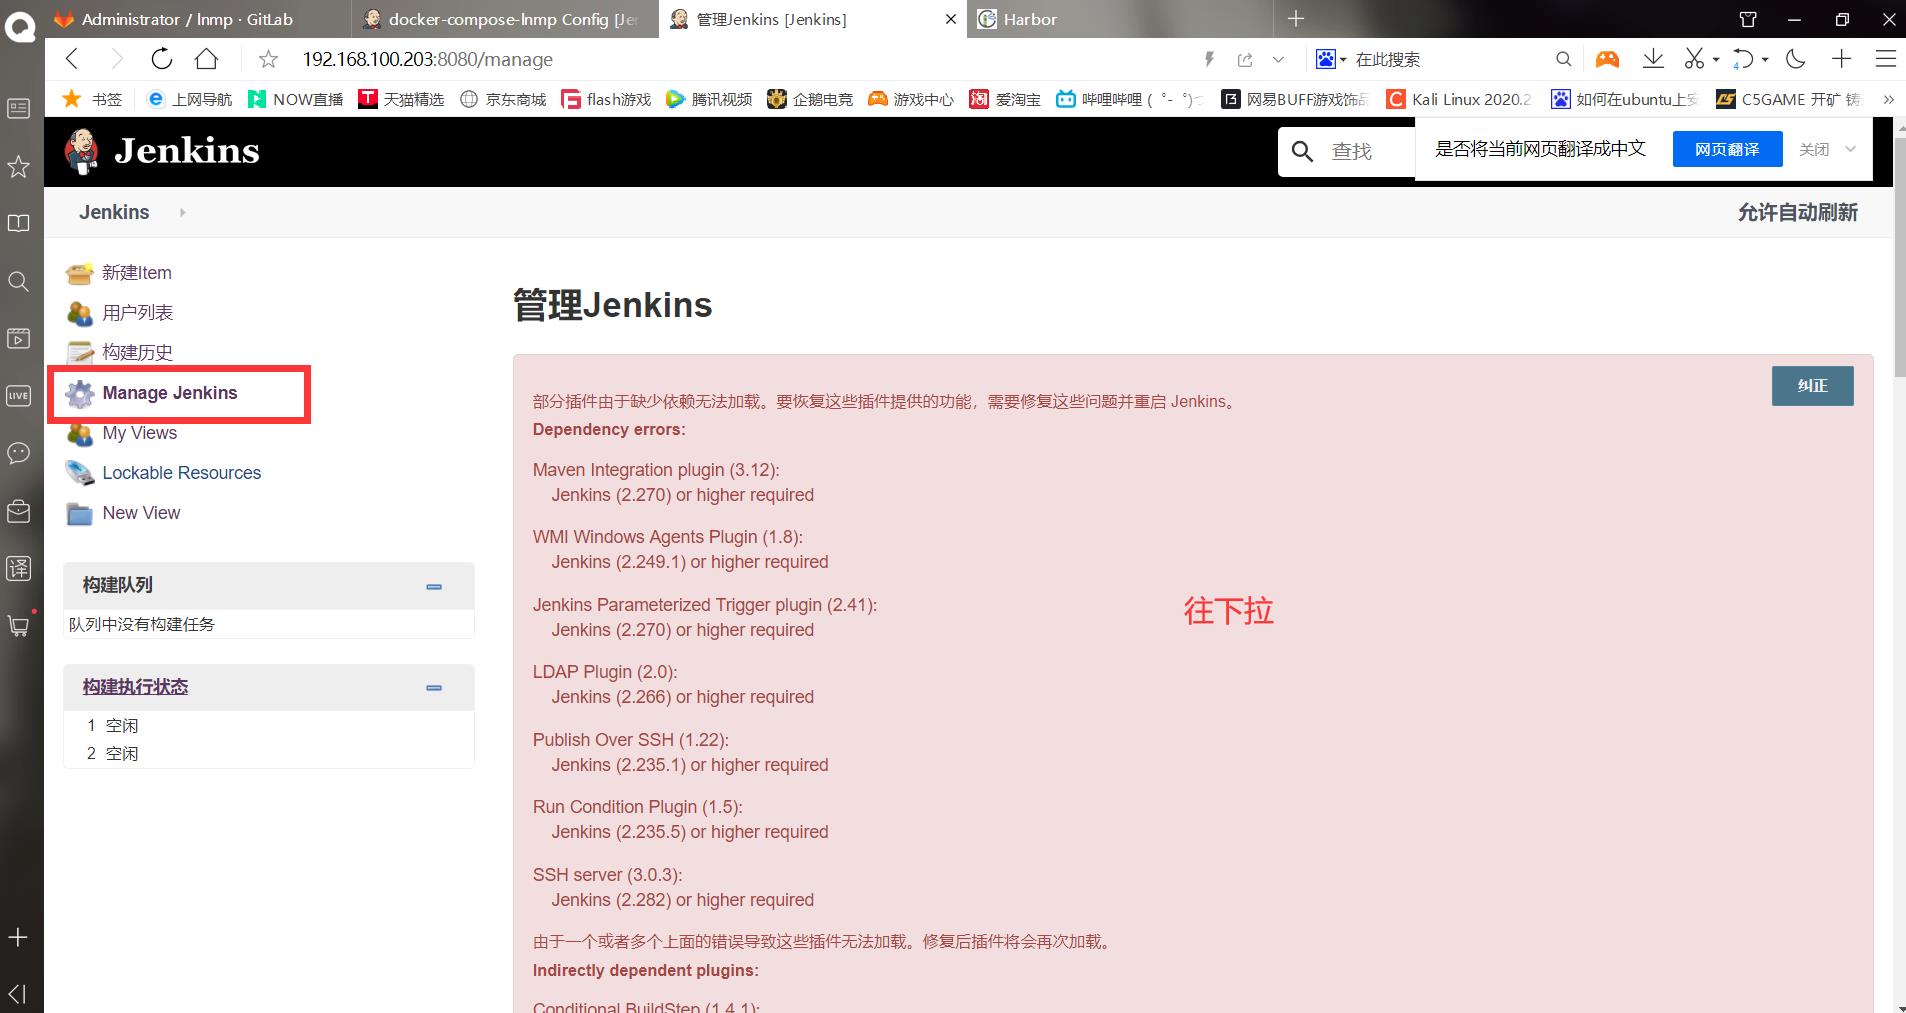
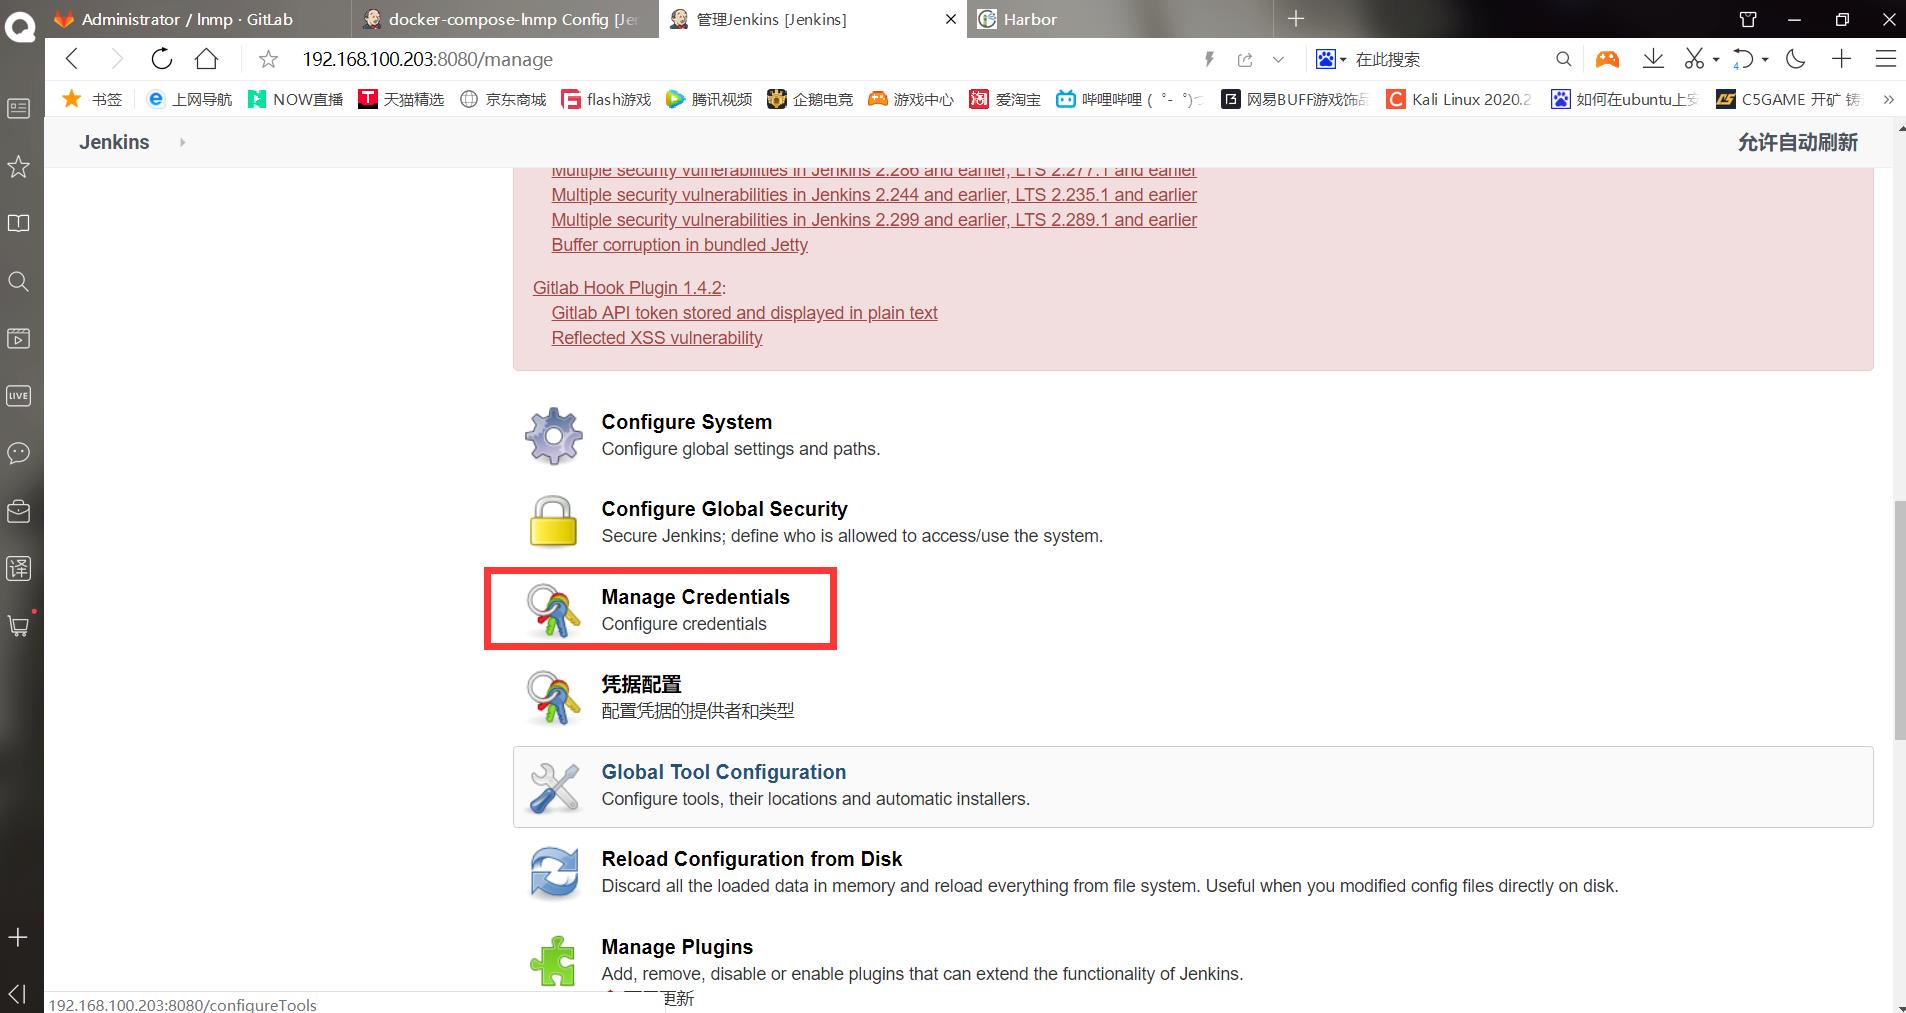
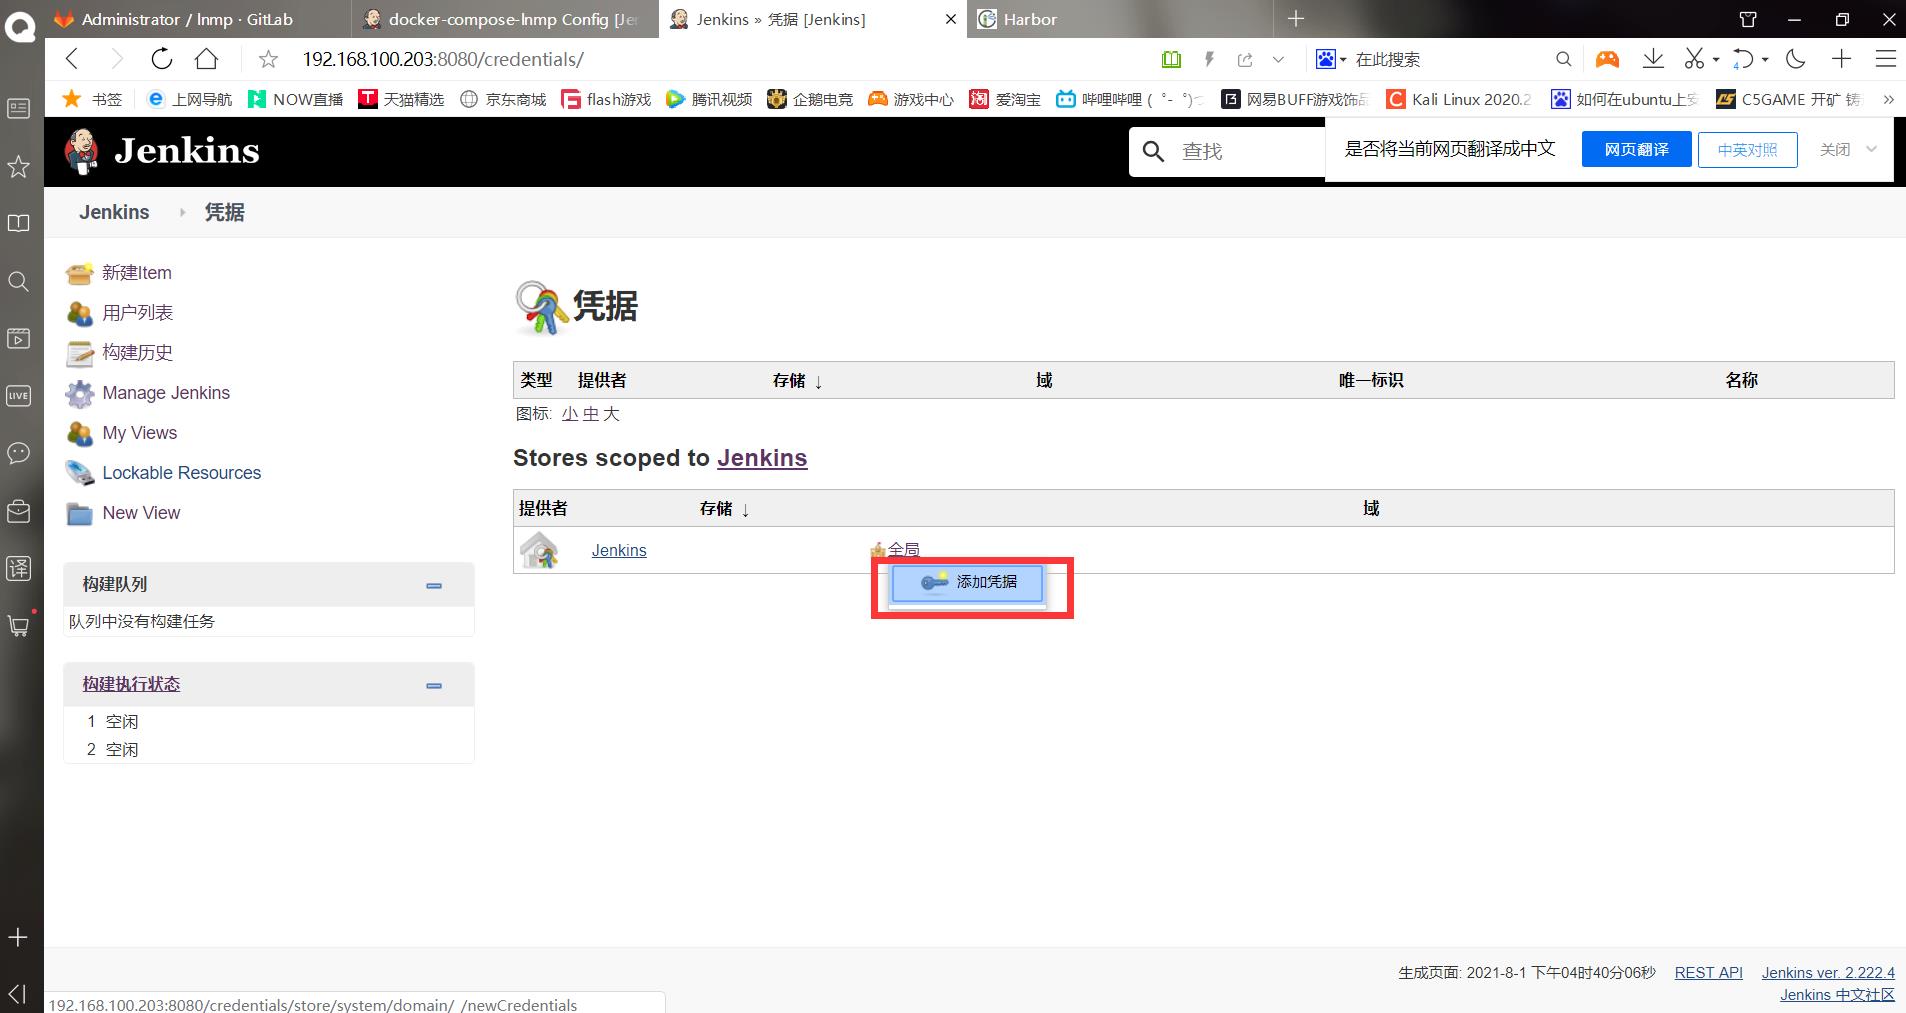

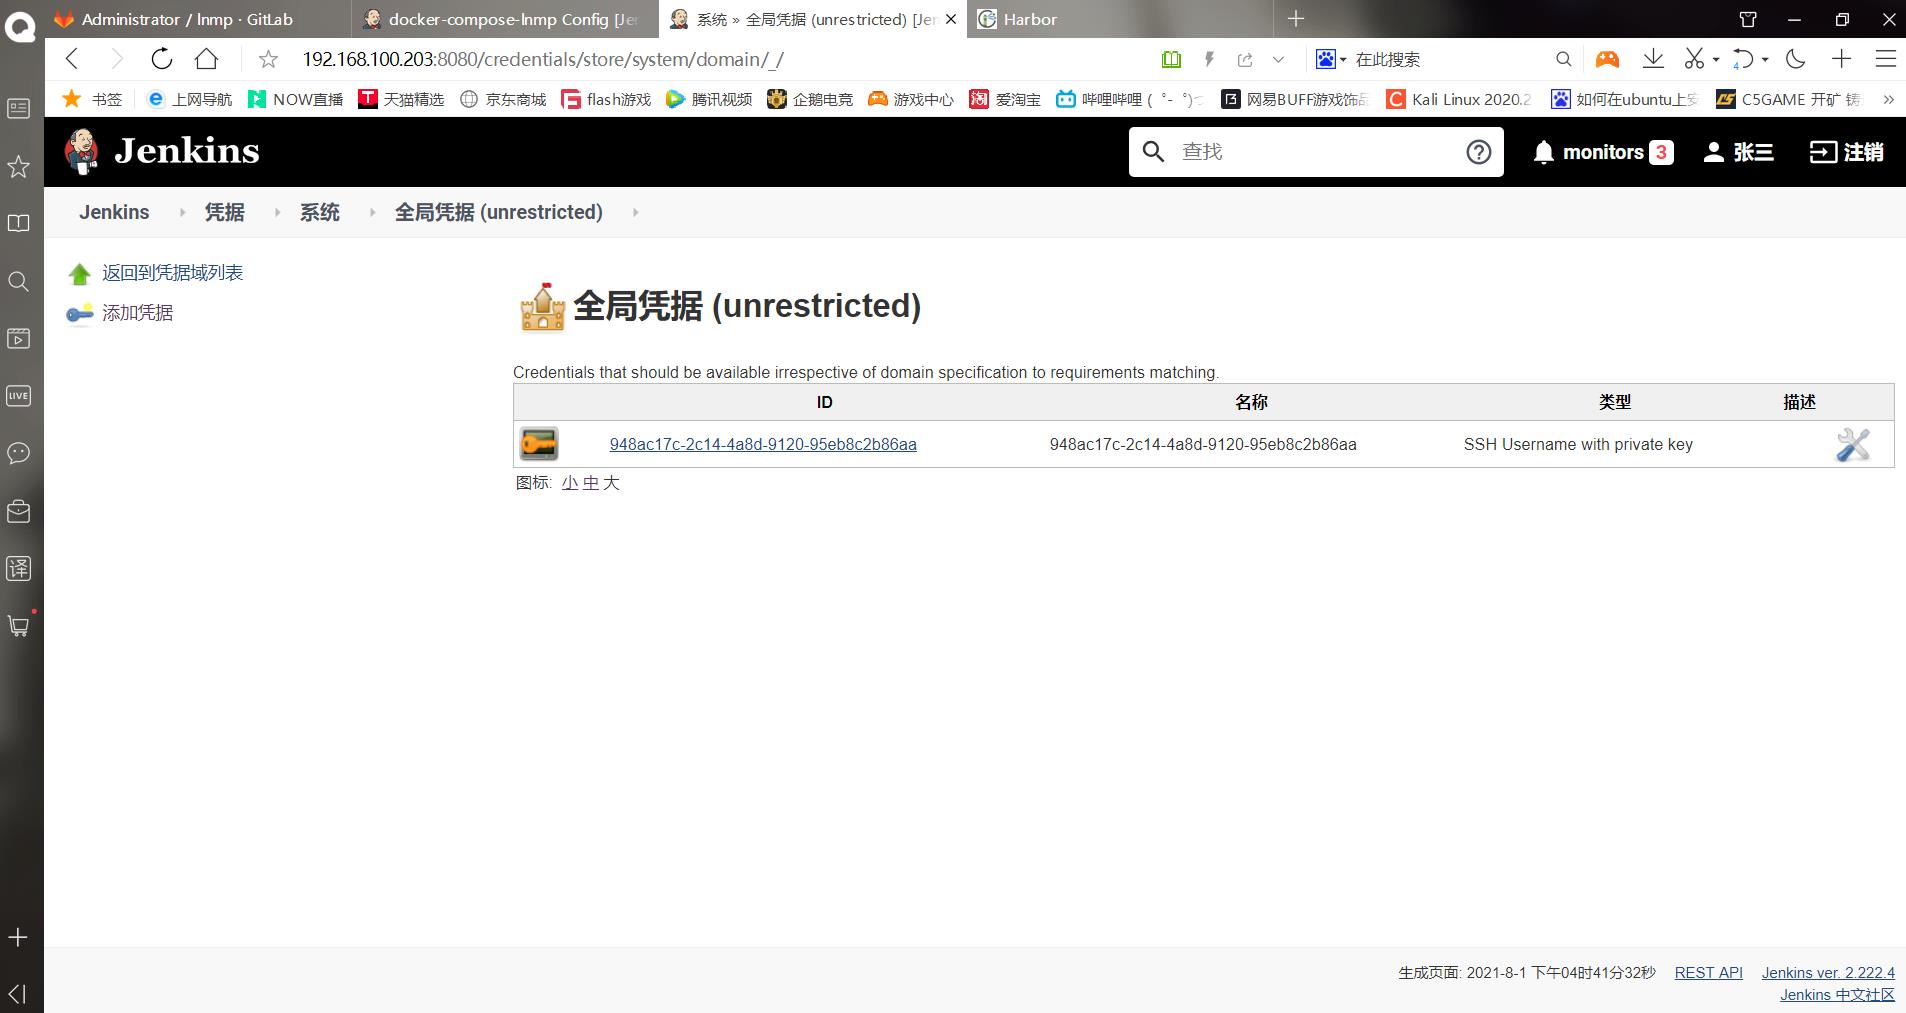
(8)把Jenkins密钥传到其他主机上
在上面的gitlab生成ssh密钥已经生成过了,所以这里直接传就行
[root@jenkins ~]# ssh-copy-id root@192.168.100.202
[root@jenkins ~]# ssh-copy-id root@192.168.100.203
[root@jenkins ~]# ssh-copy-id root@192.168.100.204
[root@jenkins ~]# ssh-copy-id root@192.168.100.205
[root@jenkins ~]# ssh-copy-id root@192.168.100.206
(3)搭建Harbor仓库,上传镜像
******(1)先做基础配置
[root@Centos7 ~]# hostnamectl set-hostname harbor
[root@Centos7 ~]# su
[root@harbor ~]# systemctl stop firewalld
[root@harbor ~]# setenforce 0
setenforce: SELinux is disabled
[root@harbor ~]# mount /dev/cdrom /mnt/
mount: /dev/sr0 写保护,将以只读方式挂载
mount: /dev/sr0 已经挂载或 /mnt 忙
       /dev/sr0 已经挂载到 /mnt 上
******(2)安装docker
[root@harbor ~]# yum install -y yum-utils device-mapper-persistent-data lvm2  #安装依赖
。。。。。。
完毕!
[root@harbor ~]# ll
总用量 8
-rw-------. 1 root root 1264 1月  12 2021 anaconda-ks.cfg
drwxr-xr-x  3 root root 4096 8月   1 22:48 docker
[root@harbor ~]# vim /etc/yum.repos.d/centos.repo
[aaa]
name=aaa
baseurl=file:///mnt
enabled=1
gpgcheck=0
[docker]
name=docker
baseurl=file:///root/docker
enabled=1
gpgcheck=0
#保存退出
[root@harbor ~]# yum -y install docker-ce
。。。。。。
#保存退出
[root@harbor ~]# mkdir -p /etc/docker/
[root@harbor ~]# vim /etc/docker/daemon.json

  "registry-mirrors": ["https://w4uieobw.mirror.aliyuncs.com"],
  "insecure-registries": ["192.168.100.206"]

#保存退出
******(3)安装Harbor,这里只搭建http协议的harbor
[root@harbor ~]# ll
总用量 614824
-rw-------. 1 root root      1264 1月  12 2021 anaconda-ks.cfg
drwxr-xr-x  3 root root      4096 8月   1 22:48 docker
-rw-r--r--  1 root root 629571428 8月   1 22:52 harbor-offline-installer-v2.3.1.tgz  #上传安装包
[root@harbor ~]# tar xf harbor-offline-installer-v2.3.1.tgz -C /usr/local/
[root@harbor ~]# cd /usr/bin
[root@harbor bin]# rz
z waiting to receive.**B0100000023be50
[root@harbor bin]# chmod  a+x docker-compose
[root@harbor bin]# ll | grep docker-compose
-rwxr-xr-x    1 root root    11748168 7月  28 18:54 docker-compose
[root@harbor bin]# cd
[root@harbor ~]# vim /usr/local/harbor/harbor.yml.tmpl
  1 # Configuration file of Harbor
  2
  3 # The IP address or hostname to access admin UI and registry service.
  4 # DO NOT use localhost or 127.0.0.1, because Harbor needs to be accessed by external clients.
  5 hostname: 192.168.100.206
  6
  7 # http related config
  8 http:
  9   # port for http, default is 80. If https enabled, this port will redirect to https port
 10   port: 80
 11
 12 # https related config
 13 #https:
 14   # https port for harbor, default is 443
 15   #port: 443
 16   # The path of cert and key files for nginx
 17   #certificate: /your/certificate/path
 18   #private_key: /your/private/key/path
 19
。。。。。。
#保存退出
[root@harbor ~]# cd /usr/local/harbor/
[root@harbor harbor]# cp harbor.yml.tmpl harbor.yml
[root@harbor harbor]# systemctl start docker   #启动docker
[root@harbor harbor]# sh install.sh #安装harbor,第一次使用脚本安装后续可使用“docker-compose up -d”命令启动 Harbor,使用“docker-compose stop”命令关闭 Harbor
[root@harbor harbor]# echo $?
0
[root@harbor harbor]# ps aux | grep docker-compose  #成功开启
root      16980  0.0  0.0 112676   988 pts/0    R+   23:00   0:00 grep --color=auto docker-compose
[root@harbor harbor]# docker images
REPOSITORY                      TAG                 IMAGE ID            CREATED             SIZE
goharbor/harbor-exporter        v2.3.1              719fd825651e        13 days ago         81MB
goharbor/chartmuseum-photon     v2.3.1              3aba4510af16        13 days ago         178MB
goharbor/redis-photon           v2.3.1              4a0d49a4ece0        13 days ago         191MB
goharbor/trivy-adapter-photon   v2.3.1              a285847f857a        13 days ago         164MB
goharbor/notary-server-photon   v2.3.1              87a2dbfd122e        13 days ago         110MB
goharbor/notary-signer-photon   v2.3.1              7e29ff33ec85        13 days ago         107MB
goharbor/harbor-registryctl     v2.3.1              91e798004920        13 days ago         132MB
goharbor/registry-photon        v2.3.1              972ce19b1882        13 days ago         81.2MB
goharbor/nginx-photon           v2.3.1              3b3ede1db494        13 days ago         44.3MB
goharbor/harbor-log             v2.3.1              40a54594fe22        13 days ago         194MB
goharbor/harbor-jobservice      v2.3.1              d6e174ae0a00        13 days ago         171MB
goharbor/harbor-core            v2.3.1              f05acc3947d6        13 days ago         158MB
goharbor/harbor-portal          v2.3.1              4a15c5622fda        13 days ago         57.6MB
goharbor/harbor-db              v2.3.1              b16a9c81ef03        13 days ago         263MB
goharbor/prepare                v2.3.1              4ce629d59c20        13 days ago         288MB
[root@harbor harbor]# docker ps
CONTAINER ID        IMAGE                                COMMAND                  CREATED             STATUS                    PORTS                       NAMES
5bf08af481aa        goharbor/harbor-jobservice:v2.3.1    "/harbor/entrypoint.…"   34 seconds ago      Up 30 seconds (healthy)                               harbor-jobservice
d38b62be5d2b        goharbor/nginx-photon:v2.3.1         "nginx -g 'daemon of…"   34 seconds ago      Up 30 seconds (healthy)   0.0.0.0:80->8080/tcp        nginx
3d223a63d976        goharbor/harbor-core:v2.3.1          "/harbor/entrypoint.…"   37 seconds ago      Up 33 seconds (healthy)                               harbor-core
964e5805fb81        goharbor/harbor-portal:v2.3.1        "nginx -g 'daemon of…"   39 seconds ago      Up 36 seconds (healthy)                               harbor-portal
41038ff6f31e        goharbor/harbor-db:v2.3.1            "/docker-entrypoint.…"   39 seconds ago      Up 36 seconds (healthy)                               harbor-db
6b3503d1367e        goharbor/redis-photon:v2.3.1         "redis-server /etc/r…"   39 seconds ago      Up 36 seconds (healthy)                               redis
c059529f89f3        goharbor/harbor-registryctl:v2.3.1   "/home/harbor/start.…"   39 seconds ago      Up 36 seconds (healthy)                               registryctl
55a65d22d7b3        goharbor/registry-photon:v2.3.1      "/home/harbor/entryp…"   39 seconds ago      Up 36 seconds (healthy)                               registry
73f8185a516a        goharbor/harbor-log:v2.3.1           "/bin/sh -c /usr/loc…"   41 seconds ago      Up 39 seconds (healthy)   127.0.0.1:1514->10514/tcp   harbor-log
[root@harbor harbor]# cd
(4)使用浏览器访问harbor
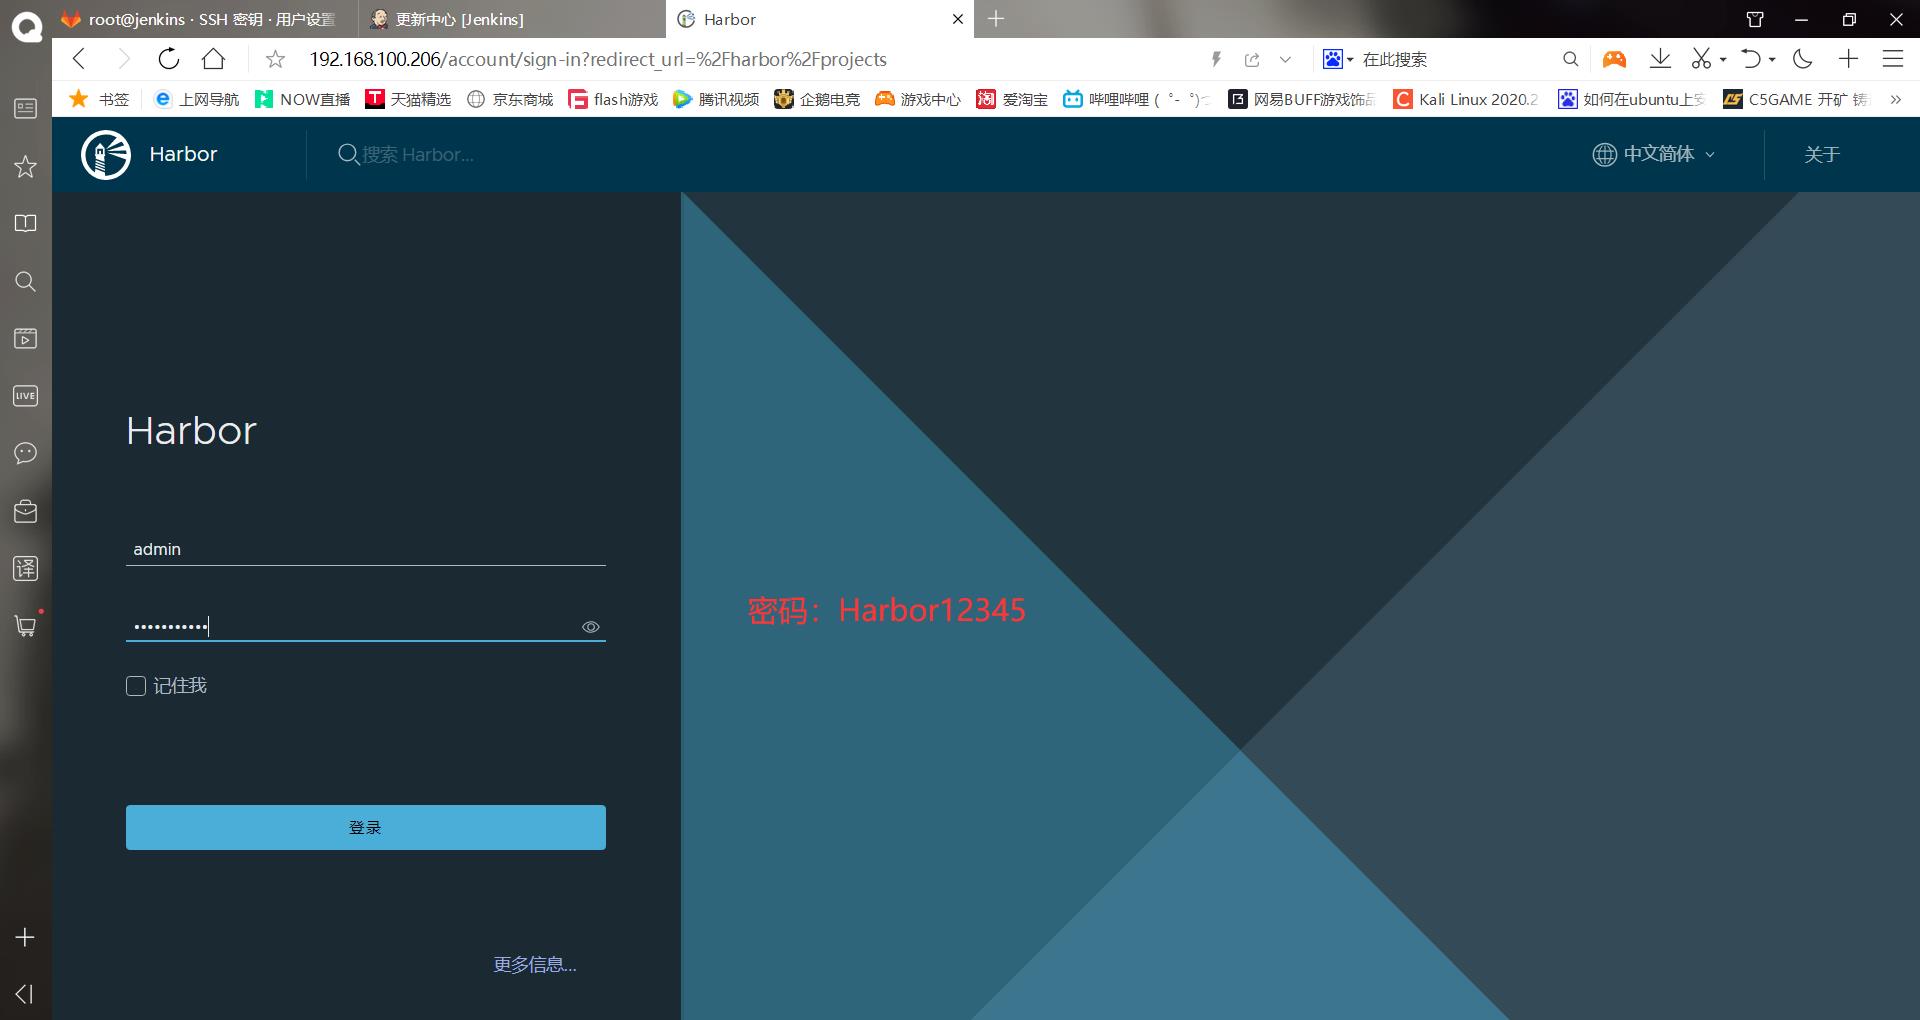
记住这个项目
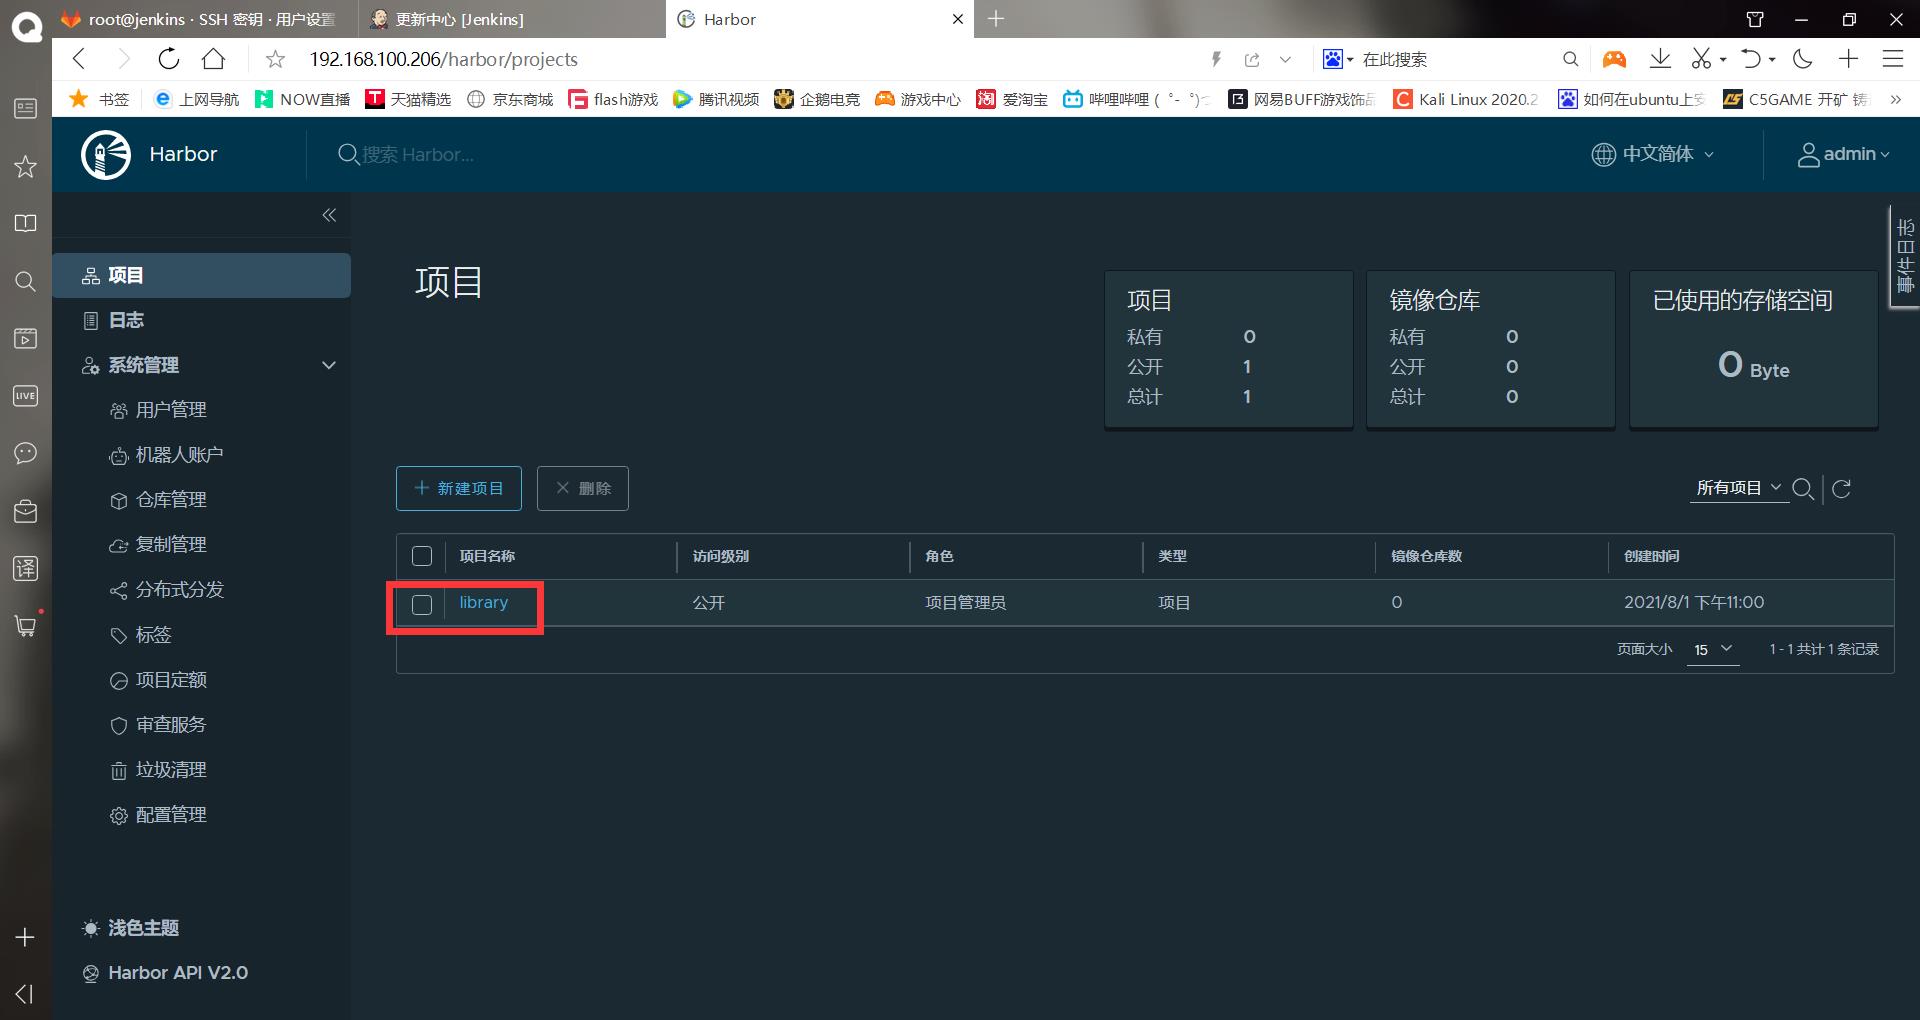
******(5)上传镜像,修改tag推送到镜像仓库
[root@harbor ~]# ll
总用量 2320516
-rw-------. 1 root root 1264 1月 12 2021 anaconda-ks.cfg
drwxr-xr-x 3 root root 4096 8月 1 22:48 docker
-rw-r--r-- 1 root root 629571428 8月 1 22:52 harbor-offline-installer-v2.3.1.tgz
-rw-r--r-- 1 root root 453615616 8月 1 23:04 mysql_5.7.tar.gz
-rw-r--r-- 1 root root 137441280 8月 1 23:04 nginx
-rw-r--r-- 1 root root 1155569664 8月 1 23:05 php_5.6
[root@harbor ~]# docker load -i nginx
[root@harbor ~]# docker load -i php_5.6
[root@harbor ~]# docker load -i mysql_5.7.tar.gz
[root@harbor ~]# docker images
REPOSITORY TAG IMAGE ID CREATED SIZE
mysql 5.7 8cf625070931 10 days ago 448MB
goharbor/harbor-exporter v2.3.1 719fd825651e 13 days ago 81MB
goharbor/chartmuseum-photon v2.3.1 3aba4510af16 13 days ago 178MB
goharbor/redis-photon v2.3.1 4a0d49a4ece0 13 days ago 191MB
goharbor/trivy-adapter-photon v2.3.1 a285847f857a 13 days ago 164MB
goharbor/notary-server-photon v2.3.1 87a2dbfd122e 13 days ago 110MB
goharbor/notary-signer-photon v2.3.1 7e29ff33ec85 13 days ago 107MB
goharbor/harbor-registryctl v2.3.1 91e798004920 13 days ago 132MB
goharbor/registry-photon v2.3.1 972ce19b1882 13 days ago 81.2MB
goharbor/nginx-photon v2.3.1 3b3ede1db494 13 days ago 44.3MB
goharbor/harbor-log v2.3.1 40a54594fe22 13 days ago 194MB
goharbor/harbor-jobservice v2.3.1 d6e174ae0a00 13 days ago 171MB
goharbor/harbor-core v2.3.1 f05acc3947d6 13 days ago 158MB
goharbor/harbor-portal v2.3.1 4a15c5622fda 13 days ago 57.6MB
goharbor/harbor-db v2.3.1 b16a9c81ef03 13 days ago 263MB
goharbor/prepare v2.3.1 4ce629d59c20 13 days ago 288MB
nginx latest 4cdc5dd7eaad 3 weeks ago 133MB
cytopia/php-fpm-5.6 latest 2943ebf1ef81 3 years ago 1.1GB
[root@harbor ~]# docker tag mysql:5.7 192.168.100.206/library/mysql:5.7
[root@harbor ~]# docker tag nginx:latest 192.168.100.206/library/nginx:latest
[root@harbor ~]# docker tag cytopia/php-fpm-5.6:latest 192.168.100.206/library/php:latest
[root@harbor ~gitlab+jenkins+maven+docker持续集成——.Jenkins获取git tags代码进行持续集成
gitlab+jenkins+maven+docker持续集成——Jenkins安装配置
Jenkins+Ant+Gitlab+Sonarqube+Docker实现持续集成,质量管理