使用 uiautomator2
Posted ʚVVcatɞ
tags:
篇首语:本文由小常识网(cha138.com)小编为大家整理,主要介绍了使用 uiautomator2相关的知识,希望对你有一定的参考价值。
环境:
- android: 4.4+
- Python:3.7.10
uiautomator2:https://github.com/openatx/uiautomator2
安装adb
官网地址:https://developer.android.google.cn/studio/command-line/adb
准备一台开启了开发者选项的安卓手机,通过USB连接上电脑
电脑上通过以下命令查看已连接的设备
adb devices -l
(Python37) M:\\python>adb devices -l
* daemon not running. starting it now on port 5037 *
* daemon started successfully *
List of devices attached
xxxxxxxx device product:oxygen model:MI_MAX_2 device:oxygen
安装 weditor
pip install --pre --upgrade weditor
(Python37) M:\\python>pip install --pre --upgrade weditor
Collecting weditor
Downloading weditor-0.6.4-py3-none-any.whl (1.6 MB)
|████████████████████████████████| 1.6 MB 726 kB/s
Collecting facebook-wda>=1.0.5
Downloading facebook_wda-1.4.3-py3-none-any.whl (25 kB)
Requirement already satisfied: pillow in h:\\anacondanavigator\\anaconda\\envs\\python37\\lib\\site-packages (from weditor) (8.2.0)
…
…
…
Successfully installed facebook-wda-1.4.3 pywin32-301 weditor-0.6.4
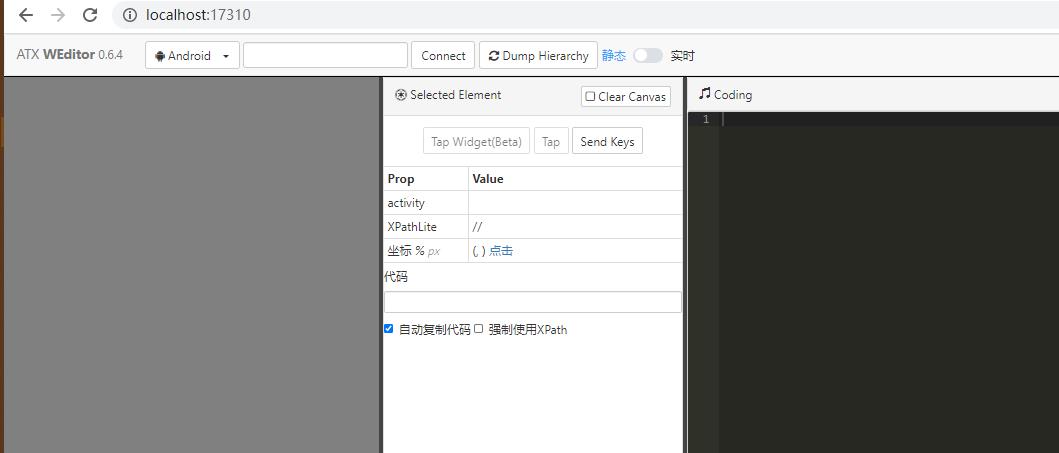
启动 weditor
python -m weditor
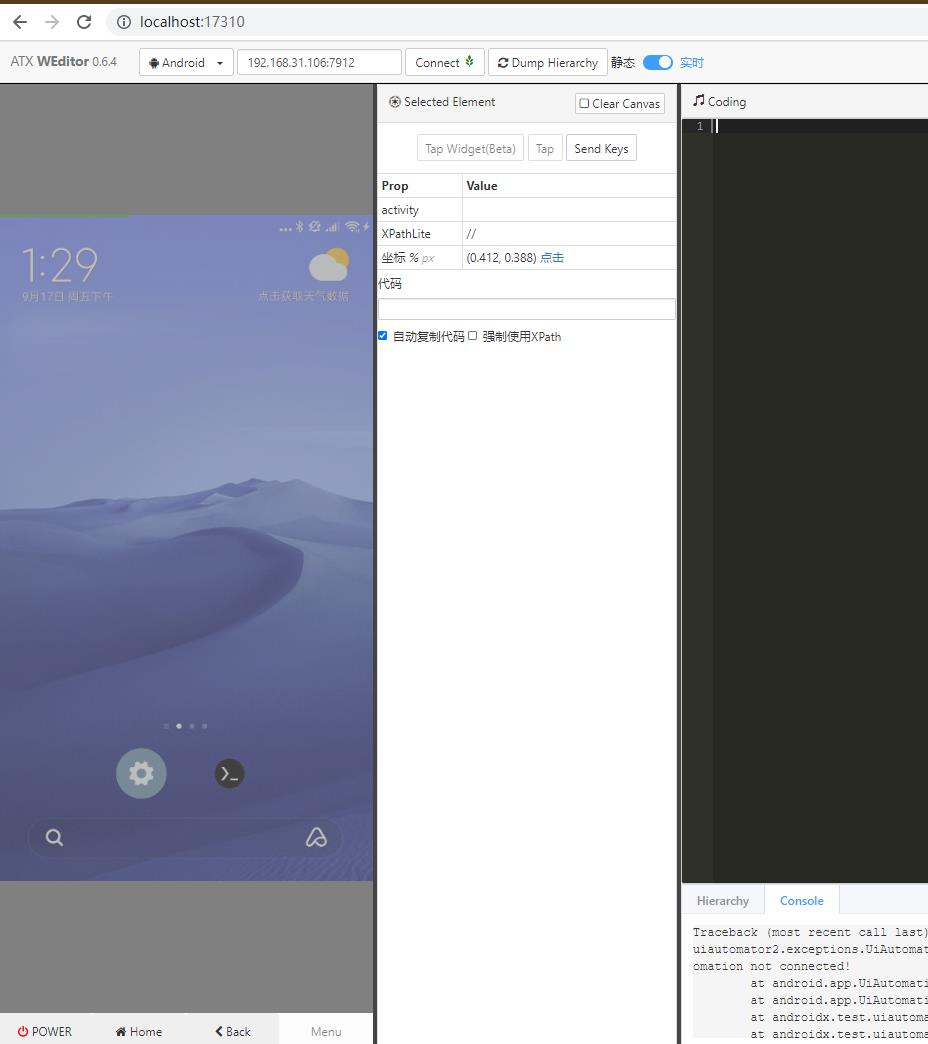
注:命令行直接输入 weditor会自动打开浏览器,输入设备的ip或者序列号,点击Connect即可。
默认会通过浏览器打开页面:http://localhost:17310/

初始化所有的已经连接到电脑的设备
python -m uiautomator2 init
或者 初始化所有的已经连接到电脑的设备 并指定端口号
python -m uiautomator2 init --addr :7912
(Python37) C:\\Users\\vvcat>python -m uiautomator2 init --addr :7912
[I 210917 13:27:42 init:156] uiautomator2 version: 2.16.7
[I 210917 13:27:42 init:356] Install minicap, minitouch
[D 210917 13:27:42 init:59] Use cached assets: C:\\Users\\vvcat.uiautomator2\\cache\\minitouch-f7a806902f\\minitouch
[D 210917 13:27:42 init:238] Push to /data/local/tmp/minitouch:0755
[D 210917 13:27:42 init:59] Use cached assets: C:\\Users\\vvcat.uiautomator2\\cache\\minicap.so-14ea849b4c\\minicap.so
[D 210917 13:27:42 init:238] Push to /data/local/tmp/minicap.so:0755
[D 210917 13:27:42 init:59] Use cached assets: C:\\Users\\vvcat.uiautomator2\\cache\\minicap-4ad740a772\\minicap
[D 210917 13:27:42 init:238] Push to /data/local/tmp/minicap:0755
[D 210917 13:27:43 init:256] apk-debug package-info: {‘package_name’: ‘com.github.uiautomator’, ‘version_name’: ‘2.3.3’, ‘version_code’: ‘2003003’, ‘flags’: [‘DEBUGGABLE’, ‘HAS_CODE’, ‘ALLOW_CLEAR_USER_DATA’, ‘ALLOW_BACKUP’], ‘first_install_time’: datetime.datetime(2021, 9, 2, 19, 36, 3), ‘last_update_time’: datetime.datetime(2021, 9, 2, 19, 36, 3), ‘signature’: ‘ae17cd86’}
[D 210917 13:27:43 init:257] apk-debug-test package-info: {‘package_name’: ‘com.github.uiautomator.test’, ‘version_name’: ‘’, ‘version_code’: ‘’, ‘flags’: [‘DEBUGGABLE’, ‘HAS_CODE’, ‘ALLOW_CLEAR_USER_DATA’, ‘ALLOW_BACKUP’], ‘first_install_time’: datetime.datetime(2021, 9, 2, 19, 36, 10), ‘last_update_time’: datetime.datetime(2021, 9, 2, 19, 36, 10), ‘signature’: ‘ae17cd86’}
[I 210917 13:27:43 init:374] Already installed com.github.uiautomator apks
[D 210917 13:27:43 init:167] Shell: (’/data/local/tmp/atx-agent’, ‘server’, ‘–stop’)
[D 210917 13:27:43 init:296] Real version: [0, 10, 0], Expect version: [0, 10, 0]
[D 210917 13:27:43 init:167] Shell: (’/data/local/tmp/atx-agent’, ‘server’, ‘–nouia’, ‘-d’, ‘–addr’, ‘:7912’)
[I 210917 13:27:43 init:384] Check atx-agent version
[D 210917 13:27:43 init:397] Forward: local:tcp:1457 -> remote:tcp:7912
[D 210917 13:27:44 init:397] Forward: local:tcp:1457 -> remote:tcp:7912
[D 210917 13:27:45 init:400] atx-agent version 0.10.0
[D 210917 13:27:45 init:403] device wlan ip: 192.168.31.106
Successfully init AdbDevice(serial=xxxxxxxx)

测试:
打印通过usb连接获取到的手机信息
import uiautomator2 as d

def connect():
    #通过usb连接
    connect_usb = d.connect_usb('28f97048')
    print(connect_usb.info)

if __name__=='__main__':
    connect()
(Python37) M:\\python>python main.py
{‘currentPackageName’: ‘com.miui.home’, ‘displayHeight’: 1920, ‘displayRotation’: 0, ‘displaySizeDpX’: 393, ‘displaySizeDpY’: 698, ‘displayWidth’: 1080, ‘productName’: ‘oxygen’, ‘screenOn’: True, ‘sdkInt’: 25, ‘naturalOrientation’: True}
uiautomator2:https://github.com/openatx/uiautomator2/blob/master/README.md
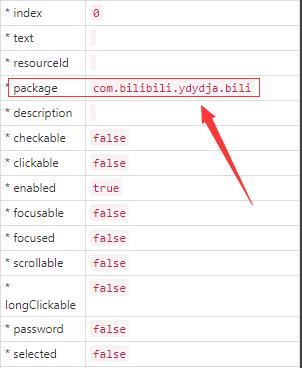
找到 package 名字

启动app
d.app_start("com.bilibili.ydydja.bili")
关闭app
d.app_stop("com.bilibili.ydydja.bili")
解锁屏幕
def open_the_screen():
    d.info.get('screenOn') # 获取当前屏幕状态
    d.screen_on()   # 打开屏幕
    d.swipe_ext("up", scale=0.8)  # 默认0.9, 滑动距离为屏幕宽度的80%   从下往上滑动
    d.click(0.497, 0.531)   # 解锁界面数字坐标
    d.click(0.502, 0.818)   # 解锁界面数字坐标
    d.click(0.778, 0.629)   # 解锁界面数字坐标
    d.click(0.778, 0.629)   # 解锁界面数字坐标
- click():点击屏幕
- screen_on():打开屏幕
- screen_off():关闭屏幕
- swipe_ext():手指滑动
- left:左滑
- right:右滑
- up:上滑
- down:下滑
- info.get():获取当前屏幕状态
以上是关于使用 uiautomator2的主要内容,如果未能解决你的问题,请参考以下文章
记一次在termux上部署python+uiautomator2实现手机上直接跑代码