SpringMVC中JSON数据交互
Posted nuist__NJUPT
tags:
篇首语:本文由小常识网(cha138.com)小编为大家整理,主要介绍了SpringMVC中JSON数据交互相关的知识,希望对你有一定的参考价值。
SpringMVC中JSON数据交互
SpringMVC在数据绑定的过程需要对传递的格式和类型进行转换,它既可以转换Spring等类型数据,也可以转换JSON等其它类型的数据,本次主要学习SpringMVC中JSON类型数据交互。
JSON(JS对象标记)是一种轻量级的数据交换格式,与XML一样,JSON也是基于纯文本的数据格式,它有对象结构和数组结构两种数据结构。
1-对象结构
对象结构以“{”开始,以"}“结束,中间部分是0个或者多个英文,分割的键值对构成,key和value之间以英文“:”分割,其中key必须是String类型,value可以是String,Number,Object,Array等数据类型。
2-数组结构
数组结构”[“开始,以”]“结束,中间部分有0个或多个英文字符,多个以”,"分割的列表组成。
上述两种数据结构也可以组合构成更复杂的数据结构。
为了实现浏览器与控制器类之间的JSON数据交互,SpringMVC提供了MappingJackson2HttpMessageConverter实现类默认处理JSON格式请求响应,该实现类利用Jakson开源包读写JSON数据,将Java对象转换为JSON对象和XML文档,同时也可以将JSON对象和XML对象转换成Java对象。
在使用注解开发时,需要用到两个重要的JSON格式转换注解,@RequestBody和@ResponseBody
@RequestBody:用于将请求主体的数据绑定到方法的形参上,该注解应用在方法上。
@ResponseBody:用于直接返回return对象,该注解应用在方法中。
下面通过一个实例演示如何进行JSON数据交互,具体步骤如下:
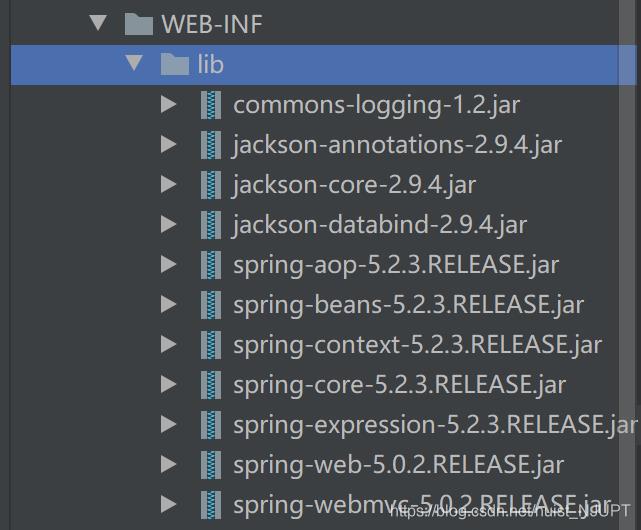
1-在IDEA中创建名为ch12-2的web应用,在该应用的WEB-INF目录下创建lib目录,在lib目录中导入SpringMVC相关jar包和JSON转换包,将lib添加为库项目。
2-在web.xml文件中配置DispatcherServlet,同时配置CharacterEncodingFilter解决中文乱码问题。
<?xml version="1.0" encoding="UTF-8"?>
<web-app xmlns="http://xmlns.jcp.org/xml/ns/javaee"
         xmlns:xsi="http://www.w3.org/2001/XMLSchema-instance"
         xsi:schemaLocation="http://xmlns.jcp.org/xml/ns/javaee
         http://xmlns.jcp.org/xml/ns/javaee/web-app_4_0.xsd"
         id = "WebApp_ID" version="4.0">
    <!--部署DispatcherServlet-->
    <servlet>
        <servlet-name>springmvc</servlet-name>
        <servlet-class>org.springframework.web.servlet.DispatcherServlet</servlet-class>
        <init-param>
            <param-name>contextConfigLocation</param-name>
            <param-value>WEB-INF/springmvc-servlet.xml</param-value>
        </init-param>
        <!--表示容器启动时加载的servlet-->
        <load-on-startup>1</load-on-startup>
    </servlet>
    <servlet-mapping>
        <servlet-name>springmvc</servlet-name>
        <!--任意的请求都通过DispatcherServlet-->
        <url-pattern>/</url-pattern>
    </servlet-mapping>

    <!-- 配置 CharacterEncodingFilter解决中文乱码问题-->
    <filter>
        <filter-name>CharacterEncodingFilter</filter-name>
        <filter-class>org.springframework.web.filter.CharacterEncodingFilter</filter-class>

        <!-- 配置编码格式为UTF-8 -->
        <init-param>
            <param-name>encoding</param-name>
            <param-value>UTF-8</param-value>
        </init-param>
    </filter>
    <filter-mapping>
        <filter-name>CharacterEncodingFilter</filter-name>
        <url-pattern>/*</url-pattern>
    </filter-mapping>
</web-app>
3-配置SpringMVC的核心配置文件,在WEB-INF目录下创建SpringMVC的核心配置文件springmvc-servlet.xml
在该配置文件中,扫描指定包,配置静态资源,配置视图解析器。
<?xml version="1.0" encoding="UTF-8"?>
<beans xmlns="http://www.springframework.org/schema/beans"
       xmlns:xsi="http://www.w3.org/2001/XMLSchema-instance"
       xmlns:context="http://www.springframework.org/schema/context"
       xmlns:mvc="http://www.springframework.org/schema/mvc"
       xsi:schemaLocation="http://www.springframework.org/schema/beans
       http://www.springframework.org/schema/beans/spring-beans.xsd
       http://www.springframework.org/schema/context
       https://www.springframework.org/schema/context/spring-context.xsd
       http://www.springframework.org/schema/mvc
       http://www.springframework.org/schema/mvc/spring-mvc.xsd">

    <!--使用扫描机制,扫描控制器类-->
    <context:component-scan base-package="controller"/>
    <mvc:annotation-driven />
    <!--annotation-driven用于简化开发的配置,注解DefaultAnnotationHandlerMapping和AnnotationMethodHandlerAdapter-->
    <!--使用resources过滤掉不需要dispatcherservlet的资源,例如静态资源,在使用resources时必须使用annotation-driven,否则resources会阻止任意控制器被调用-->
    <mvc:default-servlet-handler/>
    <!--配置静态资源,允许js目录下的所有文件可见-->
    <mvc:resources location = "/js/" mapping="/js/**"></mvc:resources>
    <!--配置视图解析器-->
    <bean class = "org.springframework.web.servlet.view.InternalResourceViewResolver" id = "internalResourceViewResolver">
        <!--前缀-->
        <property name = "prefix" value = "/WEB-INF/jsp/"/>
        <!--后缀-->
        <property name = "suffix" value = ".jsp"/>
    </bean>
</beans>
4-在src目录下创建pojo包,在该包中创建Person类。
public class Person {
    private String pname ;
    private String password ;
    private String page ;

    public String getPname() {
        return pname;
    }

    public void setPname(String pname) {
        this.pname = pname;
    }

    public String getPassword() {
        return password;
    }

    public void setPassword(String password) {
        this.password = password;
    }

    public String getPage() {
        return page;
    }

    public void setPage(String page) {
        this.page = page;
    }
}
5-创建JSP页面测试JSON数据交互,在index.jsp中测试JSON交互数据。在index.jsp页面中编写一个测试JSON交互的表单,当点击测试按钮时候执行页面中testJson()函数,在该函数中使用jQuery的AJAX方式将JSON格式数据传递给以/testJson结尾的请求中。
<%--
  Created by IntelliJ IDEA.
  User: nuist__NJUPT
  Date: 2021/8/9
  Time: 21:10
  To change this template use File | Settings | File Templates.
--%>
<%@ page language="java" contentType="text/html; charset=utf-8"
         pageEncoding="utf-8"%>
<%@ taglib prefix="form" uri="http://www.springframework.org/tags/form" %>
<!DOCTYPE html PUBLIC "-//W3C//DTD HTML 4.01 Transitional//EN" "http://www.w3.org/TR/html4/loose.dtd">
<html>
<head>
  <meta http-equiv="Content-Type" content="text/html; charset=utf-8">
  <title>Insert title here</title>
    <script type="text/javascript" src="${pageContext.request.contextPath}/js/jquery-3.2.1-min.js"></script>
<script type = "text/javascript">
  function testJson(){
    //获取输入的值pname为id
    var pname = $("#pname").val() ;
    var password = $("#password").val() ;
    var page = $("#page").val() ;
    $.ajax({
      //请求路径
      url : "${pageContext.request.contextPath}/testJson",
      //请求类型
      type : "post",
      //data表示发送的数据
      data : JSON.stringify({pname:pname,password:password,page:page}),
      //定义发送请求的数据格式为JSON字符串
      contentType : "application/json;charset=utf-8",
      //定义回调响应的数据格式为JSON字符串,该属性可以省略
      dataType : "json",
      //成功相应的结果
      success : function(data){
        if(data != null){
          alert("输入的用户名:" + data.pname + ",密码:" + data.password + ",年龄:" + data.page);
        }
      }});
  }
</script>
</head>
<body>
<form action = "">
  用户名:<input type = "text" name = "pname" id = "pname"/><br>
    密码: <input type = "password" name = "password" id = "password"/><br>
    年龄:<input type = "text" name = "page" id = "page"/> <br>
  <input type = "button" value = "测试" onclick = "testJson()"/>
</form>
</body>
</html>
6-因为在index.jsp中使用jQuery的AJAX进行JSON数据提交和响应,所以还需要引入jquery-3.2.1.min.js文件,在web目录下创建目录js,在js目录下创建文件jquery-3.2.1.min.js,在该网址下找到该文件,复制到项目即可
jquery-3.2.1.min.js文件网址:
7-在src目录创建controller包,在该包中创建一个用于用户操作的控制器类TestController,在该控制器类中编写了接收和响应JSON格式数据的testJson方法,方法中的@RequestBody注解用于将前端主体请求中的JSON格式数据绑定到形参user上,@ResponseBody注解用于直接返回Person对象。
import org.springframework.stereotype.Controller;
import org.springframework.web.bind.annotation.RequestBody;
import org.springframework.web.bind.annotation.RequestMapping;
import org.springframework.web.bind.annotation.ResponseBody;
import pojo.Person;

@Controller
public class TestController {
    //接收页面请求的JSON数据,并返回JSON格式的结果
    @RequestMapping("/testJson")
    @ResponseBody
    public Person testJson(@RequestBody Person user){
        //打印接收的JSON格式数据
        System.out.println("pname = " + user.getPname() + ", password = " + user.getPassword() + ",page" + user.getPage()) ;
        //返回JSON格式相应
        return user ;
    }
}
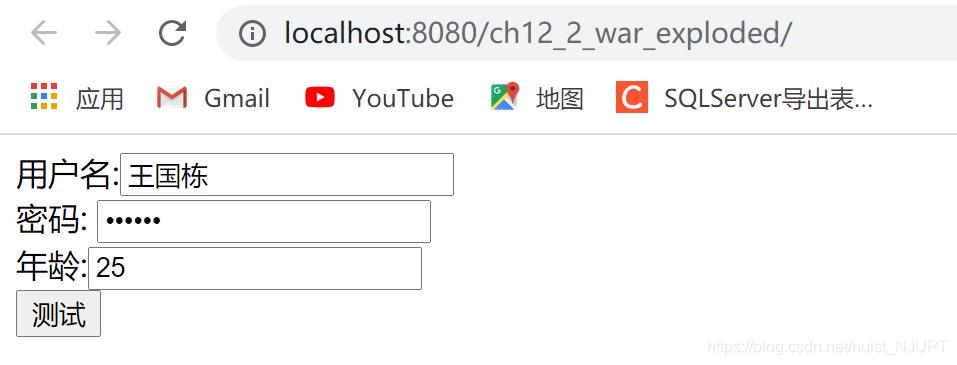
8-发布SpringMVC应用,运行Tomcat,运行 效果如下:
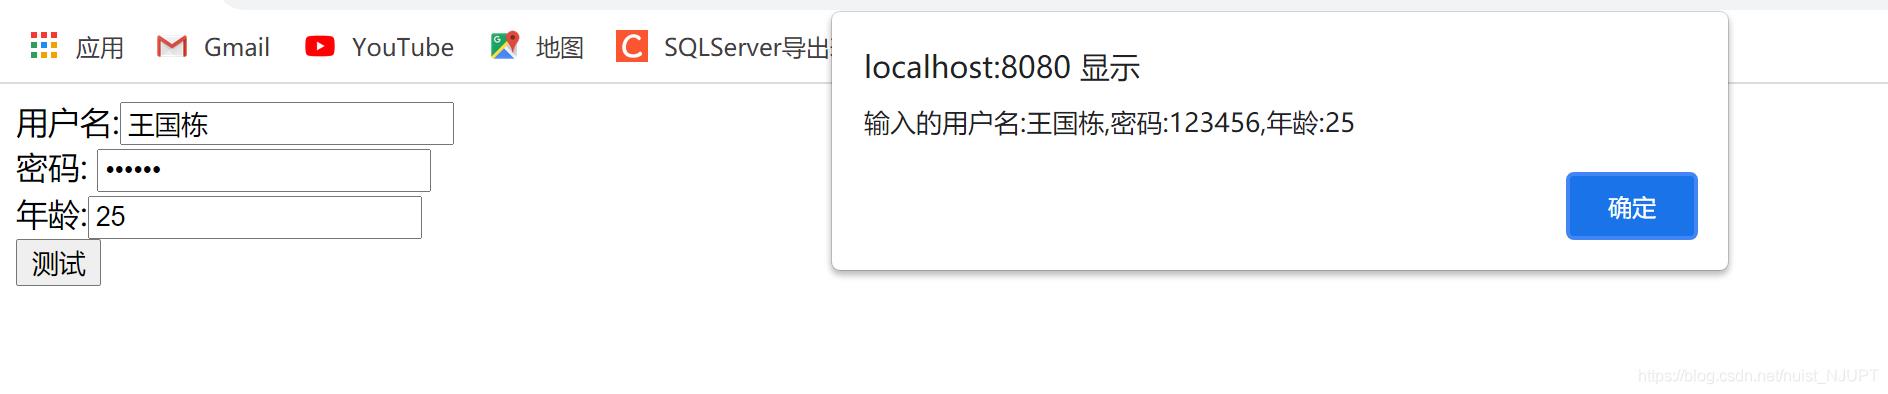
点击测试按钮,如下所示
控制台输出如下:

从结果可以看出,编写的代码可以将JSON格式数据的请求转换为方法中的java对象,也可以将java对象转换为JSON格式的响应数据。
以上是关于SpringMVC中JSON数据交互的主要内容,如果未能解决你的问题,请参考以下文章
SpringMVC学习09SpringMVC与前台的json数据交互