Android 中AlertDialog警告对话框的使用
Posted 路 宇
tags:
篇首语:本文由小常识网(cha138.com)小编为大家整理,主要介绍了Android 中AlertDialog警告对话框的使用相关的知识,希望对你有一定的参考价值。
前言: AlertDialog 为警告对话框,可以实现多种样式。
分别为:
- 默认样式
- 单选样式
- 多选样式
- 自定义样式
接下来我会通过代码实现这些样式
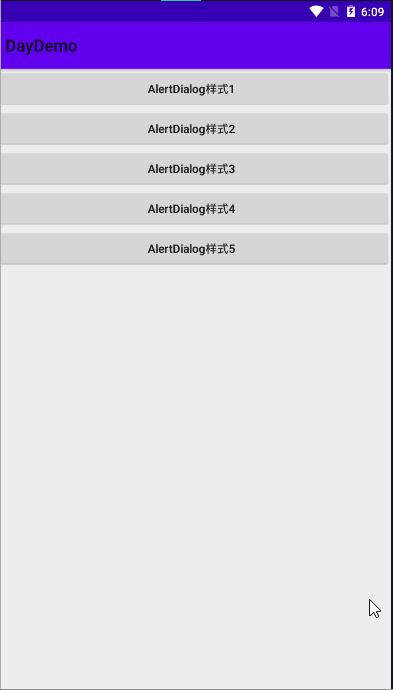
首先实现布局页面:
activity_dialog.xml
<?xml version="1.0" encoding="utf-8"?>
<LinearLayout xmlns:android="http://schemas.android.com/apk/res/android"
    xmlns:app="http://schemas.android.com/apk/res-auto"
    xmlns:tools="http://schemas.android.com/tools"
    android:layout_width="match_parent"
    android:layout_height="match_parent"
    tools:context=".DialogActivity"
    android:orientation="vertical"
    >
    <Button
        android:id="@+id/btn_dialog1"
        android:layout_width="match_parent"
        android:layout_height="wrap_content"
        android:text="AlertDialog样式1"
        />
    <Button
        android:id="@+id/btn_dialog2"
        android:layout_width="match_parent"
        android:layout_height="wrap_content"
        android:text="AlertDialog样式2"
        />
    <Button
        android:id="@+id/btn_dialog3"
        android:layout_width="match_parent"
        android:layout_height="wrap_content"
        android:text="AlertDialog样式3"
        />
    <Button
        android:id="@+id/btn_dialog4"
        android:layout_width="match_parent"
        android:layout_height="wrap_content"
        android:text="AlertDialog样式4"
        />
    <Button
        android:id="@+id/btn_dialog5"
        android:layout_width="match_parent"
        android:layout_height="wrap_content"
        android:text="AlertDialog样式5"
        />
</LinearLayout>
实现五种不同的样式AlertDialog
在DialogActivity 中实现,代码如下,具体详解已经在注释中给出
public class DialogActivity extends AppCompatActivity implements View.OnClickListener {
    private Button btn_dialog1;
    private Button btn_dialog2;
    private Button btn_dialog3;
    private Button btn_dialog4;
    private Button btn_dialog5;

    @Override
    protected void onCreate(Bundle savedInstanceState) {
        super.onCreate(savedInstanceState);
        setContentView(R.layout.activity_dialog);
        btn_dialog1 = findViewById(R.id.btn_dialog1);
        btn_dialog2 = findViewById(R.id.btn_dialog2);
        btn_dialog3 = findViewById(R.id.btn_dialog3);
        btn_dialog4 = findViewById(R.id.btn_dialog4);
        btn_dialog5 = findViewById(R.id.btn_dialog5);

        btn_dialog1.setOnClickListener(this);
        btn_dialog2.setOnClickListener(this);
        btn_dialog3.setOnClickListener(this);
        btn_dialog4.setOnClickListener(this);
        btn_dialog5.setOnClickListener(this);
    }

    @Override
    public void onClick(View v) {
        switch (v.getId()) {
            case R.id.btn_dialog1:
                AlertDialog.Builder builder = new AlertDialog.Builder(DialogActivity.this);
                builder.setTitle("请选择").setMessage("你确定要退出吗?")
                        .setIcon(R.drawable.background) //设置图标
                        .setPositiveButton("确定", new DialogInterface.OnClickListener() {
                            @Override
                            public void onClick(DialogInterface dialog, int which) {
                                Toast.makeText(DialogActivity.this, "确定", Toast.LENGTH_SHORT).show();
                            }
                        }).setNeutralButton("我再想想", new DialogInterface.OnClickListener() {
                    @Override
                    public void onClick(DialogInterface dialog, int which) {
                        Toast.makeText(DialogActivity.this, "我再想想", Toast.LENGTH_SHORT).show();
                    }
                }).setNegativeButton("取消", new DialogInterface.OnClickListener() {
                    @Override
                    public void onClick(DialogInterface dialog, int which) {
                        Toast.makeText(DialogActivity.this, "取消", Toast.LENGTH_SHORT).show();
                    }
                }).show();
                break;
            case R.id.btn_dialog2:
                String[] array = new String[]{"男","女"};
                AlertDialog.Builder builder1 = new AlertDialog.Builder(DialogActivity.this);
                builder1.setTitle("选择性别").setSingleChoiceItems(array, 0, new DialogInterface.OnClickListener() {
                    @Override
                    public void onClick(DialogInterface dialog, int which) {
                        Toast.makeText(DialogActivity.this, array[which]+"", Toast.LENGTH_SHORT).show();
                    }
                }).show();
                break;
            case R.id.btn_dialog3:
                String[] array2 = new String[]{"男","女"};
                AlertDialog.Builder builder3 = new AlertDialog.Builder(DialogActivity.this);
                builder3.setTitle("选择性别").setSingleChoiceItems(array2, 0, new DialogInterface.OnClickListener() {
                    @Override
                    public void onClick(DialogInterface dialog, int which) {
                        Toast.makeText(DialogActivity.this, array2[which]+"", Toast.LENGTH_SHORT).show();
                        dialog.dismiss();  //选中其中任何一项后,对话框消失
                    }
                }).setCancelable(false).show(); //setCancelable 如果没有选择任何一项,点击隐形部分,对话框不会消失
                break;
            case R.id.btn_dialog4:
                String[] array1 = new String[]{"读书","运动","旅游","写代码"};
                boolean[] isChecked = new boolean[]{true,false,false,false,false};
                AlertDialog.Builder builder2 = new AlertDialog.Builder(DialogActivity.this);
                builder2.setTitle("选择兴趣").setMultiChoiceItems(array1, isChecked, new DialogInterface.OnMultiChoiceClickListener() {
                    @Override
                    public void onClick(DialogInterface dialog, int which, boolean isChecked) {
                        Toast.makeText(DialogActivity.this, array1[which]+":"+isChecked, Toast.LENGTH_SHORT).show();
                    }
                }).setPositiveButton("确定", new DialogInterface.OnClickListener() {
                    @Override
                    public void onClick(DialogInterface dialog, int which) {

                    }
                }).setNegativeButton("取消", new DialogInterface.OnClickListener() {
                    @Override
                    public void onClick(DialogInterface dialog, int which) {

                    }
                }).show();
                break;
            case R.id.btn_dialog5:
                AlertDialog.Builder builder5 = new AlertDialog.Builder(DialogActivity.this);
                View view = LayoutInflater.from(this).inflate(R.layout.layout_dialog, null);
                EditText editUserName = view.findViewById(R.id.et_username);
                EditText editPassword = view.findViewById(R.id.et_password);
                Button button = view.findViewById(R.id.btn_login);
                button.setOnClickListener(new View.OnClickListener() {
                    @Override
                    public void onClick(View v) {
                        Toast.makeText(DialogActivity.this, "用户名:"+editUserName.getText().toString()+",密码:"+editPassword.getText().toString(), Toast.LENGTH_SHORT).show();
                    }
                });
                builder5.setTitle("请先登录!").setView(view)
                        .show();
                break;
            default:
                break;
        }
    }
}
效果图如图所示:

以上是关于Android 中AlertDialog警告对话框的使用的主要内容,如果未能解决你的问题,请参考以下文章