深度学习和目标检测系列教程 15-300:在 Python 中使用 OpenCV 执行 YOLOv3 对象检测
Posted 刘润森!
tags:
篇首语:本文由小常识网(cha138.com)小编为大家整理,主要介绍了深度学习和目标检测系列教程 15-300:在 Python 中使用 OpenCV 执行 YOLOv3 对象检测相关的知识,希望对你有一定的参考价值。
@Author:Runsen
上次讲了yolov3,这是使用yolov3的模型通过opencv的摄像头来执行YOLOv3 对象检测。
导入所需模块:
import cv2
import numpy as np
import time
让我们定义一些我们需要的变量和参数:
CONFIDENCE = 0.5
SCORE_THRESHOLD = 0.5
IOU_THRESHOLD = 0.5

# network configuration
config_path = "cfg/yolov3.cfg"
# YOLO net weights
weights_path = "weights/yolov3.weights"
#  coco class labels (objects)
labels = open("data/coco.names").read().strip().split("\\n")
# 每一个对象的检测框的颜色
colors = np.random.randint(0, 255, size=(len(LABELS), 3), dtype="uint8")
config_path和weights_path 分别代表yolov3模型配置 和对应的预训练模型权重。
- yolov3.cfg下载:https://github.com/pjreddie/darknet/blob/master/cfg/yolov3.cfg
- coco.names下载:https://github.com/pjreddie/darknet/blob/master/data/coco.names
- yolov3.weights下载:https://pjreddie.com/media/files/yolov3.weights
labels是检测的不同对象的所有类标签的列表,生成随机颜色
是因为有很多类的存在。
下面的代码加载模型:
net = cv2.dnn.readNetFromDarknet(config_path, weights_path)
先加载一个示例图像:

path_name = "test.jpg"
image = cv2.imread(path_name)
file_name = os.path.basename(path_name)
filename, ext = file_name.split(".")
h, w = image.shape[:2]
接下来,需要对这个图像进行归一化、缩放和整形,使其适合作为神经网络的输入:
# create 4D blob
blob = cv2.dnn.blobFromImage(image, 1/255.0, (416, 416), swapRB=True, crop=False)
这会将像素值标准化为从0到1 的范围,将图像大小调整为(416, 416)并对其进行缩放
print("image.shape:", image.shape)
print("blob.shape:", blob.shape)

image.shape: (1200, 1800, 3)
blob.shape: (1, 3, 416, 416)
现在让我们将此图像输入神经网络以获得输出预测:
# 将blob设置为网络的输入
net.setInput(blob)
# 获取所有图层名称
ln = net.getLayerNames()
ln = [ln[i[0] - 1] for i in net.getUnconnectedOutLayers()]
#得到网络输出
#测量一下时间花费
start = time.perf_counter()
layer_outputs = net.forward(ln)
time_took = time.perf_counter() - start
print(f"Time took: {time_took:.2f}s")

boxes, confidences, class_ids = [], [], []

# 在每个层输出上循环
for output in layer_outputs:
    # 在每一个物体上循环
    '''
    detection.shape等于85,前4 个值代表物体的位置,(x, y)坐标为中心点和边界框的宽度和高度,其余数字对应物体标签,因为这是COCO 数据集,它有80类标签。

例如,如果检测到的对象是人,则80长度向量中的第一个值应为1,其余所有值应为0,自行车的第二个数字,汽车的第三个数字,一直到第 80 个对象。然后使用np.argmax()
函数来获取类 id 的原因,因为它返回80长度向量中最大值的索引。
'''
	for detection in output:
        # 提取类id(标签)和置信度(作为概率)
        # 当前目标检测
        scores = detection[5:]
        class_id = np.argmax(scores)
        confidence = scores[class_id]
        if confidence > CONFIDENCE:
            # 将边界框坐标相对于
            # 图像的大小,记住YOLO实际上
            # 返回边界的中心(x,y)坐标
            # 框,然后是框的宽度和高度
            box = detection[:4] * np.array([w, h, w, h])
            (centerX, centerY, width, height) = box.astype("int")

            # 使用中心(x,y)坐标导出x和y
            # 和边界框的左角
            x = int(centerX - (width / 2))
            y = int(centerY - (height / 2))

            # 更新边界框坐标,信任度,和类ID
            boxes.append([x, y, int(width), int(height)])
            confidences.append(float(confidence))
            class_ids.append(class_id)
#根据前面定义的分数执行非最大值抑制
idxs = cv2.dnn.NMSBoxes(boxes, confidences, SCORE_THRESHOLD, IOU_THRESHOLD)
font_scale = 1
thickness = 1
# 确保至少存在一个检测
if len(idxs) > 0:
    # 循环查看我们保存的索引
    for i in idxs.flatten():
        # 提取边界框坐标
        x, y = boxes[i][0], boxes[i][1]
        w, h = boxes[i][2], boxes[i][3]
        # 在图像上绘制边框矩形和标签
        color = [int(c) for c in colors[class_ids[i]]]
        cv2.rectangle(image, (x, y), (x + w, y + h), color=color, thickness=thickness)
        text = f"{labels[class_ids[i]]}: {confidences[i]:.2f}"
        # 计算文本宽度和高度以绘制透明框作为文本背景
        (text_width, text_height) = cv2.getTextSize(text, cv2.FONT_HERSHEY_SIMPLEX, fontScale=font_scale, thickness=thickness)[0]
        text_offset_x = x
        text_offset_y = y - 5
        box_coords = ((text_offset_x, text_offset_y), (text_offset_x + text_width + 2, text_offset_y - text_height))
        overlay = image.copy()
        cv2.rectangle(overlay, box_coords[0], box_coords[1], color=color, thickness=cv2.FILLED)
        #添加(长方体的透明度)
        image = cv2.addWeighted(overlay, 0.6, image, 0.4, 0)
        cv2.putText(image, text, (x, y - 5), cv2.FONT_HERSHEY_SIMPLEX,
            fontScale=font_scale, color=(0, 0, 0), thickness=thickness)

cv2.imwrite(filename + "_yolo3." + ext, image)
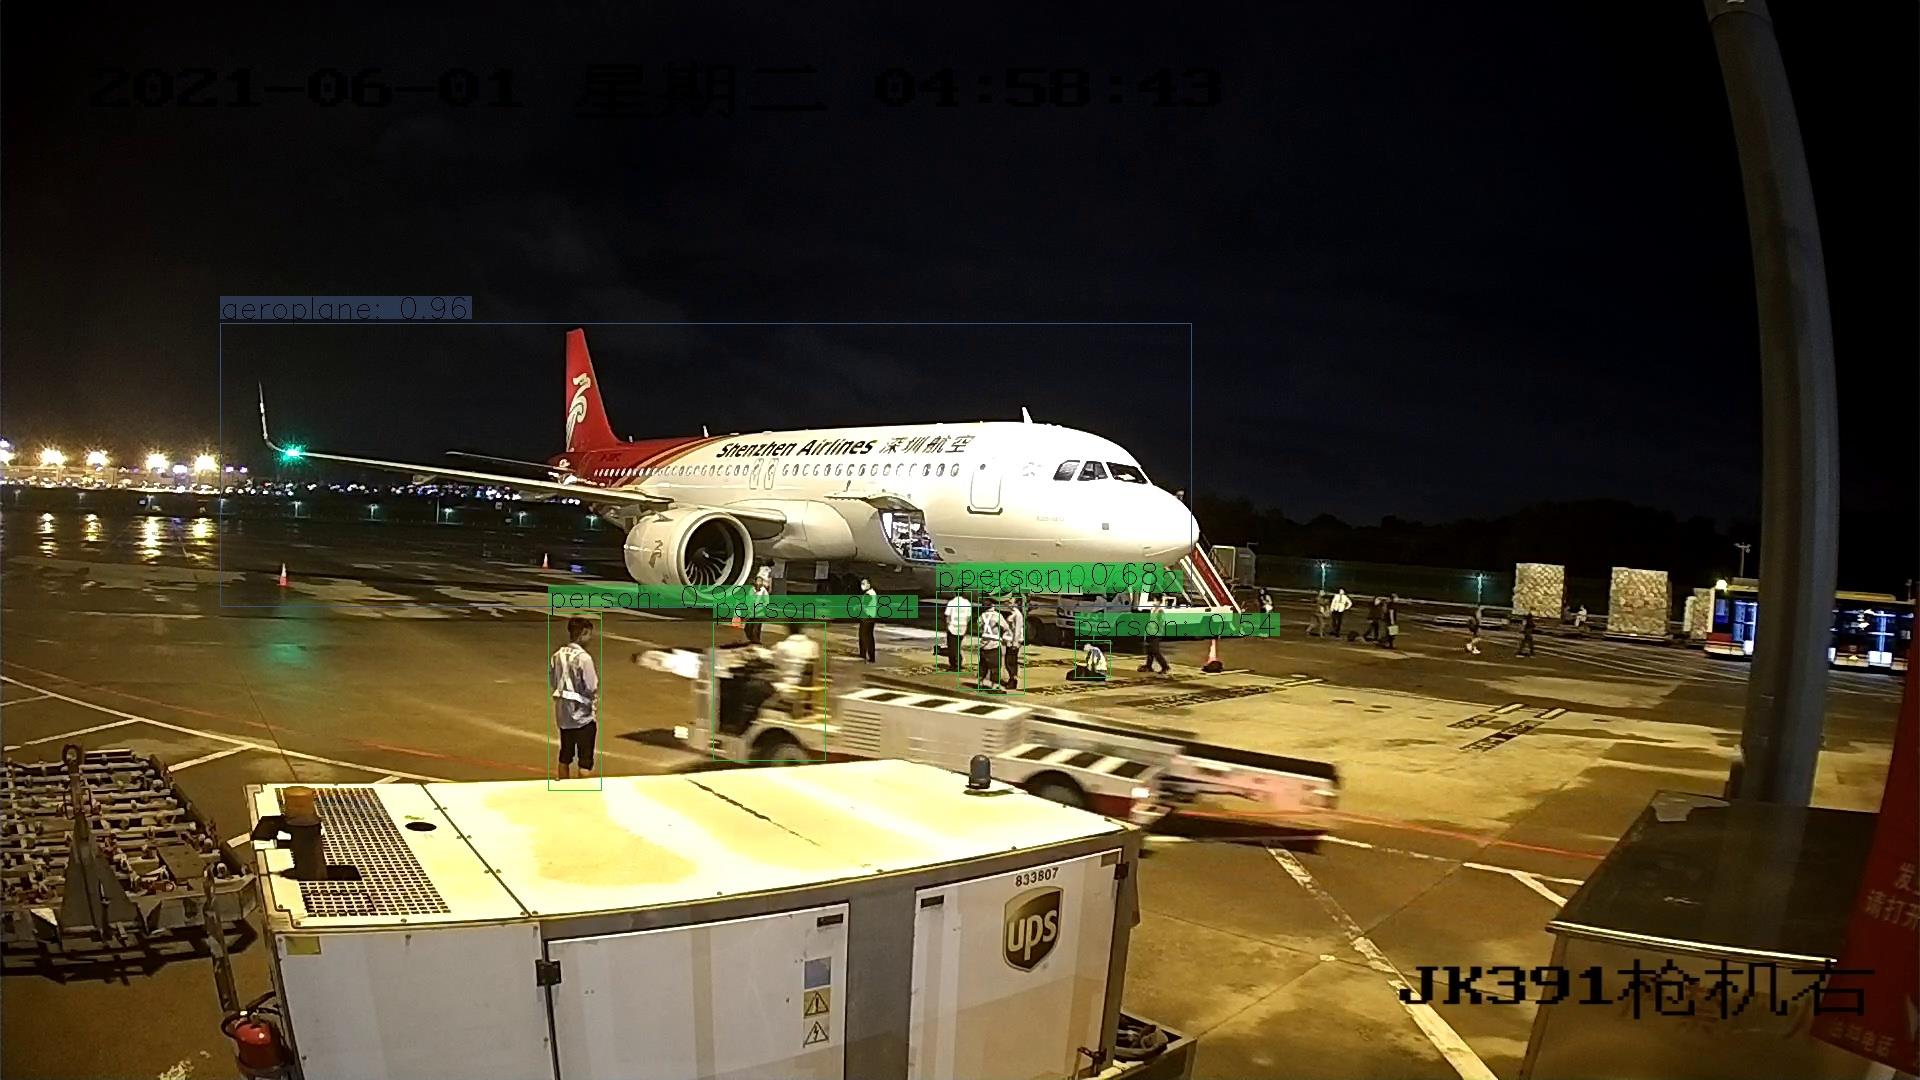
一张图片的时间需要1.3秒。
Time took: 1.32s
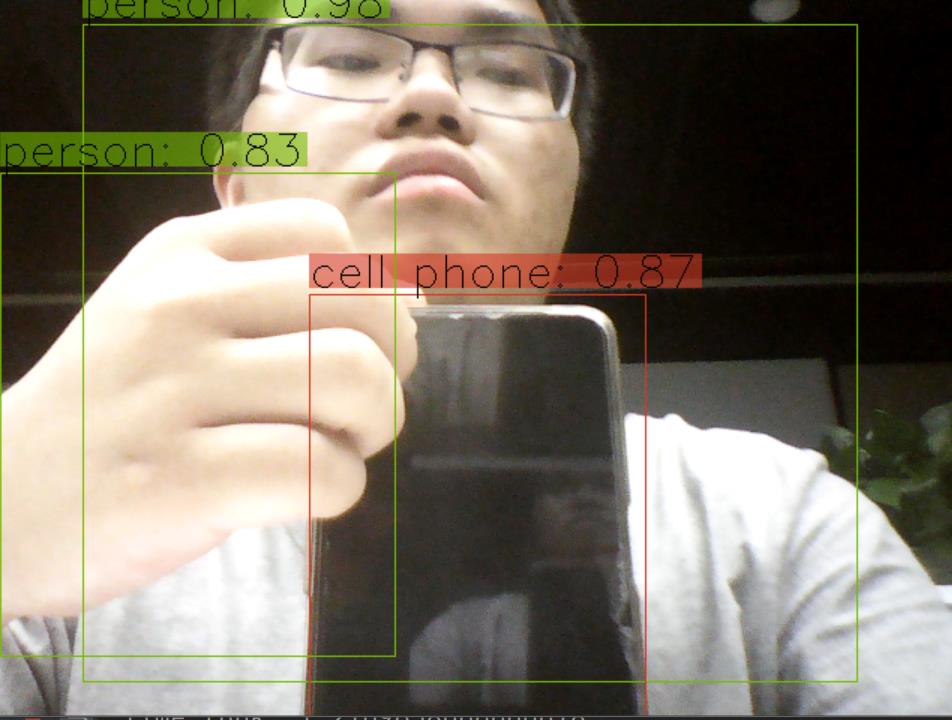
下面结合opencv读取摄像头的功能,实现摄像头的拍摄画面的识别
import cv2
import numpy as np
import time
CONFIDENCE = 0.5
SCORE_THRESHOLD = 0.5
IOU_THRESHOLD = 0.5
config_path = "cfg/yolov3.cfg"
weights_path = "weights/yolov3.weights"
font_scale = 1
thickness = 1
LABELS = open("data/coco.names").read().strip().split("\\n")
COLORS = np.random.randint(0, 255, size=(len(LABELS), 3), dtype="uint8")
net = cv2.dnn.readNetFromDarknet(config_path, weights_path)
ln = net.getLayerNames()
ln = [ln[i[0] - 1] for i in net.getUnconnectedOutLayers()]
cap = cv2.VideoCapture(0)
while True:
    _, image = cap.read()
    h, w = image.shape[:2]
    blob = cv2.dnn.blobFromImage(image, 1/255.0, (416, 416), swapRB=True, crop=False)
    net.setInput(blob)
    start = time.perf_counter()
    layer_outputs = net.forward(ln)
    time_took = time.perf_counter() - start
    print("Time took:", time_took)
    boxes, confidences, class_ids = [], [], []
    for output in layer_outputs:
        for detection in output:
            scores = detection[5:]
            class_id = np.argmax(scores)
            confidence = scores[class_id]
            if confidence > CONFIDENCE:
                box = detection[:4] * np.array([w, h, w, h])
                (centerX, centerY, width, height) = box.astype("int")
                x = int(centerX - (width / 2))
                y = int(centerY - (height / 2))
                boxes.append([x, y, int(width), int(height)])
                confidences.append(float(confidence))
                class_ids.append(class_id)
    idxs = cv2.dnn.NMSBoxes(boxes, confidences, SCORE_THRESHOLD, IOU_THRESHOLD)
    font_scale = 1
    thickness = 1
    if len(idxs) > 0:
        for i in idxs.flatten():
            x, y = boxes[i][0], boxes[i][1]
            w, h = boxes[i][2], boxes[i][3]
            color = [int(c) for c in COLORS[class_ids[i]]]
            cv2.rectangle(image, (x, y), (x + w, y + h), color=color, thickness=thickness)
            text = f"{LABELS[class_ids[i]]}: {confidences[i]:.2f}"
            (text_width, text_height) = cv2.getTextSize(text, cv2.FONT_HERSHEY_SIMPLEX, fontScale=font_scale, thickness=thickness)[0]
            text_offset_x = x
            text_offset_y = y - 5
            box_coords = ((text_offset_x, text_offset_y), (text_offset_x + text_width + 2, text_offset_y - text_height))
            overlay = image.copy()
            cv2.rectangle(overlay, box_coords[0], box_coords[1], color=color, thickness=cv2.FILLED)
            image = cv2.addWeighted(overlay, 0.6, image, 0.4, 0)
            cv2.putText(image, text, (x, y - 5), cv2.FONT_HERSHEY_SIMPLEX,
                fontScale=font_scale, color=(0, 0, 0), thickness=thickness)

    cv2.imshow("image", image)
    if ord("q") == cv2.waitKey(1):
        break

cap.release()
cv2.destroyAllWindows()
以上是关于深度学习和目标检测系列教程 15-300:在 Python 中使用 OpenCV 执行 YOLOv3 对象检测的主要内容,如果未能解决你的问题,请参考以下文章
深度学习和目标检测系列教程 1-300:什么是对象检测和常见的8 种基础目标检测算法
深度学习和目标检测系列教程 4-300:目标检测入门之目标变量和损失函数
深度学习和目标检测系列教程 13-300:YOLO 物体检测算法
深度学习和目标检测系列教程 3-300:了解常见的目标检测的开源数据集