springBoot 整合shiro
Posted 雨后星辰zxj
tags:
篇首语:本文由小常识网(cha138.com)小编为大家整理,主要介绍了springBoot 整合shiro相关的知识,希望对你有一定的参考价值。
1.导入依赖
 1     <!--集成shiro-->
 2         <dependency>
 3             <groupId>org.apache.shiro</groupId>
 4             <artifactId>shiro-spring</artifactId>
 5             <version>1.5.3</version>
 6         </dependency>
 7         <!--shiro整合thymeleaf  shiro前端标签  -->
 8         <dependency>
 9             <groupId>com.github.theborakompanioni</groupId>
10             <artifactId>thymeleaf-extras-shiro</artifactId>
11             <version>2.0.0</version>
12         </dependency>
13
2.配置
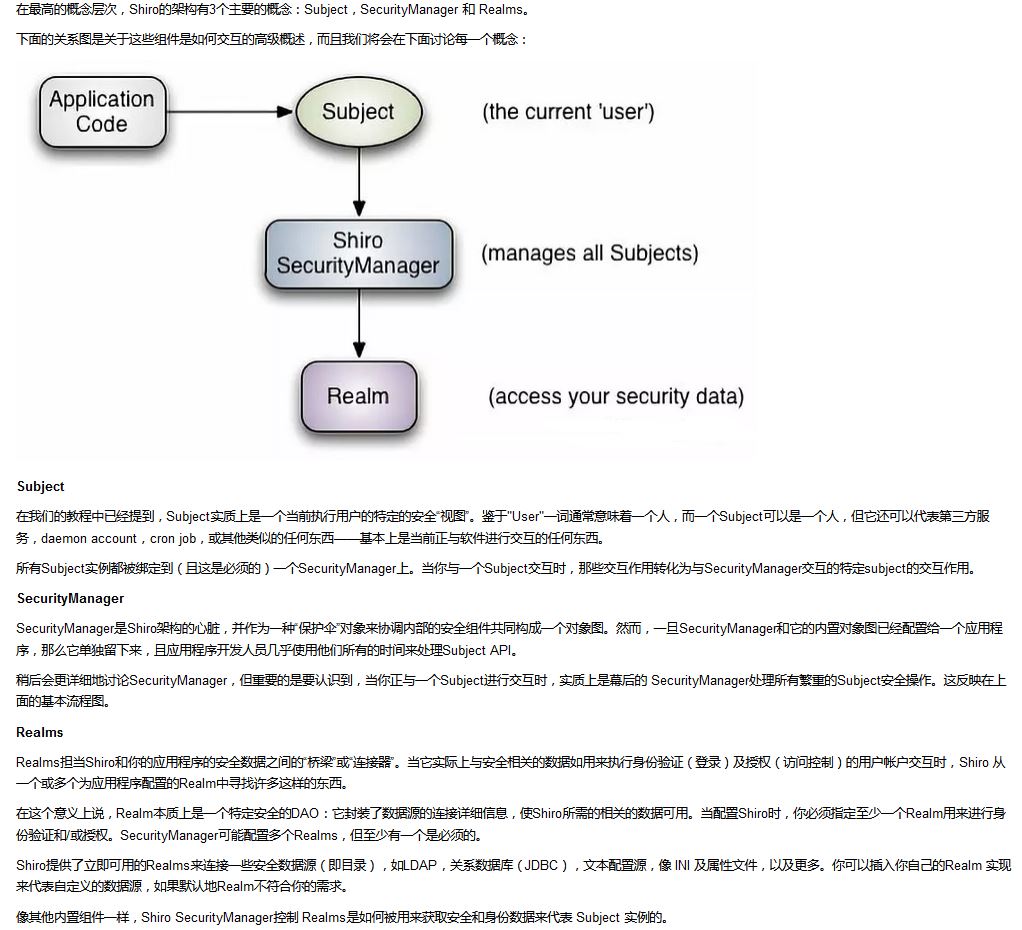
创建对象的顺序是自定义的Realm对象 然后是DefaultWebSecurityManager , 最后是ShiroFilterFactoryBean
 1 import at.pollux.thymeleaf.shiro.dialect.ShiroDialect;
 2 import org.apache.shiro.spring.web.ShiroFilterFactoryBean;
 3 import org.apache.shiro.web.mgt.DefaultWebSecurityManager;
 4 import org.springframework.beans.factory.annotation.Qualifier;
 5 import org.springframework.context.annotation.Bean;
 6 import org.springframework.context.annotation.Configuration;
 7
 8 import java.util.LinkedHashMap;
 9 import java.util.Map;
10
11 @Configuration
12 public class ShiroConfig {
13     /**
14      * 3大对象  ShiroFilterFactoryBean DefaultWebSecurityManager 自定义的Realm对象
15      * 创建步骤   3                     2                               1
16      */
17
18     @Bean
19     public ShiroFilterFactoryBean getShiroFilterFactoryBean(DefaultWebSecurityManager t){
20         ShiroFilterFactoryBean shiroFilterFactoryBean = new ShiroFilterFactoryBean();
21         //Shiro的核心安全接口,这个属性是必须的
22         shiroFilterFactoryBean.setSecurityManager(t);
23
24         //对没有登录的请求进行拦截   全部返回json信息. 覆盖掉shiro原本的跳转login.jsp的拦截方式
25 //        Map<String, Filter> filterMap = new LinkedHashMap<>();
26 //        filterMap.put("authc", new AjaxPermissionsAuthorizationFilter());
27 //        shiroFilterFactoryBean.setFilters(filterMap);
28
29         //对没有登录的请求进行拦截   设置跳转的页面
30         shiroFilterFactoryBean.setLoginUrl("/toLogin");
31         //未授权页面
32         shiroFilterFactoryBean.setUnauthorizedUrl("/noauth");
33
34         /**
35          * 添加shiro的内置过滤器
36          * anon:无需认证就能访问
37          * authc:必须认证才能访问
38          * user: 必须拥有 记住我 功能才能使用
39          * perms: 拥有对某个资源的权限才能访问
40          * role: 拥有某个角色权限
41          */
42         /*定义shiro过滤链  Map结构
43          * Map中key(xml中是指value值)的第一个\'/\'代表的路径是相对于HttpServletRequest.getContextPath()的值来的
44          * 由于是链式的,推荐使用LinkedHashMap
45          */
46         Map<String, String> filterChainDefinitionMap = new LinkedHashMap<>();
47          /* 过滤链定义,从上向下顺序执行,一般将 / ** 放在最为下边:这是一个坑呢,一不小心代码就不好使了;
48           authc:所有url都必须认证通过才可以访问; anon:所有url都都可以匿名访问 */
49 //        filterChainDefinitionMap.put("/", "anon");
50 //        filterChainDefinitionMap.put("/add", "authc");
51           filterChainDefinitionMap.put("/add", "perms[user:add]");
52         shiroFilterFactoryBean.setFilterChainDefinitionMap(filterChainDefinitionMap);
53
54
55
56         return shiroFilterFactoryBean;
57     }
58
59     //使用Qualifier添加别名
60     //public DefaultWebSecurityManager getDefaultWebSecurityManager(@Qualifier("userRealm") UserRealm){
61     @Bean
62     public DefaultWebSecurityManager getDefaultWebSecurityManager(){
63         DefaultWebSecurityManager defaultWebSecurityManager = new DefaultWebSecurityManager();
64         defaultWebSecurityManager.setRealm(getUserRealm());
65         return defaultWebSecurityManager;
66     }
67
68     // @Qualifier("userRealm")  也可以使用Qualifier添加别名
69     @Bean
70     public UserRealm getUserRealm(){
71         //自定义的Realm对象
72         return new UserRealm();
73     }
74
75     //用于整合 shiro整合thymeleaf   shiro前端标签   前台未设权限的菜单不显示
76     @Bean
77     public ShiroDialect getShiroDialect(){
78         return  new ShiroDialect();
79     }
80 }
自定义的realm
 1 import com.alibaba.fastjson.JSONObject;
 2 import org.apache.shiro.SecurityUtils;
 3 import org.apache.shiro.authc.*;
 4 import org.apache.shiro.authz.AuthorizationInfo;
 5 import org.apache.shiro.authz.SimpleAuthorizationInfo;
 6 import org.apache.shiro.realm.AuthorizingRealm;
 7 import org.apache.shiro.subject.PrincipalCollection;
 8 import org.apache.shiro.subject.Subject;
 9
10 /**
11  * 自定义Realm
12  * @author Administrator
13  */
14
15 public class UserRealm  extends AuthorizingRealm {
16
17     //授权
18     @Override
19     protected AuthorizationInfo doGetAuthorizationInfo(PrincipalCollection principalCollection) {
20         System.out.println("授权");
21         SimpleAuthorizationInfo simpleAuth = new SimpleAuthorizationInfo();
22         //授予user:add的权限
23         //simpleAuth.addStringPermission("user:add");
24
25         //获取当前登录对象
26         Subject subject = SecurityUtils.getSubject();
27         //认证方法里  创建SimpleAuthorizationInfo  传入的第一个参数
28         Object principal = subject.getPrincipal();
29         // 认证方法里 传入的是userName  所以打印出来是admin
30         System.out.println(principal);
31
32         return simpleAuth;
33     }
34     //认证
35     @Override
36     protected AuthenticationInfo doGetAuthenticationInfo(AuthenticationToken authcToken) throws AuthenticationException {
37         //执行完subject.login(token); 进入认证方法
38         System.out.println("认证");
39         // 获取用户密码
40         String loginName = (String) authcToken.getPrincipal();
41         String password = new String((char[]) authcToken.getCredentials());
42         //后台数据库查询user
43         // 暂时模拟
44         JSONObject user = new JSONObject();
45         user.put("userName","admin");
46         user.put("password","123456");
47         if(!user.getString("userName").equals(loginName)){
48             //没找到帐号
49             throw new UnknownAccountException();
50         }
51         if(!user.getString("password").equals(password)){
52             //没找到帐号
53             throw new IncorrectCredentialsException();
54         }
55         //交给AuthenticatingRealm使用CredentialsMatcher进行密码匹配,如果觉得人家的不好可以自定义实现
56         SimpleAuthenticationInfo authenticationInfo = new SimpleAuthenticationInfo(
57                 user.getString("userName"),
58                 user.getString("password"),
59                 //ByteSource.Util.bytes("salt"), salt=username+salt,采用明文访问时,不需要此句
60                 getName()
61         );
62         //session中不需要保存密码
63         user.remove("password");
64         //将用户信息放入session中
65         SecurityUtils.getSubject().getSession().setAttribute("userInfo", user);
66         return authenticationInfo;
67     }
68 }
后台Controller
 1 @Controller
 2 public class MyController {
 3
 4     @GetMapping({"/","/index"})
 5     public String index(){
 6         return  "index";
 7     }
 8     @GetMapping("/toLogin")
 9     public String toLogin (){
10         return  "login";
11     }
12     @GetMapping("/add")
13     public String add(){
14         return  "add";
15     }
16
17     @GetMapping("/login")
18     public String login (String userName,String password,Model model){
19         //获取当前用户
20         Subject subject = SecurityUtils.getSubject();
21         //封装用户登录数据
22         UsernamePasswordToken token = new UsernamePasswordToken(userName, password);
23
24         try {
25             //执行登录方法
26             subject.login(token);
27         } catch (UnknownAccountException e) {
28             //不存在
29             model.addAttribute("msg","用户不存在");
30             return "login";
31         } catch (IncorrectCredentialsException ice){
32             //密码错误
33             model.addAttribute("msg","密码错误");
34             return "login";
35         }
36         return "index";
37
38     }
39
40     @GetMapping("/noauth")
41     @ResponseBody
42     public String noAuth(){
43         return  "未授权页面";
44     }
45
46 }
前台页面
index.html
<!DOCTYPE html>
<html lang="en" xmlns:th="http://www.thymeleaf.org"
                xmlns:shiro="http://www.thymeleaf.org/thymeleaf-extras-shiro">
<head>
    <meta charset="UTF-8">
    <title>Title</title>
</head>
<body>
    <h4>首页</h4>
    <p th:text="${msg}"></p>
    <a th:href="@{/add}">add</a>
    <br>
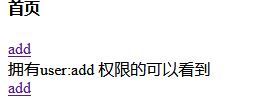
    拥有user:add 权限的可以看到
    <div shiro:hasPermission="user:add">
        <a th:href="@{/add}">add</a>
    </div>

</body>
</html>
login.html
 1 <!DOCTYPE html>
 2 <html lang="en" xmlns:th="http://www.thymeleaf.org">
 3 <head>
 4     <meta charset="UTF-8">
 5     <title>Title</title>
 6 </head>
 7 <body>
 8 <p style="color: red" th:text="${msg}"></p>
 9     <form th:action="@{/login}" >
10         <p>userName:<input type="text" name="userName" value=""></p>
11         <br>
12         <p>password:<input type="password" name="password" value=""></p>
13         <br>
14         <input type="submit"  value="登录">
15     </form>
16 </body>
17 </html>
add.html
<!DOCTYPE html>
<html lang="en">
<head>
    <meta charset="UTF-8">
    <title>Title</title>
</head>
<body>
    <h4>welcome to add.html</h4>
</body>
</html>
页面效果
没有登录时
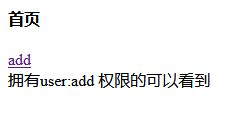
点击add
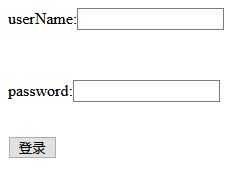
登录成功后,当前账号没有add权限
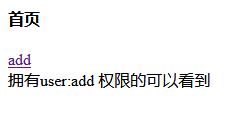
再次点击add

登录成功后,当前账号有add权限
点击add

以上是关于springBoot 整合shiro的主要内容,如果未能解决你的问题,请参考以下文章