Shiro整合Springboot缓存之Redis实现
Posted mry6
tags:
篇首语:本文由小常识网(cha138.com)小编为大家整理,主要介绍了Shiro整合Springboot缓存之Redis实现相关的知识,希望对你有一定的参考价值。
Shiro整合Springboot缓存之Redis实现
Redis 下载安装
Windows系统中Redis 下载安装
其它的代码实现可以参考:Springboot整合Shiro
引入redis依赖
<!--redis整合springboot-->
<dependency>
    <groupId>org.springframework.boot</groupId>
    <artifactId>spring-boot-starter-data-redis</artifactId>
</dependency>
配置redis连接
spring.redis.port=6379
spring.redis.host=localhost
spring.redis.database=0
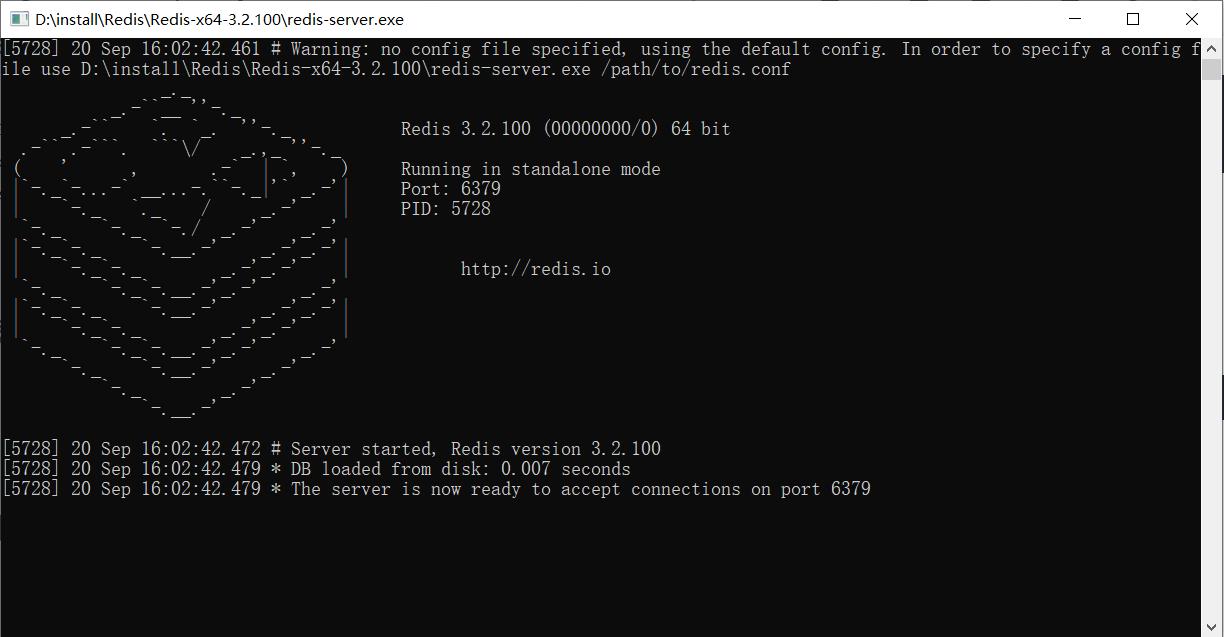
启动redis服务

自定义redis缓存的实现
/**
 * 自定义redis缓存的实现
 */
public class RedisCache<k,v> implements Cache<k,v> {

    private String cacheName;

    public RedisCache() {

    }

    public RedisCache(String cacheName) {
        this.cacheName = cacheName;
    }

    @Override
    public v get(k k) throws CacheException {
        System.out.println("put key:" + k);
        //return (v) getRedisTemplate().opsForValue().get(k.toString());
        return (v) getRedisTemplate().opsForHash().get(this.cacheName, k.toString());
    }

    @Override
    public v put(k k, v v) throws CacheException {
        System.out.println("put key:" + k);
        System.out.println("put value:" + v);
        //getRedisTemplate().opsForValue().set(k.toString(),v);
        getRedisTemplate().opsForHash().put(this.cacheName, k.toString(), v);
        return null;
    }

    @Override
    public v remove(k k) throws CacheException {
        return (v)getRedisTemplate().opsForHash().delete(this.cacheName, k.toString());
    }

    @Override
    public void clear() throws CacheException {
        getRedisTemplate().delete(this.cacheName);
    }

    @Override
    public int size() {
        return getRedisTemplate().opsForHash().size(this.cacheName).intValue();
    }

    @Override
    public Set<k> keys() {
        return getRedisTemplate().opsForHash().keys(this.cacheName);
    }

    @Override
    public Collection<v> values() {
        return getRedisTemplate().opsForHash().values(this.cacheName);
    }

    public RedisTemplate getRedisTemplate(){
        RedisTemplate redisTemplate = (RedisTemplate)ApplicationContextUtils.getBean("redisTemplate");
        redisTemplate.setKeySerializer(new StringRedisSerializer());
        redisTemplate.setHashKeySerializer(new StringRedisSerializer());
        return redisTemplate;
    }
}
自定义shiro缓存管理器
/**
 * 自定义shiro缓存管理器
 */
public class RedisCacheManager implements CacheManager {

    /**
     *
     * @param cacheName  认证或者授权缓存的统一名称
     * @param <K>
     * @param <V>
     * @return
     * @throws CacheException
     */
    @Override
    public <K, V> Cache<K, V> getCache(String cacheName) throws CacheException {
        System.out.println(cacheName);
        return new RedisCache<>(cacheName);
    }
}
自定义salt实现 实现序列化接口
/**
 * 自定义salt实现 实现序列化接口
 */
public class MyByteSource extends SimpleByteSource implements Serializable {

    public MyByteSource(String string){
        super(string);
    }
}
自定义Realm改造
/**
 * 认证
 * @param token
 * @return
 * @throws AuthenticationException
 */
@Override
protected AuthenticationInfo doGetAuthenticationInfo(AuthenticationToken token) throws AuthenticationException {
    System.out.println("=====");
    String principal = (String) token.getPrincipal();

   /**
   * redis缓存使用后,自定义salt实现 实现序列化接口
   */
    UserService userService = (UserService) ApplicationContextUtils.getBean("userService");
    User user = userService.findByUserName(principal);
    if(!ObjectUtils.isEmpty(user)){
        return new SimpleAuthenticationInfo(user.getUsername(),user.getPassword(),
                new MyByteSource(user.getSalt()),this.getName());
    }

    return null;

}
开启redis缓存
//3.创建自定义Realm
@Bean
public Realm getRealm(){
    CustomerRealm customerRealm = new CustomerRealm();
    //修改凭证校验匹配器
    HashedCredentialsMatcher credentialsMatcher = new HashedCredentialsMatcher();
    //设置加密算法为md5
    credentialsMatcher.setHashAlgorithmName("MD5");
    //设置散列次数
    credentialsMatcher.setHashIterations(1024);
    customerRealm.setCredentialsMatcher(credentialsMatcher);

    //开启redis缓存管理
    customerRealm.setCacheManager(new RedisCacheManager());
    customerRealm.setCachingEnabled(true);  //开启全局缓存
    customerRealm.setAuthenticationCachingEnabled(true);  //开启认证缓存
    customerRealm.setAuthenticationCacheName("authenticationCache");
    customerRealm.setAuthorizationCachingEnabled(true);  //开启授权缓存
    customerRealm.setAuthorizationCacheName("authorizationCache");

    return customerRealm;
}
以上是关于Shiro整合Springboot缓存之Redis实现的主要内容,如果未能解决你的问题,请参考以下文章
Springboot2.x+shiro+redis整合填坑 redis只做缓存的情况