Centos 7搭建Gitlab服务器
Posted yanux
tags:
篇首语:本文由小常识网(cha138.com)小编为大家整理,主要介绍了Centos 7搭建Gitlab服务器相关的知识,希望对你有一定的参考价值。
1、 安装并配置必要的服务
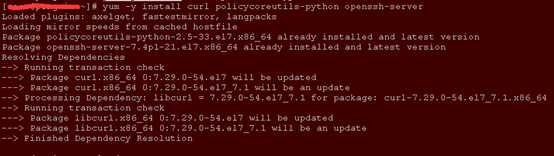
1.1 安装ssh postfix,curl(如无特殊说明,以下命令均以超级用户身份执行)
( 若系统已安装ssh,firewall,postfix(用于邮件通知) ,wget等服务或工具,该步骤可忽略)
yum install -y curl policycoreutils-python openssh-server
1.2. 设置sshd开机启动
systemctl enable sshd
1.3 配置防火墙规则(若防火墙已关闭,此步骤可省略)
添加http服务到firewalld,pemmanent表示永久生效,若不加--permanent系统下次启动后就会失效。
firewall-cmd --permanent --add-service=http
重启防火墙:systemctl reload firewalld
1.4. 安装并配置postfix开机启动
yum -y install postfix
systemctl start postfix
2、添加GitLab镜像源并安装gitlab服务器
2.1 添加gitlab镜像
wget https://mirrors.tuna.tsinghua.edu.cn/gitlab-ce/yum/el7/gitlab-ce-10.0.0-ce.0.el7.x86_64.rpm
2.2 安装gitlab
rpm -i gitlab-ce-10.0.0-ce.0.el7.x86_64.rpm
2.3.修改nginx和gitlab配置文件指定服务器ip和自定义端口
由于配置文件中的默认端口已被系统中其它服务占用,以下修改默认端口为其它未被占用端口(推荐使用端口号大于1024的端口号[1024, 65535])
2.3.1 修改nginx端口:
vi /var/opt/gitlab/nginx/conf/gitlab-http.conf
upstream gitlab-workhorse {
  server unix:/var/opt/gitlab/gitlab-workhorse/socket;
}


server {
  listen *:8089;
2.3.2 修改gitlab配置文件:
vim /etc/gitlab/gitlab.rb

修改external_url ‘http://ip:端口号‘

找到Advanced settings 下的8080端口 将端口改成自己备用端口号

保存配置
2.4 重新加载配置并重启gitlab
sudo gitlab-ctl stop --停止服务
sudo gitlab-ctl reconfigure
gitlab-ctl start --启动服务
3、 访问gitlab页面
浏览器输入http://ip:port,
初始账户: root 密码:5iveL!fe
以上是关于Centos 7搭建Gitlab服务器的主要内容,如果未能解决你的问题,请参考以下文章