Unity Shaders and Effects Cookbook (6-4) GUI 和 透明度
Posted _Captain
tags:
篇首语:本文由小常识网(cha138.com)小编为大家整理,主要介绍了Unity Shaders and Effects Cookbook (6-4) GUI 和 透明度相关的知识,希望对你有一定的参考价值。
在游戏项目中使用透明最多的地方就是 GUI 了。这一节用一个非常简单的 GUI 例子,来熟悉控制透明物体的渲染顺序。
搭建场景,导入随书资源。
创建着色器 GUI,创建两个Material,一个 GUIBG 用于背景图片,一个 GUIGRP 用于 按钮界面。
转自http://blog.csdn.net/huutu http://www.thisisgame.com.cn
把创建的Material 分别赋值给 GUIBG 和 GUIGRP。
场景搭建完毕后 效果如下
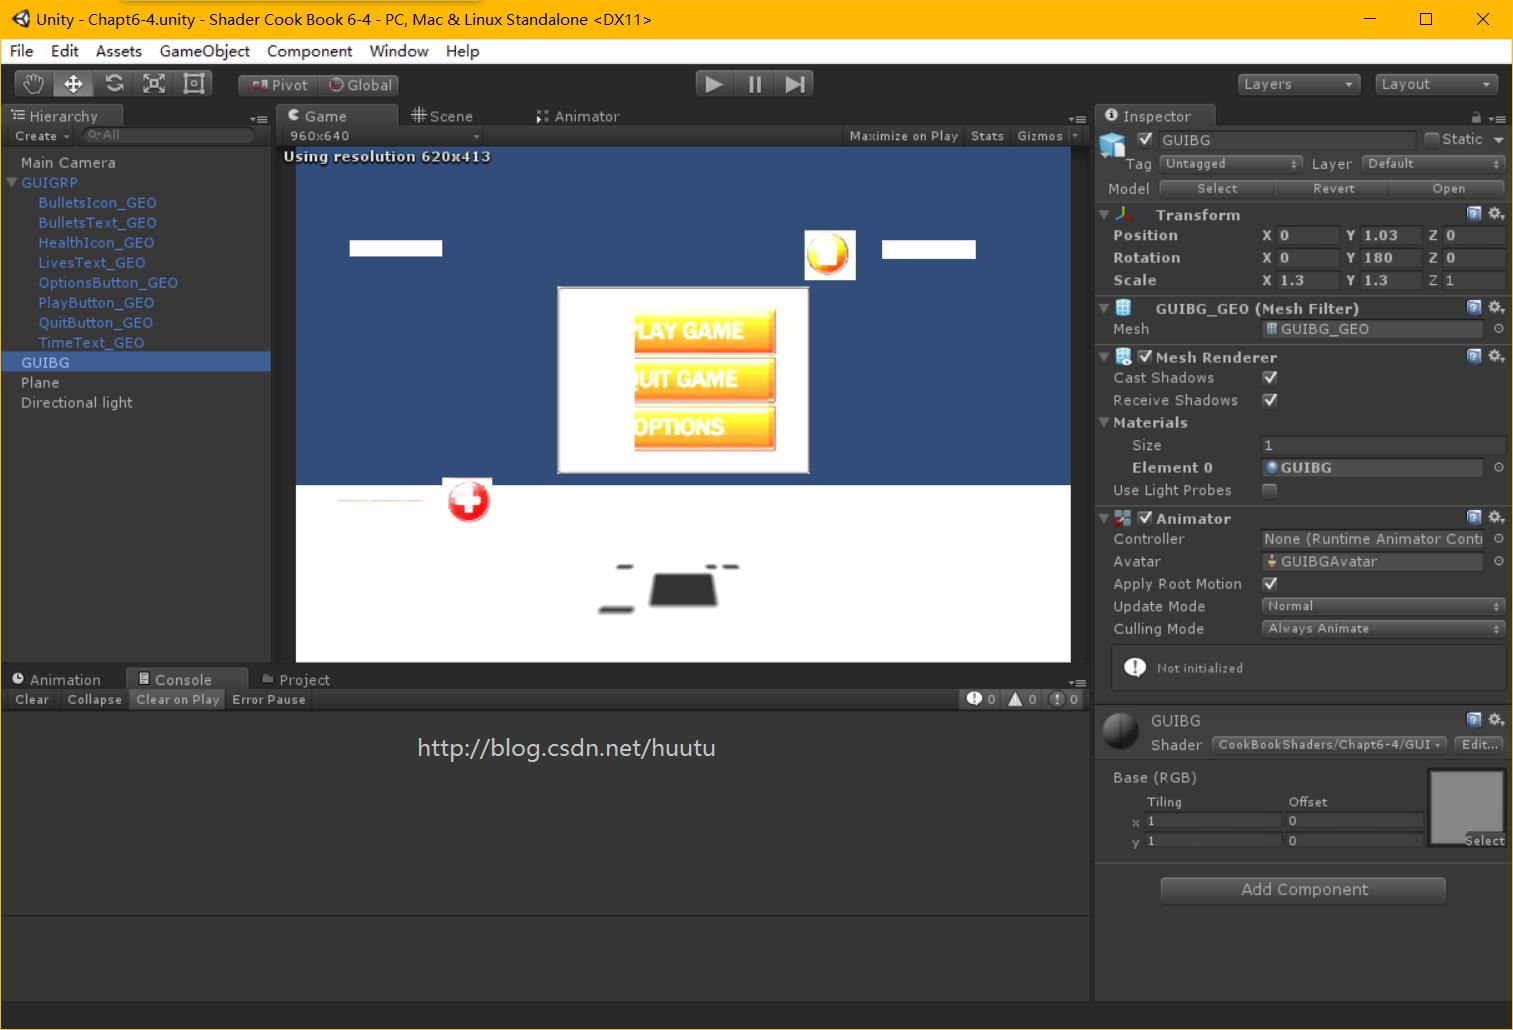
因为创建的Shader 默认是 Diffuse ,所以没有透明度。
我故意把灯光调的很强,是为了设置 不接受灯光 后 对比方便。
下面进行一系列修改。
1、使用 IgnoreProjector 标签 设置不接受Projector。
ags "IgnoreProjector"="True" "RenderType"="Opaque" 因为没有添加Projector 组件,所以这里修改后 场景中没有什么变化。
2、修改渲染队列为 Transparent,修改RenderType 为 Transparent。
Tags "Queue"="Transparent" "IgnoreProjector"="True" "RenderType"="Transparent" 声明Alpha 参数
#pragma surface surf Lambert alpha这时候已经有透明了
3、自定义光照函数 GUI,不接受光照影响
#pragma surface surf GUI alphainline fixed4 LightingGUI(SurfaceOutput s,fixed3 lightDir,fixed3 viewDir,fixed atten)
fixed4 c;
c.rgb=s.Albedo;
c.a=s.Alpha;
return c;
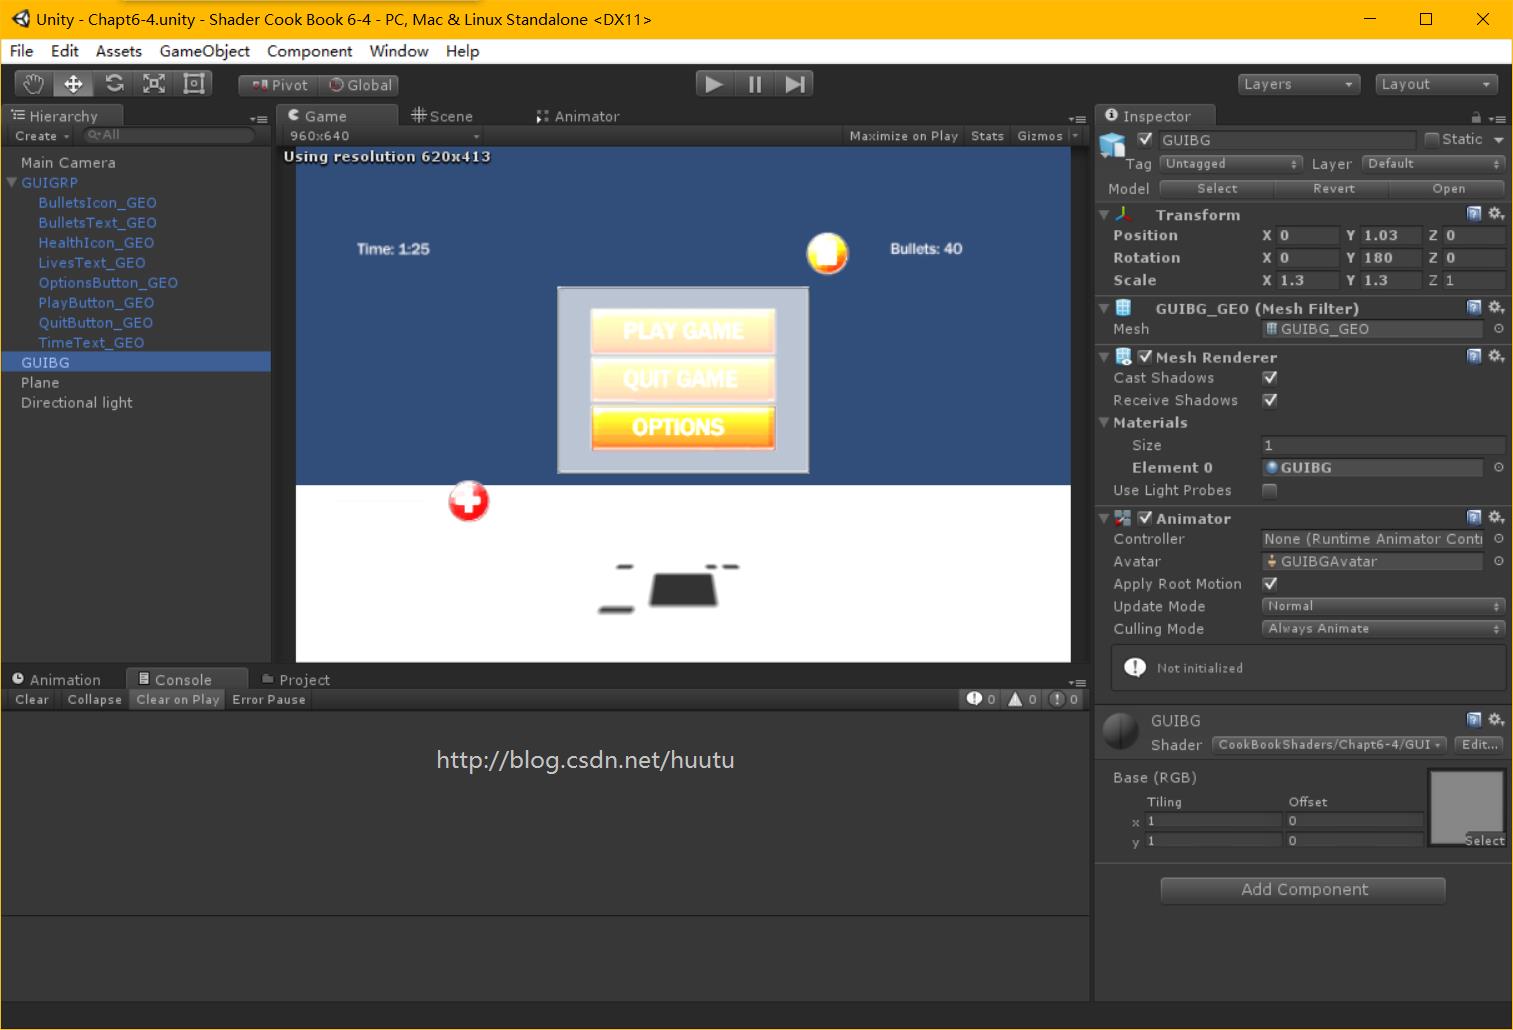
现在已经不受光照影响了。
4、声明 novertexlights 参数,告诉Unity 这里不需要任何顶点级的光照。
#pragma surface surf GUI alpha novertexlights添加 novertexlights 参数,可以让 Shader 更加轻便。
转自http://blog.csdn.net/huutu http://www.thisisgame.com.cn
5、添加 ZWrite Off 、Cull Back
ZWrite Off
Cull Back
LOD 200完整的Shader 代码如下
Shader "CookBookShaders/Chapt6-4/GUI"
Properties
_MainTex ("Base (RGB)", 2D) = "white"
SubShader
Tags "Queue"="Transparent" "IgnoreProjector"="True" "RenderType"="Transparent"
ZWrite Off
Cull Back
LOD 200
CGPROGRAM
#pragma surface surf GUI alpha novertexlights
sampler2D _MainTex;
struct Input
float2 uv_MainTex;
;
void surf (Input IN, inout SurfaceOutput o)
half4 c = tex2D (_MainTex, IN.uv_MainTex);
o.Albedo = c.rgb;
o.Alpha = c.a;
inline fixed4 LightingGUI(SurfaceOutput s,fixed3 lightDir,fixed3 viewDir,fixed atten)

	fixed4 c;
	c.rgb=s.Albedo;
	c.a=s.Alpha;
	return c;
ENDCG
FallBack "Diffuse"
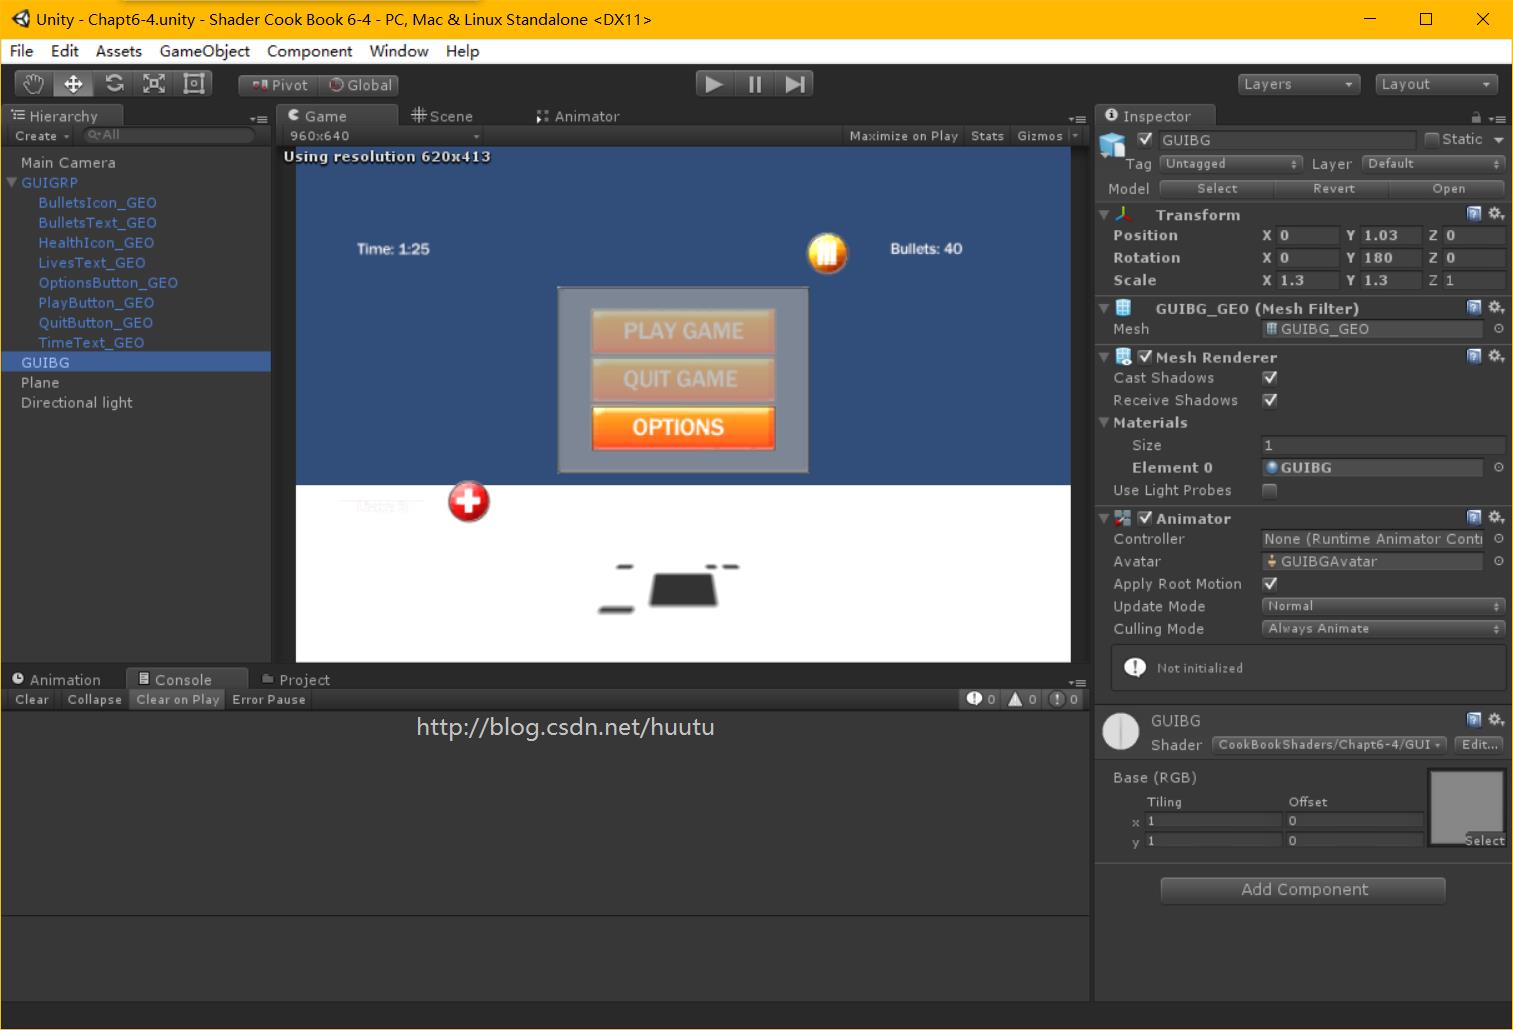
但是还没完,为什么 PLAY GAME 和 QUIT GAME 这两个按钮,被 背景图 遮住了呢?
这是因为默认是由 摄像机的距离来决定渲染顺序的,背景图 和 按钮的 Z 都是0,判断不了哪个先,哪个后。
这种情况,可以单独给 按钮 指定 Queue ,但是这样的话要新建一个Shader,未免太麻烦了。
我们可以从 脚本中去修改 Queue ,只需要创建一个脚本,然后在编辑器中赋不同的值。
创建脚本 RenderQueue.cs 完整代码如下:
using UnityEngine;
using System.Collections;

[ExecuteInEditMode]
public class RenderQueue : MonoBehaviour


    public int queueValue = 2000;

	// Use this for initialization
	void Start ()


	// Update is called once per frame
	void Update ()

        Material curMaterial = transform.renderer.sharedMaterial;
        if(curMaterial)

            curMaterial.renderQueue = queueValue;

        else

            Debug.LogError(transform.name+":  need Material to set the Render Queue");
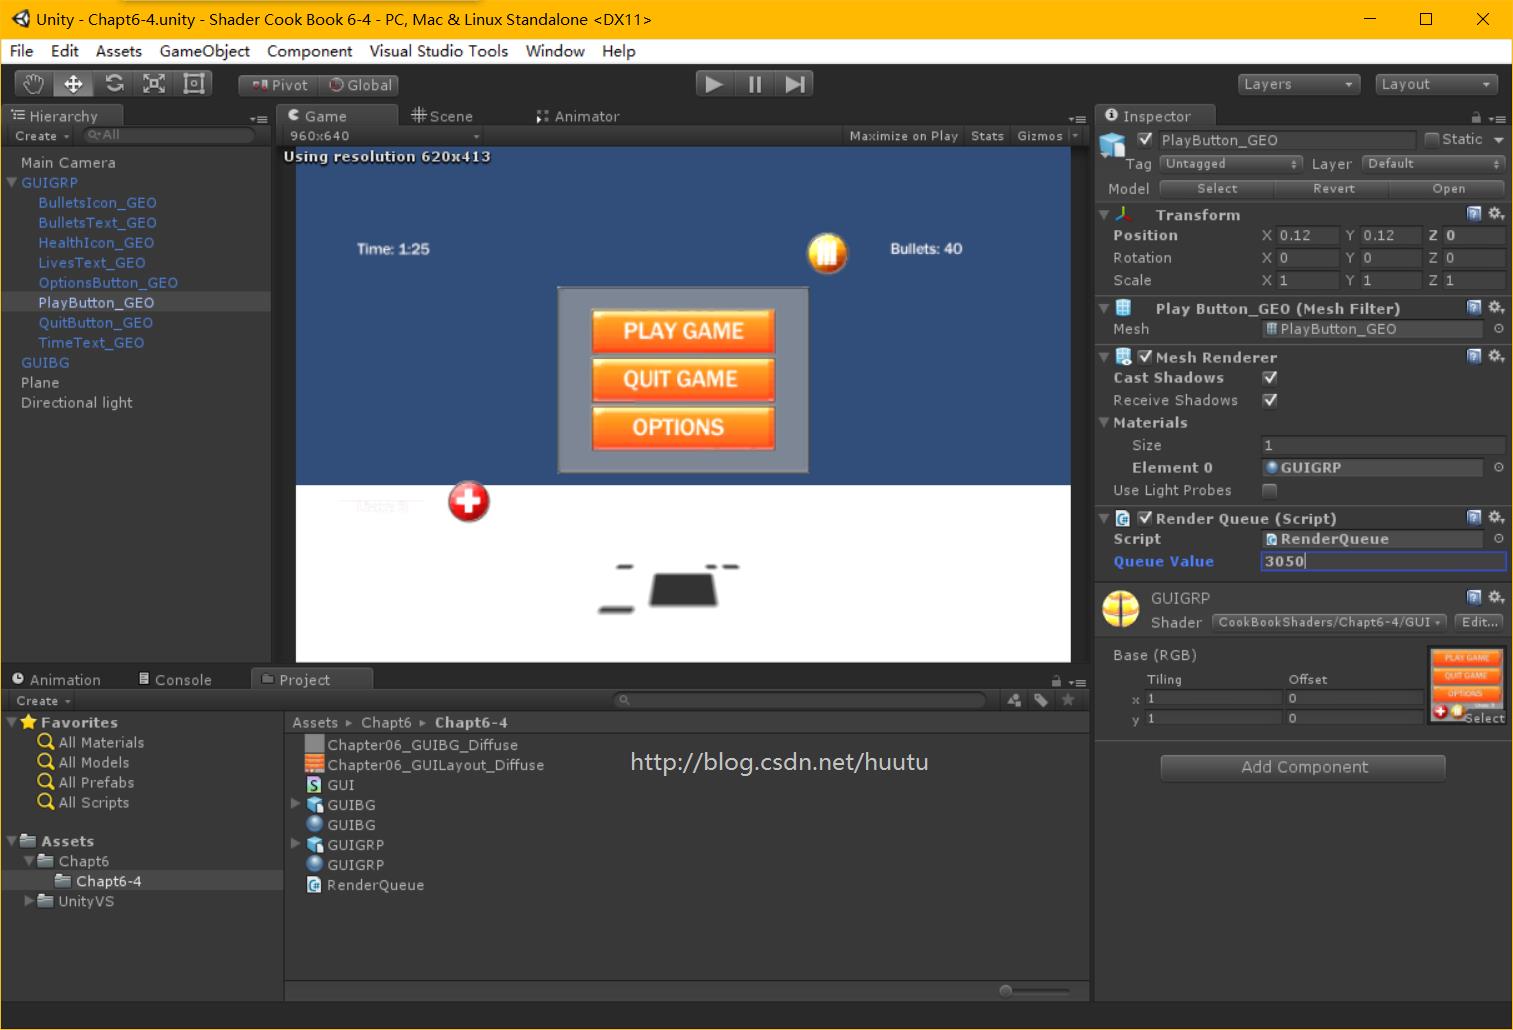
把脚本添加到 PLAY GAME 上,效果如下

因为默认值是2000,而 背景图的Queue 是 Transparent = 3000,所以现在是先渲染了 按钮,再渲染 背景图。
由于 几个按钮是共用一个 Material 的,所以修改了 PLAY GAME ,其它两个按钮也变了。
转自http://blog.csdn.net/huutu http://www.thisisgame.com.cn
在编辑器中修改 Queue Value 为3050,大于 Transparent。
效果如下,已经是正确的了:
示例项目下载:
http://pan.baidu.com/s/1hrDw71U以上是关于Unity Shaders and Effects Cookbook (6-4) GUI 和 透明度的主要内容,如果未能解决你的问题,请参考以下文章