vmware虚拟机安装Linux Mint 20全过程
Posted 奇妙之二进制
tags:
篇首语:本文由小常识网(cha138.com)小编为大家整理,主要介绍了vmware虚拟机安装Linux Mint 20全过程相关的知识,希望对你有一定的参考价值。
虚拟机软件:Vmware Workstation Pro
iso镜像:linuxmint-20.3-cinnamon-64bit.iso
提前创建安装目录。
1、打开Vmware Workstation Pro软件,点击创建新的虚拟机

2、
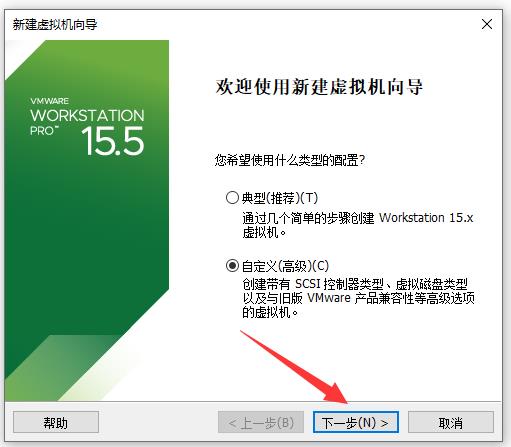
3、
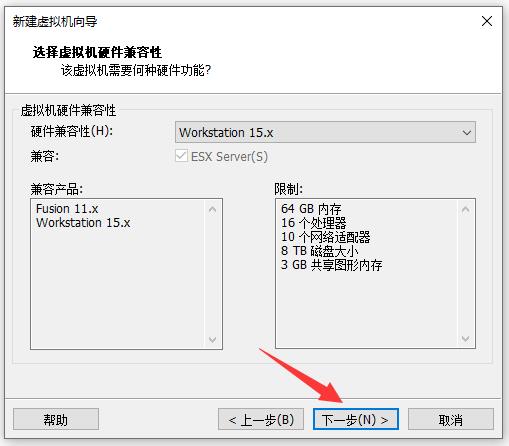
4、
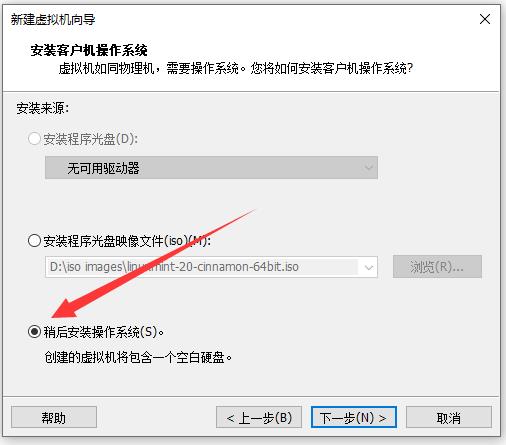
5、没有Linux Mint可选,选Ubuntu 64位就可以了

6、

7、

8、
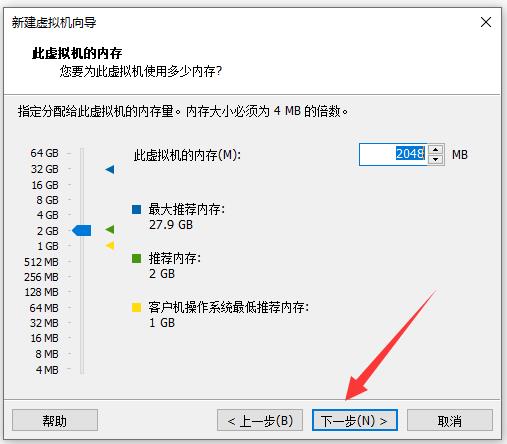
9、
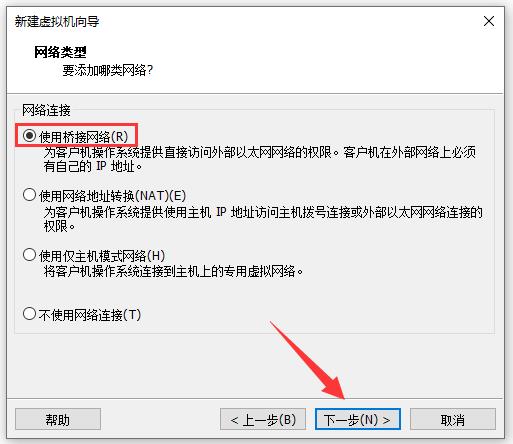
10、

11、

12、
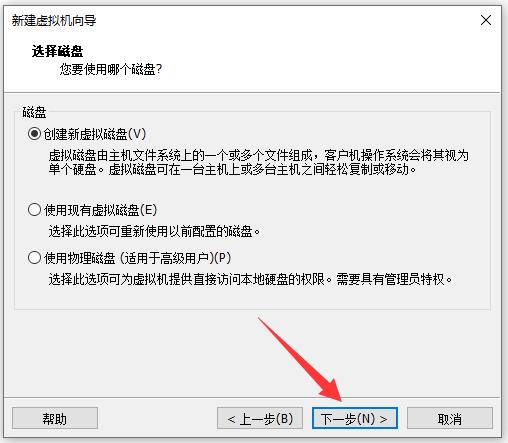
13、

14、

15、

16、
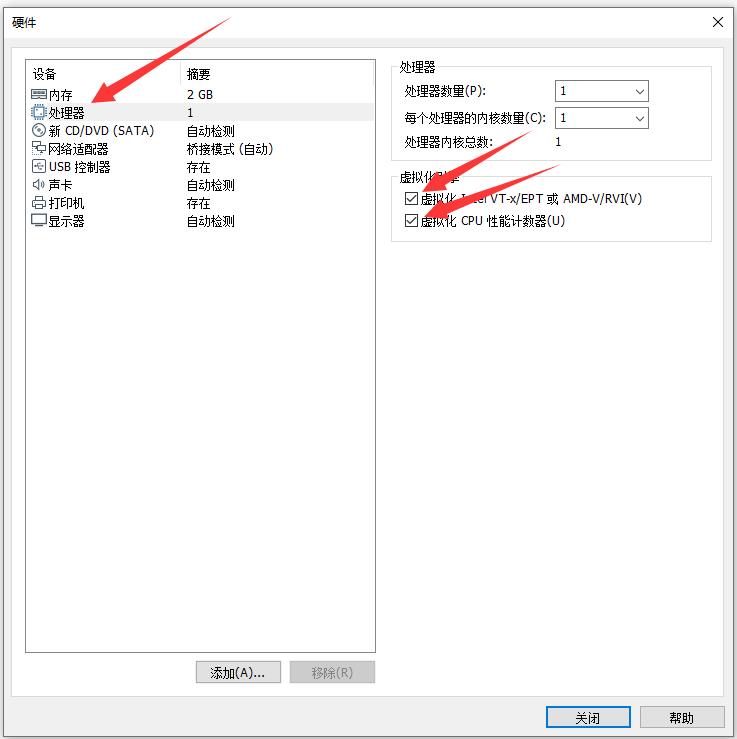
17、启动时连接务必勾选上。
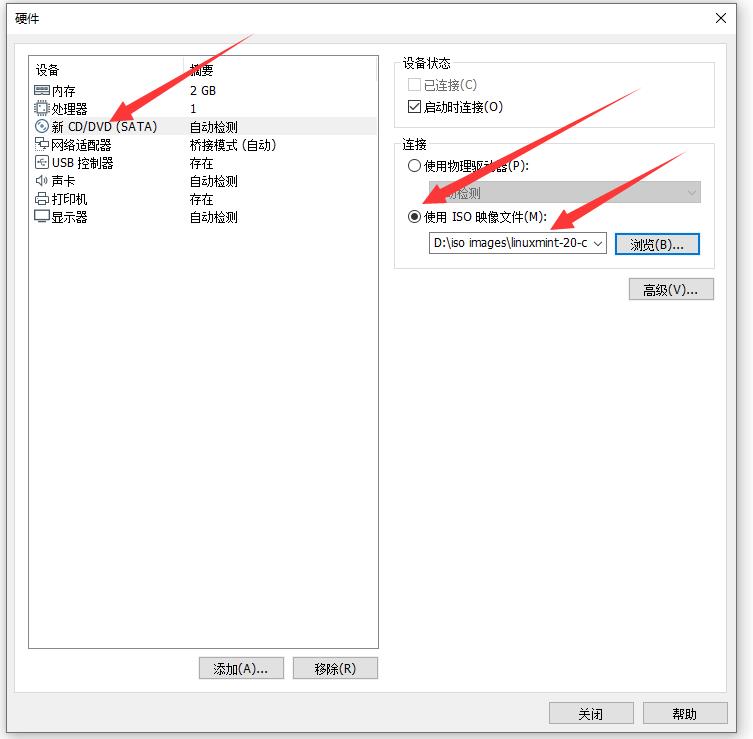
18、移除这三项(这一步可以忽略)
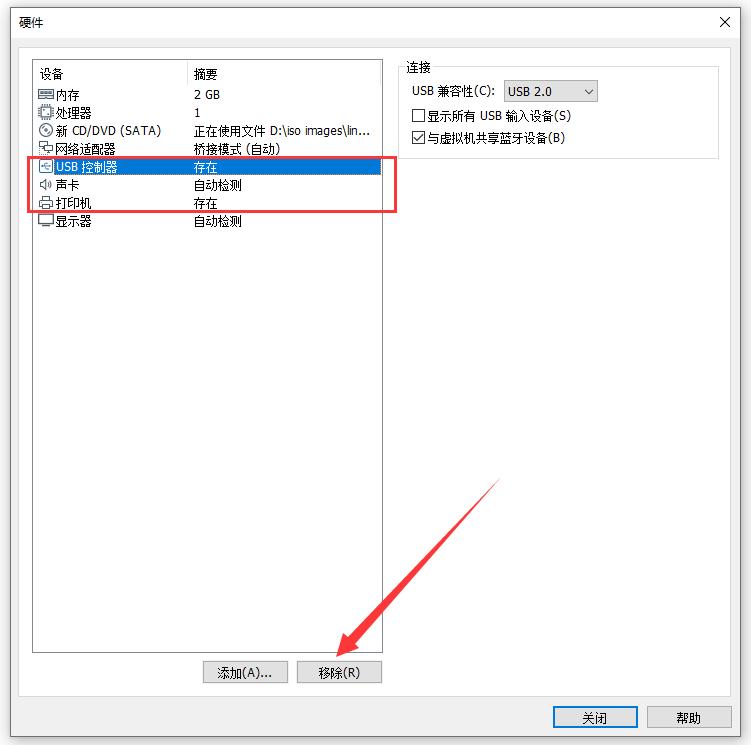
19、根据实际情况配置内存,一般2G就可以了,如果你的真机有16G以上内存,可以分个4G。

20、
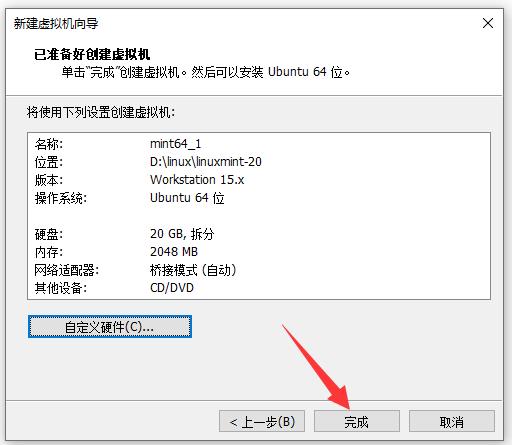
21、

22、鼠标移动至虚拟机,利用键盘将光标移动至start linux mint,然后回车

23、双击桌面的光盘

24、选择语言

25、选择键盘布局
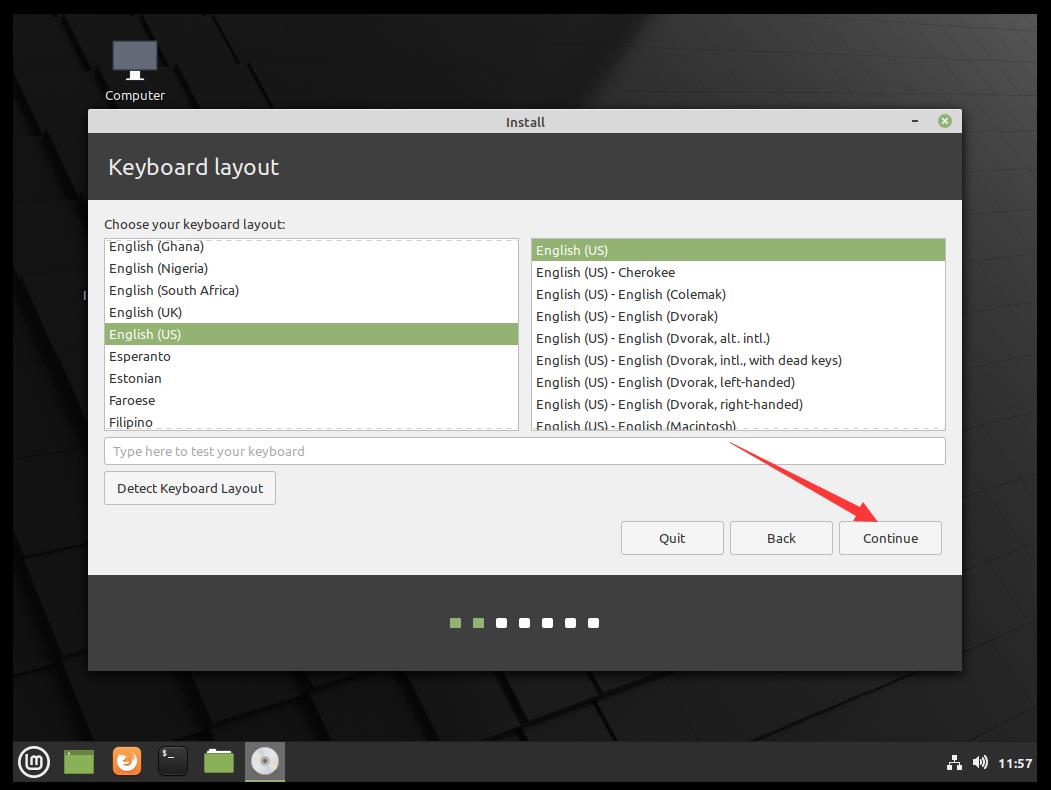
26、
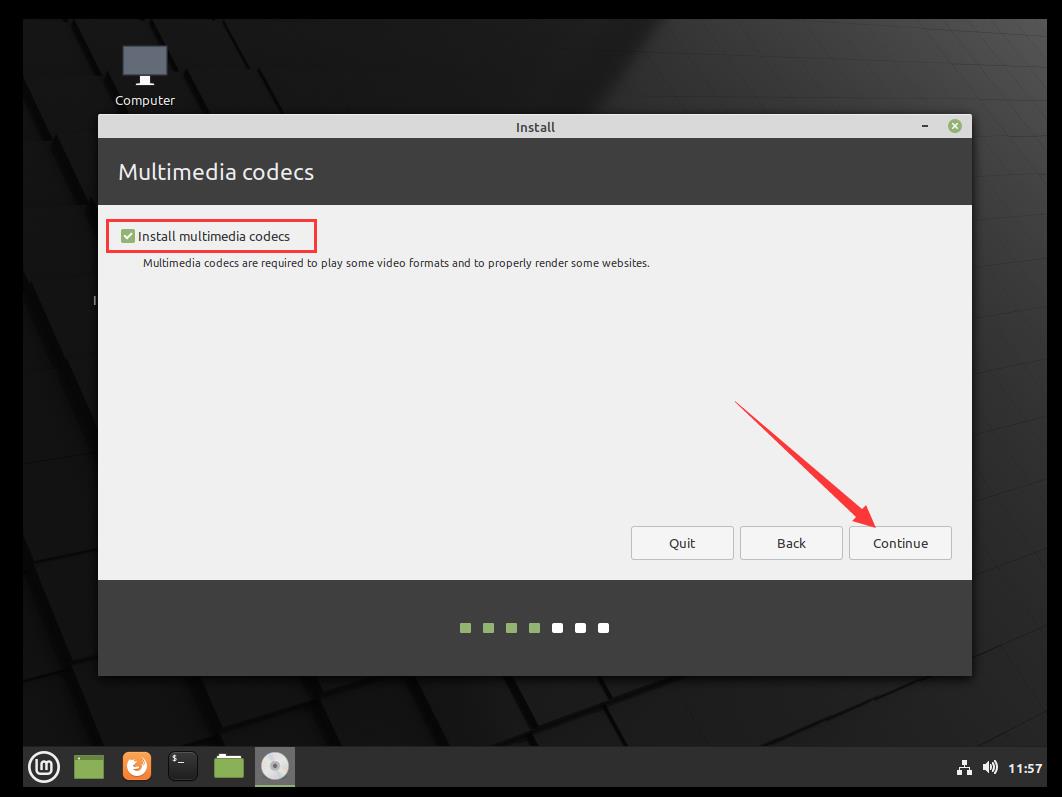
27、

28、

29、

30、

31、安装完成需要重启

32、
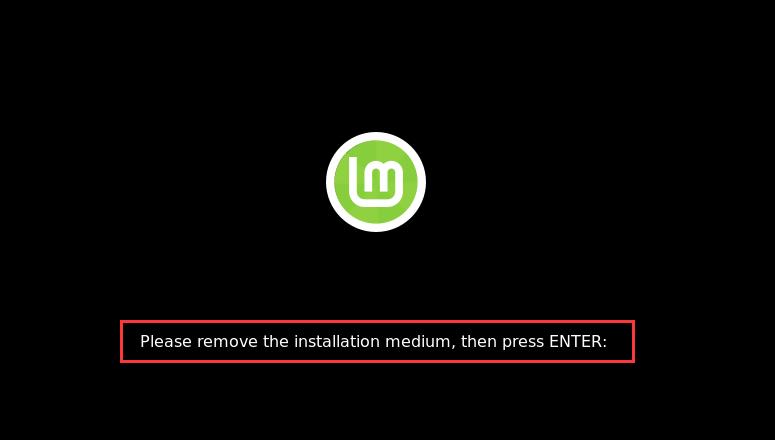
33、右击虚拟机名称,选择设置

34、把启动时连接的勾选去掉
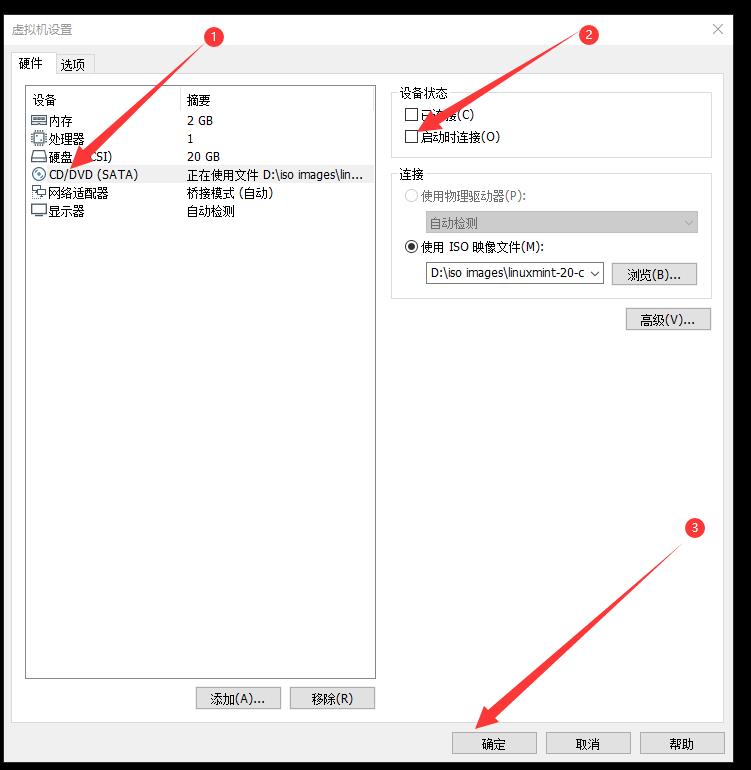
35、点击此处,选择重新启动客户机

36、登录

37、进入桌面
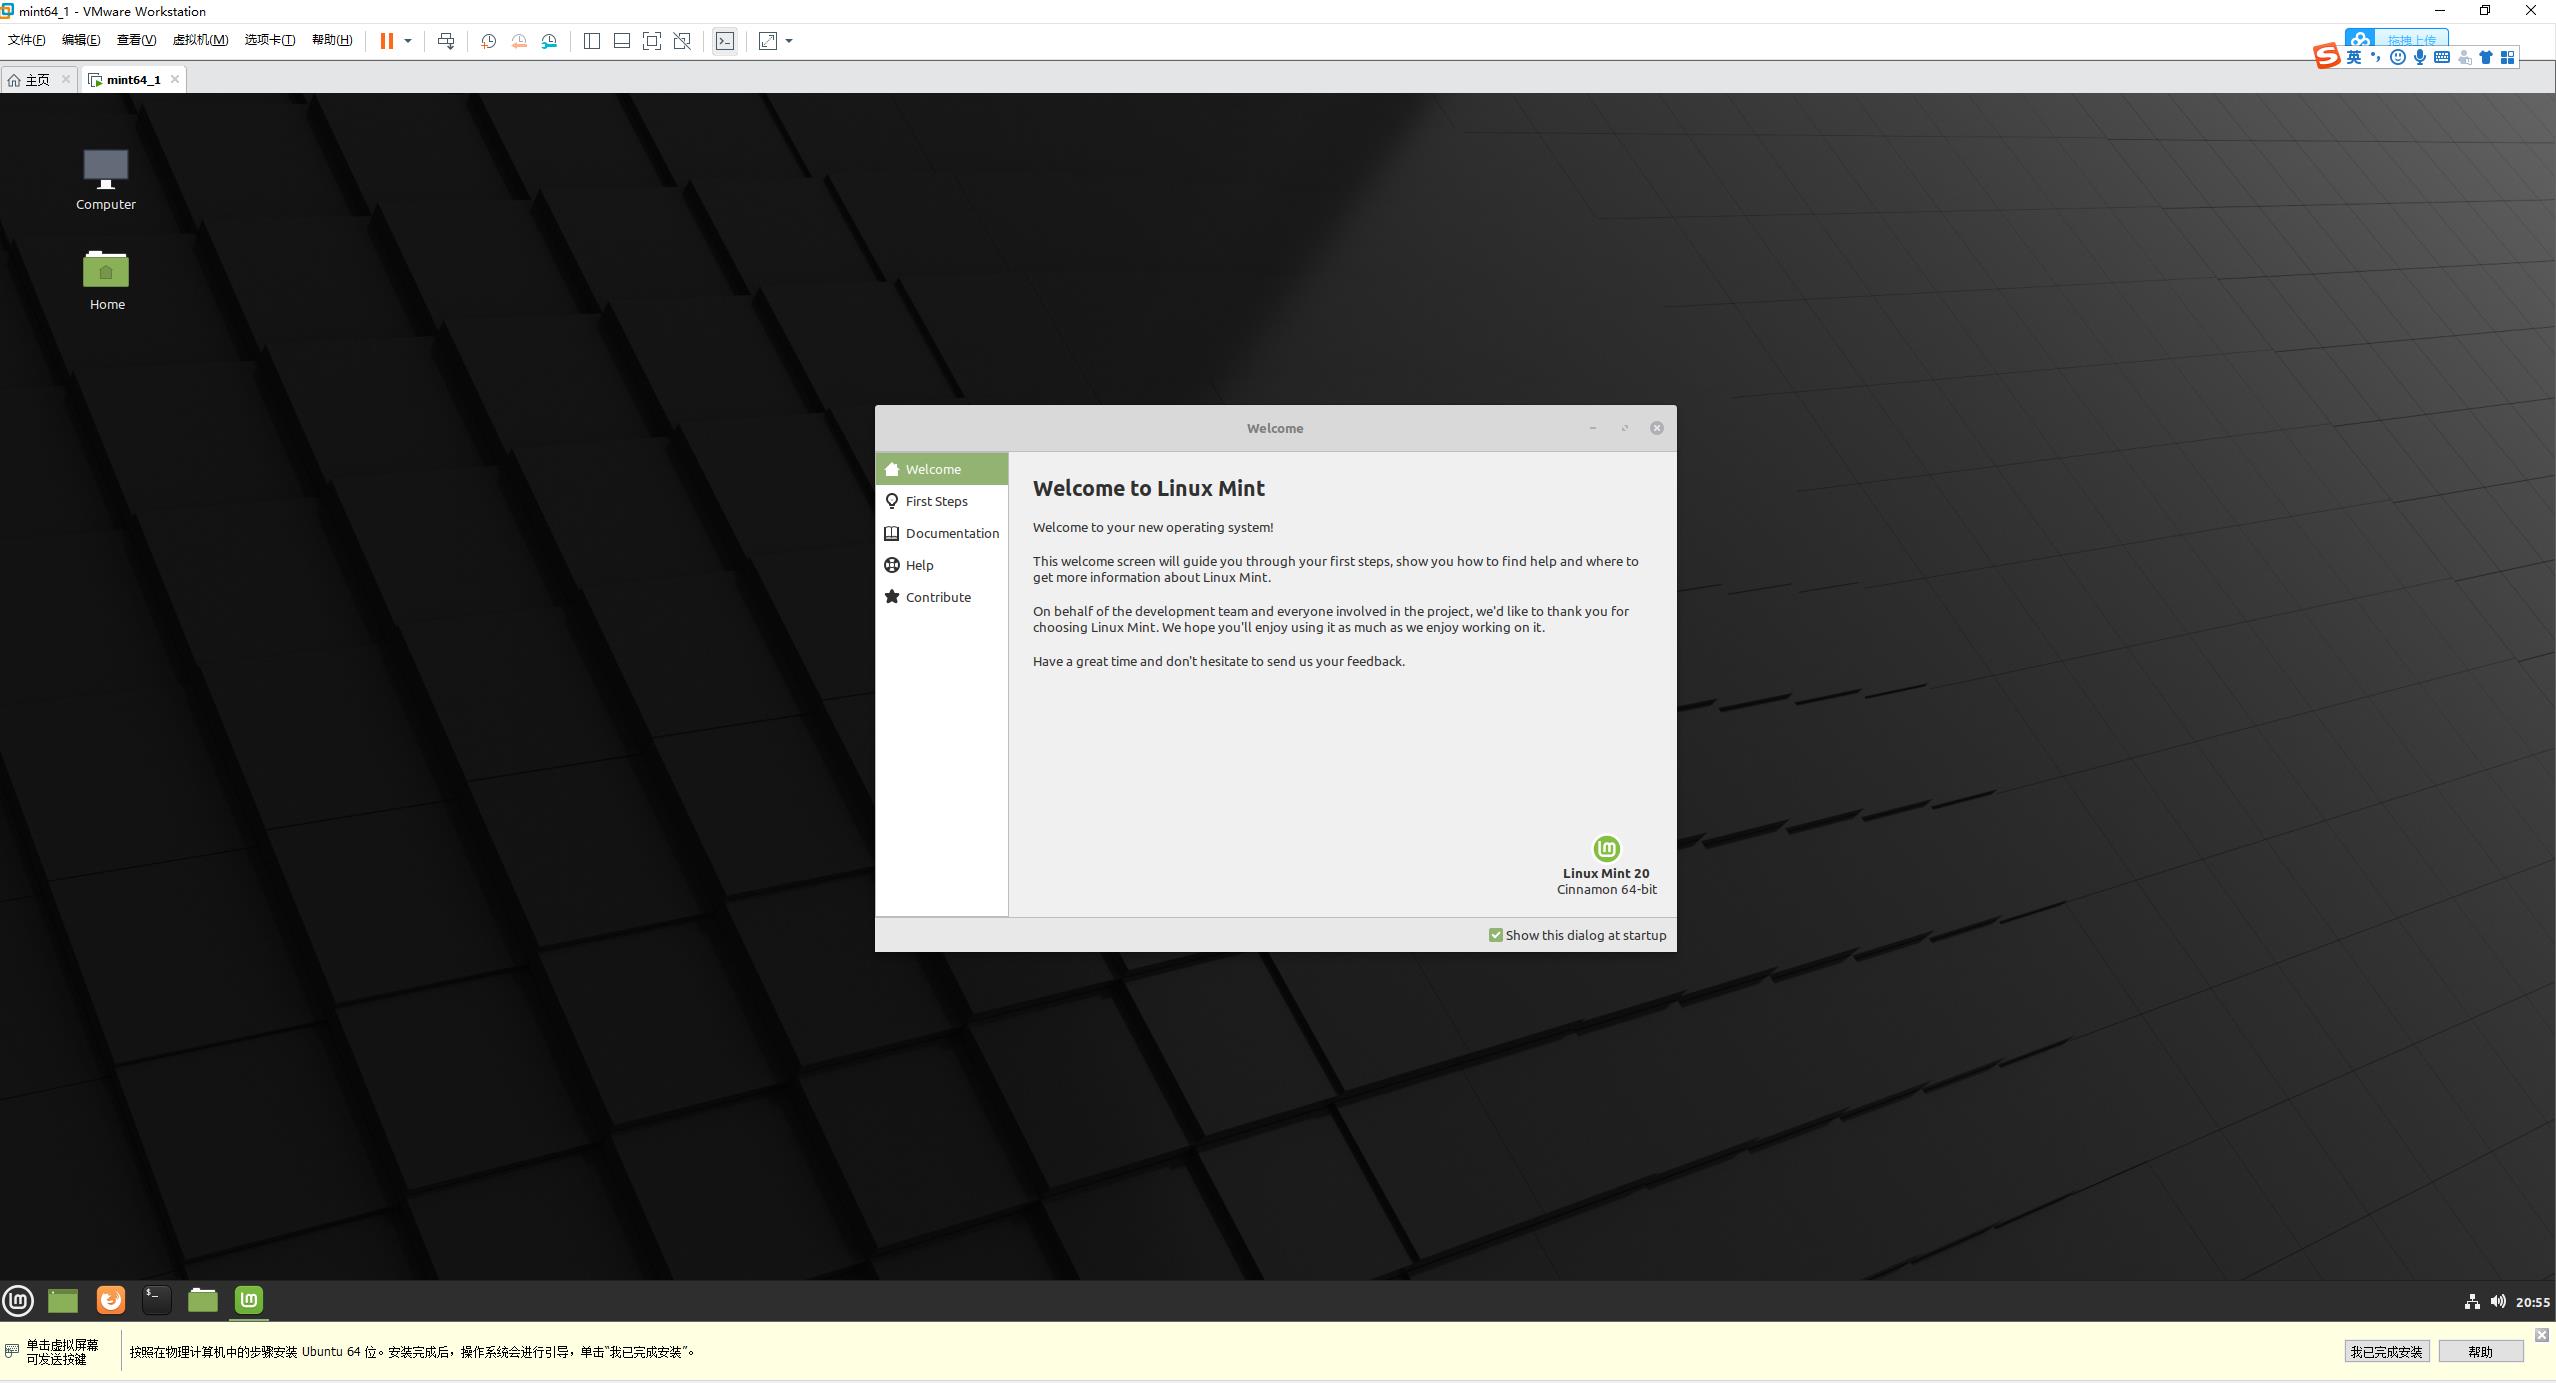
38、

39、启动终端

40、
xiaoxiami@xiaoxiami:~$ ifconfig   ## 查看ip
ens32: flags=4163<UP,BROADCAST,RUNNING,MULTICAST>  mtu 1500
        inet 192.168.3.40  netmask 255.255.255.0  broadcast 192.168.3.255
        inet6 fe80::344c:c625:af70:2f5f  prefixlen 64  scopeid 0x20<link>
        ether 00:0c:29:15:d8:70  txqueuelen 1000  (Ethernet)
        RX packets 960  bytes 1344560 (1.3 MB)
        RX errors 0  dropped 0  overruns 0  frame 0
        TX packets 956  bytes 81119 (81.1 KB)
        TX errors 0  dropped 0 overruns 0  carrier 0  collisions 0

lo: flags=73<UP,LOOPBACK,RUNNING>  mtu 65536
        inet 127.0.0.1  netmask 255.0.0.0
        inet6 ::1  prefixlen 128  scopeid 0x10<host>
        loop  txqueuelen 1000  (Local Loopback)
        RX packets 130  bytes 11026 (11.0 KB)
        RX errors 0  dropped 0  overruns 0  frame 0
        TX packets 130  bytes 11026 (11.0 KB)
        TX errors 0  dropped 0 overruns 0  carrier 0  collisions 0

xiaoxiami@xiaoxiami:~$ hostnamectl   ## 查看系统
   Static hostname: xiaoxiami
         Icon name: computer-vm
           Chassis: vm
        Machine ID: b76cc7b1bbdc489e93909d2043031de8
           Boot ID: fb78e23e87e0475e829ecd2b41290476
    Virtualization: vmware
  Operating System: Linux Mint 20
            Kernel: Linux 5.4.0-26-generic
      Architecture: x86-64
41、测试网络
xiaoxiami@xiaoxiami:~$ ping www.baidu.com   ## 测试外网
PING www.a.shifen.com (39.156.66.14) 56(84) bytes of data.
64 bytes from 39.156.66.14 (39.156.66.14): icmp_seq=1 ttl=51 time=11.1 ms
64 bytes from 39.156.66.14 (39.156.66.14): icmp_seq=2 ttl=51 time=11.0 ms
64 bytes from 39.156.66.14 (39.156.66.14): icmp_seq=3 ttl=51 time=11.2 ms
64 bytes from 39.156.66.14 (39.156.66.14): icmp_seq=4 ttl=51 time=11.0 ms
^C
--- www.a.shifen.com ping statistics ---
4 packets transmitted, 4 received, 0% packet loss, time 12027ms
rtt min/avg/max/mdev = 10.981/11.062/11.206/0.088 ms
xiaoxiami@xiaoxiami:~$ ping 192.168.3.4  ## 测试物理机
PING 192.168.3.4 (192.168.3.4) 56(84) bytes of data.
64 bytes from 192.168.3.4: icmp_seq=1 ttl=128 time=0.249 ms
64 bytes from 192.168.3.4: icmp_seq=2 ttl=128 time=0.255 ms
64 bytes from 192.168.3.4: icmp_seq=3 ttl=128 time=0.168 ms
^C
--- 192.168.3.4 ping statistics ---
3 packets transmitted, 3 received, 0% packet loss, time 2056ms
rtt min/avg/max/mdev = 0.168/0.224/0.255/0.039 ms
连通。
以上是关于vmware虚拟机安装Linux Mint 20全过程的主要内容,如果未能解决你的问题,请参考以下文章
在VMware中安装了RedHat Linux 9.0 ,虚拟机能全屏显示,但LINUX不能全屏,怎么解决
linux mint 17.3 kvm 安装windows7虚拟机