腾讯智云bk-cmdb搭建
Posted
tags:
篇首语:本文由小常识网(cha138.com)小编为大家整理,主要介绍了腾讯智云bk-cmdb搭建相关的知识,希望对你有一定的参考价值。
资源下载:https://github.com/Tencent/bk-cmdb
服务器配置(官网推荐)
php版本不低于5.6.9,nginx版本不低于1.8.0
nginx编译参数,需编译进pcre
php编译参数扩展 ./configure --prefix= -enable-fpm,另还需要(mysql、curl、pcntl、mbregex、mhash、zip、mbstring、openssl)等扩展
0.准备工作
在本地新建了一个虚拟机,系统为centos7,最小化系统安装,保证初始环境的干净。
yum groupinstall ‘development tools‘    # 安装编译工具
yum install -y epel-release    #安装epel源
过程中涉及到软件的编译安装,预先安装编译工具和环境:
1.Nginx安装
由于是测试搭建,直接yum安装Nginx的。若有需求,可自行编译安装。
2.php安装
2.1 下载及编译PHP
wget http://cn2.php.net/get/php-5.6.31.tar.gz  #自行选择地址和版本
tar -zxvf php-5.6.31.tar.gz
cd  php-5.6.31
# 以下参数并非必须,官网要求的参数加上即可。
 ./configure --prefix=/usr/local/php --with-config-file-path=/etc  --enable-shared --enable-opcache --enable-fpm --with-fpm-user=www  --with-fpm-group=www --with-mysql=mysqlnd --with-mysqli=mysqlnd  --with-pdo-mysql=mysqlnd --with-gettext --enable-mbstring --with-iconv  --with-mcrypt --with-mhash --with-openssl --enable-bcmath --enable-soap  --with-libxml-dir --enable-pcntl --enable-shmop --enable-sysvmsg  --enable-sysvsem --enable-sysvshm --enable-sockets --with-curl --with-zlib  --enable-zip --with-bz2 --with-readline --without-sqlite3 --without-pdo-sqlite  --with-pear
2.2 问题及解决
# 错误1:
configure: error: xml2-config not found. Please check your libxml2 installation

# 解决:
# 1、检查是否安装了libxml 包
rpm -qa|grep libxml2

# 2、如果没有则安装
yum install libxml2
yum install libxml2-devel

# 3、检查xml2-config文件是否存在
find / -name "xml2-config"

# 错误2:
configure: error: mcrypt.h not found. Please reinstall libmcrypt.

# 解决:
# 因为CentOs默认的yum源没有 libmcrypt-devel这个包,只能借助epel的yum源,所以先安装epel,再安装libmcrypt。
yum install -y epel-release
yum install -y libmcrypt-devel
3.MySQL安装
1.下载mysql源安装包
wget http://dev.mysql.com/get/mysql57-community-release-el7-8.noarch.rpm
# 安装mysql源
yum localinstall mysql57-community-release-el7-8.noarch.rpm
# 检查mysql源是否安装成功
yum repolist enabled | grep "mysql.*-community.*"
2. 安装MySQL
yum install mysql-community-server
3. 启动MySQL
# 启动MySQL服务
systemctl start mysqld
# 查看MySQL的启动状态
systemctl status mysqld
# 设置MySQL开机启动
systemctl enable mysqld
systemctl daemon-reload
4. 修改root默认密码
# 找到root默认密码
grep ‘temporary password‘ /var/log/mysqld.log
# 进入mysql控制台, 输入上述查询到的默认密码
set password for ‘root‘@‘localhost‘=password(‘[email protected]‘);
5.添加远程登录用户
默认只允许root帐户在本地登录,如果要在其它机器上连接mysql,必须修改root允许远程连接,或者添加一个允许远程连接的帐户
# 添加远程帐户
GRANT ALL PRIVILEGES ON *.* TO ‘yourname‘@‘%‘ IDENTIFIED BY ‘[email protected]‘ WITH GRANT OPTION;
若想将密码设置成简单密码,需要修改以下两个参数
set global validate_password_policy=0;
set global validate_password_policy=4;
4.安装bk-cmdb
4.1 创建一个分区或目录,比如 /data/htdocs,将bk-cmdb内所有文件上传至该目录下。根据需要调整根目录index.php文件内的环境模式(development/testing/production)。
4.2 修改nginx.conf文件
server {
        listen       80;
        server_name  cmdb.bk.com;
        root   /data/htdocs;


        #access_log  logs/host.access.log  main;

        location / {
            index  index.php index.html index.htm;
            if (!-e $request_filename) {
               rewrite ^(.*)$ /index.php?s=$1 last;
               break;}
        }


        #error_page  404              /404.html;

        # redirect server error pages to the static page /50x.html
        #
        error_page   500 502 503 504  /50x.html;
        location = /50x.html {
            root   html;
        }

        # proxy the PHP scripts to Apache listening on 127.0.0.1:80
        #
        #  location ~ \.php$ {
        #      proxy_pass   http://127.0.0.1;
        #  }

        # pass the PHP scripts to FastCGI server listening on 127.0.0.1:9000
        #
        location ~ \.php$ {
            fastcgi_connect_timeout 300;
            fastcgi_read_timeout 300;
            fastcgi_send_timeout 300;
            fastcgi_buffer_size 128k;
            fastcgi_buffers 32 32k;
            fastcgi_pass   127.0.0.1:9000;
            fastcgi_index  index.php;
            fastcgi_param  SCRIPT_FILENAME  $document_root$fastcgi_script_name;
            include        fastcgi_params;
        }

        # deny access to .htaccess files, if Apache‘s document root
        # concurs with nginx‘s one
        #
        location ~ /\.ht {
            deny  all;
        }
    }
4.3 数据库服务器上创建数据库cmdb,导入根目录下bk-cmdb.sql文件。
4.4 修改./application/config/db.php 配置数据库ip、用户名、密码、数据库等信息。
4.5 修改./application/config/config.php中配置session访问目录,$config[‘sess_save_path‘] = ‘/data/session‘,(自己定义),保证配置的session目录有可读写权限(chmod)。
4.6 根据4.1中配置的环境类型(development/testing/production)找到对应的常量文件,例如前面环境类型配置的为 development 则在/config/development/constants.php中定义
define(‘BASE_URL‘, ‘http://cmdb.bk.com‘); //访问主域名,务必带上http://
define(‘COMPANY_NAME‘, ‘公司名称‘); //当前公司名
define(‘COOKIE_DOMAIN‘, ‘.bk.com‘); //cookie访问域
4.7 切换到根目录下执行:
php index.php /cli/Init/initUserData。
4.8 启动nginx与php-fpm。
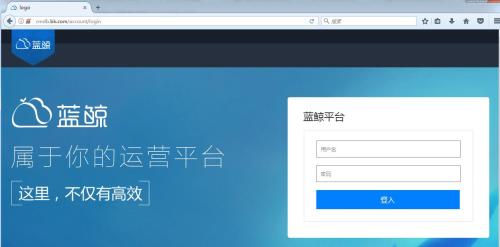
4.9 配置hosts,使用 admin/blueking账号即可登录访问。
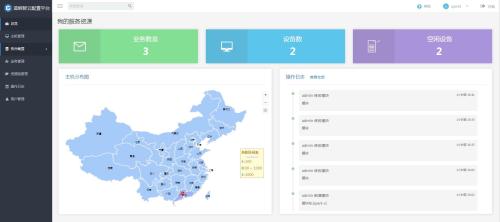
5.现有功能介绍
用户管理
业务管理
拓扑(集群、模块)管理
资源池管理
主机管理
日志查询
以上是关于腾讯智云bk-cmdb搭建的主要内容,如果未能解决你的问题,请参考以下文章

