mysql-5.7.11-winx64.zip 的下载安装配置和使用(windows里安装)
Posted
tags:
篇首语:本文由小常识网(cha138.com)小编为大家整理,主要介绍了mysql-5.7.11-winx64.zip 的下载安装配置和使用(windows里安装)相关的知识,希望对你有一定的参考价值。
想说的是,有mysql一定基础的人员,学大数据里的hive、hbase更是可贵!
一、下载
http://cdn.mysql.com//Downloads/MySQL-5.7/mysql-5.7.11-winx64.zip
二、安装

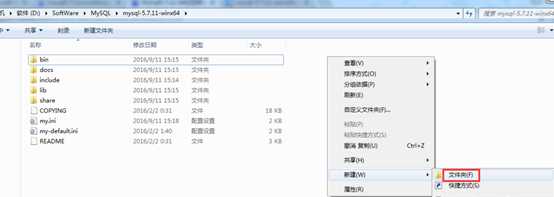
1、 解压缩zip包

这里想说的是,我们都知道,关于软件的安装,有两种,msi方式和压缩包解压安装。
关于msi的安装方式,我这里便不多赘述了,见
http://jingyan.baidu.com/article/7e440953d6f0702fc1e2ef61.html
压缩包解压方式的安装:
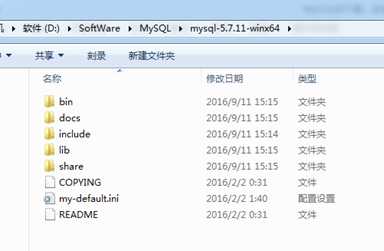
然后,在这一步有资料说,修改默认配置文件my-default.ini。这里啊,我呢。一般为了专业规范起见,将默认的my-default.ini修改命名为my.ini(这一点,是模仿hadoop/spark)里的配置文件设法。
2、  变成
变成 
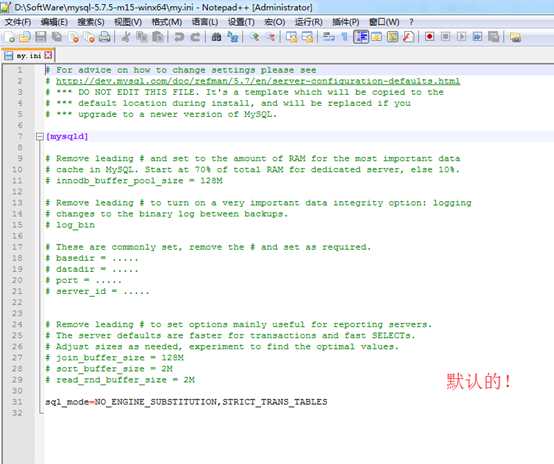
# For advice on how to change settings please see
# http://dev.mysql.com/doc/refman/5.7/en/server-configuration-defaults.html
# *** DO NOT EDIT THIS FILE. It‘s a template which will be copied to the
# *** default location during install, and will be replaced if you
# *** upgrade to a newer version of MySQL.
[mysqld]
# Remove leading # and set to the amount of RAM for the most important data
# cache in MySQL. Start at 70% of total RAM for dedicated server, else 10%.
# innodb_buffer_pool_size = 128M
# Remove leading # to turn on a very important data integrity option: logging
# changes to the binary log between backups.
# log_bin
# These are commonly set, remove the # and set as required.
# basedir = .....
# datadir = .....
# port = .....
# server_id = .....
# Remove leading # to set options mainly useful for reporting servers.
# The server defaults are faster for transactions and fast SELECTs.
# Adjust sizes as needed, experiment to find the optimal values.
# join_buffer_size = 128M
# sort_buffer_size = 2M
# read_rnd_buffer_size = 2M
sql_mode=NO_ENGINE_SUBSTITUTION,STRICT_TRANS_TABLES
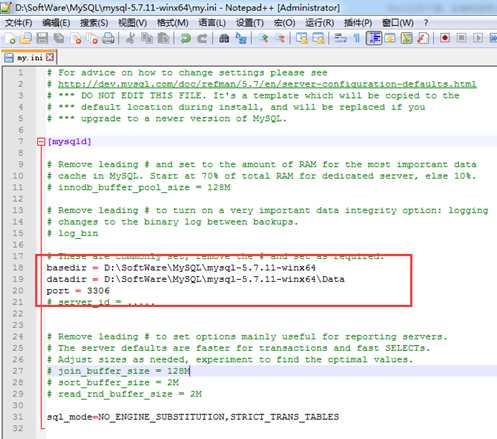
3、做如下的修改
# For advice on how to change settings please see
# http://dev.mysql.com/doc/refman/5.7/en/server-configuration-defaults.html
# *** DO NOT EDIT THIS FILE. It‘s a template which will be copied to the
# *** default location during install, and will be replaced if you
# *** upgrade to a newer version of MySQL.
[mysqld]
# Remove leading # and set to the amount of RAM for the most important data
# cache in MySQL. Start at 70% of total RAM for dedicated server, else 10%.
# innodb_buffer_pool_size = 128M
# Remove leading # to turn on a very important data integrity option: logging
# changes to the binary log between backups.
# log_bin
# These are commonly set, remove the # and set as required.
basedir = D:\SoftWare\MySQL\mysql-5.7.11-winx64
datadir = D:\SoftWare\MySQL\mysql-5.7.11-winx64\Data
port = 3306
# server_id = .....
# Remove leading # to set options mainly useful for reporting servers.
# The server defaults are faster for transactions and fast SELECTs.
# Adjust sizes as needed, experiment to find the optimal values.
# join_buffer_size = 128M
# sort_buffer_size = 2M
# read_rnd_buffer_size = 2M
sql_mode=NO_ENGINE_SUBSTITUTION,STRICT_TRANS_TABLES
4、配置环境变量
新建,MYSQL_HOME,

在windows的path里,添加如下
;%MYSQL_HOME\bin;(注意加分号)

5、将mysql注册为windows系统服务,即初始化mysql
具体操作是在命令行中执行以下命令(需要以管理员身份运行命令行):
以下命令是在dos命令行中进行的

需要切换到mysq安装的bin目录,
否则,会将服务目录指定为C:\Program Files\MySQL\MySQL Server 5.7\mysqld
这里,顺便,学些dos窗口里的一些常用命令吧!
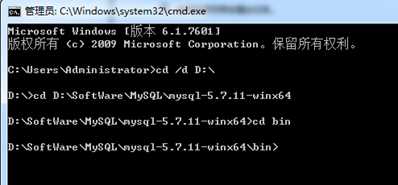
以管理员的身份进行运行,

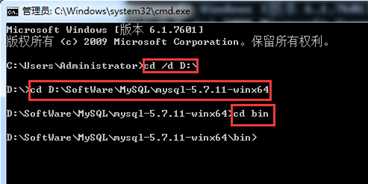
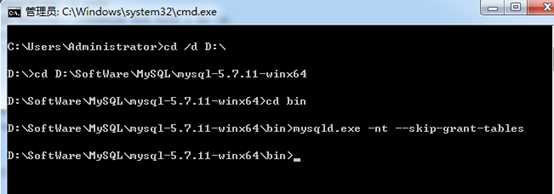
C:\Users\Administrator>cd /d D:\
D:\>cd D:\SoftWare\MySQL\mysql-5.7.11-winx64
D:\SoftWare\MySQL\mysql-5.7.11-winx64>cd bin
D:\SoftWare\MySQL\mysql-5.7.11-winx64\bin>
6、自己新建好Data目录

7、执行mysqld.exe --initialize 命令,
D:\SoftWare\MySQL\mysql-5.7.11-winx64\bin>mysqld --initialize
回车

8、执行 mysqld -install命令
D:\SoftWare\MySQL\mysql-5.7.11-winx64\bin > mysqld install
或者
D:\SoftWare\MySQL\mysql-5.7.11-winx64\bin >
mysqld install MySQL --defaults-file=
" D:\SoftWare\MySQL\mysql-5.7.11-winx64\bin\my.ini"

或者
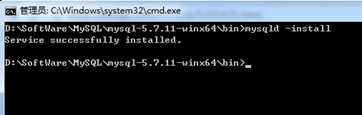
显示Service successfully installed.表示初始化成功!
9、执行mysqld.exe -nt --skip-grant-tables
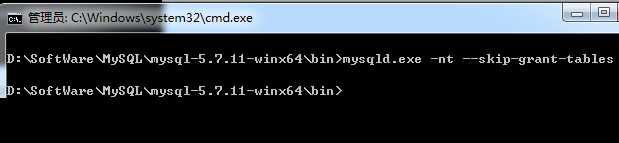
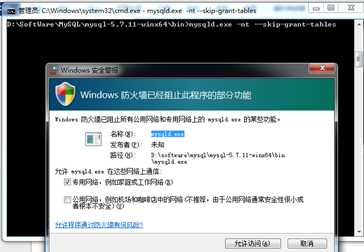
注意:窗口无反应
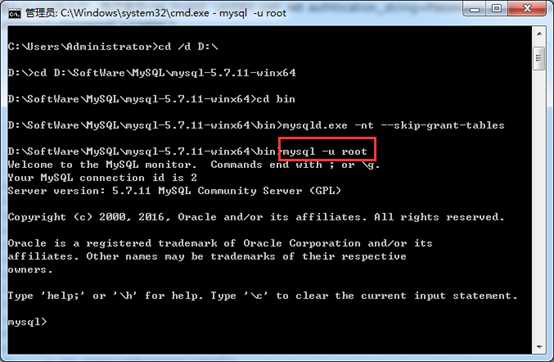
10、重新打开dos窗口,执行mysql -u root
11、执行mysql -u root
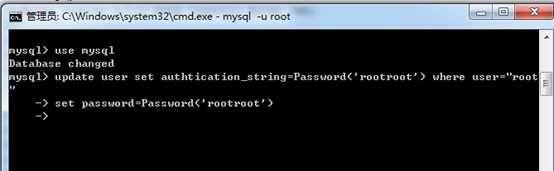
mysql> use mysql
Database changed
mysql> update user set authtication_string=Password(‘rootroot‘) where user="root"
-> set password=Password(‘rootroot‘)
->
12、在任务管理器中终止mysqld进程,


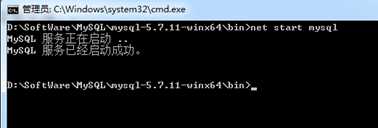
13、开启mysql服务。
D:\SoftWare\MySQL\mysql-5.7.11-winx64\bin> net start mysql
安装完成。

四、使用
以后,每次,都是到bin

感谢如下的链接博主:
http://www.cnblogs.com/endv/p/5205435.html
总结:
对于windows里安装Mysql,会出现各种问题,在此,我也是在这基础上,得到了认识和提升!!!
问题:
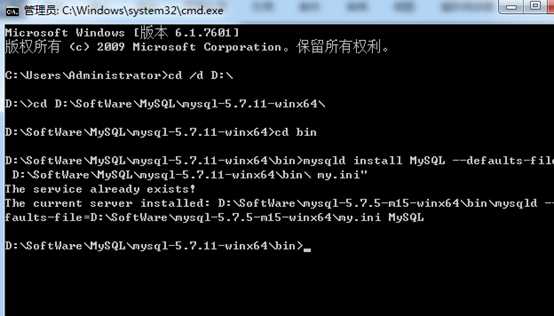
解决办法1:
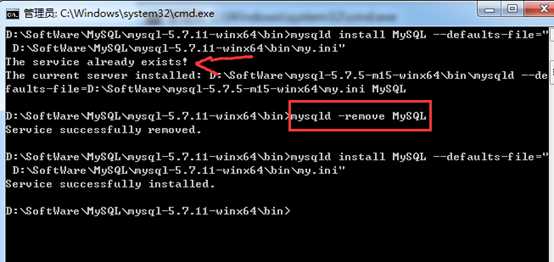
mysqld –remove MySQL
转】终于知道为什么我的mysql总是卸载的不干净以及老是找不到my.ini文件
http://blog.sina.com.cn/s/blog_6fc5bfa90100qmr9.html
http://www.cnblogs.com/zlslch/p/5862100.html
以上是关于mysql-5.7.11-winx64.zip 的下载安装配置和使用(windows里安装)的主要内容,如果未能解决你的问题,请参考以下文章