jQuery网站商品图片放大镜效果
Posted 轩宇网工作室
tags:
篇首语:本文由小常识网(cha138.com)小编为大家整理,主要介绍了jQuery网站商品图片放大镜效果相关的知识,希望对你有一定的参考价值。
咳咳!请忽略封面图片,不要在乎那些细节。
首先引入jQuery
<script type="text/javascript" ></script>
样式CSS用到的样式肯定不能少
<style type="text/css">
/* reset */
body{font:12px/18px "宋体",arial,sans-serif;color:#585858;}
body,div,p,span,form,iframe,table,td,th,input,textarea,button,label,ul,ol,li,dl,dt,dd,h1,h2,h3,h4,h5,h6{margin:0;padding:0;}
h1,h2,h3,h4,h5,h6{font-size:100%; }
ul,ol,li,dl{list-style-type:none;}
em,i,dfn,cite,strong,small{font-style:normal;}
img{border:0;}
fieldset,button,input,select,option{vertical-align:middle;font:12px/18px "宋体",arial,sans-serif;}
table{border-collapse:collapse;border-spacing:0}
textarea{resize:none}
/* color */
a:link,a:visited{color:#575757;text-decoration:none;}
a:hover{color:#ef4165;text-decoration:none;}
a:active{color:#1d7400;}
/* clearfix */
.clearfix:after{ visibility:hidden; display:block; font-size:0; content:" "; clear:both; height:0;}
*html .clearfix{ zoom:1;}
.preview{width:400px; height:465px; margin:50px 0px 0px 150px;}
/* smallImg */
.smallImg{position:relative; height:52px; margin-top:1px; background-color:#F1F0F0; padding:6px 5px; width:390px; overflow:hidden;float:left;}
.scrollbutton{width:14px; height:50px; overflow:hidden; position:relative; float:left; cursor:pointer; }
.scrollbutton.smallImgUp , .scrollbutton.smallImgUp.disabled{background:url(images/d_08.png) no-repeat;}
.scrollbutton.smallImgDown , .scrollbutton.smallImgDown.disabled{background:url(images/d_09.png) no-repeat; margin-left:375px; margin-top:-50px;}
#imageMenu {height:50px; width:360px; overflow:hidden; margin-left:0; float:left;}
#imageMenu li {height:50px; width:60px; overflow:hidden; float:left; text-align:center;}
#imageMenu li img{width:50px; height:50px;cursor:pointer;}
#imageMenu li#onlickImg img, #imageMenu li:hover img{ width:44px; height:44px; border:3px solid #959595;}
/* bigImg */
.bigImg{position:relative; float:left; width:400px; height:400px; overflow:hidden;}
.bigImg #midimg{width:400px; height:400px;}
.bigImg #winSelector{width:235px; height:230px;}
#winSelector{position:absolute; cursor:crosshair; filter:alpha(opacity=15); -moz-opacity:0.15; opacity:0.15; background-color:#000; border:1px solid #fff;}
/* bigView */
#bigView{position:absolute;border: 1px solid #959595; overflow: hidden; z-index:999;}
#bigView img{position:absolute;}
</style>
<script type="text/javascript">
$(document).ready(function(){
// 图片上下滚动
var count = $("#imageMenu li").length - 5; /* 显示 6 个 li标签内容 */
var interval = $("#imageMenu li:first").width();
var curIndex = 0;
$('.scrollbutton').click(function(){
if( $(this).hasClass('disabled') ) return false;
if ($(this).hasClass('smallImgUp')) --curIndex;
else ++curIndex;
$('.scrollbutton').removeClass('disabled');
if (curIndex == 0) $('.smallImgUp').addClass('disabled');
if (curIndex == count-1) $('.smallImgDown').addClass('disabled');
$("#imageMenu ul").stop(false, true).animate({"marginLeft" : -curIndex*interval + "px"}, 600);
});
// 解决 ie6 select框 问题
$.fn.decorateIframe = function(options) {
if ($.browser.msie && $.browser.version < 7) {
var opts = $.extend({}, $.fn.decorateIframe.defaults, options);
$(this).each(function() {
var $myThis = $(this);
//创建一个IFRAME
var divIframe = $("<iframe />");
divIframe.attr("id", opts.iframeId);
divIframe.css("position", "absolute");
divIframe.css("display", "none");
divIframe.css("display", "block");
divIframe.css("z-index", opts.iframeZIndex);
divIframe.css("border");
divIframe.css("top", "0");
divIframe.css("left", "0");
if (opts.width == 0) {
divIframe.css("width", $myThis.width() + parseInt($myThis.css("padding")) * 2 + "px");
}
if (opts.height == 0) {
divIframe.css("height", $myThis.height() + parseInt($myThis.css("padding")) * 2 + "px");
}
divIframe.css("filter", "mask(color=#fff)");
$myThis.append(divIframe);
});
}
}
$.fn.decorateIframe.defaults = {
iframeId: "decorateIframe1",
iframeZIndex: -1,
width: 0,
height: 0
}
//放大镜视窗
$("#bigView").decorateIframe();
//点击到中图
var midChangeHandler = null;
$("#imageMenu li img").bind("click", function(){
if ($(this).attr("id") != "onlickImg") {
midChange($(this).attr("src").replace("small", "mid"));
$("#imageMenu li").removeAttr("id");
$(this).parent().attr("id", "onlickImg");
}
})/*.bind("mouseover", function(){
if ($(this).attr("id") != "onlickImg") {
window.clearTimeout(midChangeHandler);
midChange($(this).attr("src").replace("small", "mid"));
$(this).css({ "border": "3px solid #959595" });
}
}).bind("mouseout", function(){
if($(this).attr("id") != "onlickImg"){
$(this).removeAttr("style");
midChangeHandler = window.setTimeout(function(){
midChange($("#onlickImg img").attr("src").replace("small", "mid"));
}, 1000);
}
})*/;
function midChange(src) {
$("#midimg").attr("src", src).load(function() {
changeViewImg();
});
}
//大视窗看图
function mouseover(e) {
if ($("#winSelector").css("display") == "none") {
$("#winSelector,#bigView").show();
}
$("#winSelector").css(fixedPosition(e));
e.stopPropagation();
}
function mouseOut(e) {
if ($("#winSelector").css("display") != "none") {
$("#winSelector,#bigView").hide();
}
e.stopPropagation();
}
$("#midimg").mouseover(mouseover); //中图事件
$("#midimg,#winSelector").mousemove(mouseover).mouseout(mouseOut); //选择器事件
var $divWidth = $("#winSelector").width(); //选择器宽度
var $divHeight = $("#winSelector").height(); //选择器高度
var $imgWidth = $("#midimg").width(); //中图宽度
var $imgHeight = $("#midimg").height(); //中图高度
var $viewImgWidth = $viewImgHeight = $height = null; //IE加载后才能得到 大图宽度 大图高度 大图视窗高度
function changeViewImg() {
$("#bigView img").attr("src", $("#midimg").attr("src").replace("mid", "big"));
}
changeViewImg();
$("#bigView").scrollLeft(0).scrollTop(0);
function fixedPosition(e) {
if (e == null) {
return;
}
var $imgLeft = $("#midimg").offset().left; //中图左边距
var $imgTop = $("#midimg").offset().top; //中图上边距
X = e.pageX - $imgLeft - $divWidth / 2; //selector顶点坐标 X
Y = e.pageY - $imgTop - $divHeight / 2; //selector顶点坐标 Y
X = X < 0 ? 0 : X;
Y = Y < 0 ? 0 : Y;
X = X + $divWidth > $imgWidth ? $imgWidth - $divWidth : X;
Y = Y + $divHeight > $imgHeight ? $imgHeight - $divHeight : Y;
if ($viewImgWidth == null) {
$viewImgWidth = $("#bigView img").outerWidth();
$viewImgHeight = $("#bigView img").height();
if ($viewImgWidth < 200 || $viewImgHeight < 200) {
$viewImgWidth = $viewImgHeight = 800;
}
$height = $divHeight * $viewImgHeight / $imgHeight;
$("#bigView").width($divWidth * $viewImgWidth / $imgWidth);
$("#bigView").height($height);
}
var scrollX = X * $viewImgWidth / $imgWidth;
var scrollY = Y * $viewImgHeight / $imgHeight;
$("#bigView img").css({ "left": scrollX * -1, "top": scrollY * -1 });
$("#bigView").css({ "top": 50, "left": $(".preview").offset().left + $(".preview").width() + 15 });
return { left: X, top: Y };
}
});
</script>
最后——调用实例
<div class="preview">
<div id="vertical" class="bigImg">
<img width="400" height="400" alt="" id="midimg" />
<div style="display:none;" id="winSelector"></div>
</div><!--bigImg end-->
<div class="smallImg">
<div class="scrollbutton smallImgUp disabled"></div>
<div id="imageMenu">
<ul>
<li id="onlickImg"><img width="68" height="68" alt="洋妞"/></li>
<li><img width="68" height="68" alt="洋妞"/></li>
<li><img width="68" height="68" alt="洋妞"/></li>
<li><img width="68" height="68" alt="洋妞"/></li>
<li><img width="68" height="68" alt="洋妞"/></li>
<li><img width="68" height="68" alt="洋妞"/></li>
<li><img width="68" height="68" alt="洋妞"/></li>
</ul>
</div>
<div class="scrollbutton smallImgDown"></div>
</div><!--smallImg end-->
<div id="bigView" style="display:none;"><img width="800" height="800" alt="" /></div>
</div>
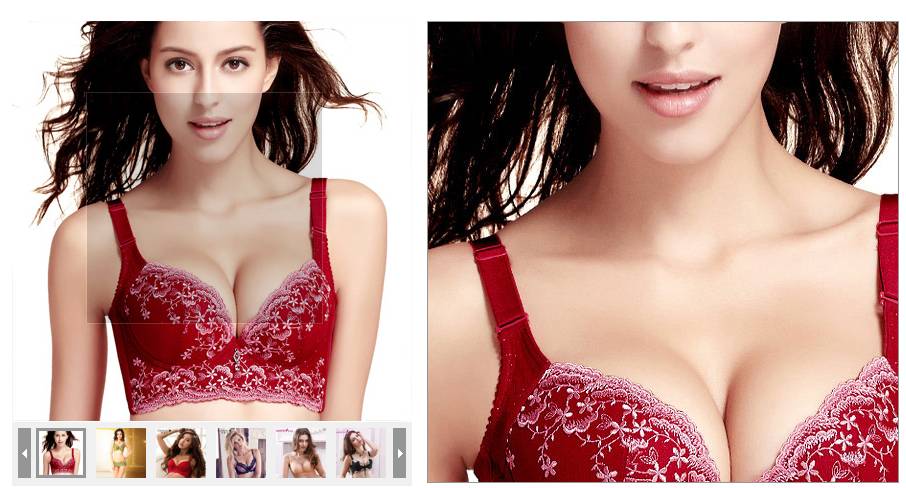
效果图:
链接:http://pan.baidu.com/s/1o7RlNnk 密码:90ce
以上是关于jQuery网站商品图片放大镜效果的主要内容,如果未能解决你的问题,请参考以下文章