SpringBoot——SpringBoot四大核心之起步依赖(自定义starter)
Posted 张起灵-小哥
tags:
篇首语:本文由小常识网(cha138.com)小编为大家整理,主要介绍了SpringBoot——SpringBoot四大核心之起步依赖(自定义starter)相关的知识,希望对你有一定的参考价值。
文章目录:
1.开始
首先肯定要说一下SpringBoot的四大核心了:
- 自动装配:简单配置甚至零配置即可运行项目
- 起步依赖:springboot程序监控器
- Actuator:jar包的引入,解决jar版本冲突问题
- 命令行界面 :命令行
这篇文章呢,我来和大家聊聊起步依赖这个东西。
2.聊聊起步依赖
首先呢,我们来看一个SpringBoot项目中最常见的依赖项。
<dependency>
    <groupId>org.springframework.boot</groupId>
    <artifactId>spring-boot-starter-web</artifactId>
</dependency>
这个我们都知道,一般称为 SpringBoot框架web项目的起步依赖,那么为什么我们添加这个依赖之后,之前在SpringMVC中的一些依赖就不需要再添加了呢?点进入这个依赖看看。
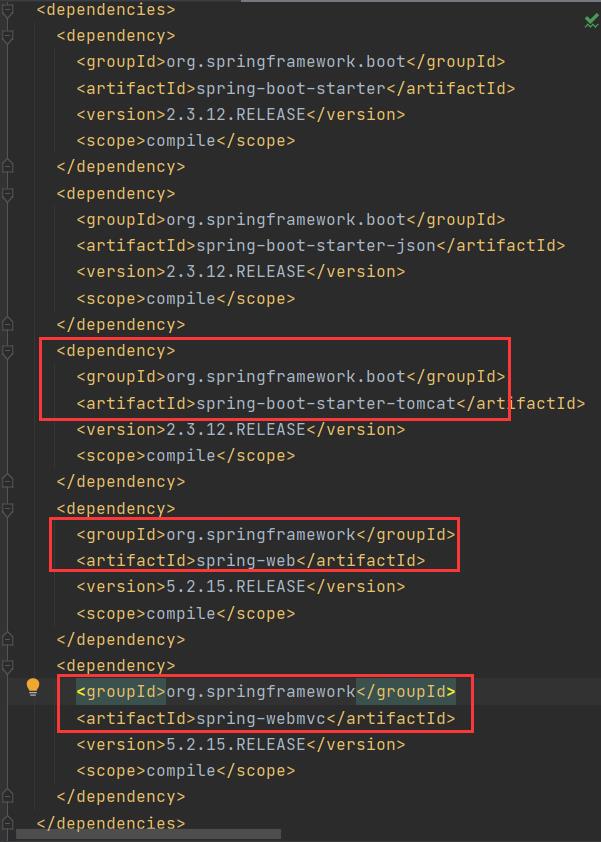
可以看到这个依赖中,还管理着其他依赖,其中就有tomcat、spring-webmvc这些,这不都是之前学SpringMVC需要配置tomcat以及其他依赖项吗?而spring-boot-starter-web这个起步依赖已经帮我们做好了,你就不需要再添加很多其他依赖了,是不是很方便呢?
在我们创建一个SpringBoot项目之后,向其中的pom文件添加依赖的时候,我们会发现,添加的很多依赖都是以 spring-boot-start-XXX 这样的形式,我当时就按照字面意思去理解:springboot-开始-XXX的依赖。
那么,我们现在说的规范一点:spring-boot-start-XXX就是spring-boot的场景启动器。
spring-boot-starter-web:帮我们导入了web模块正常运行所依赖的组件;
spring-boot-starter-thymeleaf:帮我们导入了thymeleaf模板引擎正常运行所依赖的组件;
SpringBoot就是将所有的功能场景都抽取出来,做成一个个的starter (启动器),只需要在项目中引入这些starter即可,所有相关的依赖都会导入进来 , 我们要用什么功能就导入什么样的场景启动器即可 ;我们未来也可以自己自定义 starter。
说的形象一点,我们之前学SSM的时候,在pom文件中加入依赖,是不是有spring-context、spring-core、spring-webmvc等等。而现在不需要了,你就可以直接写一个spring-boot-start-XXX完事了。之前SSM那种方式就是点了一份又一份的菜,而现在SpringBoot直接就是点了一个套餐,这个套餐中有很多你需要的菜名。
我们可以在spring.factories配置文件中,随便找一个自动配置类点进去看看。

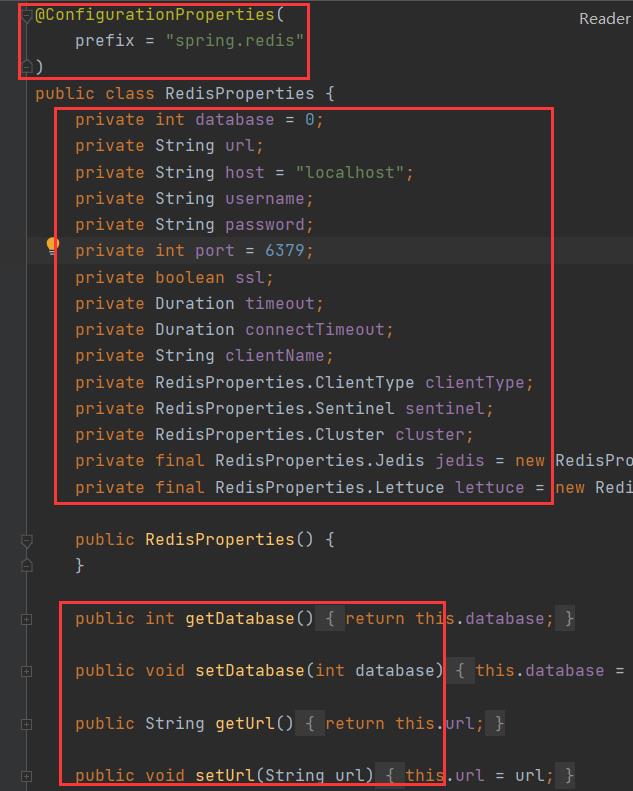
可以看到,在SpringBoot官方的starter中,先是定义了一个XXXAutoConfiguration自动配置类,然后这个类上标注的一些注解:是个配置类、什么条件下生效,导入了哪些类,以及开启对@ConfigurationProperties 注解的支持,在这个@EnableConfigurationProperties注解中,还有一个XXXProperties的属性配置类,在这个类中,上面有一个配置前缀信息的注解,而这个类中有一些属性、set/get方法,而这个前缀 + 属性 就是我们在application.properties配置文件中所写的属性名。
3.自定义starter
上面说的是SpringBoot官方的starter,那么我们也可以自定义starter。
starter的命名有一种习惯,官方的starter一般都是spring-boot-starter-xxx,而我们自定义的starter一般都是xxx-spring-boot-starter。
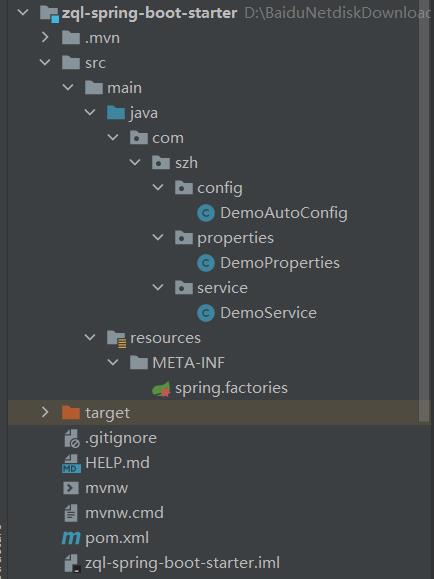
3.1 新建一个SpringBoot普通项目
3.2 在这个项目的pom文件添加依赖
第一个依赖是普通SpringBoot项目中规定好的,后面两个是新添加的。
        <dependency>
            <groupId>org.springframework.boot</groupId>
            <artifactId>spring-boot-starter</artifactId>
        </dependency>

        <dependency>
            <groupId>org.springframework.boot</groupId>
            <artifactId>spring-boot-autoconfigure</artifactId>
        </dependency>
        <dependency>
            <groupId>org.springframework.boot</groupId>
            <artifactId>spring-boot-configuration-processor</artifactId>
            <optional>true</optional>
        </dependency>
3.3 自定义一个XXXProperties属性配置类
这个类的作用帮助我们在核心配置文件中 配置相关信息。
即 szh.name=...,szh.sex=...
package com.szh.properties;

import org.springframework.boot.context.properties.ConfigurationProperties;

/**
 * 通过prefix配置前缀的内容,再加上这个属性类中定义的属性
 * 当SpringBoot项目启动之后,会读取classpath路径下的spring.factories这个配置文件,读取到下面这行代码
 * org.springframework.boot.autoconfigure.EnableAutoConfiguration=com.szh.config.DemoAutoConfig
 * 它会去读取DemoAutoConfig这个类,通过类中定义的各个注解,读取到相对应的属性配置类DemoProperties
 * 同时将读取到的这些类加载装配到Spring容器中
 * 然后就可以在application.properties配置文件中使用 szh.name 进行配置
 */
@ConfigurationProperties(prefix = "szh")
public class DemoProperties {

    private String name;
    private String sex;

    public String getName() {
        return name;
    }

    public void setName(String name) {
        this.name = name;
    }

    public String getSex() {
        return sex;
    }

    public void setSex(String sex) {
        this.sex = sex;
    }
}
3.4 自定义一个Service
在这个类中,注入属性配置类,可以获取到相应的配置属性的值。
package com.szh.service;

import com.szh.properties.DemoProperties;
import org.springframework.beans.factory.annotation.Autowired;

/**
 *
 */
public class DemoService {

    @Autowired
    private DemoProperties properties;

    public DemoProperties getProperties() {
        return properties;
    }

    public void setProperties(DemoProperties properties) {
        this.properties = properties;
    }

    public String saySomething() {
        return "姓名:" + properties.getName() + ", 性别:" + properties.getSex();
    }
}
3.5 自定义一个XXXAutoConfig自动配置类
package com.szh.config;

import com.szh.properties.DemoProperties;
import com.szh.service.DemoService;
import org.springframework.beans.factory.annotation.Autowired;
import org.springframework.boot.autoconfigure.condition.ConditionalOnWebApplication;
import org.springframework.boot.context.properties.EnableConfigurationProperties;
import org.springframework.context.annotation.Bean;
import org.springframework.context.annotation.Configuration;

/**
 *
 */
@Configuration //声明该类是一个配置类
@ConditionalOnWebApplication //当对应为web项目时生效
//告诉SpringBoot能支持DemoProperties.class这个类中的@ConfigurationProperties注解
@EnableConfigurationProperties(DemoProperties.class)
public class DemoAutoConfig {

    //将对应的属性配置类Bean对象注入到Spring容器中
    @Autowired
    private DemoProperties properties;

    //将DemoService这个Bean对象注入到Spring容器中
    @Bean
    public DemoService getSomething() {
        DemoService service=new DemoService();
        service.setProperties(properties);
        return service;
    }
}
3.6 重点:spring.factories配置文件
#---------starter自动装配---------
org.springframework.boot.autoconfigure.EnableAutoConfiguration=com.szh.config.DemoAutoConfig
3.7 执行maven中的install命令
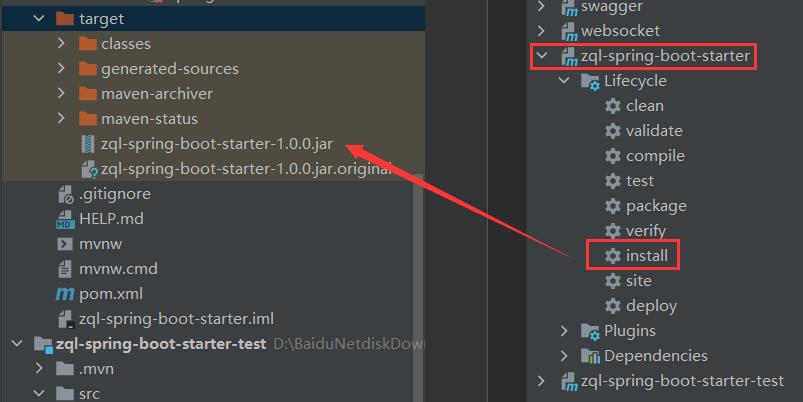
我们将这个自定义的starter打成一个jar包,目的是为了在测试项目中加入它的起步依赖。
3.8 创建一个新的SpringBoot-Web项目
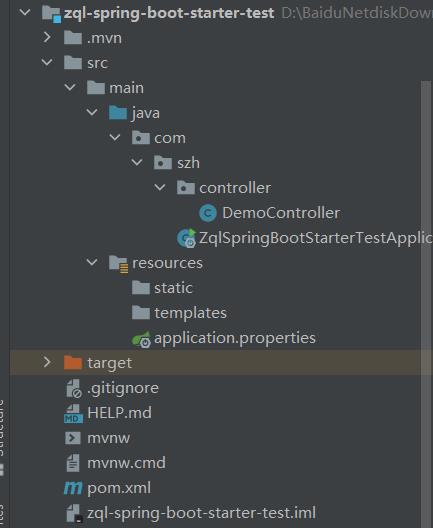
3.9 pom文件中添加依赖
第一个依赖是SpringBoot框架web项目的起步依赖,是创建完项目之后就存在的。下面那个依赖是我们自定义的起步依赖。
        <dependency>
            <groupId>org.springframework.boot</groupId>
            <artifactId>spring-boot-starter-web</artifactId>
        </dependency>

        <dependency>
            <groupId>com.szh</groupId>
            <artifactId>zql-spring-boot-starter</artifactId>
            <version>1.0.0</version>
        </dependency>
3.10 写一个controller
package com.szh.controller;

import com.szh.service.DemoService;
import org.springframework.beans.factory.annotation.Autowired;
import org.springframework.web.bind.annotation.GetMapping;
import org.springframework.web.bind.annotation.RestController;

/**
 *
 */
@RestController
public class DemoController {

    @Autowired
    private DemoService service;

    @GetMapping(value = "/test")
    public String test() {
        return service.saySomething();
    }
}
3.11 核心配置文件
szh.name=zhangqiling
szh.sex=boy
3.12 启动测试
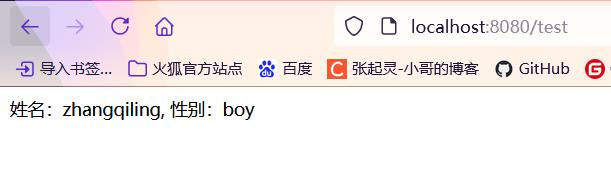
可以看到这里能够拿到我们自定义starter中的属性值。
以上是关于SpringBoot——SpringBoot四大核心之起步依赖(自定义starter)的主要内容,如果未能解决你的问题,请参考以下文章
SpringBoot——SpringBoot四大核心之起步依赖(自定义starter)