使用vue学习three.js之渲染后期处理-使用UnrealBloomPass通道在场景中添加泛光效果,三维物体表面发光效果
Posted 点燃火柴
tags:
篇首语:本文由小常识网(cha138.com)小编为大家整理,主要介绍了使用vue学习three.js之渲染后期处理-使用UnrealBloomPass通道在场景中添加泛光效果,三维物体表面发光效果相关的知识,希望对你有一定的参考价值。
使用UnrealBloomPass通道在场景中添加泛光效果
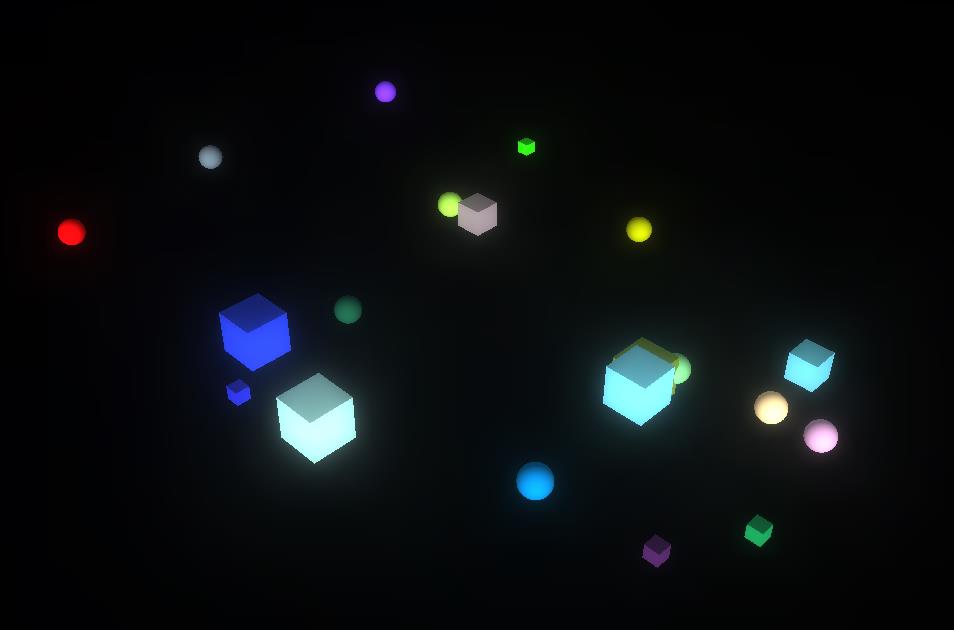
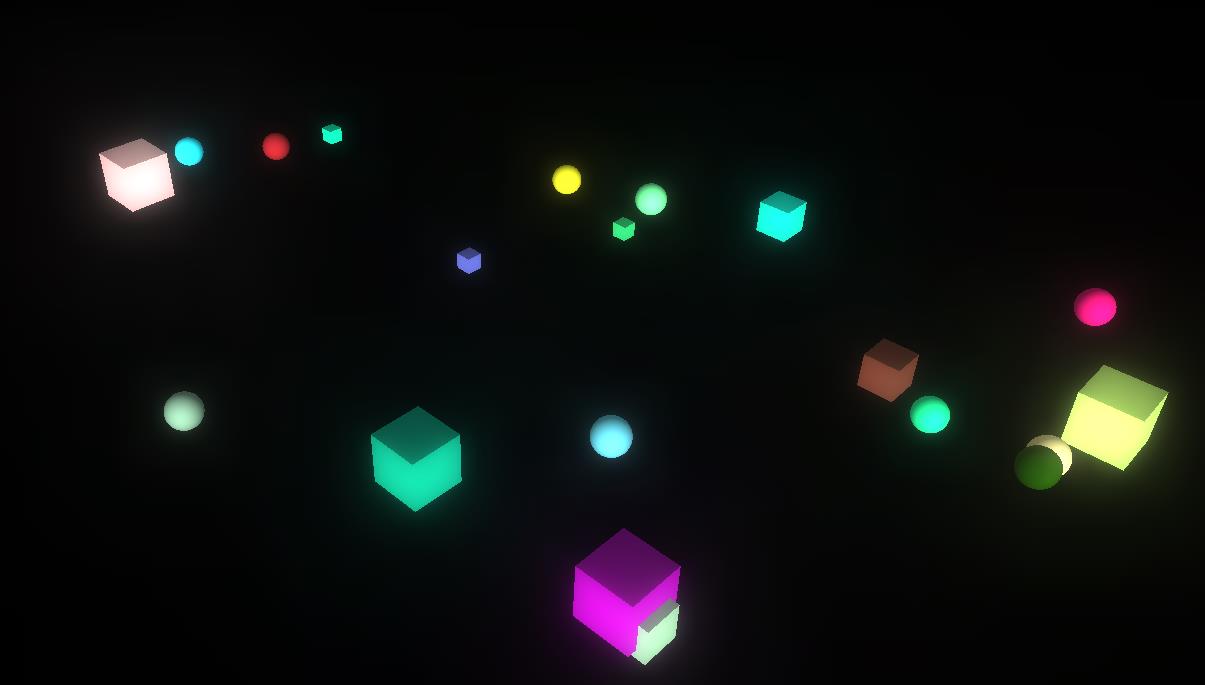
1.demo效果
2. 重要知识点
2.1 回顾要点
上一篇文章中我们介绍了如何使用后期处理,同时也介绍了几个简单的后期处理通道:FilmPass(类似电视效果)、DotScreenPass(将场景输出成点集)、GlitchPass(电磁风暴效果)
这里在回顾一下使用后期处理的步骤
-
创建效果组合器
使用 EffectComposer 类创建一个效果组合器实例,之后就可以向这个实例中添加各种后期处理通道 -
添加通道
有了上一步创建的效果组合器,这里要添加各种需要的后期处理通道,renderPass 通道 必须要添加上,然后添加各种需要的处理通道,包括可以使用自定义的Shader创建高级的后期处理的ShaderPass 通道 -
更新通道
在render循环中,调用效果组合器的render函数,效果组合器会依次使用添加的处理通道来处理场景将最终的结果输出
2.2 UnrealBloomPass通道介绍
UnrealBloomPass通道可以在场景的物体中产生泛光效果,使得场景中明亮区域变得更显著,比较暗的区域也会变得稍亮。
创建UnrealBloomPass对象需要输入四个参数,具体如下
- resolution:表示泛光所覆盖的场景大小,是Vector2类型的向量
- strength:表示泛光的强度,值越大明亮的区域越亮,较暗区域变亮的范围越广
- radius:表示泛光散发的半径
- threshold:表示产生泛光的光照强度阈值,如果照在物体上的光照强度大于该值就会产生泛光
3. 实现要点
3.1 相关文件引入
这里要引入三个文件,EffectComposer 效果组合器, RenderPass 处理通道,以及demo中产生泛光效果的 UnrealBloomPass 泛光通道
import { EffectComposer } from 'three/examples/jsm/postprocessing/EffectComposer.js'
import { RenderPass } from 'three/examples/jsm/postprocessing/RenderPass.js'
import { UnrealBloomPass } from 'three/examples/jsm/postprocessing/UnrealBloomPass.js'
3.2 创建效果组合器并添加通道
createComposer() {
  //使用场景和相机创建RenderPass通道
  const renderPass = new RenderPass(this.scene, this.camera)

  //创建UnrealBloomPass泛光通道
  this.unrealBloomPass = new UnrealBloomPass(
    new THREE.Vector2(256, 256),
    1,
    1.1,
    0.18
  )
  this.unrealBloomPass.renderToScreen = true

  //创建效果组合器
  this.composer = new EffectComposer(this.renderer)

  //将创建的通道添加到EffectComposer(效果组合器)对象中
  this.composer.addPass(renderPass)
  this.composer.addPass(this.unrealBloomPass)
}
3.3 render中更新效果组合器
render() {
  const delta = this.clock.getDelta() // 获取自上次调用的时间差
  this.orbitControls.update(delta) // 相机控制更新

  this.renderer.render(this.scene, this.camera)

  /********** 更新效果组合器一定要在渲染器更新后,否则通道无法产生效果************/
  this.composer.render(delta) //效果组合器更新

  requestAnimationFrame(this.render)
}
4. demo代码
<template>
  <div id="container" />
</template>

<script>
import * as THREE from 'three'
import { OrbitControls } from 'three/examples/jsm/controls/OrbitControls.js'
import { EffectComposer } from 'three/examples/jsm/postprocessing/EffectComposer.js'
import { RenderPass } from 'three/examples/jsm/postprocessing/RenderPass.js'
import { UnrealBloomPass } from 'three/examples/jsm/postprocessing/UnrealBloomPass.js'

export default {
  data() {
    return {
      camera: null,
      scene: null,
      renderer: null,
      orbitControls: null,
      clock: null,
      composer: null,
      unrealBloomPass: null
    }
  },
  mounted() {
    this.init()
  },
  methods: {
    // 初始化
    init() {
      this.createScene() // 创建场景
      this.createModels() // 创建模型
      this.createLight() // 创建光源
      this.createCamera() // 创建相机
      this.createRender() // 创建渲染器
      this.createControls() // 创建控件对象
      this.createComposer()
      this.render() // 渲染
    },
    // 创建场景
    createScene() {
      this.scene = new THREE.Scene()
    },
    createCube() {
      const cubeSize = Math.ceil(Math.random() * 3)
      const cubeGeometry = new THREE.BoxGeometry(cubeSize, cubeSize, cubeSize)
      const material = new THREE.MeshLambertMaterial({
        color: Math.random() * 0xffffff
      })
      const cube = new THREE.Mesh(cubeGeometry, material)

      // 给方块设置随机坐标
      cube.position.x = -30 + Math.round(Math.random() * 60)
      cube.position.y = Math.round(Math.random() * 5)
      cube.position.z = -20 + Math.round(Math.random() * 40)
      // 将生成的方块添加到场景
      this.scene.add(cube)
    },
    createSphere() {
      const sphereSize = Math.ceil(Math.random() * 1)
      const sphereGeometry = new THREE.SphereGeometry(sphereSize, 50, 50)
      const material = new THREE.MeshLambertMaterial({
        color: Math.random() * 0xffffff
      })
      const mesh = new THREE.Mesh(sphereGeometry, material)

      // 设置随机坐标
      mesh.position.x = -30 + Math.round(Math.random() * 60)
      mesh.position.y = Math.round(Math.random() * 5)
      mesh.position.z = -20 + Math.round(Math.random() * 40)
      // 将生成的球添加到场景
      this.scene.add(mesh)
    },
    // 创建模型
    createModels() {
      for (let i = 0; i < 10; i++) {
        this.createCube()
        this.createSphere()
      }
    },

    // 创建光源
    createLight() {
      // 环境光
      const ambientLight = new THREE.AmbientLight(0xffffff, 0.3) // 创建环境光
      this.scene.add(ambientLight) // 将环境光添加到场景

      const directionLight = new THREE.DirectionalLight(0xffffff)
      directionLight.position.set(550, 100, 550)
      directionLight.intensity = 0.8
      this.scene.add(directionLight)
    },
    // 创建相机
    createCamera() {
      const element = document.getElementById('container')
      const width = element.clientWidth // 窗口宽度
      const height = element.clientHeight // 窗口高度
      const k = width / height // 窗口宽高比
      // PerspectiveCamera( fov, aspect, near, far )
      this.camera = new THREE.PerspectiveCamera(45, k, 0.1, 1000)
      this.camera.position.set(30, 30, 30) // 设置相机位置

      this.camera.lookAt(new THREE.Vector3(0, 0, 0)) // 设置相机方向
    },
    // 创建渲染器
    createRender() {
      const element = document.getElementById('container')
      this.renderer = new THREE.WebGLRenderer({ antialias: true, alpha: true })
      this.renderer.setSize(element.clientWidth, element.clientHeight) // 设置渲染区域尺寸
      this.renderer.shadowMap.enabled = true // 显示阴影
      this.renderer.setClearColor(0x000000, 1) // 设置背景颜色
      element.appendChild(this.renderer.domElement)
    },

    createComposer() {
      //使用场景和相机创建RenderPass通道
      const renderPass = new RenderPass(this.scene, this.camera)

      //创建UnrealBloomPass泛光通道
      this.unrealBloomPass = new UnrealBloomPass(
        new THREE.Vector2(256, 256),
        1,
        1.1,
        0.18
      )
      this.unrealBloomPass.renderToScreen = true

      //创建效果组合器
      this.composer = new EffectComposer(this.renderer)

      //将创建的通道添加到EffectComposer(效果组合器)对象中
      this.composer.addPass(renderPass)
      this.composer.addPass(this.unrealBloomPass)
    },

    render() {
      const delta = this.clock.getDelta() // 获取自上次调用的时间差
      this.orbitControls.update(delta) // 相机控制更新

      this.renderer.render(this.scene, this.camera)

      /********** 更新效果组合器一定要在渲染器更新后,否则通道无法产生效果************/
      this.composer.render(delta) //效果组合器更新

      requestAnimationFrame(this.render)
    },
    // 创建控件对象
    createControls() {
      this.clock = new THREE.Clock() // 创建THREE.Clock对象,用于计算上次调用经过的时间
      this.orbitControls = new OrbitControls(
        this.camera,
        this.renderer.domElement
      )
    }
  }
}
</script>

<style>
#container {
  position: absolute;
  width: 100%;
  height: 100%;
}
</style>
以上是关于使用vue学习three.js之渲染后期处理-使用UnrealBloomPass通道在场景中添加泛光效果,三维物体表面发光效果的主要内容,如果未能解决你的问题,请参考以下文章